2004 BMW 645CI COUPE&CONVERTIBLE warning light
[x] Cancel search: warning lightPage 15 of 216
At a glance
13Reference
Controls
Driving tips
Communications
Navigation
Entertainment
Mobility
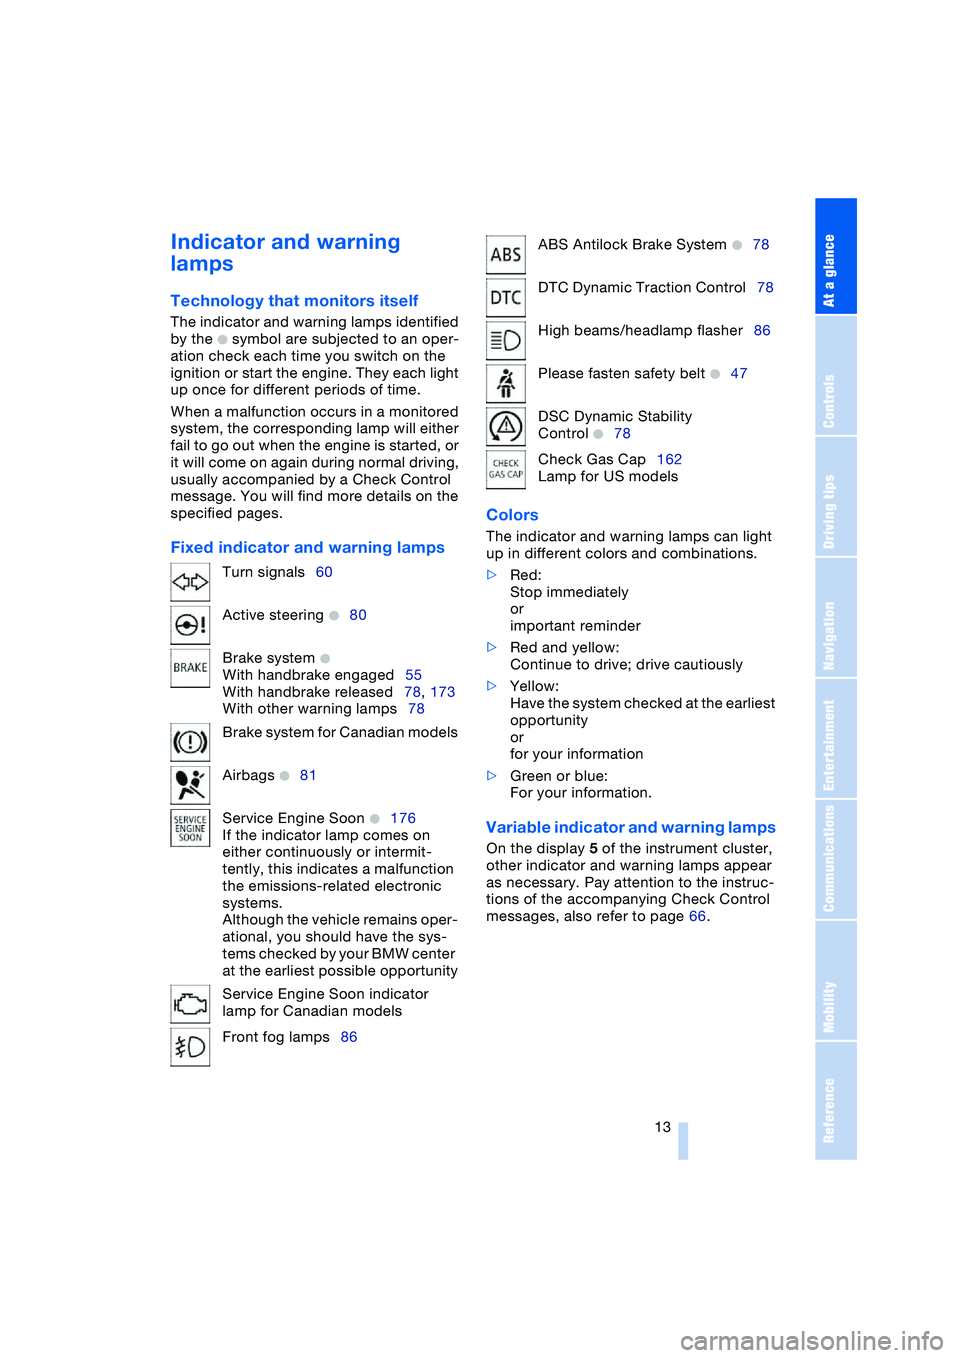
Indicator and warning
lamps
Technology that monitors itself
The indicator and warning lamps identified
by the
+ symbol are subjected to an oper-
ation check each time you switch on the
ignition or start the engine. They each light
up once for different periods of time.
When a malfunction occurs in a monitored
system, the corresponding lamp will either
fail to go out when the engine is started, or
it will come on again during normal driving,
usually accompanied by a Check Control
message. You will find more details on the
specified pages.
Fixed indicator and warning lampsColors The indicator and warning lamps can light
up in different colors and combinations.
>Red:
Stop immediately
or
important reminder
>Red and yellow:
Continue to drive; drive cautiously
>Yellow:
Have the system checked at the earliest
opportunity
or
for your information
>Green or blue:
For your information.
Variable indicator and warning lamps
On the display 5 of the instrument cluster,
other indicator and warning lamps appear
as necessary. Pay attention to the instruc-
tions of the accompanying Check Control
messages, also refer to page 66. Turn signals60
Active steering
+80
Brake system
+
With handbrake engaged55
With handbrake released78, 173
With other warning lamps78
Brake system for Canadian models
Airbags
+81
Service Engine Soon
+176
If the indicator lamp comes on
either continuously or intermit-
tently, this indicates a malfunction
the emissions-related electronic
systems.
Although the vehicle remains oper-
ational, you should have the sys-
tems checked by your BMW center
at the earliest possible opportunity
Service Engine Soon indicator
lamp for Canadian models
Front fog lamps86
ABS Antilock Brake System +78
DTC Dynamic Traction Control78
High beams/headlamp flasher86
Please fasten safety belt
+47
DSC Dynamic Stability
Control
+78
Check Gas Cap162
Lamp for US models
Page 48 of 216
Adjustments
46
Adjusting tilt angle
Swivel the head restraints.
Entry to the rear
Before moving off, fold back both seat
backrests. Otherwise, there is a risk
of accident from unexpected movement.<
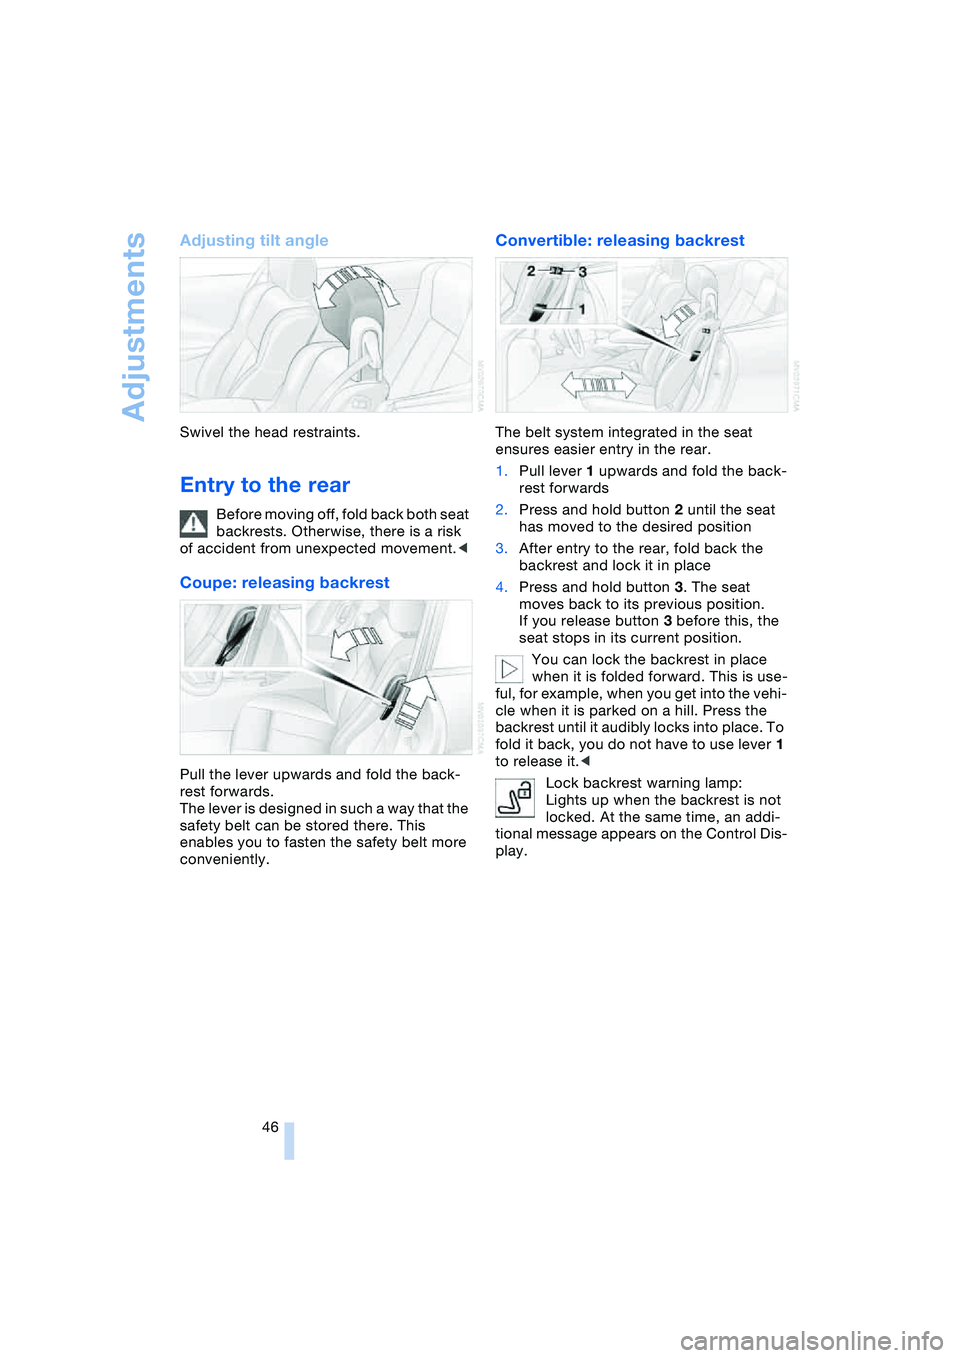
Coupe: releasing backrest
Pull the lever upwards and fold the back-
rest forwards.
The lever is designed in such a way that the
safety belt can be stored there. This
enables you to fasten the safety belt more
conveniently.
Convertible: releasing backrest
The belt system integrated in the seat
ensures easier entry in the rear.
1.Pull lever 1 upwards and fold the back-
rest forwards
2.Press and hold button 2 until the seat
has moved to the desired position
3.After entry to the rear, fold back the
backrest and lock it in place
4.Press and hold button 3. The seat
moves back to its previous position.
If you release button 3 before this, the
seat stops in its current position.
You can lock the backrest in place
when it is folded forward. This is use-
ful, for example, when you get into the vehi-
cle when it is parked on a hill. Press the
backrest until it audibly locks into place. To
fold it back, you do not have to use lever 1
to release it.<
Lock backrest warning lamp:
Lights up when the backrest is not
locked. At the same time, an addi-
tional message appears on the Control Dis-
play.
Page 49 of 216
Controls
47Reference
At a glance
Driving tips
Communications
Navigation
Entertainment
Mobility
Safety belts
Fasten your safety belt before starting any
trip. Airbags complement the safety belt as
an additional safety device, but they do not
represent a substitute.
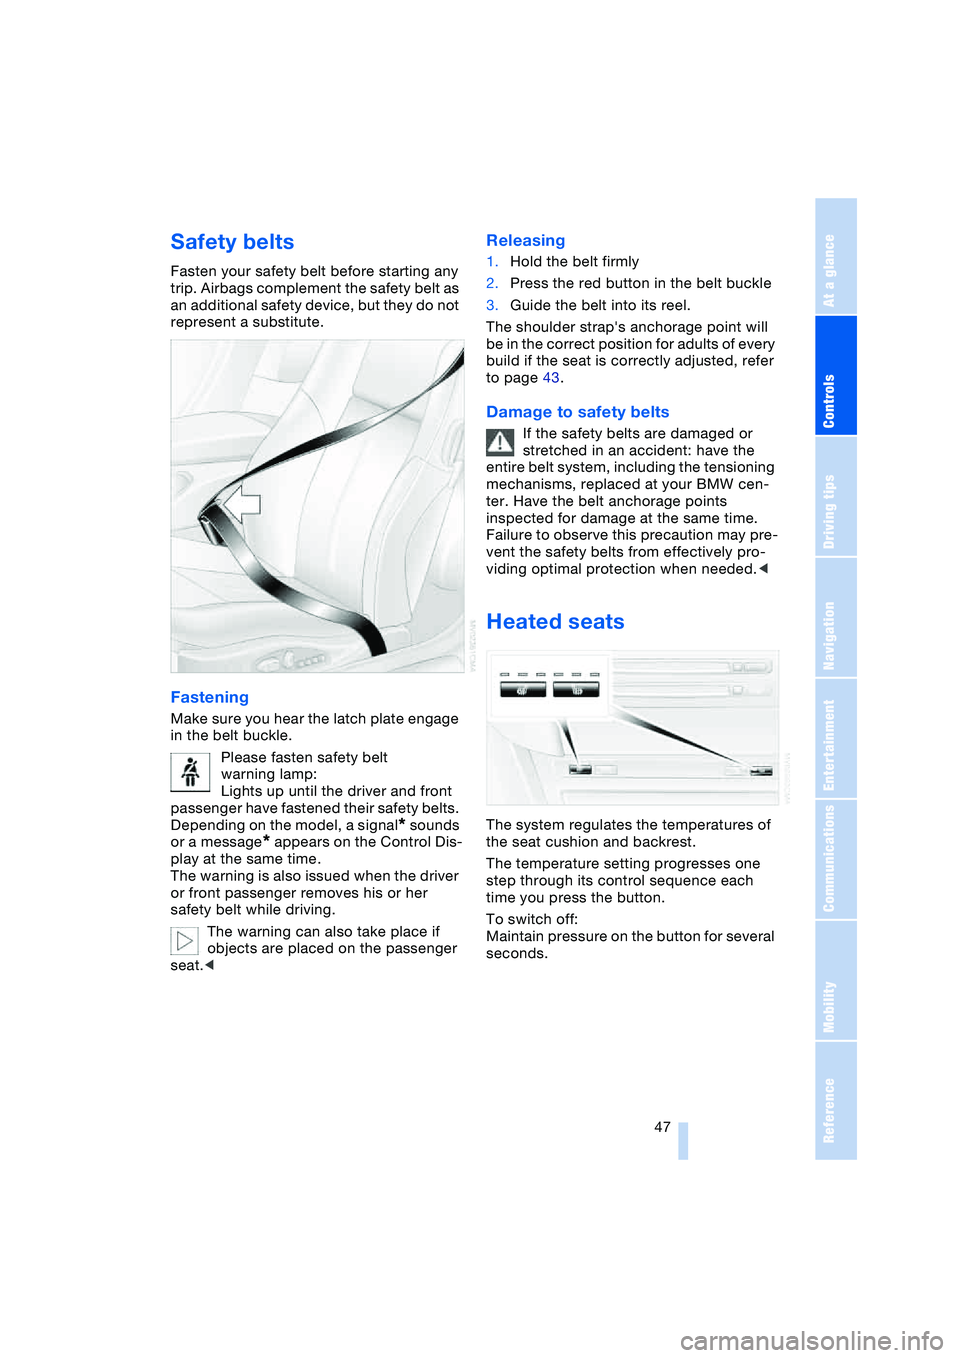
Fastening
Make sure you hear the latch plate engage
in the belt buckle.
Please fasten safety belt
warning lamp:
Lights up until the driver and front
passenger have fastened their safety belts.
Depending on the model, a signal
* sounds
or a message
* appears on the Control Dis-
play at the same time.
The warning is also issued when the driver
or front passenger removes his or her
safety belt while driving.
The warning can also take place if
objects are placed on the passenger
seat.<
Releasing
1.Hold the belt firmly
2.Press the red button in the belt buckle
3.Guide the belt into its reel.
The shoulder strap's anchorage point will
be in the correct position for adults of every
build if the seat is correctly adjusted, refer
to page 43.
Damage to safety belts
If the safety belts are damaged or
stretched in an accident: have the
entire belt system, including the tensioning
mechanisms, replaced at your BMW cen-
ter. Have the belt anchorage points
inspected for damage at the same time.
Failure to observe this precaution may pre-
vent the safety belts from effectively pro-
viding optimal protection when needed.<
Heated seats
The system regulates the temperatures of
the seat cushion and backrest.
The temperature setting progresses one
step through its control sequence each
time you press the button.
To switch off:
Maintain pressure on the button for several
seconds.
Page 60 of 216
Driving
58 speed; thus, for example, a downshift
that would cause the engine to overrev
will not be executed by the system
>When the vehicle is stationary, the
transmission automatically downshifts
into first gear
>Shortly before dropping below a gear-
dependent minimum speed, the trans-
mission downshifts automatically even
without your intervention.
Malfunction
The warning lamp lights up and a
message appears on the Control
Display. There is a malfunction in
the transmission system. Avoid high loads.
While it will remain still possible to move
the selector lever to any desired position,
the transmission will revert to operation in
its default mode with only a limited number
of forward gears.
Have the system checked as soon as pos-
sible.
Information on jump-starting and towing
begins on page 185.
Overheating
The warning lamp lights up and a
message appears on the Control
Display. In addition, an acoustic
signal sounds. Overheating in the area of
the transmission. If possible, stop or drive
off quickly so that the system can cool
down.
Automatic transmission
with Steptronic*
In addition to the fully automatic mode, you
can also shift manually with Steptronic,
refer to page 59.
Selector-lever positions
P R N D M/S + –
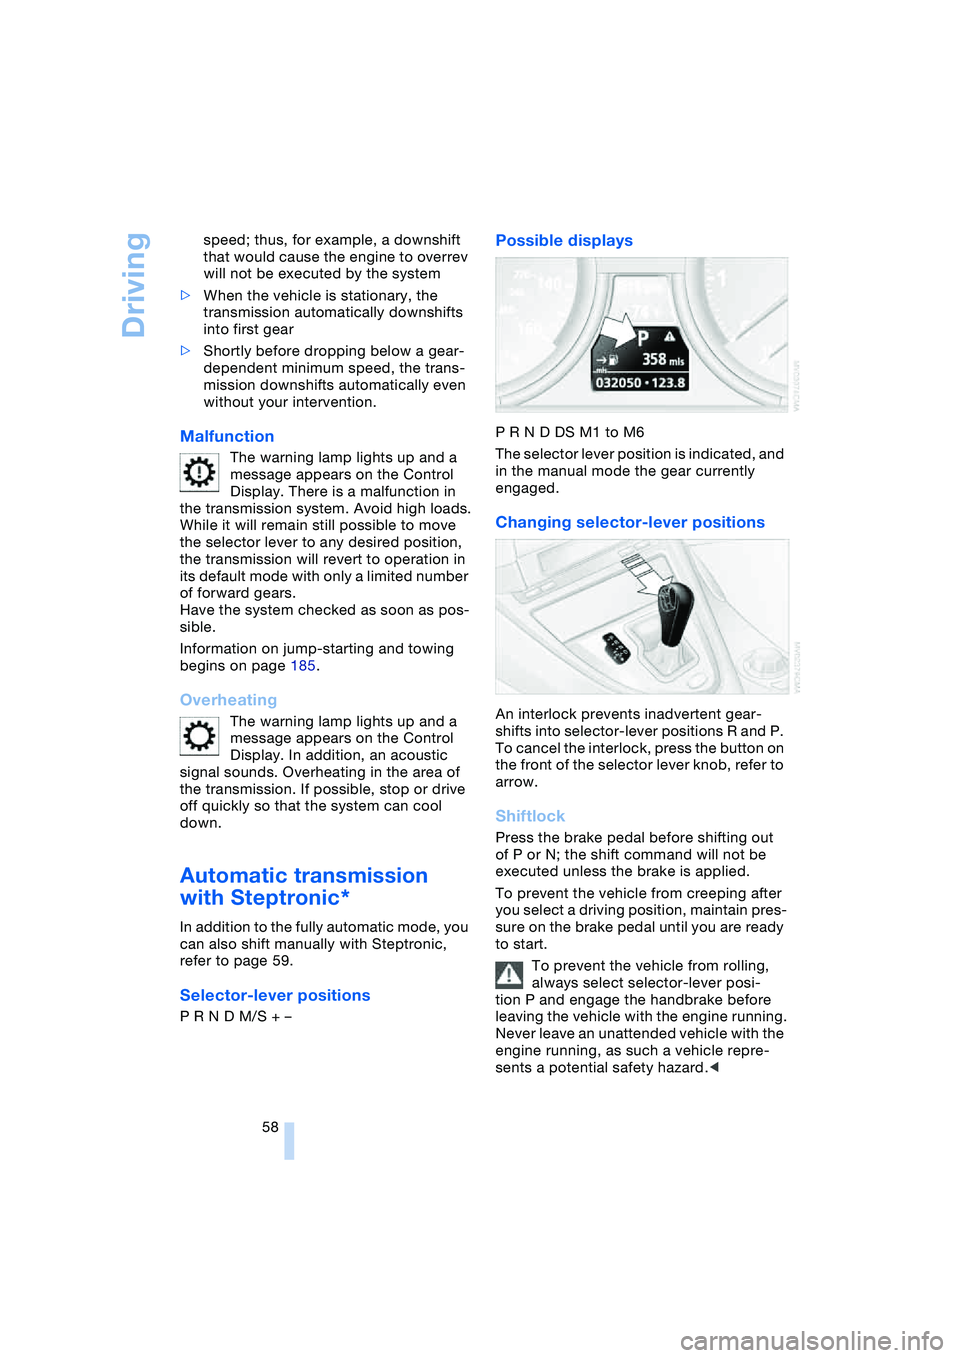
Possible displays
P R N D DS M1 to M6
The selector lever position is indicated, and
in the manual mode the gear currently
engaged.
Changing selector-lever positions
An interlock prevents inadvertent gear-
shifts into selector-lever positions R and P.
To cancel the interlock, press the button on
the front of the selector lever knob, refer to
arrow.
Shiftlock
Press the brake pedal before shifting out
of P or N; the shift command will not be
executed unless the brake is applied.
To prevent the vehicle from creeping after
you select a driving position, maintain pres-
sure on the brake pedal until you are ready
to start.
To prevent the vehicle from rolling,
always select selector-lever posi-
tion P and engage the handbrake before
leaving the vehicle with the engine running.
Never leave an unattended vehicle with the
engine running, as such a vehicle repre-
sents a potential safety hazard.<
Page 61 of 216
Controls
59Reference
At a glance
Driving tips
Communications
Navigation
Entertainment
Mobility
P Parking
Select only when the vehicle is completely
stationary. The rear wheels are blocked.
R Reverse
Select only when the vehicle is completely
stationary.
N Neutral
E.g. engage in car washes. The vehicle can
roll.
D Drive, automatic position
Position for normal vehicle operation.
All forward gears are available.
Under normal operating conditions, fuel
consumption is lowest when driving in
position D.
Kickdown
The kickdown mode provides maximum
acceleration:
Press the accelerator pedal beyond the
full-throttle resistance point.
M/S manual operation and
Sport program
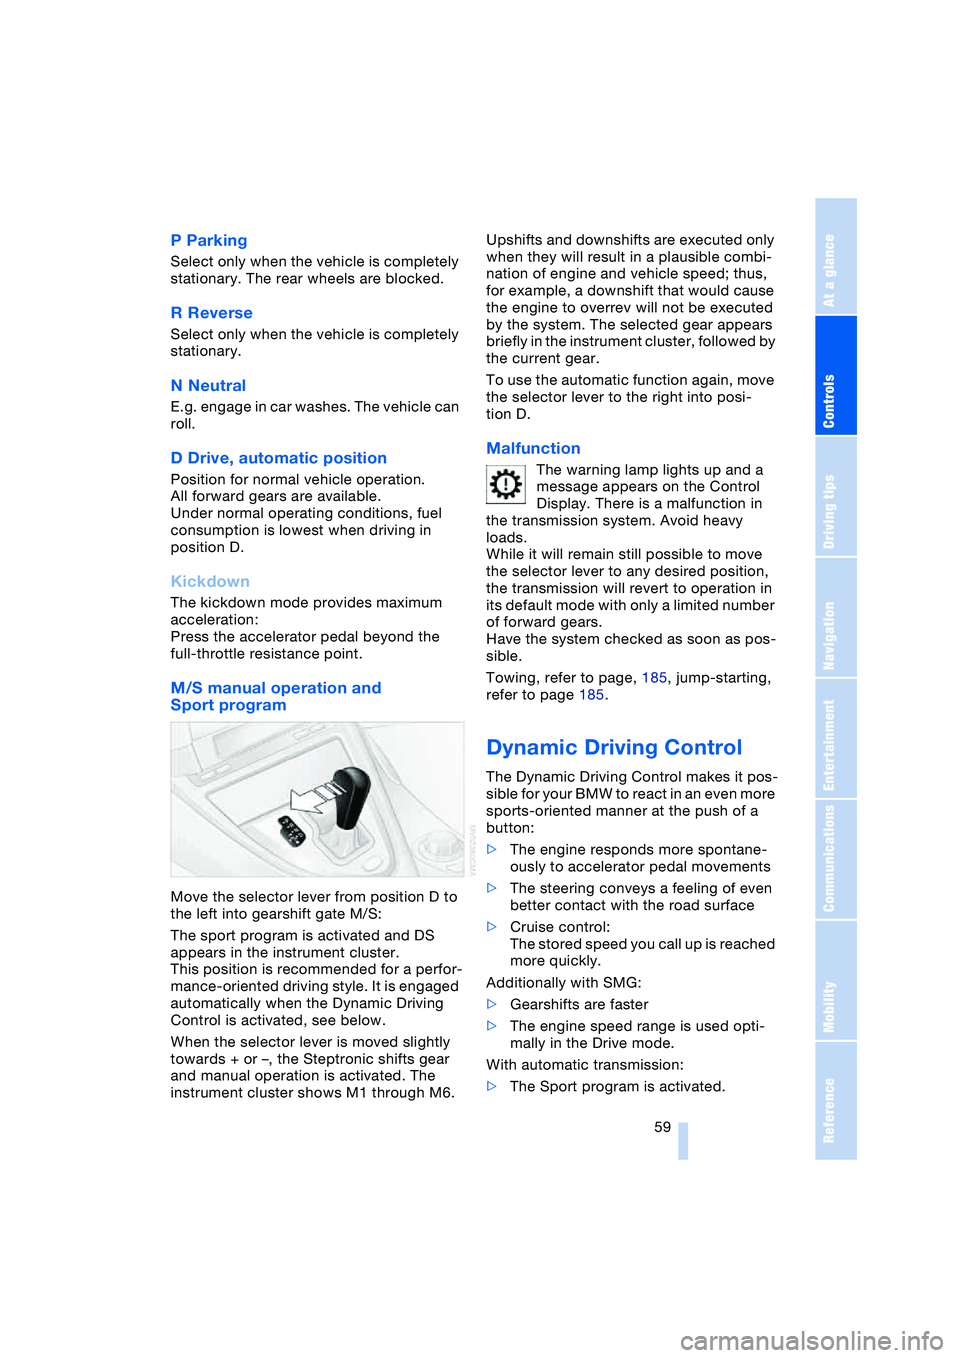
Move the selector lever from position D to
the left into gearshift gate M/S:
The sport program is activated and DS
appears in the instrument cluster.
This position is recommended for a perfor-
mance-oriented driving style. It is engaged
automatically when the Dynamic Driving
Control is activated, see below.
When the selector lever is moved slightly
towards + or –, the Steptronic shifts gear
and manual operation is activated. The
instrument cluster shows M1 through M6.Upshifts and downshifts are executed only
when they will result in a plausible combi-
nation of engine and vehicle speed; thus,
for example, a downshift that would cause
the engine to overrev will not be executed
by the system. The selected gear appears
briefly in the instrument cluster, followed by
the current gear.
To use the automatic function again, move
the selector lever to the right into posi-
tion D.
Malfunction
The warning lamp lights up and a
message appears on the Control
Display. There is a malfunction in
the transmission system. Avoid heavy
loads.
While it will remain still possible to move
the selector lever to any desired position,
the transmission will revert to operation in
its default mode with only a limited number
of forward gears.
Have the system checked as soon as pos-
sible.
Towing, refer to page, 185, jump-starting,
refer to page 185.
Dynamic Driving Control
The Dynamic Driving Control makes it pos-
sible for your BMW to react in an even more
sports-oriented manner at the push of a
button:
>The engine responds more spontane-
ously to accelerator pedal movements
>The steering conveys a feeling of even
better contact with the road surface
>Cruise control:
The stored speed you call up is reached
more quickly.
Additionally with SMG:
>Gearshifts are faster
>The engine speed range is used opti-
mally in the Drive mode.
With automatic transmission:
>The Sport program is activated.
Page 73 of 216
Controls
71Reference
At a glance
Driving tips
Communications
Navigation
Entertainment
Mobility
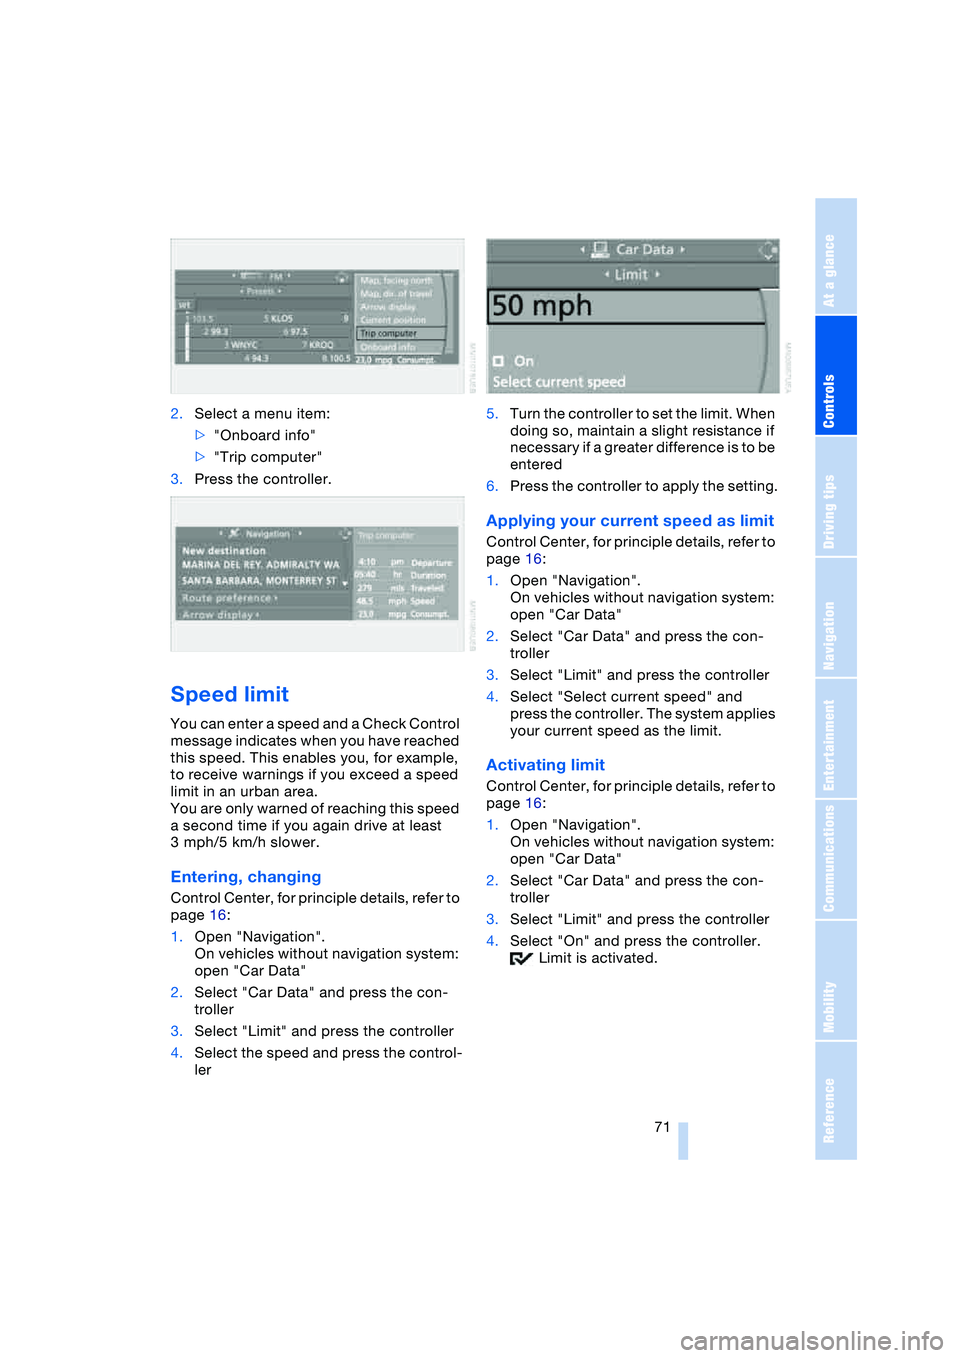
2.Select a menu item:
>"Onboard info"
>"Trip computer"
3.Press the controller.
Speed limit
You can enter a speed and a Check Control
message indicates when you have reached
this speed. This enables you, for example,
to receive warnings if you exceed a speed
limit in an urban area.
You are only warned of reaching this speed
a second time if you again drive at least
3 mph/5 km/h slower.
Entering, changing
Control Center, for principle details, refer to
page 16:
1.Open "Navigation".
On vehicles without navigation system:
open "Car Data"
2.Select "Car Data" and press the con-
troller
3.Select "Limit" and press the controller
4.Select the speed and press the control-
ler5.Turn the controller to set the limit. When
doing so, maintain a slight resistance if
necessary if a greater difference is to be
entered
6.Press the controller to apply the setting.
Applying your current speed as limit
Control Center, for principle details, refer to
page 16:
1.Open "Navigation".
On vehicles without navigation system:
open "Car Data"
2.Select "Car Data" and press the con-
troller
3.Select "Limit" and press the controller
4.Select "Select current speed" and
press the controller. The system applies
your current speed as the limit.
Activating limit
Control Center, for principle details, refer to
page 16:
1.Open "Navigation".
On vehicles without navigation system:
open "Car Data"
2.Select "Car Data" and press the con-
troller
3.Select "Limit" and press the controller
4.Select "On" and press the controller.
Limit is activated.
Page 77 of 216

Controls
75Reference
At a glance
Driving tips
Communications
Navigation
Entertainment
Mobility
Technology for comfort, convenience
and safety
PDC Park Distance Control*
The concept
The PDC assists you when you are parking.
Signal tones and a visual display
* indicate
the current distance to an object behind or
in front of your vehicle. To measure the dis-
tance, there are four ultrasonic sensors in
each bumper. The sensors at the front and
at the two rear corners have a range of
approx. 20 in/50 cm; the rear middle sen-
sors have approx. 5 ft/1.50 m.
PDC is a parking aid that can indicate
objects when they are approached
slowly, as is usually the case when parking.
Avoid approaching an object at high speed,
as otherwise the physical circumstances
would mean that the system warning was
too late.<
Automatic mode
In ignition key position 2, the system auto-
matically assumes operational status after
a few seconds each time you engage
reverse gear or selector-lever position R.
Wait this short period before driving.<
The system is automatically deacti-
vated once the vehicle travels approx.
165 ft/50 m or exceeds a speed of roughly
20 mph/30 km/h; the indicator lamp goes
out. You can reactivate the system manu-
ally as needed.
Manual mode
With the ignition key in position 2, press the
button; the indicator lamp lights up.
Deactivating manual mode
Press the button again; the indicator lamp
goes out.
Signal tones
The signal indicating the distance to the
nearest obstacle is directional. Thus, an
object detected to the left rear of the vehi-
cle will be indicated by a signal tone from
the left rear speaker, etc. As the distance
between vehicle and object decreases, the
intervals between the tones become
shorter. The signal tone becomes continu-
ous once the distance to the nearest object
falls to below roughly 1 ft/30 cm.
The warning signal is canceled after
approx. 3 seconds if you are moving paral-
lel to a wall.
Malfunctions
The indicator lamp within the button
flashes and a message appears on the
Control Display. PDC has failed. Switch off
PDC. Have the system checked.
As a preventive measure, keep the sensors
clean and free of ice or snow in order to
ensure that they will continue to operate
effectively.
PDC with visual warning*
You also enjoy the option of having the sys-
tem show distances to objects on the Con-
trol Display. The Control Display will also
Page 80 of 216
Technology for comfort, convenience and safety
78 The laws of physics cannot be
repealed, even with DSC. An appro-
priate driving style always remains the
responsibility of the driver. Therefore, do
not reduce the additional safety margin
again by taking risks.<
DBC Dynamic Brake Control
When you apply the brakes rapidly, this
system automatically produces the maxi-
mum braking force boost and thus helps to
achieve the shortest braking distance dur-
ing panic stops. This system exploits all of
the benefits provided by ABS.
Do not reduce the pressure on the brake
pedal for the duration of the brake applica-
tion. When the brake pedal is released,
DBC is deactivated.
Malfunctions of driving stability
control systems
The brake system warning lamp
lights up in red, appearing together
with the indicator lamps for ABS
and DSC. A message appears on
the Control Display. Driving stability
control and ABS have failed. Con-
ventional braking efficiency remains
available without limitations.
While you may continue, you should
remember to proceed cautiously and drive
defensively while avoiding full brake appli-
cations.
Have the system checked as soon as pos-
sible.
Display of the previously described
malfunction on Canadian models.
The DSC warning lamp lights up.
DSC and DTC have failed.
The stability maintenance functions
are no longer available. The vehicle will
remain completely operational, however,
without DSC.Have the system checked as soon as pos-
sible.
The warning lamp for the brake sys-
tem lights up yellow and a message
appears on the Control Display.
DBC has failed.
Have the system checked as soon as pos-
sible.
Display of the previously described
malfunction on Canadian models.
Active roll stabilization*
The concept
Active roll stabilization minimizes body roll
and optimizes vehicle stability during cor-
nering and evasive maneuvers.
Dynamic stabilizers at the front and rear
axles form the basis for active roll stabiliza-
tion. Suspension compliance adapts to suit
driving conditions, varying from perfor-
mance-oriented during cornering to
smooth and comfort-oriented when the
vehicle is proceeding in a straight line. Dur-
ing vehicle operation, the system continu-
ously runs through closed-loop control
cycles lasting only fractions of a second.
The system assumes operational status
each time you start the engine.
Malfunction
The warning lamp lights up and a
message appears on the Control
Display. There is a malfunction in
the system. Have the system checked as
soon as possible.
If there is a malfunction in the system,
please remember to adapt your
speed accordingly, especially in curves.
The suspension will be noticeably softer
and the vehicle will display a greater ten-
dency to tilt during cornering and in cross-
winds.
If a message stating that you should stop
appears on the Control Display, stop and
switch off the engine as soon as possible.
In this case the oil level in the reservoir may