2004 BMW 645CI COUPE&CONVERTIBLE warning light
[x] Cancel search: warning lightPage 82 of 216
Technology for comfort, convenience and safety
80
Report of a flat tire
The warning lamp lights up in red
and a message appears on the
Control Display. In addition, an
acoustic signal sounds. There is a flat tire
or extensive inflation pressure loss.
1.Cautiously reduce the vehicle speed to
below 50 mph/80 km/h. Avoid sudden
braking and steering maneuvers. Do
not exceed a vehicle speed of 50 mph/
80 km/h
Due to the reinforcement on the
side walls of the run-flat tires,
inflation pressure loss can not usually
be recognized from the outside, refer to
Run-flat tires on page 168.<
2.To continue driving, comply with the
instructions for driving with damaged
tires on page 168.
Malfunction
The warning lamp lights up yellow
and a message appears on the
Control Display. The Flat Tire Moni-
tor has a malfunction or has failed. Have
the system checked as soon as possible.
Active steering*
The concept
The active steering is a system that actively
varies the steering angle of the front wheels
in relation to the steering wheel move-
ments.
When you are driving in the low road speed
range, e.g. in a town or when parking, the
steering angle of the wheels is reinforced,
i.e. the steering becomes very direct.
In the higher speed range, on the other
hand, the steering angle of the wheels is
reduced more and more. This improves the
handling capability of your BMW over the
entire speed range.
In critical situations, the system can make
targeted changes to the steering angle pro-
vided by the driver and thus stabilize the
vehicle before the driver intervenes.
Malfunction
The fixed warning lamp lights up.
The active steering is no longer
operational. In the low speed range,
greater steering wheel movement is neces-
sary. Have the system checked.
If the warning lamp lights up during the first
engine starting following a power supply
interruption, the system must be activated
with initialization.
Initializing system
1.Start the engine
2.With the vehicle stationary, turn the
steering wheel from the straight-ahead
position to the left as far as it will go and
then back to the straight-ahead position
3.Switch off the engine.
When you start the engine again, all the
functions of the active steering are avail-
able once again.
Brake Force Display
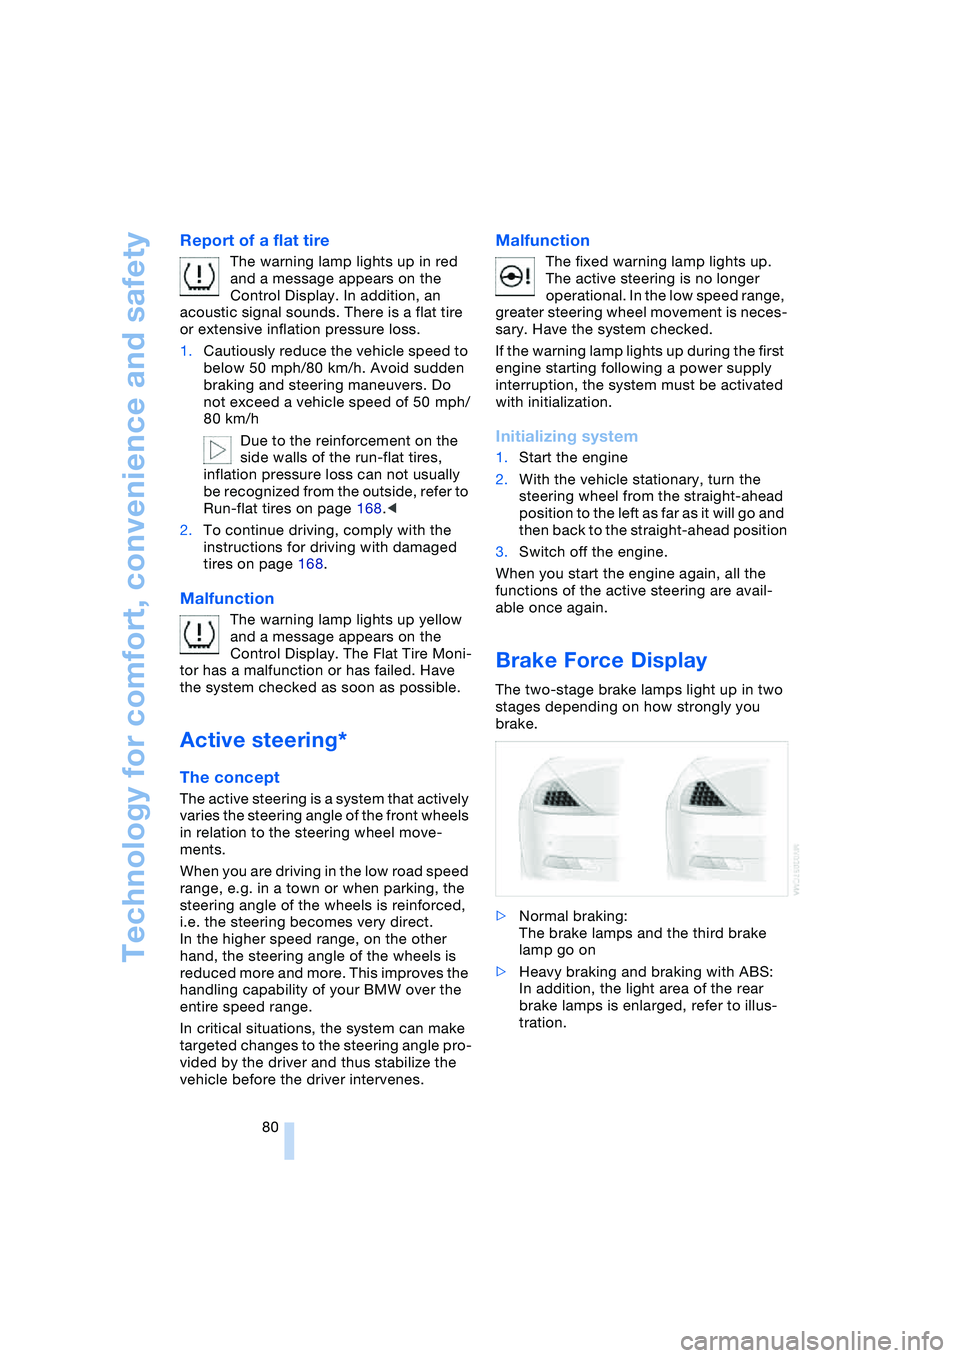
The two-stage brake lamps light up in two
stages depending on how strongly you
brake.
>Normal braking:
The brake lamps and the third brake
lamp go on
>Heavy braking and braking with ABS:
In addition, the light area of the rear
brake lamps is enlarged, refer to illus-
tration.
Page 84 of 216
Technology for comfort, convenience and safety
82
Airbag system operational
The airbag warning lamp in the instrument
cluster indicates the operational readiness
of the entire airbag system and the safety
belt tensioners as of ignition key position 1.
The warning lamp goes out after a few sec-
onds.
Airbag system malfunction
Have the airbag system checked
immediately if a malfunction occurs,
as otherwise there is a danger of the sys-
tem not responding in the expected man-
ner to an impact occurring within its normal
response range.<
There is a malfunction in the airbag
system when:
>The warning lamp does not light up as
of ignition key position 1
>The warning lamp remains on continu-
ously
>The warning lamp lights up while the
vehicle is being driven.
Convertible:
Rollover protection system
The rollover protection system is automati-
cally activated in the event of an accident
or a critical driving situation, extreme incli-
nation on the longitudinal or transverse
axis, or loss of ground contact. The rollover
bars located behind the rear head
restraints move out within fractions of a
second.As a supplement to the rollover bar inte-
grated in the windshield frame, the rollover
protection system ensures that all vehicle
occupants have the necessary headroom.
Always keep the path of movement of
the rollover protection system clear.
In less severe accidents, you are protected
by the fastened safety belt and, depending
on the severity of the accident, the belt ten-
sioner and the multistage airbag restraint
system.<
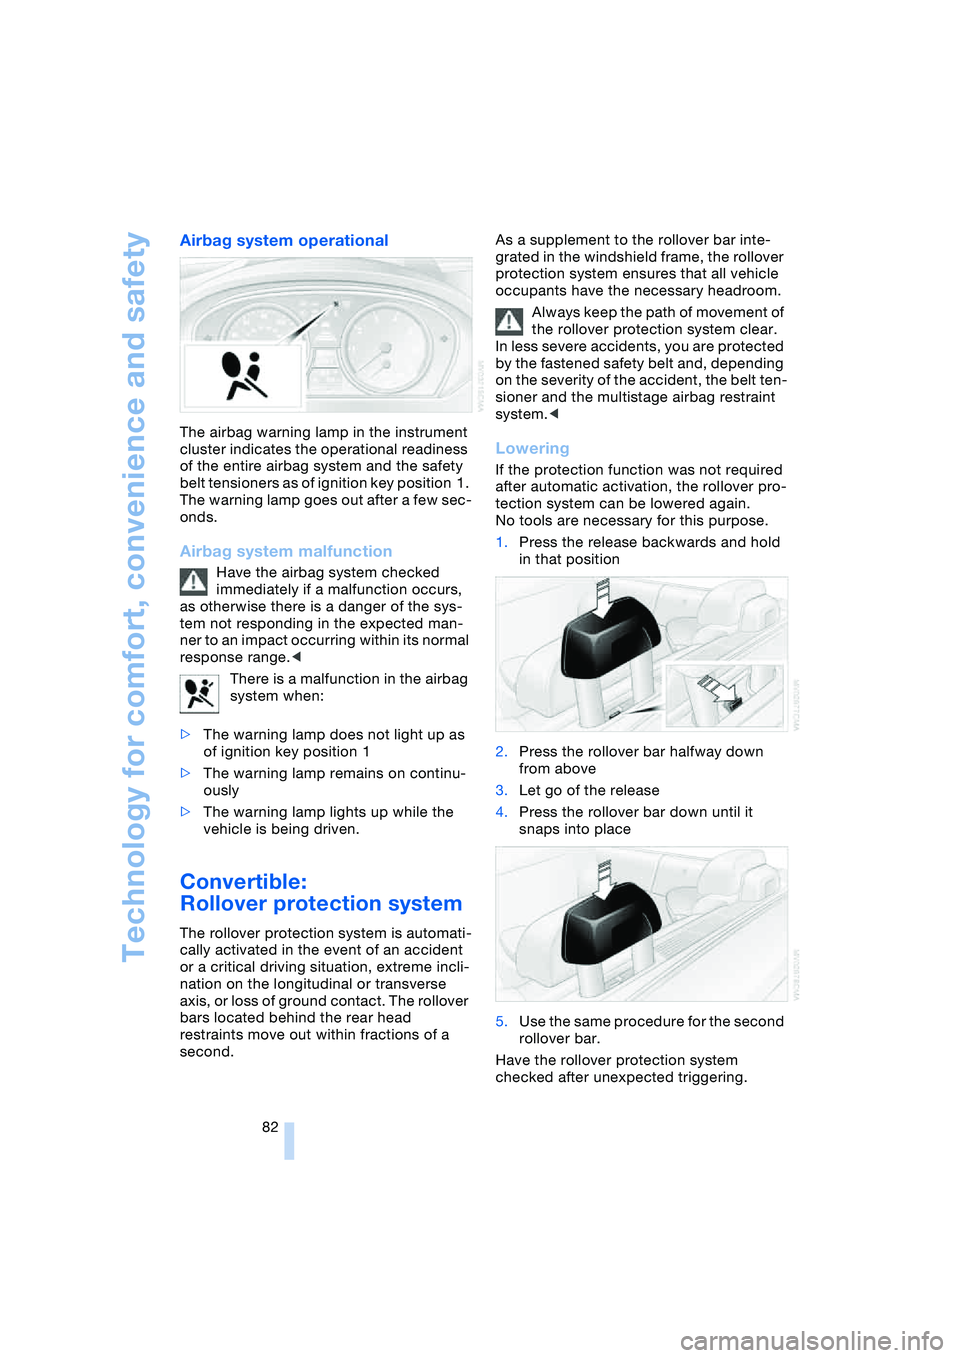
Lowering
If the protection function was not required
after automatic activation, the rollover pro-
tection system can be lowered again.
No tools are necessary for this purpose.
1.Press the release backwards and hold
in that position
2.Press the rollover bar halfway down
from above
3.Let go of the release
4.Press the rollover bar down until it
snaps into place
5.Use the same procedure for the second
rollover bar.
Have the rollover protection system
checked after unexpected triggering.
Page 87 of 216
Controls
85Reference
At a glance
Driving tips
Communications
Navigation
Entertainment
Mobility
Lamps
Parking lamps/low beams
Parking lamps
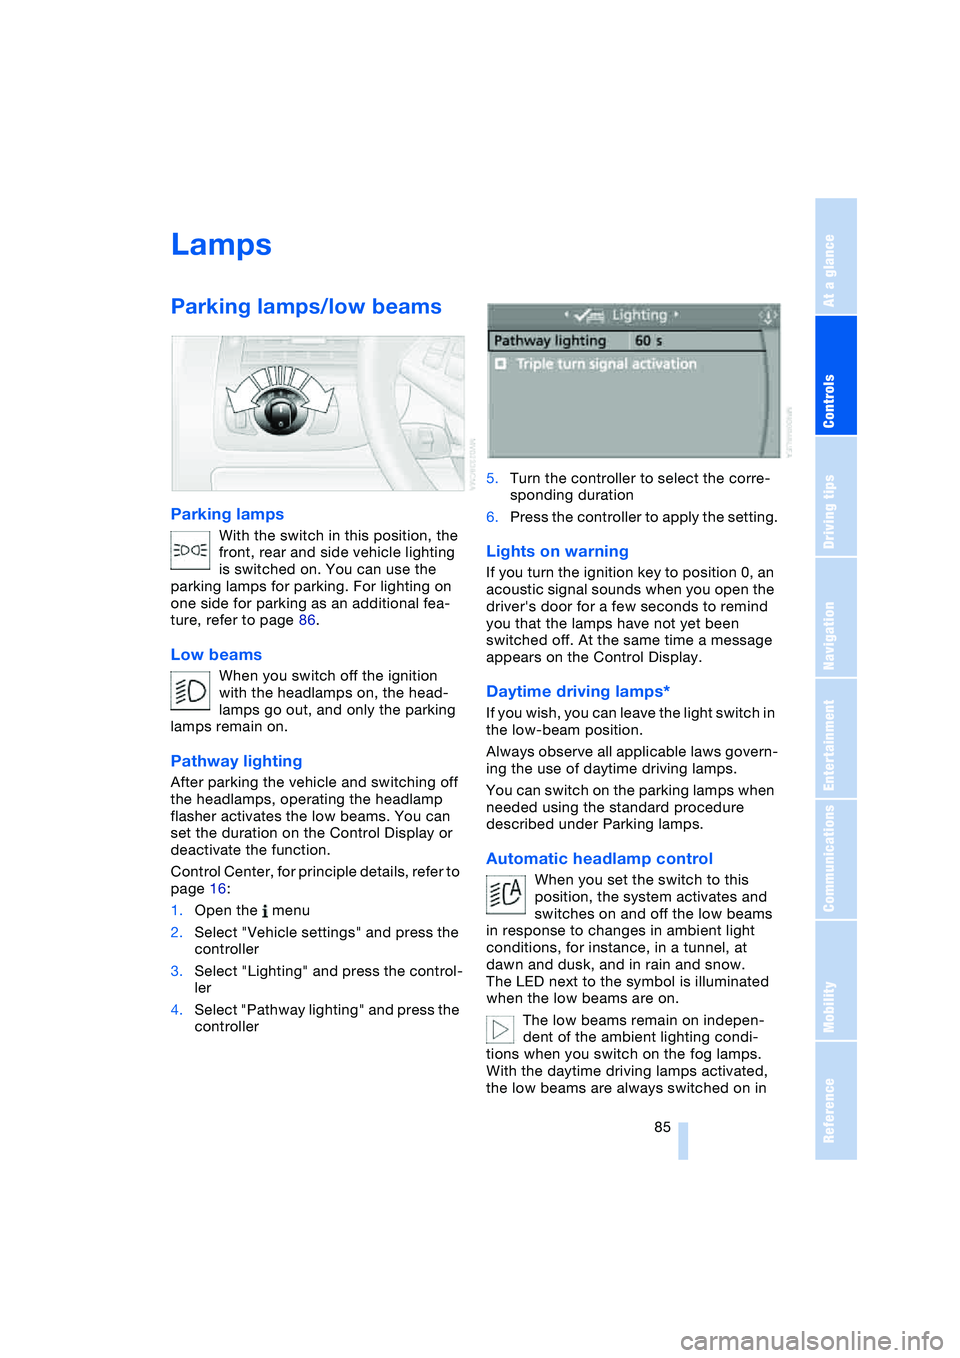
With the switch in this position, the
front, rear and side vehicle lighting
is switched on. You can use the
parking lamps for parking. For lighting on
one side for parking as an additional fea-
ture, refer to page 86.
Low beams
When you switch off the ignition
with the headlamps on, the head-
lamps go out, and only the parking
lamps remain on.
Pathway lighting
After parking the vehicle and switching off
the headlamps, operating the headlamp
flasher activates the low beams. You can
set the duration on the Control Display or
deactivate the function.
Control Center, for principle details, refer to
page 16:
1.Open the menu
2.Select "Vehicle settings" and press the
controller
3.Select "Lighting" and press the control-
ler
4.Select "Pathway lighting" and press the
controller5.Turn the controller to select the corre-
sponding duration
6.Press the controller to apply the setting.
Lights on warning
If you turn the ignition key to position 0, an
acoustic signal sounds when you open the
driver's door for a few seconds to remind
you that the lamps have not yet been
switched off. At the same time a message
appears on the Control Display.
Daytime driving lamps*
If you wish, you can leave the light switch in
the low-beam position.
Always observe all applicable laws govern-
ing the use of daytime driving lamps.
You can switch on the parking lamps when
needed using the standard procedure
described under Parking lamps.
Automatic headlamp control
When you set the switch to this
position, the system activates and
switches on and off the low beams
in response to changes in ambient light
conditions, for instance, in a tunnel, at
dawn and dusk, and in rain and snow.
The LED next to the symbol is illuminated
when the low beams are on.
The low beams remain on indepen-
dent of the ambient lighting condi-
tions when you switch on the fog lamps.
With the daytime driving lamps activated,
the low beams are always switched on in
Page 165 of 216
Mobility
163Reference
At a glance
Controls
Driving tips
Communications
Navigation
Entertainment
Warning lamp* lights up.
Fuel filler cap is not properly closed
or is missing. Check whether the
fuel filler cap is properly closed.
Fuel specifications
The engine uses lead-free gasoline only.
Required fuel
Premium Unleaded Gasoline,
Minimum Octane Rating: 91.
Minimum Octane Rating corresponds to
the Anti Knock Index AKI and is deter-
mined according to the so-called (R+M)/
2 method.
Do not use leaded gasoline, as other-
wise the lambda probe and catalytic
converter will be permanently damaged.<
Use high-quality brands
Field experience has indicated significant
differences in fuel quality: volatility, compo-
sition, additives, etc., among gasolines
offered for sale in the United States and
Canada. Fuels containing up to and includ-
ing 10 % ethanol or other oxygenates with
up to 2.8 % oxygen by weight, that is,
15 % MTBE or 3 % methanol plus an equiv-
alent amount of co-solvent, will not void
the applicable warranties with respect to
defects in materials or workmanship.
The use of poor-quality fuels may
result in drivability, starting and stall-
ing problems, especially under certain
environmental conditions such as high
ambient temperature and high altitude.
Should you encounter drivability problems
which you suspect could be related to the
fuel you are using, we recommend that you
respond by switching to a recognized high-
quality brand.
Failure to comply with these recommenda-
tions may also result in unscheduled main-
tenance.<
Page 175 of 216
Mobility
173Reference
At a glance
Controls
Driving tips
Communications
Navigation
Entertainment
3.The coolant level is correct when the
measuring range of the fill level indica-
tor is at the level of the upper edge of
the filler neck, also refer to the drawing
next to the filler neck
4.If the coolant is low, slowly add coolant
up to the specified level – do not overfill
5.Turn the cap until you hear a click
6.Have the reason for the coolant loss
eliminated as soon as possible.
Brake system
Malfunction
Brake fluid
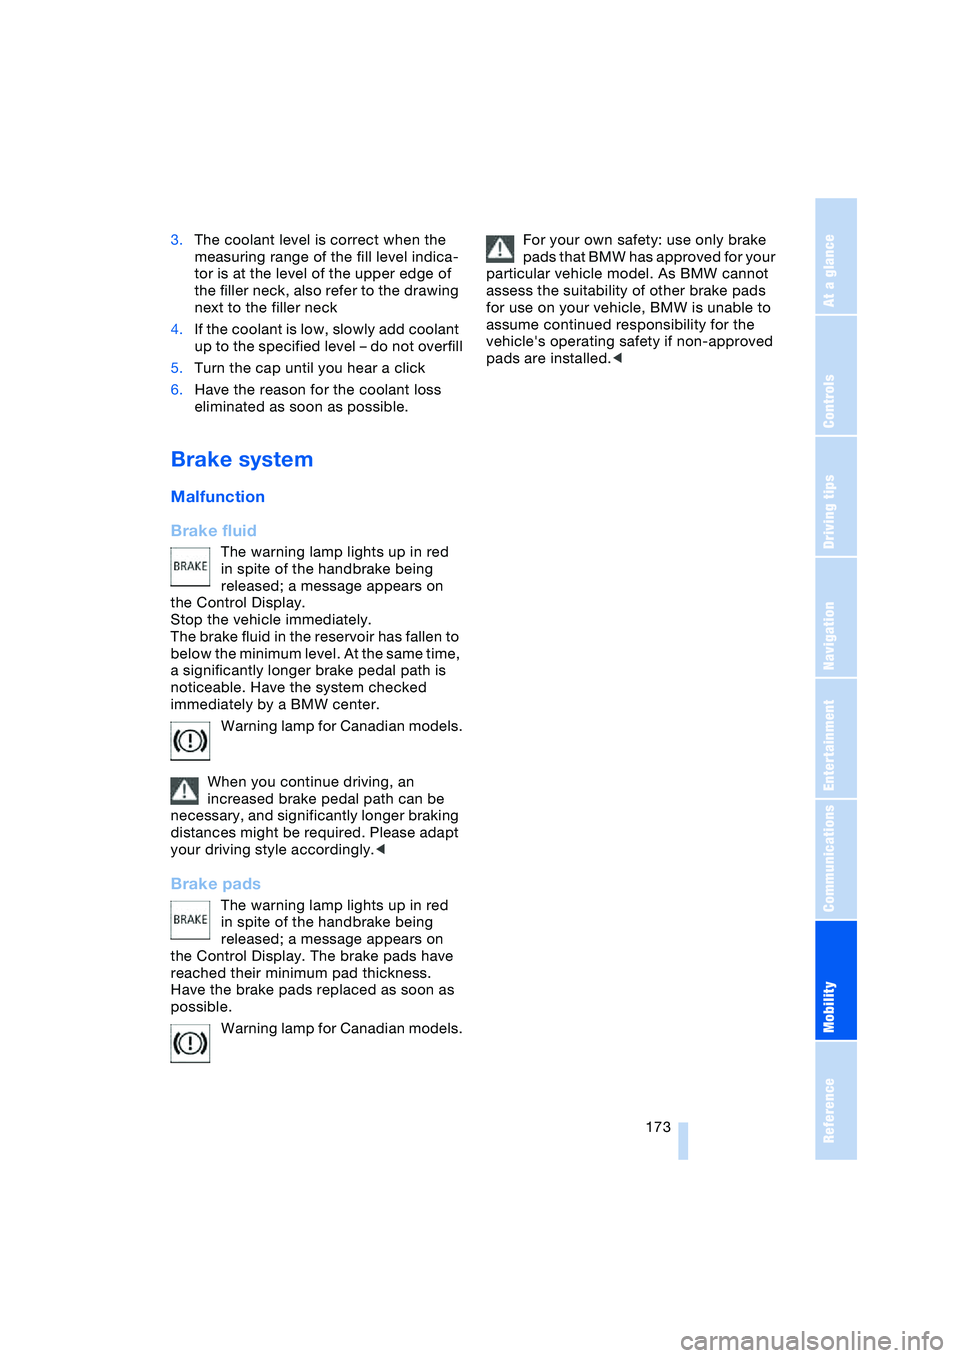
The warning lamp lights up in red
in spite of the handbrake being
released; a message appears on
the Control Display.
Stop the vehicle immediately.
The brake fluid in the reservoir has fallen to
below the minimum level. At the same time,
a significantly longer brake pedal path is
noticeable. Have the system checked
immediately by a BMW center.
Warning lamp for Canadian models.
When you continue driving, an
increased brake pedal path can be
necessary, and significantly longer braking
distances might be required. Please adapt
your driving style accordingly.<
Brake pads
The warning lamp lights up in red
in spite of the handbrake being
released; a message appears on
the Control Display. The brake pads have
reached their minimum pad thickness.
Have the brake pads replaced as soon as
possible.
Warning lamp for Canadian models.For your own safety: use only brake
pads that BMW has approved for your
particular vehicle model. As BMW cannot
assess the suitability of other brake pads
for use on your vehicle, BMW is unable to
assume continued responsibility for the
vehicle's operating safety if non-approved
pads are installed.<
Page 188 of 216
Giving and receiving assistance
186
Using tow fitting
The threaded tow fitting is stored in the tool
kit mounted on the inside of the luggage
compartment under the floor mat, refer to
page 178, and should always remain in the
vehicle. It can be screwed in at the front or
rear of the BMW.
To avoid damage to the tow fitting
and the vehicle, observe the follow-
ing: only use the tow fitting that comes with
the vehicle and screw it in as far as possi-
ble. Only use the tow fitting to tow on the
roadway. Avoid heavy lateral loading of the
tow fitting, e.g. do not lift the vehicle by the
tow fitting.<
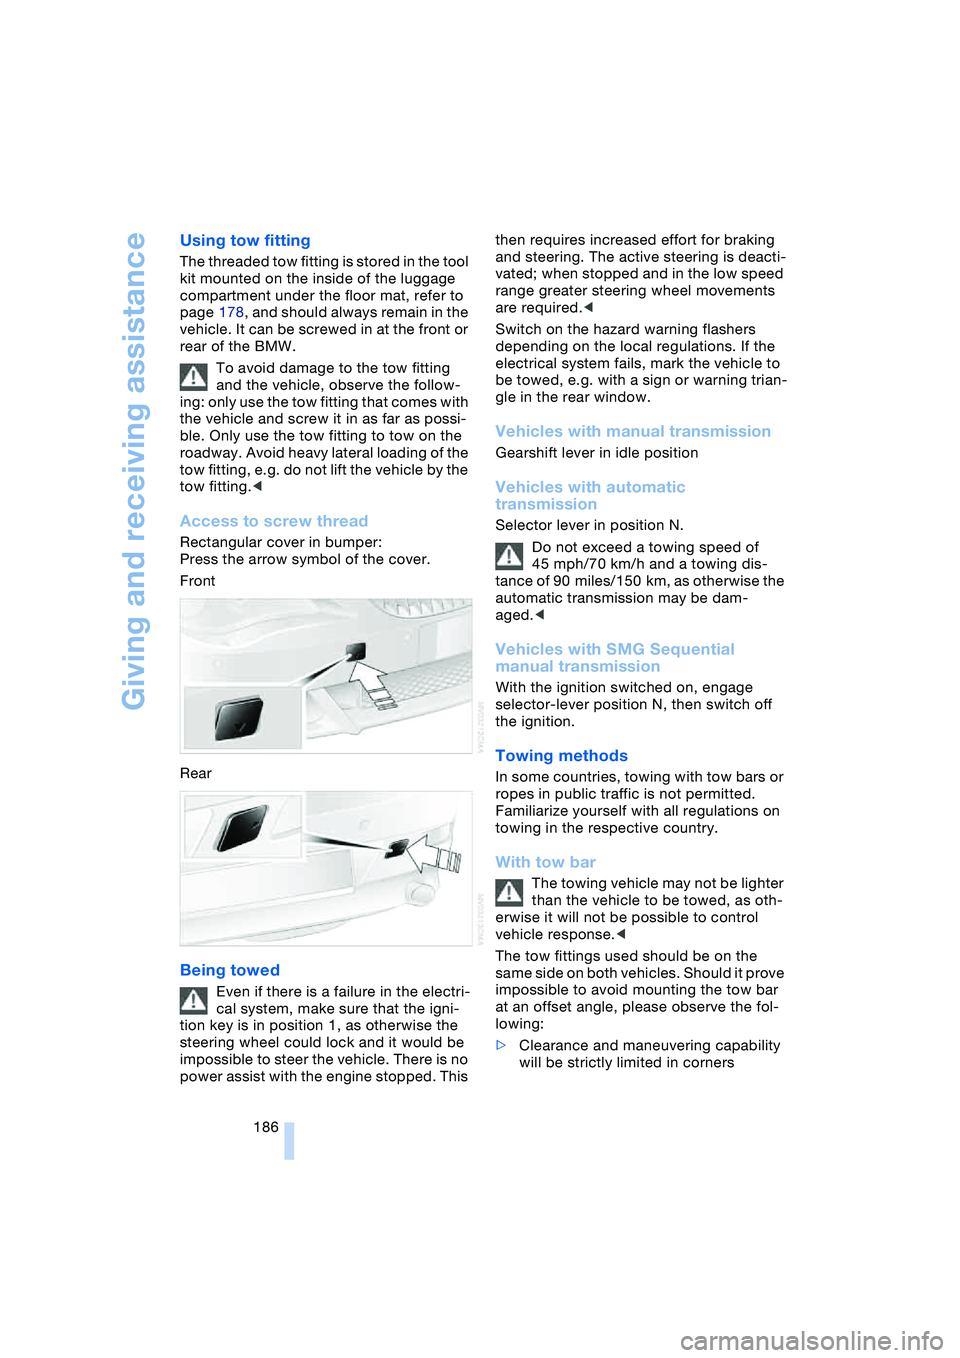
Access to screw thread
Rectangular cover in bumper:
Press the arrow symbol of the cover.
Front
Rear
Being towed
Even if there is a failure in the electri-
cal system, make sure that the igni-
tion key is in position 1, as otherwise the
steering wheel could lock and it would be
impossible to steer the vehicle. There is no
power assist with the engine stopped. This then requires increased effort for braking
and steering. The active steering is deacti-
vated; when stopped and in the low speed
range greater steering wheel movements
are required.<
Switch on the hazard warning flashers
depending on the local regulations. If the
electrical system fails, mark the vehicle to
be towed, e.g. with a sign or warning trian-
gle in the rear window.
Vehicles with manual transmission
Gearshift lever in idle position
Vehicles with automatic
transmission
Selector lever in position N.
Do not exceed a towing speed of
45 mph/70 km/h and a towing dis-
tance of 90 miles/150 km, as otherwise the
automatic transmission may be dam-
aged.<
Vehicles with SMG Sequential
manual transmission
With the ignition switched on, engage
selector-lever position N, then switch off
the ignition.
Towing methods
In some countries, towing with tow bars or
ropes in public traffic is not permitted.
Familiarize yourself with all regulations on
towing in the respective country.
With tow bar
The towing vehicle may not be lighter
than the vehicle to be towed, as oth-
erwise it will not be possible to control
vehicle response.<
The tow fittings used should be on the
same side on both vehicles. Should it prove
impossible to avoid mounting the tow bar
at an offset angle, please observe the fol-
lowing:
>Clearance and maneuvering capability
will be strictly limited in corners
Page 199 of 216
197Reference
At a glance
Controls
Driving tips
Communications
Navigation
Entertainment
Mobility
Everything from A to Z
Index
"..." Indicates texts on the
Control Display for the
selection of functions,
pointing out where these
are located.
A
ABS Antilock Brake
System 76
– malfunction 78
– warning lamp 13, 78
Acceleration assistant with
SMG 60
Accessories, refer to
Your individual vehicle 5
Activated-charcoal filter 92
"Activation time" for
independent
ventilation 93
Activation times 93
– entering 93
Active roll stabilization 78
Active steering 80
– initializing the system 80
– warning lamp 13, 80
Adapting the temperature
in the upper body
region 91
Adaptive brake lamps, refer
to Brake Force Display 80
Adaptive Head Light 86
"Add digits" for portable
phone 149
"Address book" for
navigation 114
Address for navigation
– deleting 115
– entering 110
– selecting 115
– storing current
location 114
"Add to destination
list" 111Adjusting the temperature
with automatic climate
control 89
Adjusting the thigh
support 43
"After opening door" 44
"After unlocking" 44
Airbags 81
– deactivating, Coupe 51
– indicator lamp 82
– sitting safely 42
Air distribution
– automatic 89
– manual 90
Airing, refer to
Ventilation 92
Air recirculation, refer to
Automatic recirculated-
air control 89
"Air recirculation on /
off" 49
Air vents, refer to
Ventilation 88
Air volume 89
AKI, refer to Fuel
specifications 163
Alarm system 32
– avoiding unintentional
alarms 33
– interior motion sensor 33
– switching off alarm 32
– switching off tilt alarm
sensor and interior
motion sensor 33
– tilt alarm sensor 33
All around the center
console 14
All around the steering
wheel 10
"All channels" 135
"All doors" 27
All-season tires, refer to
Winter tires 169
Altering stretch of road 120"AM", reception
range 127, 130
Antenna for portable
phone 144
Antifreeze
– coolant 172
– washer fluid 62
Antilock Brake System,
ABS 76
Anti-theft alarm system,
refer to Alarm system 32
Anti-theft system 27
Anti-trapping mechanism
– glass roof 36
– power windows 35
Approved axle loads, refer
to Weights 190
Approved gross vehicle
weight, refer to
Weights 190
Armrest, refer to
Center armrest 96
Arrival time, refer to
Computer 70
Arrival time, refer to
Starting destination
guidance 118
"Arrow display" 119
Ashtray 97
Assistance systems, refer
to Driving stability control
systems 76
Assistance window 19
AUC Automatic recircu-
lated-air control 89
"Audio" 128
Audio 126
– adjusting the tone 127
– controls 126
– switching on/off 126
– volume 127
Page 201 of 216
Reference 199
At a glance
Controls
Driving tips
Communications
Navigation
Entertainment
Mobility
C
California laws
– Event Data
Recorders 176
– Proposition 65
Warning 176
"Call" 148
Call
– accepting 147
– display accepted 149
– ending 148
– in absence 149
– starting 147
Calling
– from phone book 148
– from the Top 8 list 149
– redialing 149
– refer to telephone
Owner's Manual 96
"Call sender" 151
Can holder, refer to
Cup holders 97
Capacities 193
Car battery, refer to
Battery 181
Car care, refer to the Caring
for your vehicle brochure
Car-care products, refer to
the Caring for your
vehicle brochure
"Car data" 69
Care 175
Cargo, securing 105
Caring for artificial leather,
refer to the Caring for
your vehicle brochure
Caring for leather, refer to
the Caring for your
vehicle brochure
Caring for light-alloy
wheels, refer to the
Caring for your vehicle
brochure'
Caring for plastic, refer to
the Caring for your
vehicle brochure
Caring for the carpet, refer
to the Caring for your
vehicle brochureCaring for the vehicle finish,
refer to the Caring for
your vehicle brochure'
Car jacking points 181
Car keys, refer to
Key set 26
Car phone 145
– location, refer to
Center armrest 96
– refer to
Portable phone 144
– refer to separate
Owner's Manual
Car radio, refer to
Radio 130
Car wash 102
– also refer to the Caring for
your vehicle brochure
Catalytic converter, refer to
Exhaust system 102
"Categories" 135
CBC Cornering Brake
Control 76
CBS Condition Based
Service 174
"CD" 127, 137
CD changer 137
– adjusting the tone 127
– controls 126
– fast forward/reverse 140
– installation location 140
– playing a track 139
– random play
sequence 140
– repeating a track 139
– selecting a CD 137
– selecting a track 138
– switching on/off 126
– volume 127
CD player 137
– adjusting the tone 127
– controls 126
– fast forward/reverse 140
– playing a track 139
– random play
sequence 140
– repeating a track 139
– selecting a track 138
– switching on/off 126
– volume 127Center armrest
– adjusting the height 96
– front 96
Center console 14
"Central locking" 27
Central locking system 26
– from inside vehicle 29
Changes, technical, refer to
For your own safety 6
Changing a wheel 181
Changing the language on
Control Display 73
Changing the
measurement units on the
Control Display 72
Changing wheels 181
CHECK button 68
Check Control 66
"Check Control
messages" 68
Check Gas Cap 162
Checking the air pressure,
refer to Tire inflation
pressure 164
Child's seats, refer to
Child-restraint
systems 52
Child-restraint system 51
Chrome parts, care, refer
to the Caring for your
vehicle brochure
Cigarette lighter 97
Cleaning, refer to the
Caring for your vehicle
brochure
Cleaning windshield, refer
to Wiper system 61
"Climate" 90
"Climate control" 91
Clock 64
– 12/24 hour mode 73
– setting time and date 73
Closing
– from inside 29
– from outside 27
Clothes hooks, Coupe 96
Cockpit 10
Cold start, refer to
Starting the engine 54
"Communication" 146