2004 BMW 525I SEDAN climate control
[x] Cancel search: climate controlPage 94 of 220
A congenial climate
92 rarily suspending the supply of outside air.
The system then recirculates the air cur-
rently within the vehicle. AUC executes this
function automatically.
Press the button repeatedly to run through
the following control sequence:
>Indicator lamps off: outside air flows in
>Right indicator lamp on, AUC mode: the
system detects pollutants in the outside
air and responds by blocking the supply
of outside air when required. The sys-
tem then recirculates the air currently
within the vehicle.
Depending upon air quality require-
ments, in the automatic mode the sys-
tem alternates between its outside-air
and recirculated-air modes
>Left indicator lamp on, recirculated-air
mode: the supply of outside air is per-
manently blocked. The system then
recirculates the air currently within the
vehicle.
If condensation starts to form on the
inside window surfaces during opera-
tion in the recirculated-air mode, you
should switch it off while also increasing
the air volume as required.
The recirculated-air mode should not be
used over a sustained longer period of
time, as the air quality inside the vehicle
deteriorates continuously.<
Residual heat mode
The system uses the warmth
stored in the engine to heat the
interior when the ignition is off,
for instance, while the vehicle is
stopped at a school to pick up a
child.
You can adjust the automatic climate con-
trol settings in ignition key position 1.
Provided that the engine has warmed
to its normal operating temperature
and the battery is charged, you can use this
function for up to 15 minutes after switch-
ing off the ignition. The LED within the but-
ton lights up to confirm compliance with
these conditions.<
Switching automatic climate control
off
The air volume, the heater and
the cooling function are all
switched off. You can restart
the automatic climate control
by pressing any of its buttons
except the REST button.
Settings using the Control Center
You can make the settings for each specific
key.
Control Center, for principle details, refer to
page 16:
1.Turn the ignition key to position 2
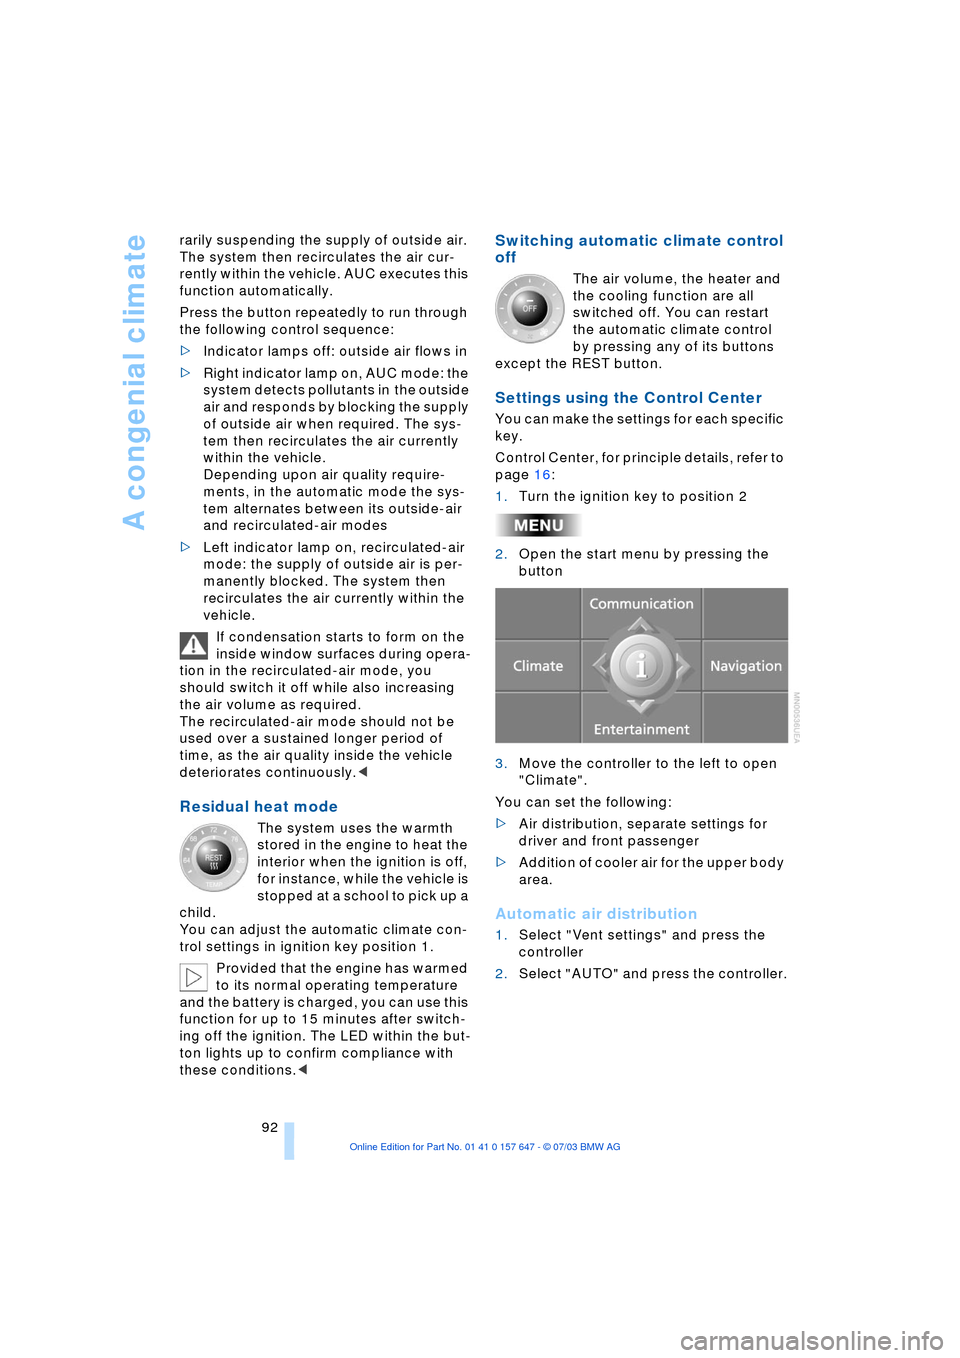
2.Open the start menu by pressing the
button
3.Move the controller to the left to open
"Climate".
You can set the following:
>Air distribution, separate settings for
driver and front passenger
>Addition of cooler air for the upper body
area.
Automatic air distribution
1.Select "Vent settings" and press the
controller
2.Select "AUTO" and press the controller.
Page 95 of 220
Controls
93Reference
At a glance
Driving tips
Communications
Navigation
Entertainment
Mobility
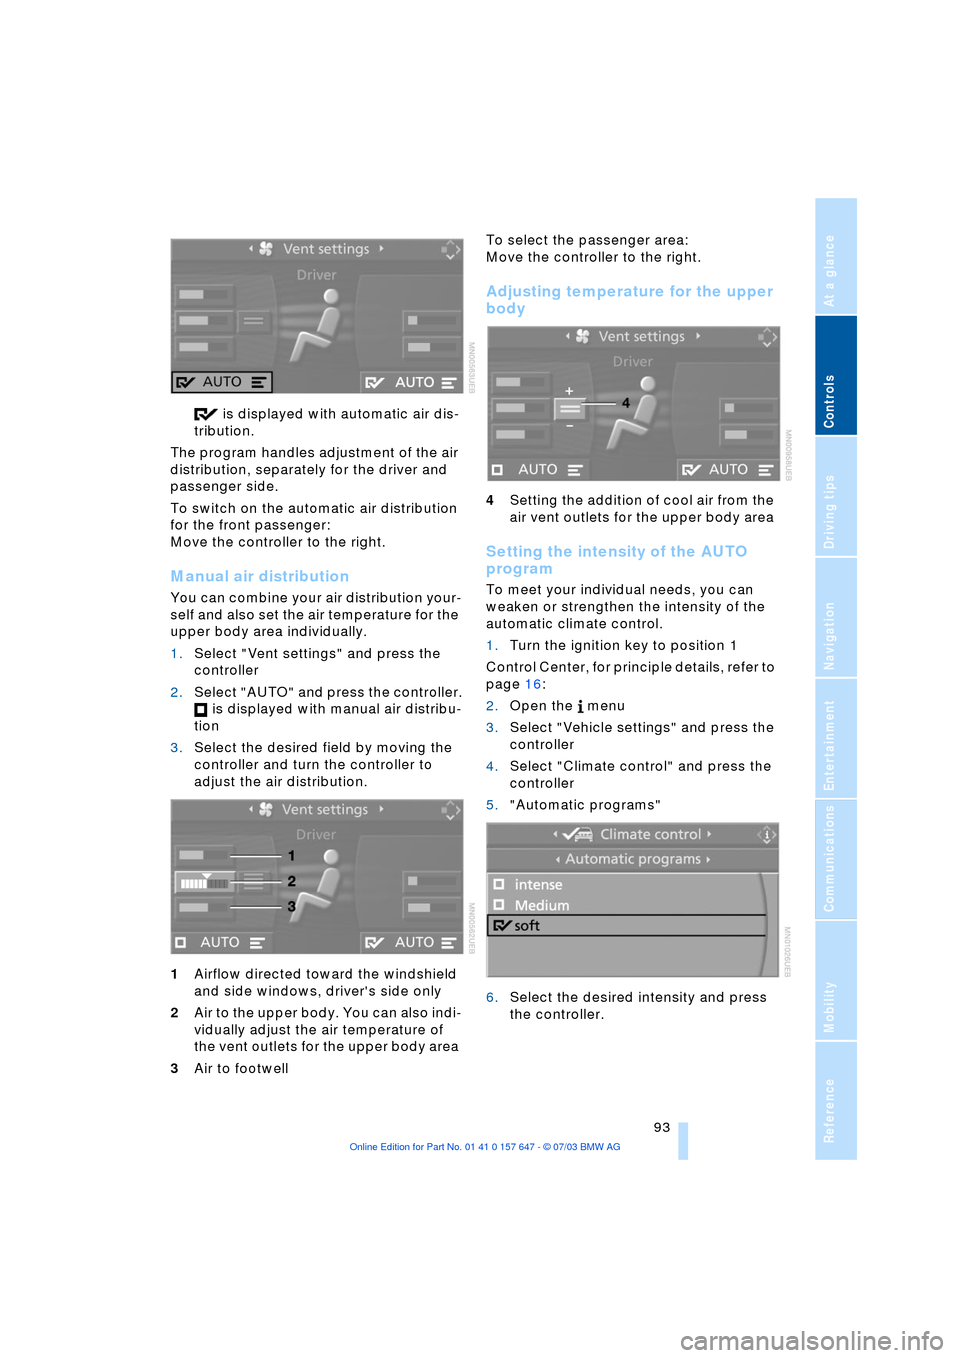
is displayed with automatic air dis-
tribution.
The program handles adjustment of the air
distribution, separately for the driver and
passenger side.
To switch on the automatic air distribution
for the front passenger:
Move the controller to the right.
Manual air distribution
You can combine your air distribution your-
self and also set the air temperature for the
upper body area individually.
1.Select "Vent settings" and press the
controller
2.Select "AUTO" and press the controller.
is displayed with manual air distribu-
tion
3.Select the desired field by moving the
controller and turn the controller to
adjust the air distribution.
1Airflow directed toward the windshield
and side windows, driver's side only
2Air to the upper body. You can also indi-
vidually adjust the air temperature of
the vent outlets for the upper body area
3Air to footwell To select the passenger area:
Move the controller to the right.
Adjusting temperature for the upper
body
4Setting the addition of cool air from the
air vent outlets for the upper body area
Setting the intensity of the AUTO
program
To meet your individual needs, you can
weaken or strengthen the intensity of the
automatic climate control.
1.Turn the ignition key to position 1
Control Center, for principle details, refer to
page 16:
2.Open the menu
3.Select "Vehicle settings" and press the
controller
4.Select "Climate control" and press the
controller
5."Automatic programs"
6.Select the desired intensity and press
the controller.
Page 96 of 220
A congenial climate
94
Front ventilation
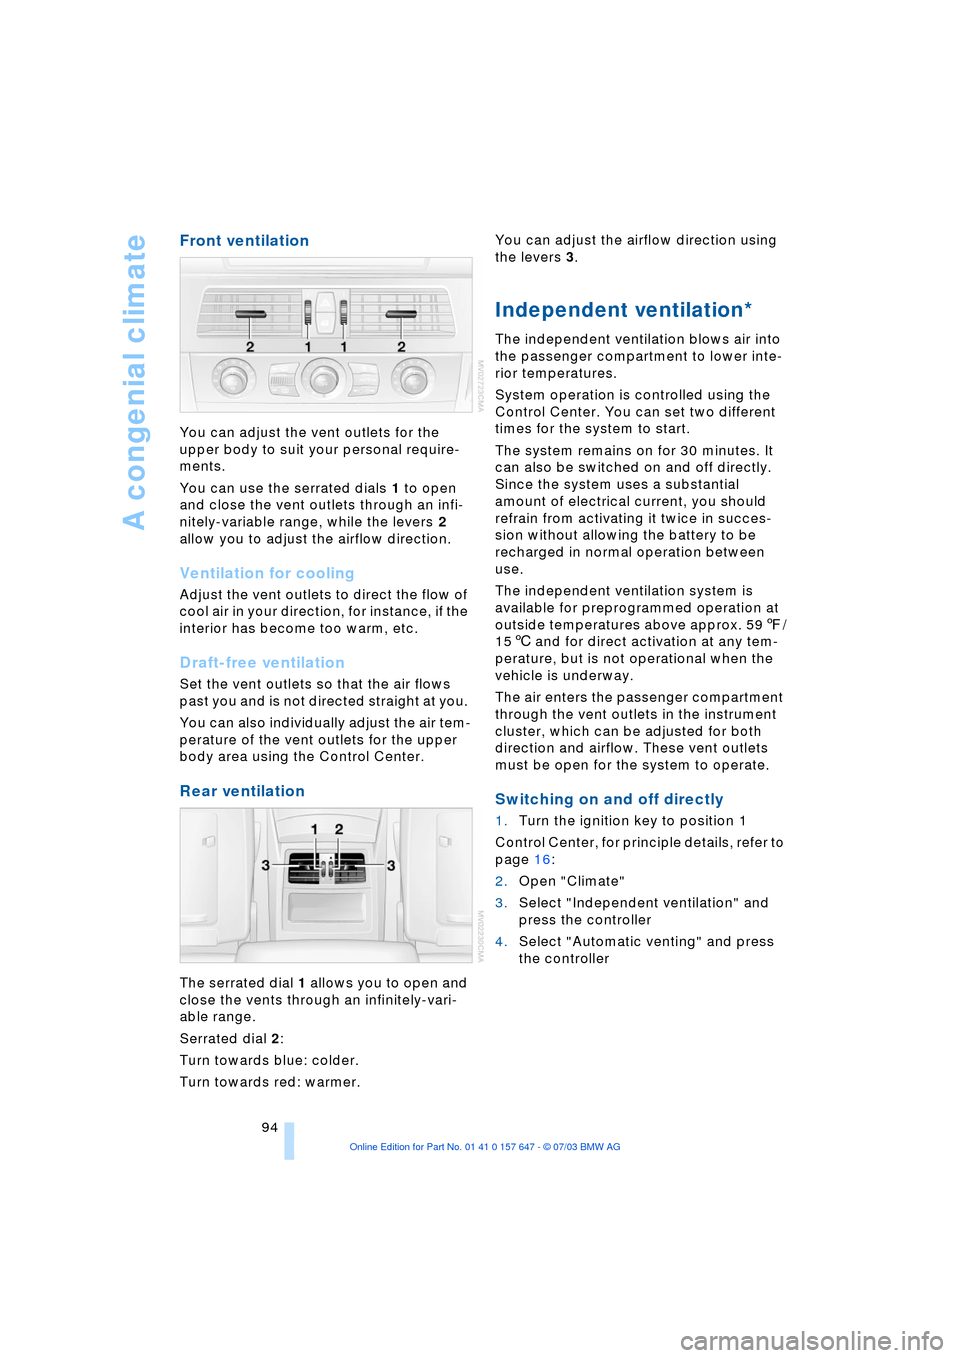
You can adjust the vent outlets for the
upper body to suit your personal require-
ments.
You can use the serrated dials 1 to open
and close the vent outlets through an infi-
nitely-variable range, while the levers 2
allow you to adjust the airflow direction.
Ventilation for cooling
Adjust the vent outlets to direct the flow of
cool air in your direction, for instance, if the
interior has become too warm, etc.
Draft-free ventilation
Set the vent outlets so that the air flows
past you and is not directed straight at you.
You can also individually adjust the air tem-
perature of the vent outlets for the upper
body area using the Control Center.
Rear ventilation
The serrated dial 1 allows you to open and
close the vents through an infinitely-vari-
able range.
Serrated dial 2:
Turn towards blue: colder.
Turn towards red: warmer. You can adjust the airflow direction using
the levers 3.
Independent ventilation*
The independent ventilation blows air into
the passenger compartment to lower inte-
rior temperatures.
System operation is controlled using the
Control Center. You can set two different
times for the system to start.
The system remains on for 30 minutes. It
can also be switched on and off directly.
Since the system uses a substantial
amount of electrical current, you should
refrain from activating it twice in succes-
sion without allowing the battery to be
recharged in normal operation between
use.
The independent ventilation system is
available for preprogrammed operation at
outside temperatures above approx. 597/
156 and for direct activation at any tem-
perature, but is not operational when the
vehicle is underway.
The air enters the passenger compartment
through the vent outlets in the instrument
cluster, which can be adjusted for both
direction and airflow. These vent outlets
must be open for the system to operate.
Switching on and off directly
1.Turn the ignition key to position 1
Control Center, for principle details, refer to
page 16:
2.Open "Climate"
3.Select "Independent ventilation" and
press the controller
4.Select "Automatic venting" and press
the controller
Page 97 of 220
Controls
95Reference
At a glance
Driving tips
Communications
Navigation
Entertainment
Mobility
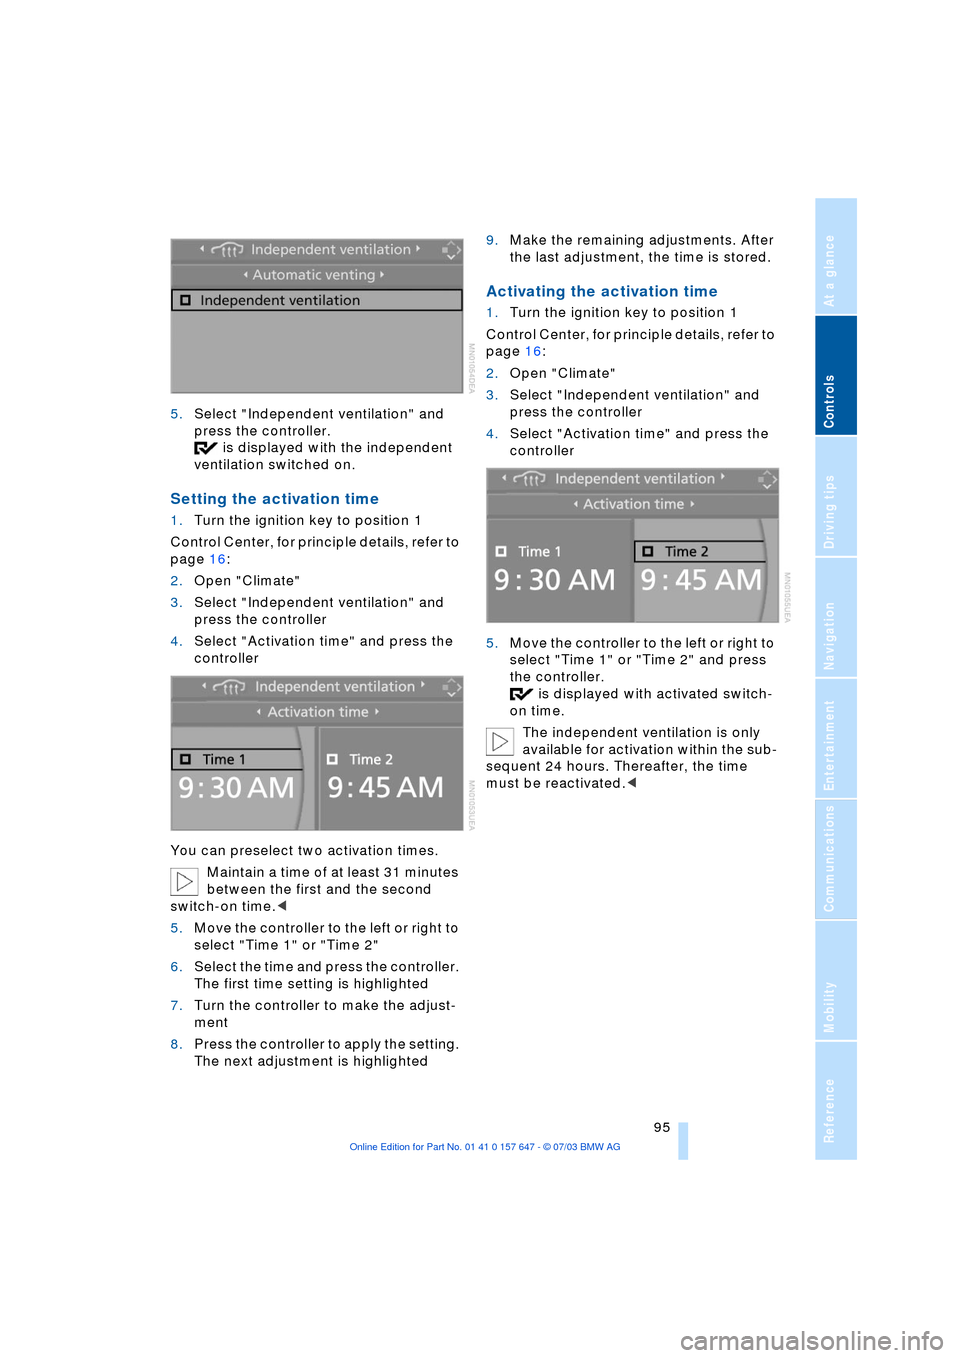
5.Select "Independent ventilation" and
press the controller.
is displayed with the independent
ventilation switched on.
Setting the activation time
1.Turn the ignition key to position 1
Control Center, for principle details, refer to
page 16:
2.Open "Climate"
3.Select "Independent ventilation" and
press the controller
4.Select "Activation time" and press the
controller
You can preselect two activation times.
Maintain a time of at least 31 minutes
between the first and the second
switch-on time.<
5.Move the controller to the left or right to
select "Time 1" or "Time 2"
6.Select the time and press the controller.
The first time setting is highlighted
7.Turn the controller to make the adjust-
ment
8.Press the controller to apply the setting.
The next adjustment is highlighted9.Make the remaining adjustments. After
the last adjustment, the time is stored.
Activating the activation time
1.Turn the ignition key to position 1
Control Center, for principle details, refer to
page 16:
2.Open "Climate"
3.Select "Independent ventilation" and
press the controller
4.Select "Activation time" and press the
controller
5.Move the controller to the left or right to
select "Time 1" or "Time 2" and press
the controller.
is displayed with activated switch-
on time.
The independent ventilation is only
available for activation within the sub-
sequent 24 hours. Thereafter, the time
must be reactivated.<
Page 100 of 220
Practical interior accessories
98
Glove compartment
Opening
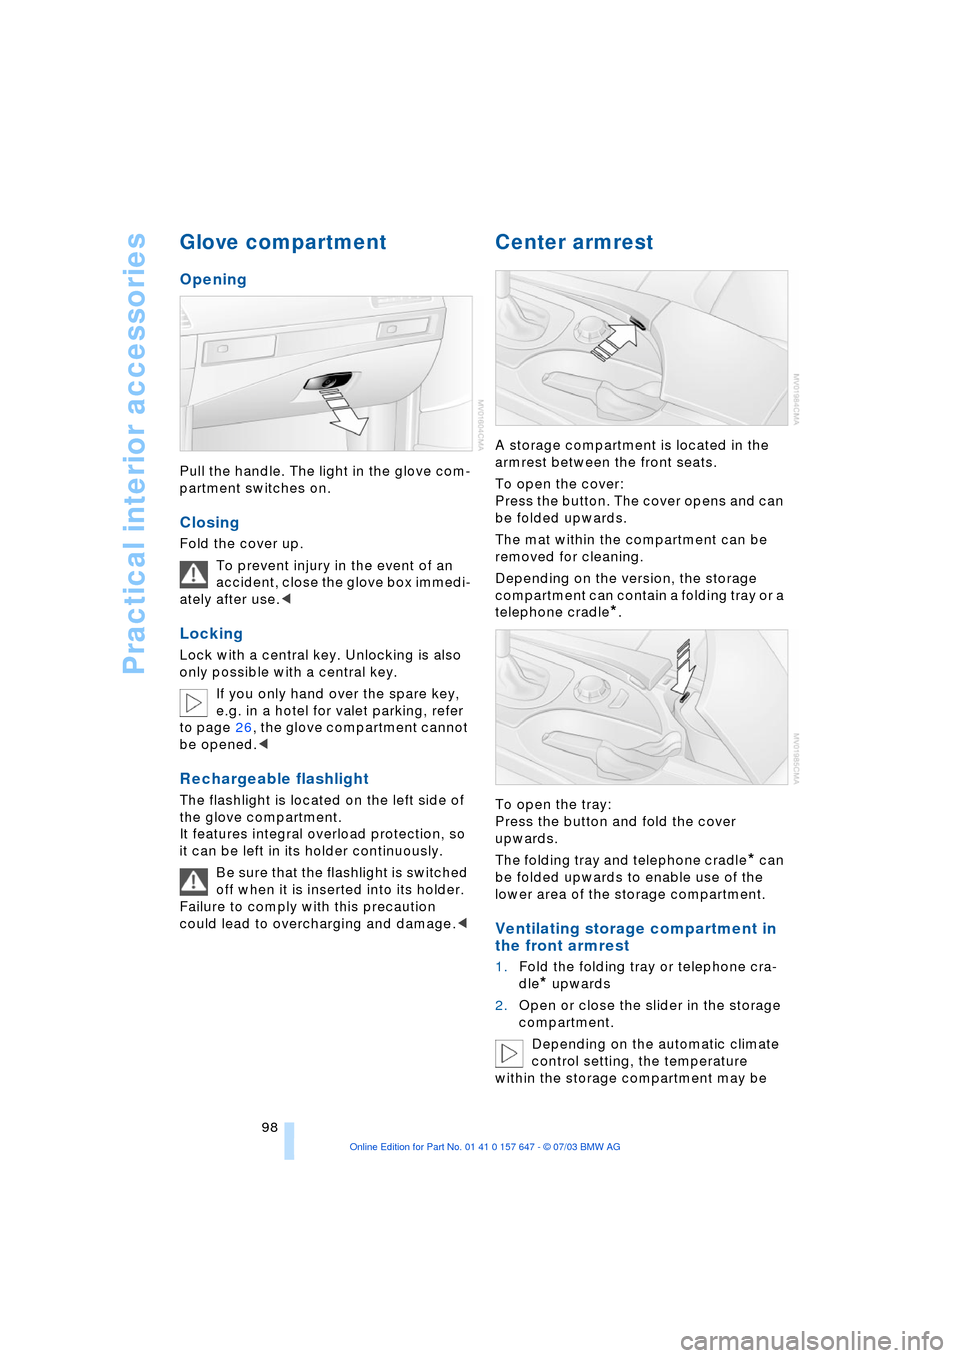
Pull the handle. The light in the glove com-
partment switches on.
Closing
Fold the cover up.
To prevent injury in the event of an
accident, close the glove box immedi-
ately after use.<
Locking
Lock with a central key. Unlocking is also
only possible with a central key.
If you only hand over the spare key,
e.g. in a hotel for valet parking, refer
to page 26, the glove compartment cannot
be opened.<
Rechargeable flashlight
The flashlight is located on the left side of
the glove compartment.
It features integral overload protection, so
it can be left in its holder continuously.
Be sure that the flashlight is switched
off when it is inserted into its holder.
Failure to comply with this precaution
could lead to overcharging and damage.<
Center armrest
A storage compartment is located in the
armrest between the front seats.
To open the cover:
Press the button. The cover opens and can
be folded upwards.
The mat within the compartment can be
removed for cleaning.
Depending on the version, the storage
compartment can contain a folding tray or a
telephone cradle
*.
To open the tray:
Press the button and fold the cover
upwards.
The folding tray and telephone cradle
* can
be folded upwards to enable use of the
lower area of the storage compartment.
Ventilating storage compartment in
the front armrest
1.Fold the folding tray or telephone cra-
dle
* upwards
2.Open or close the slider in the storage
compartment.
Depending on the automatic climate
control setting, the temperature
within the storage compartment may be
Page 175 of 220
Mobility
173Reference
At a glance
Controls
Driving tips
Communications
Navigation
Entertainment
dently of the fact that tires can reach an age
of 10 years.
Uniform Tire Quality Grading
Quality grades can be found where appli-
cable on the tire sidewall between tread
shoulder and maximum section width. For
example:
Treadwear 200 Traction AA
Temperature A
DOT Quality Grades
Treadwear
Traction AA A B C
Temperature A B C
All passenger car tires must conform
to Federal Safety Requirements in
addition to these grades.<
Treadwear
The treadwear grade is a comparative rat-
ing based on the wear rate of the tire when
tested under controlled conditions on a
specified government test course.
For example, a tire graded 150 would wear
one and one-half (1 g) times as well on the
government course as a tire graded 100.
The relative performance of tires depends
upon the actual conditions of their use,
however, and may depart significantly from
the norm due to variations in driving habits,
service practices and differences in road
characteristics and climate.
Traction
The traction grades, from highest to lowest,
are AA, A, B, and C.
Those grades represent the tire's ability to
stop on wet pavement as measured under
controlled conditions on specified govern-
ment test surfaces of asphalt and concrete.
A tire marked C may have poor traction
performance.
The traction grade assigned to this
tire is based on straight-ahead brak-
ing traction tests, and does not include
acceleration, cornering, hydroplaning, or
peak traction characteristics.<
Temperature
The temperature grades are A Ð the
highest Ð B, and C, representing the tire's
resistance to the generation of heat and its
ability to dissipate heat when tested under
controlled conditions on a specified indoor
laboratory test wheel.
Sustained high temperature can cause the
material of the tire to degenerate and
reduce tire life, and excessive temperature
can lead to sudden tire failure. The grade C
corresponds to a level of performance
which all passenger car tires must meet
under the Federal Motor Vehicle Safety
Standard No. 109. Grades B and A repre-
sent higher levels of performance on the
laboratory test wheel than the minimum
required by law.
The temperature grade for this tire is
established for a tire that is properly
inflated and not overloaded. Excessive
speed, underinflation, or excessive load-
ing, either separately or in combination,
can cause heat buildup and possible tire
failure.<
RSC Ð Run-flat tires
You will recognize run-flat tires by a circular
symbol containing the letters RSC on the
side of the tire, refer to page 175.
M+S
Winter and all-season tires.
These have better winter properties than
summer tires.
Tire condition
Inspect your tires frequently for treadwear,
signs of damage and for foreign objects
lodged in the tread. Check the tread depth.
Tire tread
The tread depth should not drop below
0.12 in/3 mm, although, for example, Euro-
pean legislation only specifies a minimum
tread depth of 0.063 in/1.6 mm. At tread
depths below 0.12 in/3 mm there is an
increased risk of high-speed hydroplaning,
Page 204 of 220
Everything from A to Z
202
Everything from A to Z
Index
A
ABS Antilock Brake
System 77
Ð indicator lamp 77
Acceleration assistant 54
Accessories, refer to Your
individual vehicle 5
"Activation time" for
independent
ventilation 95
Active cruise control 59
Ð malfunctions 64
Active head restraints,
front 40
Active roll stabilization 80
Active seat 42
Active seat ventilation 42
Active steering 82
Adaptive Head Light 88
"Address book" for
navigation 120
Address for navigation
Ð deleting 120
Ð entering 116
Ð selecting 120
"Add to address book" for
navigation 120
"Add to destination
list" 118
Adjusting temperature for
upper body 93
Adjusting the thigh
support 37
"After door is opened" 39
"After unlocking" 39
Airbags 83
Ð indicator lamp 84
Ð sitting safely 36
Air circulation, refer to
Recirculated air 91
Air distribution
Ð automatic 91
Ð individual 93Air flow, refer to Air
volume 91
Airing, refer to
Ventilation 94
"Air recirculation on /
off" 44
Air vent outlets of
automatic climate
control 90
Air volume 91
AKI, refer to Fuel
specifications 169
Alarm system 32
Ð avoiding unintentional
alarms 33
All around the steering
wheel 10
"All channels" 138
"All doors" 28
All-season tires, refer to
Winter tires 175
"AM", wave-
band 130, 134
Antenna for portable
phone 150
Antifreeze
Ð coolant 179
Ð washer fluid 57
Anti-theft system 27
Anti-trapping mechanism
Ð glass roof 35
Ð windows 34
Approved axle loads, refer
to Weights 200
Approved gross vehicle
weight, refer to
Weights 200
Arrival time, refer to
Computer 71
Ashtray
Ð front 99
Ð rear 100
Assistance window 18Assisting systems, refer to
DSC Dynamic Stability
Control 78
AUC Automatic
recirculated-air
control 91
"Audio" 131
Audio 130
Ð adjusting the tone 131
Ð controls 130
Ð switching on/off 130
Ð volume 131
Audio systems, refer to
Tone control 131
Automatic
Ð air distribution 91
Ð air volume 91
Ð cruise control 58, 59
Ð storing stations 135
Automatic car wash, refer
to Caring for your vehicle
brochure
Automatic climate
control 90
Ð automatic air
distribution 91
Ð settings using the Control
Center 92
Ð switching off 92
Automatic curb monitor 39
Automatic headlamp
control 87
"Automatic programs" 93
Automatic recirculated-air
control AUC 91
Automatic steering wheel
Ð adjustment 43
Page 205 of 220
Reference 203
At a glance
Controls
Driving tips
Communications
Navigation
Entertainment
Mobility
Automatic transmission
with Steptronic 54
Ð indicator lamp 56
Ð interlock 49
Ð selector lever interlock 55
Ð shiftlock 55
Ð sport program 55
Ð starting the engine 50
Ð towing 193
AUTO program, refer to
Automatic air distribution
and volume 91
"Autostore" on the
radio 136
"AUTO" with automatic
climate control 93
Average fuel
consumption 70
Ð setting the units 74
Average speed 70
"Avoid ferries" for
navigation 121
"Avoid freeways / tolls" for
navigation 121
Avoiding unintentional
alarms 33
"Avoid tollroads" for
navigation 121
Axle loads, refer to
Weights 200
"A - Z" 154
B
Backrests, refer to
Seats 36
Backrest width
adjustment 37
Backup lamps, refer to
Reverse gear 51
Ð replacing the bulbs 186
"Balance", audio
system 132
Balance, refer to Tone
control 131
"Bass", audio system 132
Bass, refer to Tone
control 131
Battery 188
Ð in the remote control 26
Ð jump-starting 192Belts, refer to Safety
belts 36, 40
Beverage holders 99
Black ice, refer to Ice
warning 65
Blocking sections of a route
for navigation 125
Blower, refer to Air
volume 91
BMW Assist 161
Ð enabling 161
Ð services offered 162
"BMW Info" 163
BMW Maintenance
System 181
"BMW Service
settings" 161
Bore, refer to Engine
data 198
Bottle holder, refer to
Beverage holders 99
Brake Assistant, refer to
DBC Dynamic Braking
Control 79
Brake fluid 180
Ð indicator lamp 180
Ð level 180
Ð replacing 180
Brake force display 82
Brake hydraulic
systems 180
Brake lamps, replacing the
bulbs 186
Brake pads 107
Ð breaking-in
procedure 106
Brake pedal, refer to
Brakes 107
Brake rotors 107
Brakes 107
Ð ABS 77
Ð brake fluid 180
Ð breaking-in
procedure 106
Ð handbrake 50Brake system 106
Ð brake-fluid level 180
Ð brake pads 107
Ð breaking-in
procedure 106
Ð disc brakes 107
Ð indicator lamp 13, 107
Breakdown services, refer
to Roadside
Assistance 191
Break-in procedures 106
Ð brakes 106
Ð clutch 106
Ð differential 106
Ð engine 106
Brightness on the Control
Display 73
Bulbs and lamps
Ð replacing the bulbs 184
Buttons on steering
wheel 11
C
California Proposition
65 Warning 183
"Call" 154
Call
Ð accepting 153
Ð display accepted 154
Ð ending 154
Ð in absence 154
Ð starting 153
Calling
Ð from phone book 154
Ð from the Top 8 list 154
Ð redialing 154
Calling up traffic
information 126
"Call sender" 156
"Call Sirius" 138
Can holder, refer to
Beverage holders 99
Capacities 201
Car battery, refer to
Battery 188
Car care, refer to Caring for
your vehicle brochure
Car-care products, refer to
Caring for your vehicle
brochure