Page 1329 of 2234

I22120
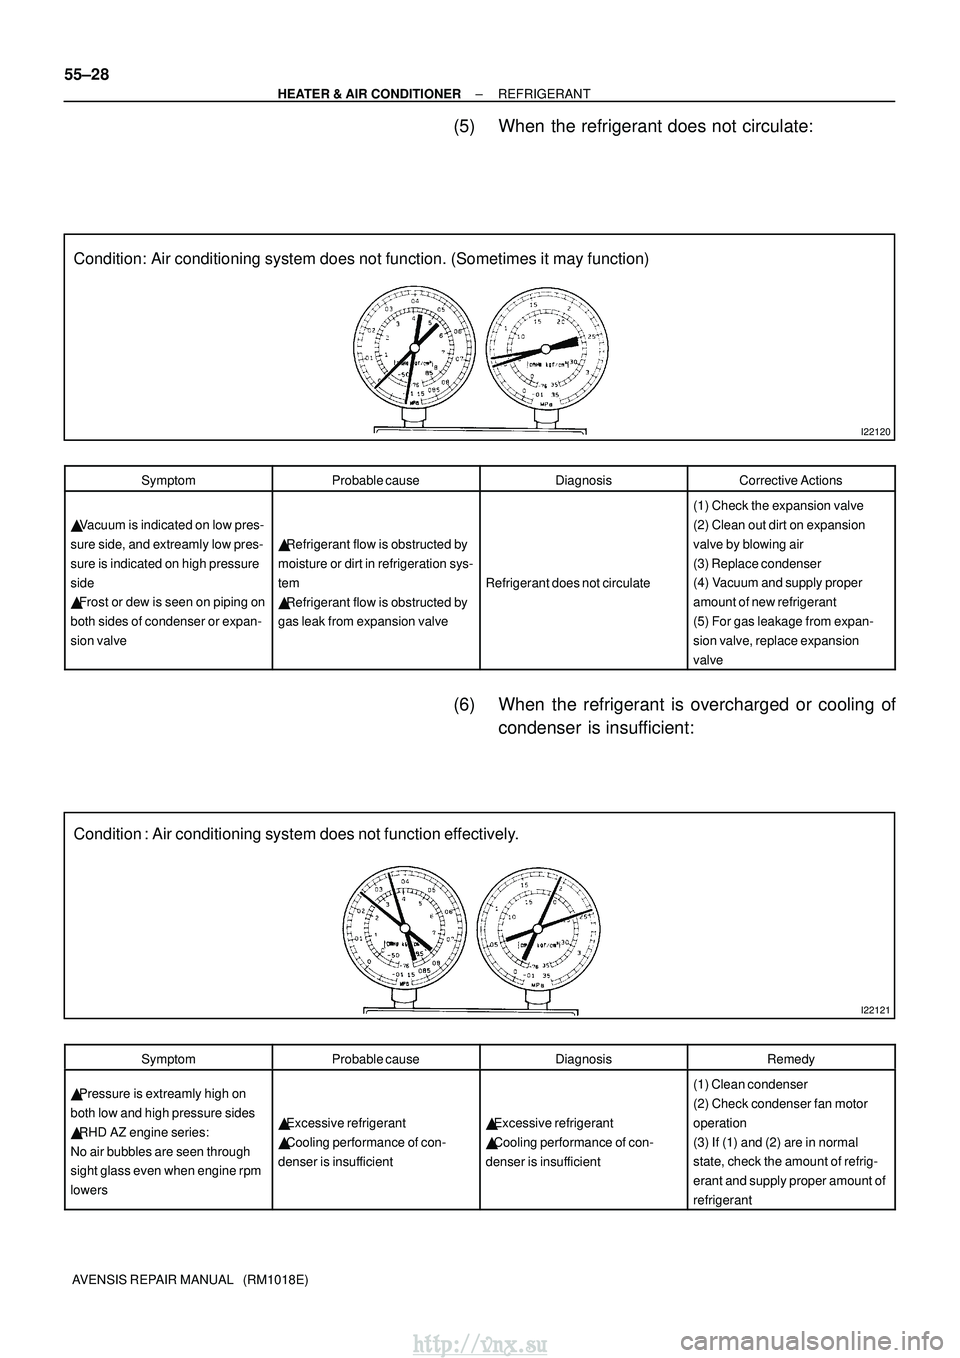
Condition: Air conditioning system does not function. (Sometimes it may function)\
I22121
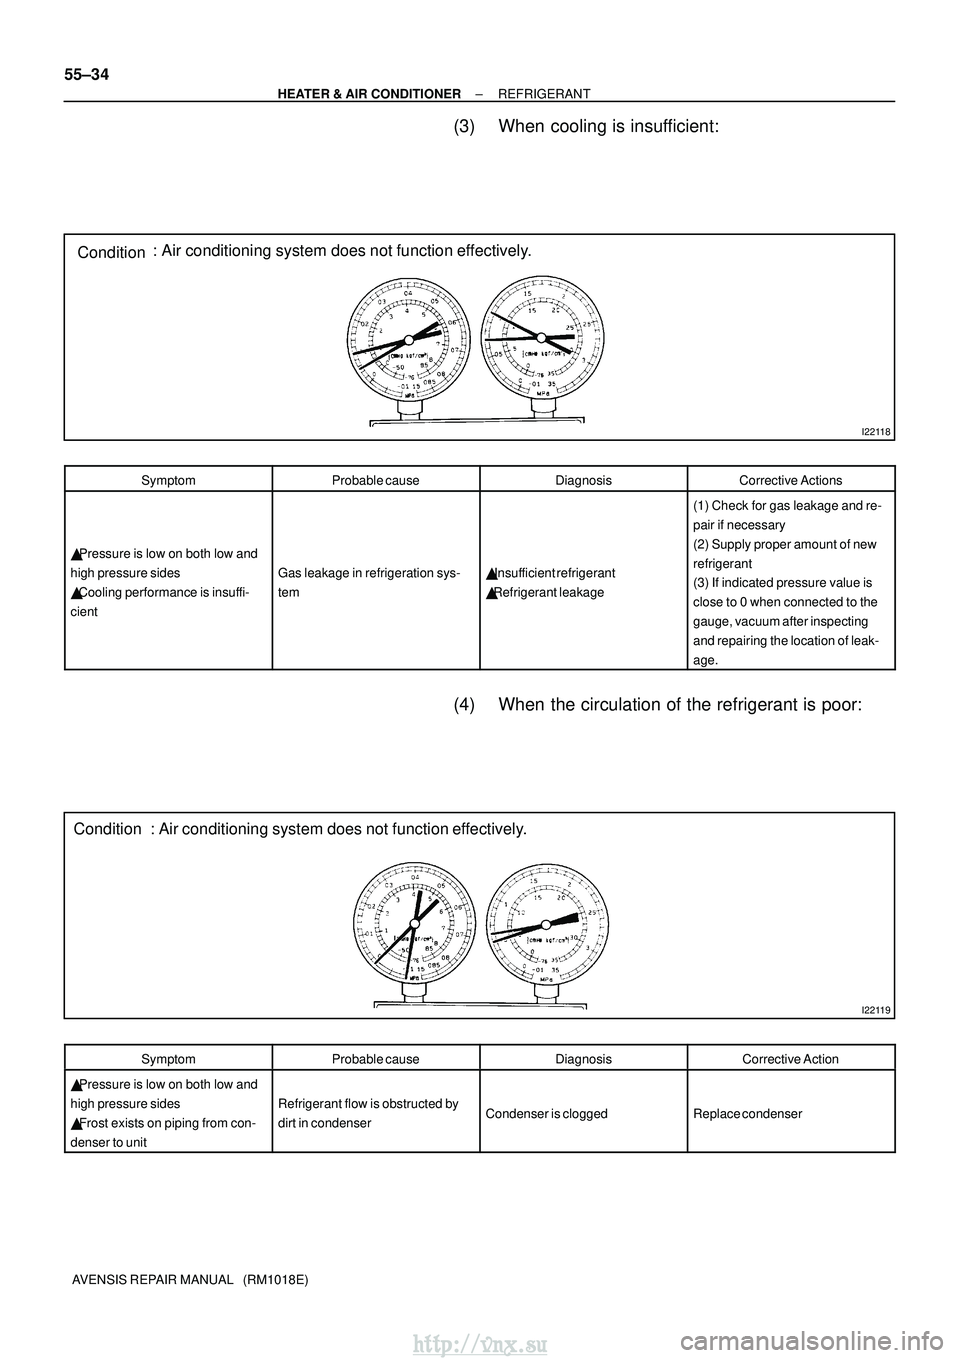
Condition : Air conditioning system does not function effectively.
55±28
±
HEATER & AIR CONDITIONER REFRIGERANT
AVENSIS REPAIR MANUAL (RM1018E)
(5) When the refrigerant does not circulate:
SymptomProbable causeDiagnosisCorrective Actions
� Vacuum is indicated on low pres-
sure side, and extreamly low pres-
sure is indicated on high pressure
side
� Frost or dew is seen on piping on
both sides of condenser or expan-
sion valve
� Refrigerant flow is obstructed by
moisture or dirt in refrigeration sys-
tem
� Refrigerant flow is obstructed by
gas leak from expansion valve
Refrigerant does not circulate
(1) Check the expansion valve
(2) Clean out dirt on expansion
valve by blowing air
(3) Replace condenser
(4) Vacuum and supply proper
amount of new refrigerant
(5) For gas leakage from expan-
sion valve, replace expansion
valve
(6) When the refrigerant is overcharged or cooling of condenser is insufficient:
SymptomProbable causeDiagnosisRemedy
� Pressure is extreamly high on
both low and high pressure sides
� RHD AZ engine series:
No air bubbles are seen through
sight glass even when engine rpm
lowers
� Excessive refrigerant
� Cooling performance of con-
denser is insufficient� Excessive refrigerant
� Cooling performance of con-
denser is insufficient
(1) Clean condenser
(2) Check condenser fan motor
operation
(3) If (1) and (2) are in normal
state, check the amount of refrig-
erant and supply proper amount of
refrigerant
http://vnx.su
Page 1335 of 2234

I22118
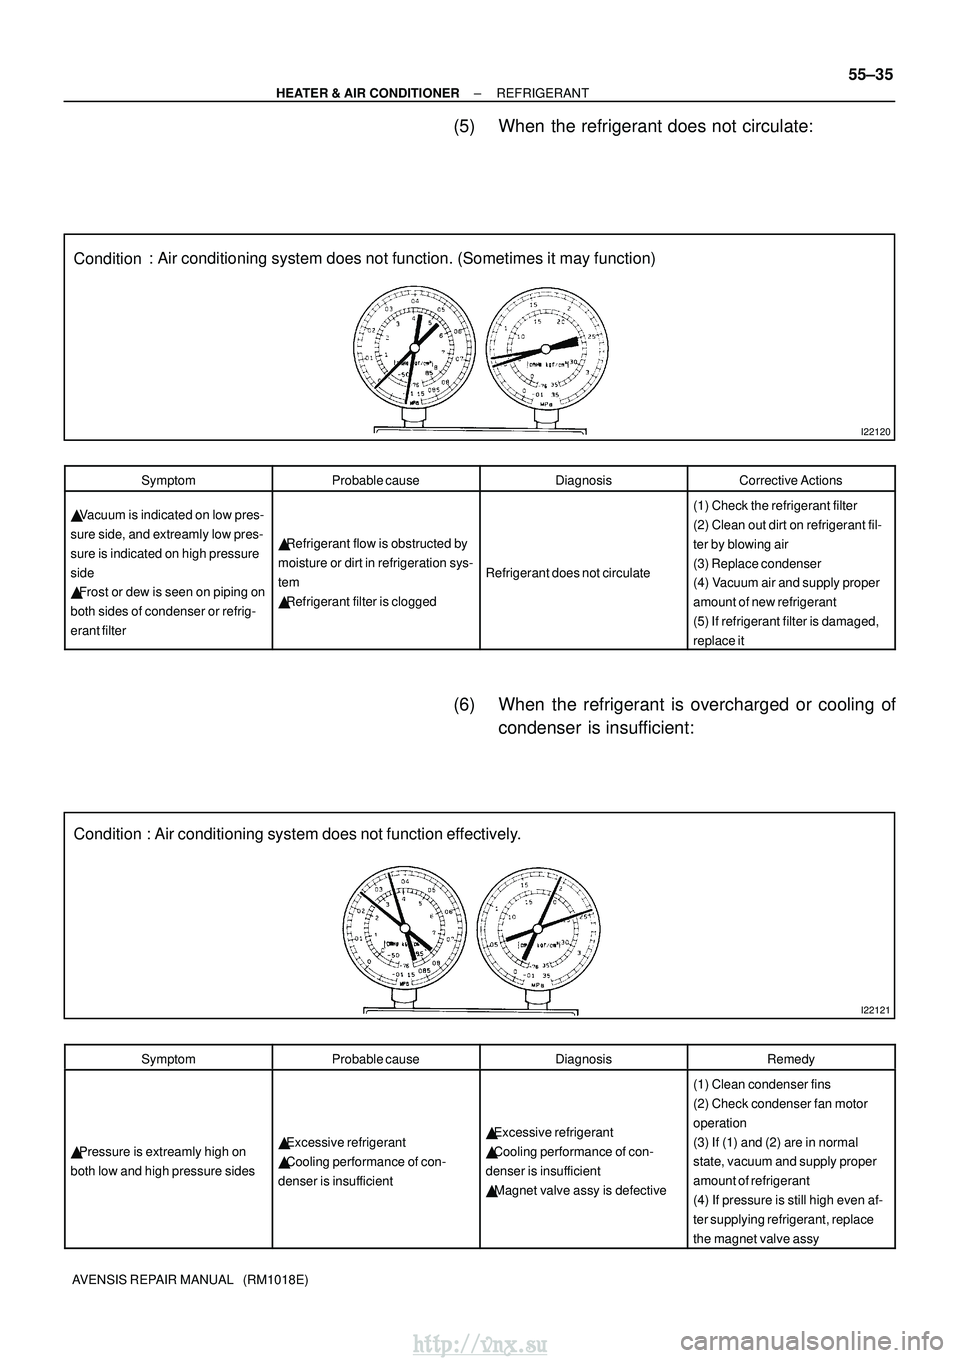
Condition: Air conditioning system does not function effectively.
I22119
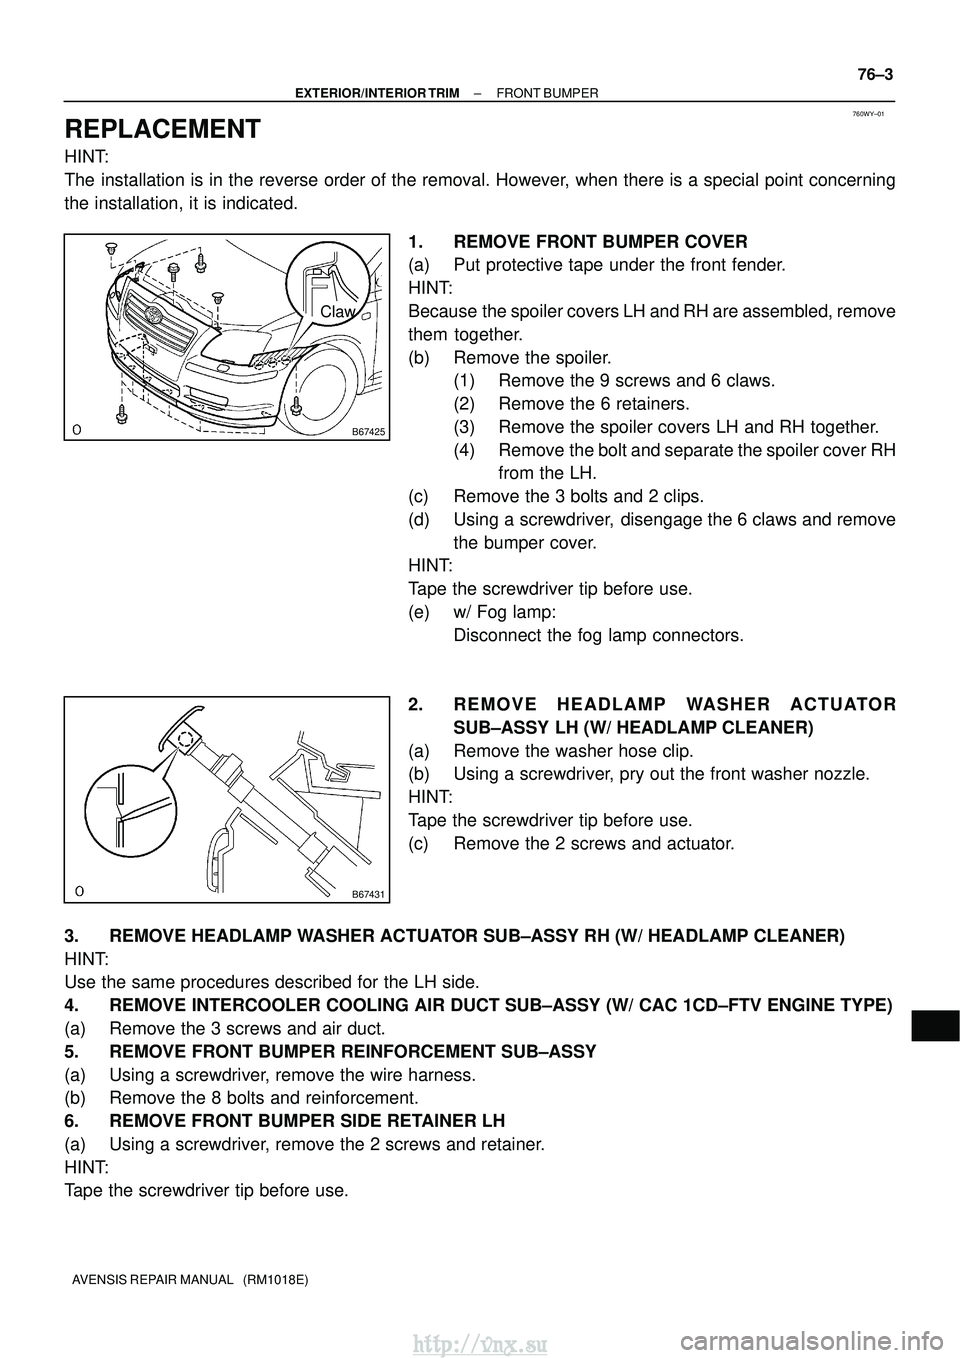
Condition : Air conditioning system does not function effectively.
55±34
±
HEATER & AIR CONDITIONER REFRIGERANT
AVENSIS REPAIR MANUAL (RM1018E)
(3) When cooling is insufficient:
SymptomProbable causeDiagnosisCorrective Actions
� Pressure is low on both low and
high pressure sides
� Cooling performance is insuffi-
cient
Gas leakage in refrigeration sys-
tem� Insufficient refrigerant
� Refrigerant leakage
(1) Check for gas leakage and re-
pair if necessary
(2) Supply proper amount of new
refrigerant
(3) If indicated pressure value is
close to 0 when connected to the
gauge, vacuum after inspecting
and repairing the location of leak-
age.
(4) When the circulation of the refrigerant is poor:
SymptomProbable causeDiagnosisCorrective Action
� Pressure is low on both low and
high pressure sides
� Frost exists on piping from con-
denser to unit
Refrigerant flow is obstructed by
dirt in condenserCondenser is cloggedReplace condenser
http://vnx.su
Page 1336 of 2234

I22120
Condition: Air conditioning system does not function. (Sometimes it may function)\
I22121
Condition : Air conditioning system does not function effectively.
±
HEATER & AIR CONDITIONER REFRIGERANT
55±35
AVENSIS REPAIR MANUAL (RM1018E)
(5) When the refrigerant does not circulate:
SymptomProbable causeDiagnosisCorrective Actions
� Vacuum is indicated on low pres-
sure side, and extreamly low pres-
sure is indicated on high pressure
side
� Frost or dew is seen on piping on
both sides of condenser or refrig-
erant filter
� Refrigerant flow is obstructed by
moisture or dirt in refrigeration sys-
tem
� Refrigerant filter is clogged
Refrigerant does not circulate
(1) Check the refrigerant filter
(2) Clean out dirt on refrigerant fil-
ter by blowing air
(3) Replace condenser
(4) Vacuum air and supply proper
amount of new refrigerant
(5) If refrigerant filter is damaged,
replace it
(6) When the refrigerant is overcharged or cooling of
condenser is insufficient:
SymptomProbable causeDiagnosisRemedy
� Pressure is extreamly high on
both low and high pressure sides� Excessive refrigerant
� Cooling performance of con-
denser is insufficient� Excessive refrigerant
� Cooling performance of con-
denser is insufficient
� Magnet valve assy is defective
(1) Clean condenser fins
(2) Check condenser fan motor
operation
(3) If (1) and (2) are in normal
state, vacuum and supply proper
amount of refrigerant
(4) If pressure is still high even af-
ter supplying refrigerant, replace
the magnet valve assy
http://vnx.su
Page 1790 of 2234
760WX±01
B67422
Front Bumper CoverCAC Cooling
Air Duct Sub±assy
Front Bumper
Reinforcement Sub±assy
Front Bumper Side
Retainer LH
Front Bumper Side
Retainer RH
w/ Fog Lamp
Fog Lamp
Assy RH Front Bumper Hole
Cover LH
Front Bumper Hole
Cover RH
Front Spoiler
Cover LH
Front Spoiler
Cover RH Front Bumper Side
Moulding LH
Front Bumper Side
Moulding RH
Hood to Front
End Panel Seal
Radiator Grille
Radiator Grille Lower
w/ CAC
Front Bumper
Stay Sub±assy LH
Front Bumper
Stay Sub±assy RH
w/ Fog Lamp
Fog Lamp Assy LH
±
EXTERIOR/INTERIOR TRIM FRONT BUMPER
76±1
AVENSIS REPAIR MANUAL (RM1018E)
FRONT BUMPER
COMPONENTS
http://vnx.su
Page 1792 of 2234

760WY±01
B67425
Claw
B67431
±
EXTERIOR/INTERIOR TRIM FRONT BUMPER
76±3
AVENSIS REPAIR MANUAL (RM1018E)
REPLACEMENT
HINT:
The installation is in the reverse order of the removal. However, when there is a special point concerning
the installation, it is indicated.
1. REMOVE FRONT BUMPER COVER
(a) Put protective tape under the front fender.
HINT:
Because the spoiler covers LH and RH are assembled, remove
them together.
(b) Remove the spoiler.(1) Remove the 9 screws and 6 claws.
(2) Remove the 6 retainers.
(3) Remove the spoiler covers LH and RH together.
(4) Remove the bolt and separate the spoiler cover RHfrom the LH.
(c) Remove the 3 bolts and 2 clips.
(d) Using a screwdriver, disengage the 6 claws and remove the bumper cover.
HINT:
Tape the screwdriver tip before use.
(e) w/ Fog lamp:
Disconnect the fog lamp connectors.
2. R E M O V E H E A D L A M P WA S H E R A C T U ATO R SUB±ASSY LH (W/ HEADLAMP CLEANER)
(a) Remove the washer hose clip.
(b) Using a screwdriver, pry out the front washer nozzle.
HINT:
Tape the screwdriver tip before use.
(c) Remove the 2 screws and actuator.
3. REMOVE HEADLAMP WASHER ACTUATOR SUB±ASSY RH (W/ HEADLAMP CLEANER)
HINT:
Use the same procedures described for the LH side.
4. REMOVE INTERCOOLER COOLING AIR DUCT SUB±ASSY (W/ CAC 1CD±FTV ENGI\
NE TYPE)
(a) Remove the 3 screws and air duct.
5. REMOVE FRONT BUMPER REINFORCEMENT SUB±ASSY
(a) Using a screwdriver, remove the wire harness.
(b) Remove the 8 bolts and reinforcement.
6. REMOVE FRONT BUMPER SIDE RETAINER LH
(a) Using a screwdriver, remove the 2 screws and retainer.
HINT:
Tape the screwdriver tip before use.
http://vnx.su