Page 76 of 381
 gas can come into your vehicle. You cant
see or smell CO. It can cause unco")
2-12
Liftgate/Liftglass
CAUTION:
It can be dangerous to drive with the
liftgate/liftglass open because carbon monoxide
(CO) gas can come into your vehicle. You can't
see or smell CO. It can cause unconsciousness
and even death.
If you must drive with the liftgate/liftglass open
or if electrical wiring or other cable connections
must pass through the seal between the body and
the liftgate/liftglass:
�Make sure all other windows are shut.
�Turn the fan on your heating or cooling
system to its highest speed and select the
control setting that will force outside air
into your vehicle. See ªComfort Controlsº
in the Index.
�If you have air outlets on or under the
instrument panel, open them all the way.
See ªEngine Exhaustº in the Index.
Liftgate/Liftglass Release
To open the liftgate using your key do the following:
�To unlock the liftgate, insert the key into the keyhole
and turn it counterclockwise.
When closing the liftgate, you can use the handle to
pull it down.
�To lock the liftgate, turn the key clockwise to the
first position.
Page 77 of 381
2-13
To open the liftglass using your key do the following:
�To open the liftglass, insert the key into the keyhole
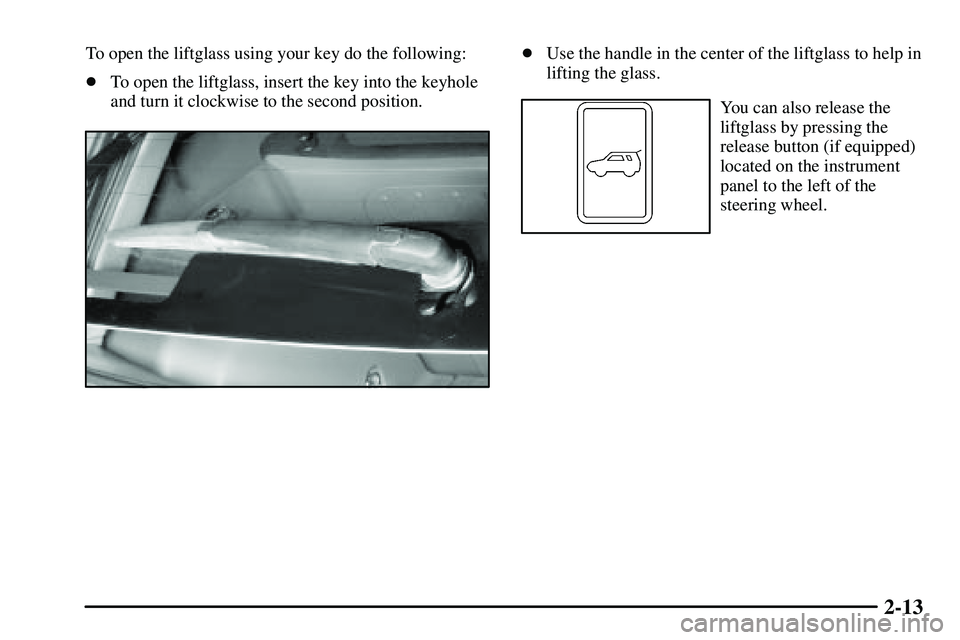
and turn it clockwise to the second position.�Use the handle in the center of the liftglass to help in
lifting the glass.
You can also release the
liftglass by pressing the
release button (if equipped)
located on the instrument
panel to the left of the
steering wheel.
Page 79 of 381

Your vehicles theft-deterrent system is designed to
activate an alarm if any of the side doors or the liftgate
is forcibly unlocked or if the batter")
2-15
Content Theft-Deterrent System
(If Equipped)
Your vehicle's theft-deterrent system is designed to
activate an alarm if any of the side doors or the liftgate
is forcibly unlocked or if the battery terminal is
disconnected and then reconnected while the system
is set.
The alarm will sound the horn intermittently and flash
the headlamps, turn signal lamps and interior lights. If
the driver's or front passenger's side doors are unlocked
forcibly, the other side doors and the liftgate will be
locked automatically.
Setting the System
To set the system, do the following:
1. Turn the ignition key to the LOCK position and
remove it.
2. Have all passengers get out of the vehicle.
3. Close and lock all the side doors and liftgate with the
key or remote keyless entry transmitter.
The indicator light located
on the instrument panel to
the left of the steering wheel
will come on when all the
side doors and liftgate are
closed and locked.
The system will be automatically set after 30
seconds. When the system is set, the indicator light
will start flashing.
4. After the indicator light starts flashing, you may
leave the vehicle.
Do not leave anyone in the vehicle when you set the
system, because unlocking the vehicle from the
inside will activate the system.
Page 89 of 381

button. It is located on the
left side of the shift lever.
Press the O/D button to turn off overdrive. A light on the
instrument pane")
2-25 Overdrive
Your automatic transaxle
has an O/D (overdrive off)
button. It is located on the
left side of the shift lever.
Press the O/D button to turn off overdrive. A light on the
instrument panel cluster will come on when this feature
is used. Press the button again to turn overdrive back on.
Then the light on the instrument panel cluster will go
off. See ªOverdrive Off Lightº in the Index.
Use this feature for better fuel economy. Fast starts
use the most fuel while gradual starts give you the
best fuel economy.
When you turn on your vehicle the overdrive will
automatically be on until you turn it off.
Manual Transaxle Operation
Five-Speed
FIRST (1): Press the
clutch pedal and shift into
FIRST (1). Then, slowly
let up on the clutch pedal
as you press the
accelerator pedal.
Five
-Speed Transaxle
Shift Pattern
You can shift into FIRST (1) when you're going less
than 20 mph (32 km/h). If you've come to a complete
stop and it's hard to shift into FIRST (1), put the shift
lever in neutral and let up on the clutch. Press the clutch
pedal back down. Then shift into FIRST (1).
SECOND (2): Press the clutch pedal as you let up on
the accelerator pedal and shift into SECOND (2). Then,
slowly let up on the clutch pedal as you press the
accelerator pedal.
Page 100 of 381

2-36
Turn Signal/Multifunction Lever
The turn signal/multifunction lever is located on the left
side of the steering column.
This lever operates the following:
�Turn and Lane
-Change Signals
�Headlamp High/Low
-Beam Changer
�Flash
-to-Pass
For more information on the exterior lamps, see
ªExterior Lampsº later in this section.
Turn and Lane-Change Signals
The turn signal has an upward (for right) and a
downward (for left) position. These positions allow you
to signal a turn or a lane change.
To signal a turn, move the lever all the way up or down.
When the turn is finished, the lever will return automatically.
To signal a lane change, raise or lower the lever until the
arrow starts to flash. Hold it there until you complete
your lane change. The lever will return by itself when
you release it.
An arrow on the instrument
panel cluster will flash in
the direction of the turn or
lane change.
If you signal a turn or a lane change and notice the
arrow flashing rapidly, a signal bulb may be burned out
and other drivers won't see your turn signal.
If a bulb is burned out, have it replaced to help avoid an
accident. If the arrows don't go on at all when you
signal a turn, check for burned
-out bulbs and then check
the fuse. See ªFuses and Circuit Breakersº in the Index.
Page 101 of 381

2-37 Headlamp High/Low Beam Changer
The headlamps must be on for this feature to work. For
high beams, push the turn signal lever away from you.
When the high beams
are on, this light on the
instrument panel
cluster also will be on.
It will go off when you switch to the low beams. To
switch back to low beams, pull the lever toward you.
Flash-to-Pass
With the lever in the low-beam position, pull the lever
toward you to momentarily switch to high beams (to
signal that you are going to pass). If you have the
headlamps on when you release the lever, they will
return to the low beams.
Windshield Wipers
The lever on the right side of the steering column
controls the windshield wipers and washer.
The available positions are the following:
OFF: The wipers are off.
INT (Intermittent): Move the lever to INT to choose a
delayed wiping cycle. In light rain or snow, you might
want to use this position rather than continuous wiping.
You can change the time between wipes by turning the
INT TIME band. Turn the band forward or rearward for
longer or shorter delay interval. This position works the
same for the rear wiper.
Page 104 of 381

2-40
Setting Cruise Control
CAUTION:
If you leave your cruise control switch on when
you're not using cruise, you might hit a button
and go into cruise when you don't want to. You
could be startled and even lose control. Keep the
cruise control switch off until you want to use
cruise control.
1. Press the ON-OFF button at the end of the cruise
control lever. The CRUISE light on the instrument
panel cluster will come on. See ªCruise Lightº in the
Index for more information.
2. Get up to the speed you want.
3. Move the lever down to SET/COAST and release it.
4. Take your foot off the accelerator pedal.Resuming a Set Speed
Suppose the cruise control is set at a desired speed and
then you apply the brake. This will shut off cruise
control. But you won't need to reset it.
Unless you're going about 25 mph (40 km/h) you can
push the lever up to RES/ACC (Resume/Accelerate).
You'll go right back up to your chosen speed and
stay there.
If your preset speed cancels out when it shouldn't, there
may be a problem with your vehicle's cruise control.
See your dealer.
Increasing Speed While Using Cruise Control
There are two ways to go to a higher speed:
�Use the accelerator pedal to get to the higher speed.
Move the lever down to SET/COAST. Release the
lever and the accelerator pedal. You'll now cruise at
the higher speed.
�Move the cruise lever up to RES/ACC. Hold it there
until you get up to the speed you want, and then
release the lever.
�To increase your speed in very small amounts, move
the lever to RES/ACC briefly and then release it.
Each time you do this, your vehicle will go about
1 mph (1.6 km/h) faster.
Page 106 of 381
2-42
Exterior Lamps
The lever on the left side of the steering column
operates the exterior lamps.
(Exterior Lamps): Turn the outside part of the
lever with the symbol on it, to operate the lamps.The exterior lamp switch has three positions:
OFF: Turning the switch to this position turns off all
lamps, except the Daytime Running Lamps (DRL).
� (Parking Lamps): Turning the switch to this
position turns on the parking lamps together with the
following:
�Sidemarker Lamps
�Taillamps
�License Plate Lamp
�Instrument Panel Lights
(Headlamps): Turning the switch to this position
turns on the headlamps, together with the previously
listed lamps and lights.
Turn the switch to OFF to turn off the lamps.
(Fog Lamps): You can also use the control lever to
turn on the fog lamps.
: Turn the outside part of the
lever with the symbol on it, to operate the lamps.The")