2003 PONTIAC GRAND PRIX steering wheel
[x] Cancel search: steering wheelPage 124 of 378

The main components of the instrument panel are
the following:
A. Side Window Defogger Outlets
B. Fog Lamps Switch
C. Turn SignaVMultifunction Lever
D. Instrument Panel Cluster
E. Hazard Warning Button
F. Horn
G. Trip Computer (If Equipped) and/or Driver
Information Center (DIC)
H. Instrument Panel Outlets
I. Interior Lamps Control
J. Exterior Lamps Control
K. Tilt Steering Wheel Control
L. Audio Steering Controls
(If Equipped)
M. Head Up Display (HUD) Controls (Option)
N. Climate Controls
0. Ashtray and Cigarette Lighter
P. Audio System
Q. Glove Box
R. Instrument Panel Fuse Block
Hazard Warning Flashers
Your hazard warning flashers let you warn others. They
also let police know you have a problem. Your front
and rear turn signa! !amps
will flash or! and off.
The hazard warning
flasher button is
located on top of the
steering column.
The hazard warning flashers work no matter what
position your key is in, and even
if the key isn’t in.
Press the button to make your front and rear turn signal
lamps flash on and
off. Press the button again to turn
the flashers
off.
When the hazard warning flashers are on, your turn
signals and brake lamps won’t work.
3-3
Page 125 of 378
Other Warning Devices
If you carry reflective triangles, you can set one up
at the side of the road about
300 feet (I00 m) behind
your vehicle.
Horn
Press near or on the horn symbols on your steering
wheel pad to sound the horn.
Tilt Wheel
A tilt steering wheel allows you to adjust the steering
wheel before you drive. You can raise it to the highest
level to give your legs more room when you exit and
enter the vehicle, or you can lower
it so that you’re more
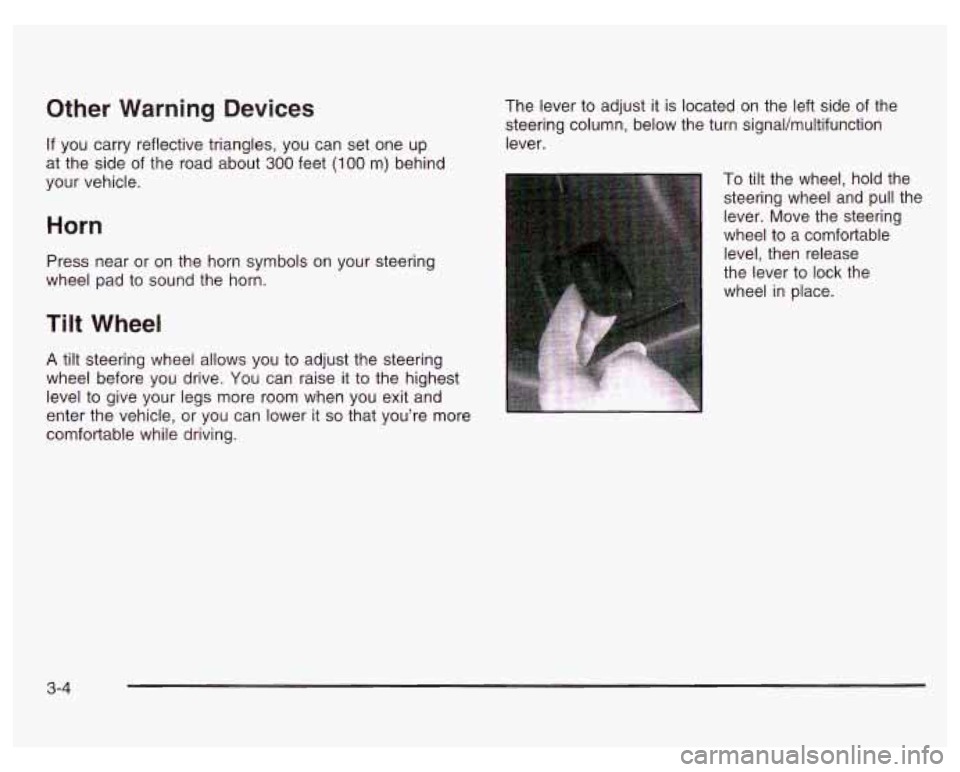
comfortable while driving. The lever
to adjust it
is located on the left side of the
steering column, below the turn signaVmultifunction
lever.
To tilt the wheel, hold the
steering wheel and pull the
lever. Move the steering
wheel to a comfortable
level, then release
the lever to
lock the
wheel in place.
3-4
Page 131 of 378

Ending Cruise Control
There are two ways to turn off the cruise control:
Step lightly on the brake pedal,
or move the cruise switch to OFF.
Erasing Speed Memory
When you turn off the cruise control or the ignition,
or shift into PARK
(P) or NEUTRAL (N), the cruise
control set speed memory is erased.
Exterior Lamps
The exterior lamp control
is located on the lower
left side of the instrument
panel, to the left of the
steering wheel. The
exterior lamp has three positions.
OFF: Turning the control to this position, turns off all
lamps, except the Daytime Running Lamps (DRL).
pf (Parking Lamps): Turning the control to this
position turns on the parking lamps, together with the
following:
Sidemarker Lamps
Taillamps
License Plate Lamp
Instrument Panel Lights
4 20 (Headlamps): Turning the control to this position
turns on the headlamps, together with the previously
listed lamps and lights.
A warning chime will sound
if you open the driver’s door
when you turn the ignition switch to LOCK or
ACCESSORY with the lamps on.
3-1 0
Page 133 of 378
Fog Lamps
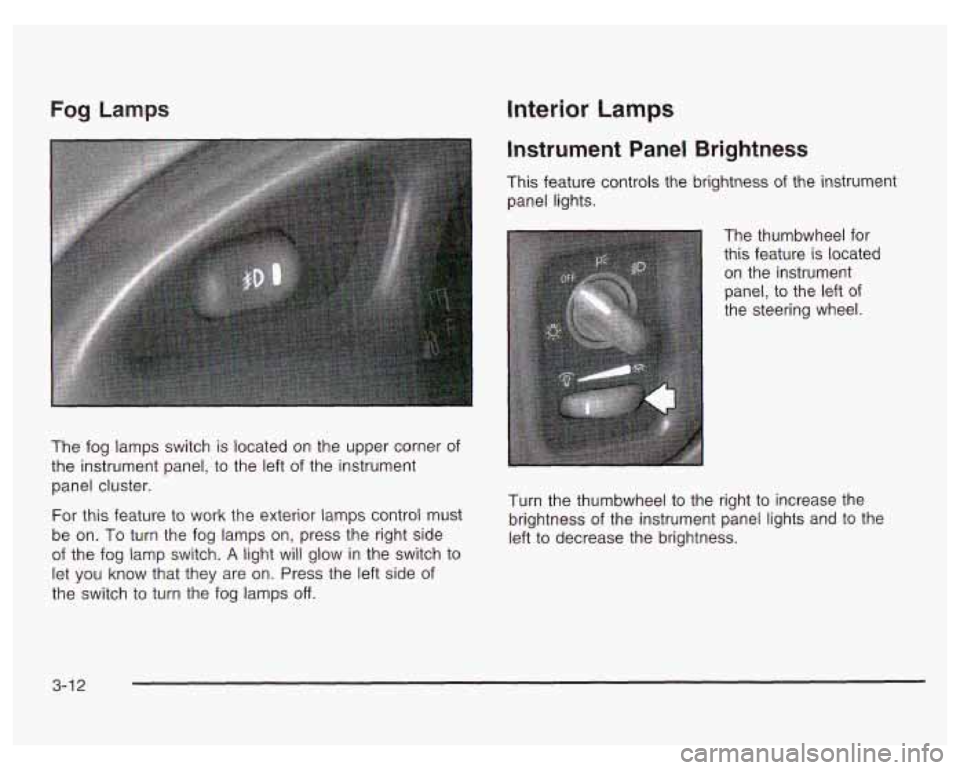
The fog lamps switch is located on the upper corner of
the instrument panel, to the left of the instrument
panel cluster.
For this feature to work the exterior
lamps control must
be on. To turn the fog lamps on, press the right side
of the fog lamp switch.
A light will glow in the switch to
let you know that they are on. Press the left side of
the switch to turn the fog lamps
off.
Interior Lamps
Instrument Panel Brightness
This feature controls the brightness of the instrument
panel lights.
The thumbwheel for
this feature
is located
on the instrument
panel, to the left of
the steering wheel.
Turn the thumbwheel to the right to increase the
brightness of the instrument panel lights and to the
left to decrease the brightness.
3-1 2
Page 137 of 378

The HUD also shows the following lights when they are
lit on the instrument panel cluster:
Turn Signal Indicators
High-Beam Indicator Symbol
Low Fuel Symbol
The HUD will display CHECK GAGES when the
following items are lit on the instrument panel cluster:
Oil Warning Symbol
Coolant Temperature Symbol
Charging System Symbol
When the ignition key is turned to RUN, the entire HUD
image will come on. Then the Head-Up Display will
operate normally.
Notice: Although the HUD image appears to be
near the front
of the vehicle, do not use it as
a parking aid. The
HUD was not designed for that
purpose.
If you try to use it as such, you may
misjudge the distance and damage your vehicle.
When the HUD is on, the speedometer reading will be
displayed continually. The current radio station
or
CD track number will only be displayed for three
seconds after the radio or CD track status changes.
This will happen whenever one of the radio controls is
pressed, either on the radio itself or on the optional
steering wheel controls. To
adjust the HUD
so you can see it properly do the
following:
1. Adjust your seat, if necessary, to a comfortable
position.
2. Start the engine and adjust the HUD controls
located on the instrument panel, to the right
of
the steering wheel. Move the DIM thumbwheel up
or down to adjust brightness.
3-1 6
Page 177 of 378
Disabling the Theft-Deterrent Feature
Enter your secret code as follows; pause no more than
15 seconds between steps:
1. Turn the ignition on.
2. Turn the radio off.
3. Press the 1 and 4 pushbuttons at the same time.
Hold them down until
SEC shows on the display.
4. Press MIN and 000 will appear on the display.
5. Press MIN again to make the last two digits agree
with your code.
6. Press HR to make the first one or two digits agree
with your code.
7. Press AM/FM after you have confirmed that the
code matches the secret code you have written
down. The display will show
---, indicating that the
radio is no longer secured.
If the code entered is incorrect,
SEC will appear on the
display. The radio will remain secured until the correct
code is entered.
When battery power is removed and later applied to
a
secured radio, the radio won’t turn on and LOC will
appear on the display.
To unlock a secured radio, see “Unlocking the
Theft-Deterrent Feature After a Power
Loss” earlier in
this section.
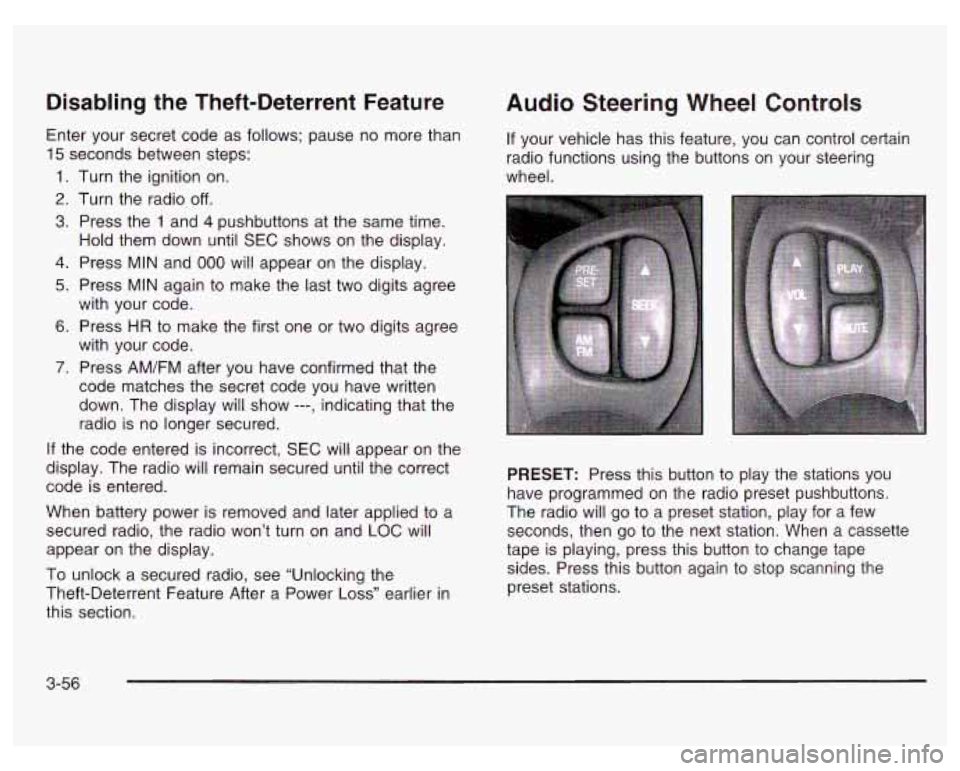
Audio Steering Wheel Controls
If your vehicle has this feature, you can control certain
radio functions using the buttons on your steering
wheel.
PRESET: Press this button to play the stations you
have programmed on the radio preset pushbuttons.
The radio will go to a preset station, play for a few
seconds, then go to the next station. When a cassette
tape is playing, press this button to change tape
sides. Press this button again to stop scanning the
preset stations.
3-56
Page 190 of 378
Remember: Anti-lock doesn’t change the time you need
to get your foot up to the brake pedal or always
decrease stopping distance. If you get too close to the
vehicle in front of you, you won’t have time to apply
your brakes
if that vehicle suddenly slows or stops.
Always leave enough room up ahead to stop, even
though you have anti-lock brakes.
Using Anti-Lock
Don’t pump the brakes. Just hold the brake pedal down
firmly and let anti-lock work for you. You may feel a
slight brake pedal pulsation or notice some noise, but
this is normal.
Braking in Emergencies
At some time, nearly every driver gets into a situation
that requires hard braking.
If you have anti-lock, you can steer and brake at the
same time. However,
if you don’t have anti-lock,
your first reaction
- to hit the brake pedal hard and
hold it down
- may be the wrong thing to do. Your
wheels can stop rolling. Once they do, the vehicle
can’t respond to your steering. Momentum will carry
it in whatever direction it was headed when the wheels
stopped rolling. That could be off the road, into the
very
thing you were trying to avoid, or into traffic.
If you don’t have anti-lock, use a “squeeze’’ braking
technique. This will give you maximum braking while
maintaining steering control. You can do this by pushing
on the brake pedal with steadily increasing pressure.
In an emergency, you will probably want to squeeze the
brakes hard without locking the wheels. If you hear or
feel the wheels sliding, ease off the brake pedal.
This will help you retain steering control.
If you do have
anti-lock, it’s different. See “Anti-Lock Brakes.”
In many emergencies, steering can help you more than
even the very best braking.
4-9
Page 194 of 378
Power Steering
If you lose power steering assist because the engine
stops or the system is not functioning, you can steer
but it will take much more effort.
Variable Effort Steering
If your vehicle has this steering system, the system
provides less steering effort for parking and when driving
at speeds below
20 mph (32 km/h). Steering effort will
increase at higher speeds for improved road feel.
Steering Tips
Driving on Curves
It’s important to take curves at a reasonable speed.
A lot of the “driver lost control” accidents mentioned on
the news happen on curves. Here’s why:
Experienced driver or beginner, each of us is subject to
the same laws of physics when driving on curves. The
traction of the tires against the road surface makes it
possible for the vehicle to change its path when you turn
the front wheels. If there’s no traction, inertia will keep the
vehicle going in the same direction. If you’ve ever tried to
steer a vehicle on wet ice, you’ll understand this. The
traction you can get in a curve depends on the
condition of your tires and the road surface, the angle at
which the curve is banked, and your speed. While you’re
in a curve, speed is the one factor you can control.
Suppose you’re steering through a sharp curve. Then you
suddenly accelerate. Both control systems
- steering
and braking
- have to do their work where the tires meet
the road. Unless you have four-wheel anti-lock brakes,
adding the hard braking can demand
too much of those
places. You can lose control.
The same thing can happen
if you’re steering through a
sharp curve and you suddenly accelerate. Those two
control systems
- steering and acceleration - can
overwhelm those places where the tires meet the
road and make you lose control. See Traction Control
System (TCS) on page
4- 10 or Enhanced Traction
System (ETS)
on page 4- I 1.
What should you do if this ever happens? Ease up on
the brake or accelerator pedal, steer the vehicle the way
you want it
to go, and slow down.
Speed limit signs near curves warn that you should
adjust your speed. Of course, the posted speeds
are based
on good weather and road conditions.
Under less favorable conditions you’ll want to
go slower.
4-1 3