2003 PONTIAC GRAND PRIX seats
[x] Cancel search: seatsPage 36 of 378
Child Restraints
Older Children
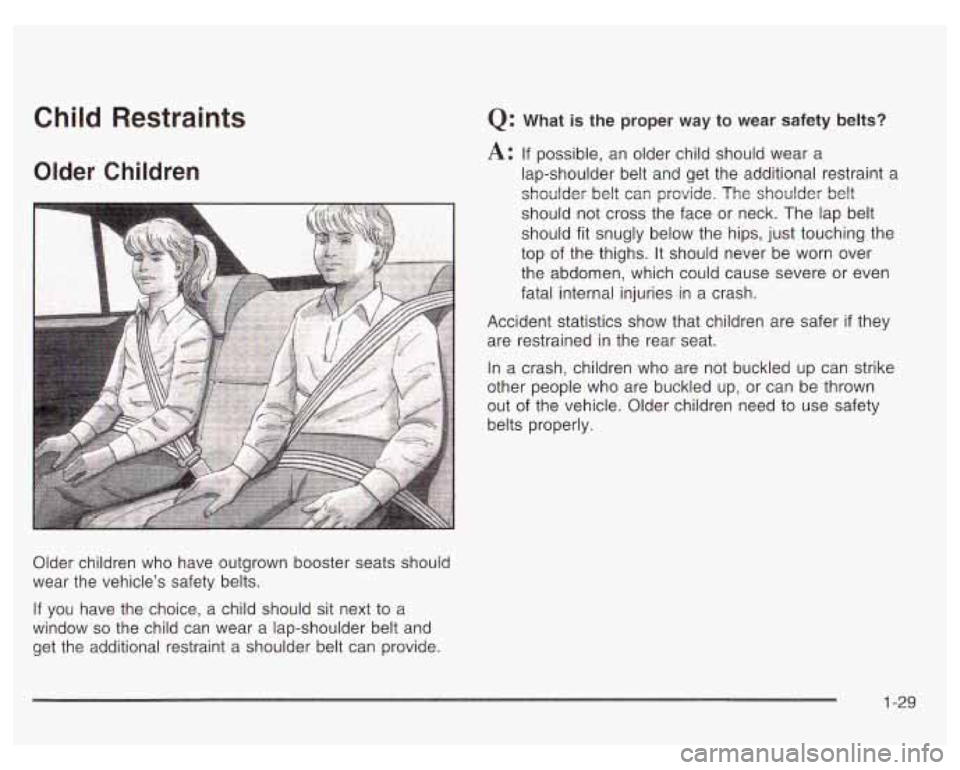
Older children who have outgrown booster seats should
wear the vehicle’s safety belts.
If you have the choice, a child should sit next to a
window
so the child can wear a lap-shoulder belt and
get the additional restraint a shoulder belt can provide.
Q: What is the proper way to wear safety belts?
A: If possible, an older child should wear a
lap-shoulder belt and get the additional restraint a
shoulder belt can provide. The shoulder
belt
should not cross the face or neck. The lap belt
should fit snugly below the hips, just touching the
top of the thighs. It should never be worn over
the abdomen, which could cause severe or even
fatal internal injuries in a crash.
Accident statistics show that children are safer
if they
are restrained in the rear seat.
In a crash, children who are not buckled up can strike
other people who are buckled up, or can be thrown
out of the vehicle. Older children need to use safety
belts properly.
1-29
Page 44 of 378
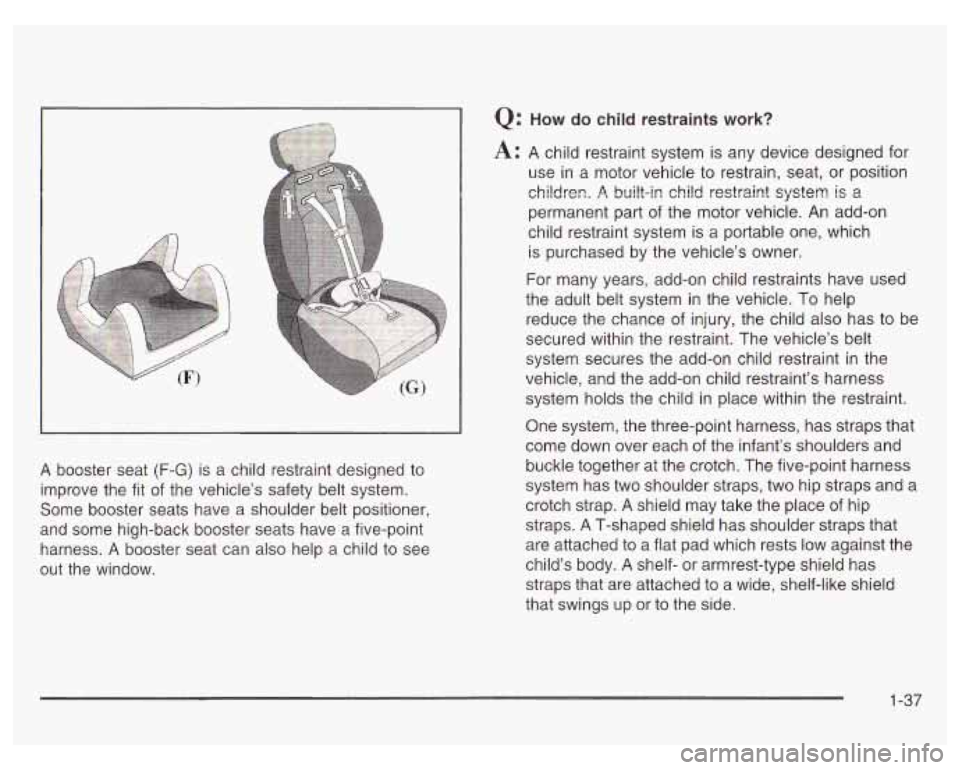
A booster seat (F-G) is a child restraint designed to
improve the fit
of the vehicle’s safety belt system.
Some booster seats have a shoulder belt positioner,
and some high-back booster seats have a five-point
harness.
A booster seat can also help a child to see
out the window.
Q: How do child restraints work?
A: A child restraint system is any device designed for
use in a motor vehicle to restrain, seat, or position
children.
R built-in child restraint system is i!
permanent part of the motor vehicle. An add-on
child restraint system is a portable one, which
is purchased by the vehicle’s owner.
For many years, add-on child restraints have used
the adult belt system in the vehicle. To help
reduce the chance of injury, the child also has to be
secured within the restraint. The vehicle’s belt
system secures the add-on child restraint in the
vehicle, and the add-on child restraint’s harness
system holds the child in place within the restraint.
One system, the three-point harness, has straps that
come down over each of the infant’s shoulders and
buckle together at the crotch. The five-point harness
system has two shoulder straps, two hip straps and a
crotch strap.
A shield may take the place of hip
straps.
A T-shaped shield has shoulder straps that
are attached to a flat pad which rests
low against the
child’s body.
A shelf- or armrest-type shield has
straps that are attached to a wide, shelf-like shield
that swings up or to the side.
1-37
Page 55 of 378
Securing a Child Restraint in the Right Front Seat Position
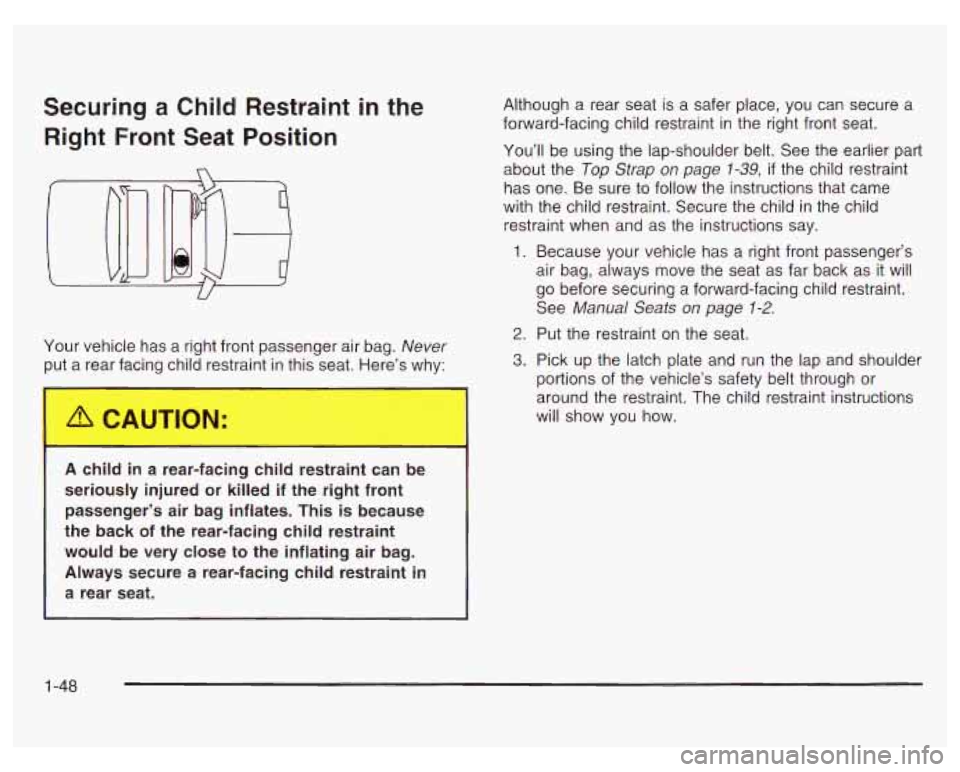
Your vehicle has a right front passenger air bag. Never
t a rear facing child restraint in this seat. Here’s why:
I A CAUTION:
A child in a rear-facing child restraint can be
seriously injured or killed
if the right front
passenger’s air bag inflates. This
is because
the back of the rear-facing child restraint
would be very close to the inflating air bag.
Always secure
a rear-facing child restraint in
a rear seat.
Although a rear seat is a safer place, you can secure a
forward-facing child restraint in the right front seat.
You’ll be using the lap-shoulder belt. See the earlier part
about the Top Strap on page
7-39, if the child restraint
has one. Be sure to follow the instructions that came
with the child restraint. Secure the child in the child
restraint when and as the instructions say.
1. Because your vehicle has a right front passenger’s
air bag, always move the seat as far back as it will
go before securing a forward-facing child restraint.
See Manual Seats on page
1-2.
2. Put the restraint on the seat.
3. Pick up the latch plate and run the lap and shoulder
portions of the vehicle’s safety belt through or
around the restraint. The child restraint instructions
will show you how.
1 -48
Page 91 of 378

How long should you keep the coolant heater plugged
in? The answer depends on the outside temperature, the
kind of oil you have, and some other things. Instead
of trying to list everything here, we ask that you contact
your dealer in the area where you’ll be parking your
vehicle. The dealer can give you the best advice for that
particular area.
Automatic Transaxle Operation
Maximum engine speed is limited when your vehicle is
in PARK
(P) or NEUTRAL (N) to protect driveline
components from improper operation.
There are several different positions for the shift lever.
PARK (P): This position locks the front wheels. It’s
the best position to
use when you start the engine
because the vehicle can’t move easily.
The automatic transaxle has a shift lever on the console
between the seats. There is also a display of the gear
positions on the instrument panel cluster near the
speedometer and tachometer.
It is dangerous to get out of your vehicle if the
shift lever is not fully in PARK (P) with the
parking brake firmly set. Your vehicle can roll.
Don’t leave your vehicle when the engine is
running unless you have to. If you have left the
engine running,
the vehicle can move suddenly.
You
or others could be injured. To be sure your
vehicle won’t move, even when you’re on fairly
level ground, always set your parking brake and
move the
shift lever to PARK (P). See “Shifting
Into Park (P)”
in the Index. If you’re pulling a
trailer, see “Towing a Trailer”
in the Index.
2-24
Page 143 of 378
Rear Window Defogger
The rear window defogger uses a warming grid to
remove fog or frost from the rear window.
The rear window defogger will only work when the
ignition is in
RUN.
REAR: Press this button to turn the rear window
defogger on or
off. When this button is pressed an
indicator light above the button will come on to show that
the rear window defogger is active. The instrument
brightness control may have to be adjusted to the
highest setting during the daytime in order to see the
indicator light.
Be sure to clear as much snow from the rear window
as possible.
The rear window defogger will turn
off approximately
15 minutes after the button is pressed. If turned on
again, the defogger will only run for approximately seven
and one-half minutes before turning
off. The defogger
can also be turned
off by pressing the button again or by
turning
off the engine.
Notice: Don’t use a razor blade or something else
sharp on the inside of the rear window.
If you
do, you could cut or damage the defogger and the
repairs would not be covered by your warranty.
Do not attach a temporary vehicle license, tape, a
decal or anything similar to the defogger grid.
3-22
Outlet Adjustment
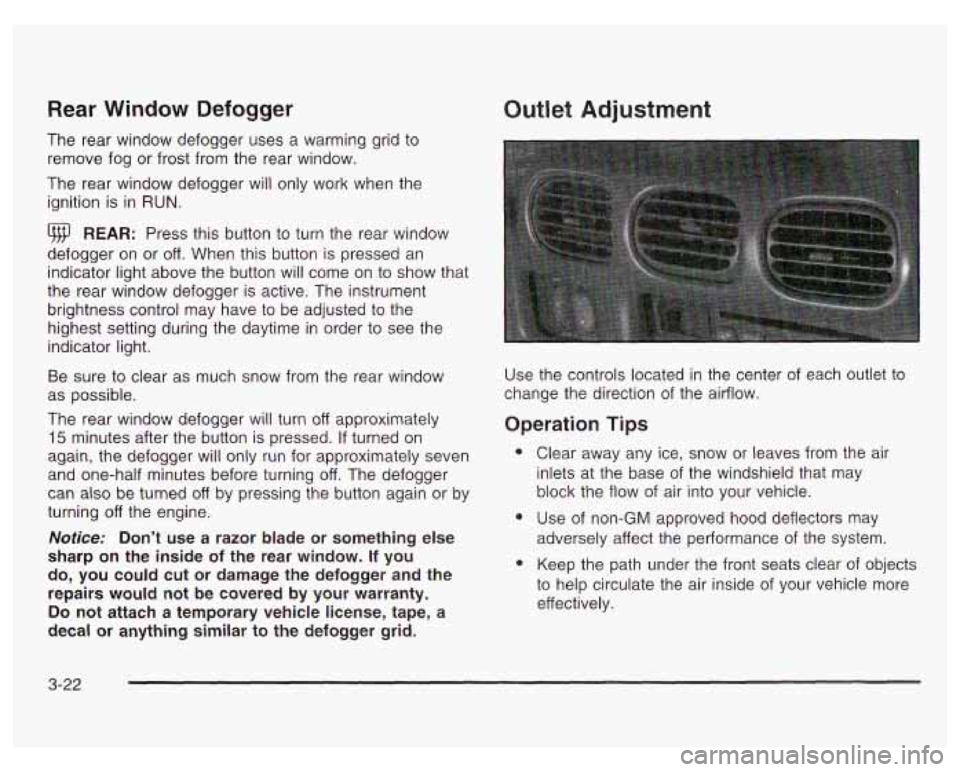
Use the controls located in the center of each outlet to
change the direction
of the airflow.
Operation Tips
e
e
Clear away any ice, snow or leaves from the air
inlets at the base of the windshield that may
block the flow of air into your vehicle.
Use of non-GM approved hood deflectors
may
adversely affect the performance of the system.
Keep the path under the front seats clear of objects
to help circulate the air inside
of your vehicle more
effectively.
Page 217 of 378
If you do have a heavy load, spread it out. Don’t carry
more than
167 pounds (75 kg) in your trunk.
~ 3 not load your vehicle any heavier than the
GVWR, or either the maximum front or rear
GAWR. If you do, parts on your vehicle can
break, and
it can change the way your vehicle
handles. These could cause you to lose
control and crash.
Also, overloading can
shorten the life of your vehicle.
Notice: Your warranty does not cover parts or
components that fail because
of overloading.
If you put things inside your vehicle - like suitcases,
tools, packages or anything else - they will go as
fast as the vehicle goes. If you have to stop or
turn quickly,
or if there is a crash, they’ll keep going. Things you
put insi your
ve--.:le can s.. ..
or in a crash.
Put things in the trunk of your vehicle.
In a trunk, put them as far forward as you
can. Try to spread the weight evenly.
Never stack heavier things, like suitcases,
inside the vehicle
so that some of them
are above the tops of the seats.
Don’t leave an unsecured child restraint in
your vehicle.
When you carry something inside the
vehicle, secure
it whenever you can.
Don’t leave a seat folded down unless you
need to.
4-36
Page 365 of 378

Fuel (cont.)
Gasoline Specifications
................
Low Warning Light ........ , ....
System Inspection .............
Functions ......................................
Fuses
Fuses and Circuit Breakers
....
Windshield Wiper ..............
.........
..........
..........
...........
........
...... 5-5
..... 3-37
..... 6-13
..... 3-39
..... 5-97
..... 5-97
G
Gage
Engine Coolant Temperature
......................... 3-31
Fuel
.......................................................... 3-37
Speedometer
.............................................. 3-25
Tachometer
................................................. 3-25
Garage Door Opener Compartment
................... 2-40
Gasoline Octane
........................................................ 5-5
Specifications ............................................... 5-5
Glass Surfaces
............................................... 5-90
Glove Box ..................................................... 2-40
GM Mobility Program for Persons with
Disabilities
................................... .. 7-5
Hazard Warning Flashers
................................... 3-3
Head Restraints
............................................... 1-6 Headlamp
Aiming
....................................................... 5-59
Headlamp Wiring
............................................ 5-97
Headlamps
.................................................... 5-60
Bulb Replacement
....................................... 5-60
Front Turn Signal and Sidemarker Lamps
....... 5-62
Halogen Bulbs
............................................ 5-60
Head-Up Display (HUD)
................................... 3-15
Heated Seats
................................................... 1-4
Highway Hypnosis
........................................... 4-25
Hill and Mountain Roads
.................................. 4-25
Hitches
.......................................................... 4-40
Hood Checking Things Under
................................ 5-10
Release
..................................................... 5-10
Horn
............................................................... 3-4
How to Add Coolant
to the Coolant
Recovery Tank
............................................ 5-38
How to Add Coolant
to the Radiator .................. 5-41
How to Add Fluid
............................................ 5-29
How to Check
........................................ 5-27, 5-69
How to Check and Add Oil
............................... 5-25
How to Check Power Steering Fluid .................. 5-47
How to Use This Manual ...................................... ii
How to Wear Safety Belts Properly ................... 1-12
Headlamp High/Low-Beam Changer
.................... 3-6
Hydroplaning
.................................................. 4-20
6
Page 368 of 378

Maintenance Schedule (cont.) Steering. Suspension and Front Drive Axle
Boot and Seal Inspection .......................... 6-13
Throttle System Inspection ............................ 6-1 4
Your Vehicle and the Environment ................... 6-2
Maintenance When Trailer Towing ..................... 4-43
Making Turns ................................................. 4-41
Malfunction Indicator Light ................................ 3-32
Manual Seats ................................................... 1-2
Matching Transmitter(s) to Your Vehicle ............... 2-6
Mexico, Central America and Caribbean
Using
Your
................................................... 6-4
Islands/Countries
(Except Puerto Rico and
U.S. Virgin Islands) ....... 7-4
Mirror Operation ..................................... 2-33, 2-35
Mirrors Automatic Dimming Rearview with Compass
Automatic Dimming Rearview with Onstar@,
Manual Rearview Mirror
................................ 2-33
Outside Convex Mirror ................................. 2-37
Outside Power Mirrors .................................. 2-37
and Temperature Display ........................... 2-34
Compass and Temperature Display ............. 2-33
New Vehicle Break-In ............................ ... 2-19
Normal Maintenance Replacement Parts ........... 5-1 04
0
Odometer ...................................................... 3-25
Off-Road Recovery .......................................... 4-15
Oil
Engine .................................... .... 5-18
Low Oil Level Light ...................................... 3-36
Pressure Light ............................................. 3-35
Supercharger, Engine ................................... 5-24
Older Children, Restraints ................................ 1-29
Onstar@ Personal Calling ................................. 2-39
Onstar@ Services ............................................ 2-38
Onstat-@ System ............................................. 2-38
Onstar@ Virtual Advisor .................................... 2-39
Other Warning Devices ...................................... 3-4
Outlet Adjustment ............................................ 3-22
Outside
Convex Mirror
............................................. 2-37
Power Mirrors ............................................. 2-37
Overhead Console .......................................... 2-40
Overhead Console Reading Lamps .................... 3-14
Overheated Engine Protection
Operating Mode
.......................................... 5-33
Owners, Canadian ............................................... ii
Owner’s Information ........................................ 7-10
9