2003 PONTIAC BONNEVILLE climate settings
[x] Cancel search: climate settingsPage 113 of 418

Vehicle Personalization
Memory Seat and Mirrors
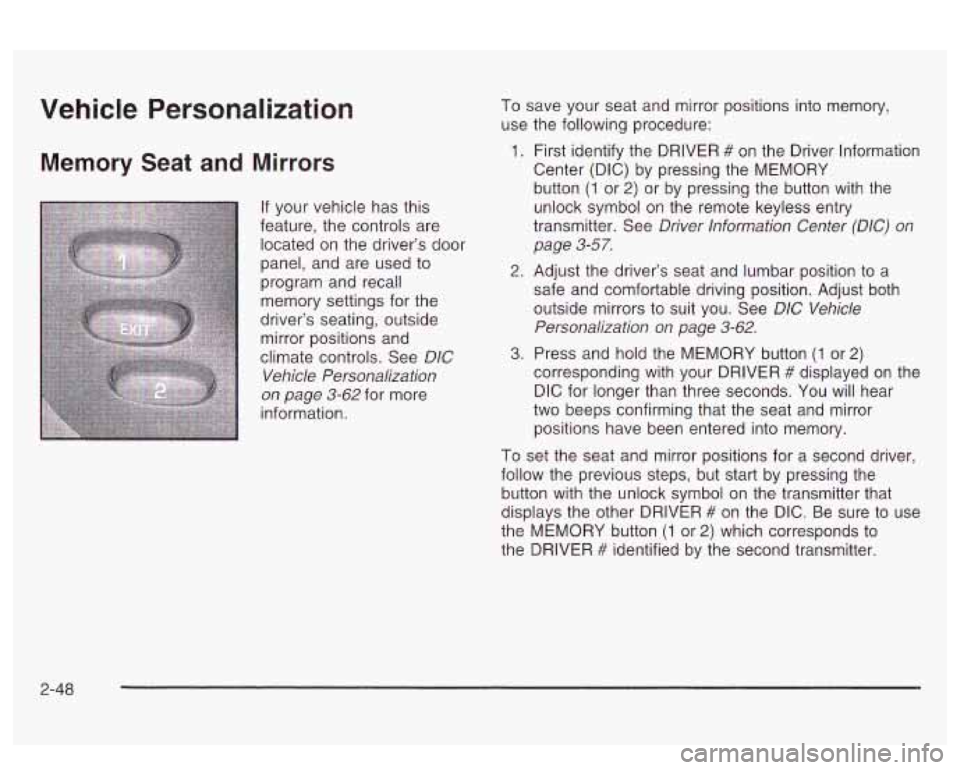
If your vehicle has this
feature, the controls are
located on the driver’s door
panel, and are used
to
program and recall
memory settings for the
driver’s seating, outside mirror positions and
climate controls. See
DIC
Vehicle Personalization
on page 3-62 for more
information. To
save your seat and mirror positions into memory,
use the following procedure:
1. First identify the DRIVER # on the Driver lnformation
Center (DIC) by pressing the MEMORY
button
(1 or 2) or by pressing the button with the
unlock symbol on the remote keyless entry
transmitter. See
Driver lnformation Center (DIC) on
page 3-57.
2. Adjust the driver’s seat and lumbar position to a
safe and comfortable driving position. Adjust both
outside mirrors to suit you. See
D/C Vehicle
Personalization on page 3-62.
3. Press and hold the MEMORY button (1 or 2)
corresponding with your DRIVER # displayed on the
DIC for longer than three seconds. You will hear
two beeps confirming that the seat and mirror
positions have been entered into memory.
To set the seat and mirror positions for a second driver,
follow the previous steps, but start by pressing the
button with the unlock symbol on the transmitter that
displays the other DRIVER
# on the DIC. Be sure to use
the MEMORY button
(1 or 2) which corresponds to
the DRIVER
# identified by the second transmitter.
2-48
Page 141 of 418

.1#t A/C (Air Conditioning): Press this button to turn
the air conditioning compressor on and off. When
A/C is
pressed, an indicator light in the button will come on
to let you know that air conditioning is activated.
If your
climate control system is
off, you may also turn it
back on in vent mode by selecting the
A/C button.
On hot days, open the windows
to let hot inside
air escape; then close them. This helps
to reduce the
time
it takes for your vehicle to cool down. It also helps
the system
to operate more efficiently.
For quick cool down on hot days, do the following:
1. Select the vent mode.
2. Select the recirculation mode.
3. Select NC.
4. Select the coolest temperature.
5. Select the highest fan speed.
Using these settings together for long periods of time
may cause the air inside
of your vehicle to become too
dry.
To prevent this from happening, after the air in
your vehicle has cooled, turn the recirculation mode
off.
The air conditioning system removes moisture from
the air,
so you may sometimes notice a small amount of
water dripping underneath your vehicle while idling or
after turning off the engine. This is normal.
Sensors
The solar sensor on your vehicle monitors
radiation and the air inside of your vehicle, the solar
then uses the
information
to maintain the selected temperature by
initiating needed adjustments
to the temperature, the fan
speed and the air delivery system. The system may
also supply cooler air to the side of the vehicle facing the
sun. The recirculation mode will also be activated, as
necessary.
Do not cover the solar sensor located in the
center of the instrument panel, near the windshield,
or the system will not work properly.
Defogging and Defrosting
There are two modes to clear fog or frost from your
windshield. Use the defog mode to clear the windows of
fog or moisture and warm the passengers. Use the
defrost mode
to remove fog or frost from the windshield
more quickly.
Press one of the available mode buttons
to select the
defog or defrost mode.
+3 (Defog): This mode directs most of the air to the
windshield and the floor outlets.
A small amount of air is
also directed to the outboard outlets (for the side
windows). When you select this mode, the system turns
off recirculation and runs the air conditioning compressor
unless the outside temperature is at or below freezing.
The recirculation mode cannot be selected while in
the defog mode.
3-26
Page 143 of 418

Automatic Climate Control System
With this system you can control the heating, cooling
and ventilation for your vehicle.
Automatic Operation
AUTO (Automatic): Press the AUTO button for
automatic control of the inside temperature, the air
delivery mode and the fan speed.
1. Press the AUTO button. Whenever this button is
pressed, the display will show the current settings
for five seconds before returning the display to
the exterior temperature.
2. Adjust the temperature to 75” F (24” C).
Choosing the coldest or warmest temperature
setting will not cause the system to heat or cool any
faster.
If you set the system at the warmest
temperature setting, the system will remain at the
maximum heat setting and fan speed.
In cold weather, the system will start at reduced fan
speeds to avoid blowing cold air into your vehicle
until warmer air is available. The system will
start out blowing air at the floor but may change
modes automatically as the vehicle warms up
to maintain the chosen temperature setting. The
length of time needed for warm up will depend on
the outside temperature and the length of time
that has elapsed since your vehicle was last driven.
3. Wait for the system to regulate. This may take from
10 to 30 minutes. Then adjust the temperature, if
necessary.
Do not cover the solar sensor located in the center OT
the instrument panel, near the windshield. For more
information on the solar sensor, see “Sensors” later in
this section.
3-28
Page 148 of 418

Climate Controls Personalization
If your vehicle is equipped with this feature, up to two
drivers are able to store and recall climate control
settings for the temperature, the fan speed and the
direction
of the airflow.
Memory buttons
1 and 2 are located on the driver’s
door panel and correspond to the numbers
1 or 2 found
on the back
of each remote keyless entry transmitter.
To store settings, do the following:
1. Select the desired temperature, fan speed and
airflow mode,
If desired, a separate temperature
setting may also be selected for the front seat
passenger. For information on how to
do this, see
Automatic Climate Control System on page 3-28.
2. Locate memory buttons 1 and 2 on the driver’s
door panel.
3. Press the memory button on the door panel that
corresponds to the number on the back of the
transmitter you are programming, until you hear two
beeps. The beeps confirm that your selection has
been saved and can now
be recalled. For more
information on the memory feature, see
Memory
Seat and Mirrors on page 2-48.
Follow these steps each time you want to change the
stored settings.
To recall the climate control settings last stored on your
transmitter, press the unlock button on your remote
keyless entry transmitter and put the ignition in
ACCESSORY or RUN.
3-33
Page 177 of 418

DIC Vehicle Personalization
The DIC can be used to program the following
personalization features available with your vehicle:
Automatic Door Locks
Window Lock Out
Security Feedback
Delayed Locking
Perimeter Lighting
Memory Seats
Outside Curb View Assist Mirror
Driver ID
The DIC is used to program the personal choices of two
drivers. The drivers are recognized as DRIVER
#1
and DRIVER #2. You will let the DIC know which driver
you are by using your remote keyless entry transmitter
or by pressing the appropriate memory seat control
button located on the driver’s door or by choosing the
driver with the
DIC. Each remote keyless entry
transmitter was preprogrammed to belong to DRIVER
#I
or DRIVER #2. Each transmitter may be programmed
differently for each driver. When you
press the button with the unlock symbol on
your transmitter, the DIC will automatically change driver
numbers and the vehicle will recall the personalization
settings that were last made to correspond to your
transmitter, including your radio and comfort control
settings. See
Climate Controls Personalization on
page
3-33.
If you unlock the vehicle using your door key instead of
your transmitter, the DIC will not change drivers and
will recall the information from the last transmitter use or
the last driver change using the memory seat controls.
If this happens and you were not the last driver of
the vehicle, simply press your correct driver number on
the memory seat controls or press the button with
the unlock symbol
on your transmitter or select the
personalization programming mode and choose
the correct driver number.
Use the following steps for personalization programming
instructions.
1. Turn the ignition on and keep the transaxle in
2. Press the MODE button to reach personalization
3. Press the SELECT button to enter personalization
PARK (P).
programming display. programming mode.
3-62