2003 PONTIAC BONNEVILLE service reset
[x] Cancel search: service resetPage 204 of 418
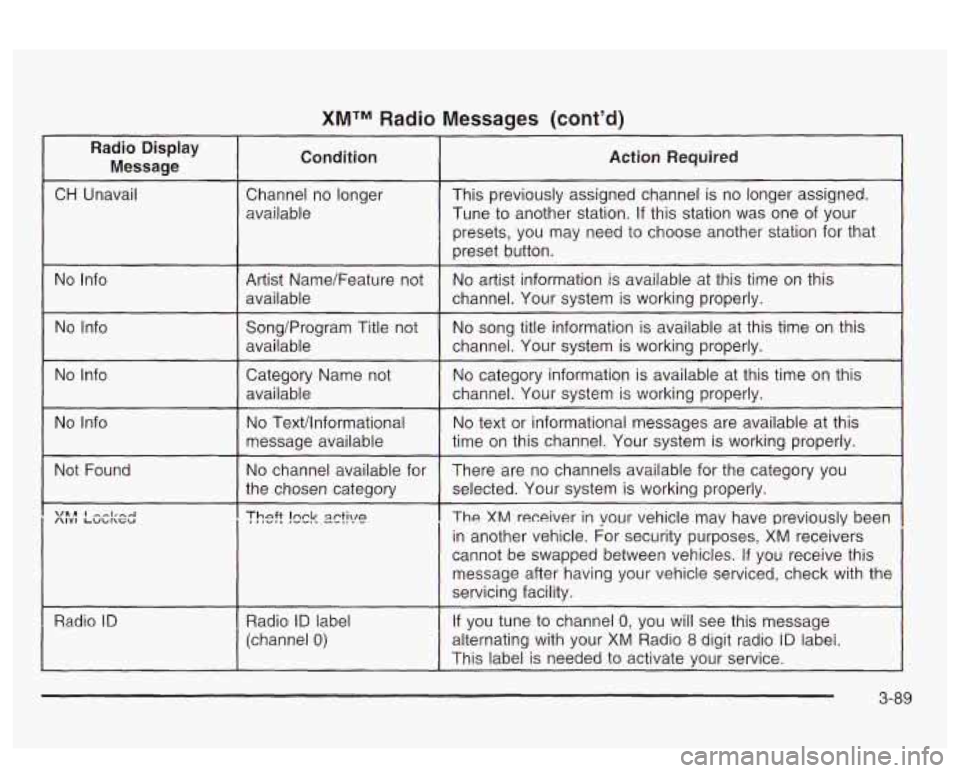
XMTM Radio Messages (cont'd) ~
Radio Display
Message Condition Action Required
:
CH
Unavail Channel no longer
available This previously
assigned channel is no longer assigned.
Tune to another station.
If this station was one of your
presets, you may need to choose another station for that
preset button.
No Info
Artist Name/Feature not
available No
artist information is available at this time on this
channel. Your system is working properly.
No Info
I
Song/Program Title not No song
title information is available at this time on this
available
1 channel. Your system is working properly.
No Info
1 Category Name not No category information is available at this time on this
I availabie I channel. YGG system is werking properly.
No Info
I
No Texthformational
message available
~~ ~
Not Found
~
No channel available for
the chosen category
I
Radio ID 1 Radio ID label
(channel
0)
No text or informational messages are available at this
time on this channel. Your system is working properly.
There are no channels available for the category you
selected. Your system is working properly.
The XM receiver in your vehicle may have previously been
in another vehicle. For security purposes, XM receivers
cannot be swapped between vehicles.
If you receive this
message after having your vehicle serviced, check with the
servicing facility.
If you tune to channel
0, you will see this message
alternating with your XM Radio
8 digit radio iD iabei.
This label is needed to activate your service.
3-89
Page 215 of 418
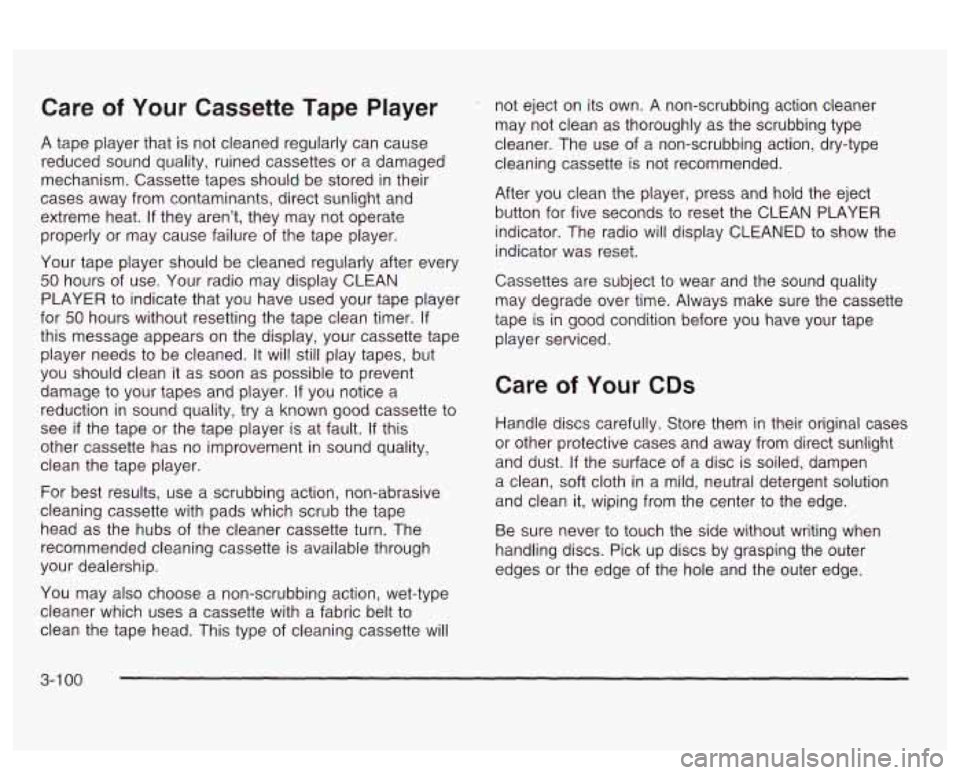
Care of Your Cassette Tape Player
A tape player that is not cleaned regularly can cause
reduced sound quality, ruined cassettes or a damaged
mechanism. Cassette tapes should be stored
in their
cases away from contarninants, direct sunlight and
extreme heat.
If they aren’t, they may not operate
properly or may cause failure of the tape player.
Your tape player should be cleaned regularly after every
50 hours of use. Your radio may display CLEAN
PLAYER to indicate that you have used your tape player
for
50 hours without resetting the tape clean timer. If
this message appears on the display, your cassette tape
player needs to be cleaned.
It will still play tapes, but
you should clean
it as soon as possible to prevent
damage to your tapes and player.
If you notice a
reduction in sound quality, try a known good cassette to
see
if the tape or the tape player is at fault. If this
other cassette has no improvement in sound quality,
clean the tape player.
For best results, use a scrubbing action, non-abrasive
cleaning cassette with pads which scrub the tape
head as the hubs
of the cleaner cassette turn. The
recommended cleaning cassette is available through
your dealership.
You may also choose a non-scrubbing action, wet-type
cleaner which uses a cassette with a fabric belt to
clean the tape head. This type of cleaning cassette will not eject
on its own. A non-scrubbing action cleaner
may not clean as thoroughly as the scrubbing type
cleaner. The use of a non-scrubbing action, dry-type
cleaning cassette is not recommended.
After you clean the player, press and hold the eject
button for five seconds to reset the CLEAN PLAYER
indicator. The radio will display CLEANED to show the
indicator was reset.
Cassettes are subject to wear and the sound quality
may degrade over time. Always make sure the cassette
tape is in good condition before you have your tape
player serviced.
Care of Your CDs
Handle discs carefully. Store them in their original cases
or other protective cases and away from direct sunlight
and dust.
If the surface of a disc is soiled, dampen
a clean, soft cloth in a mild, neutral detergent solution
and clean it, wiping from the center to the edge.
Be sure never to touch the side without writing when
handling discs. Pick up discs by grasping the outer
edges or the edge
of the hole and the outer edge.
3-1 00
Page 279 of 418
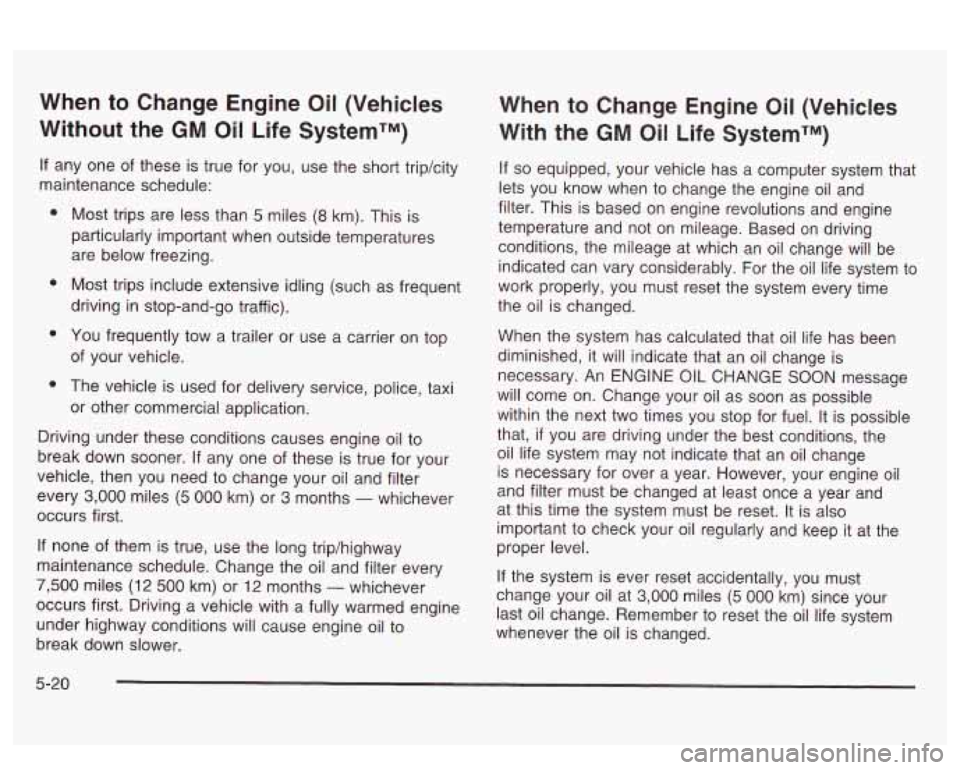
When to Change Engine Oil (Vehicles
Without the
GM Oil Life SystemTM)
If any one of these is true for you, use the short trip/city
maintenance schedule:
e
e
e
e
Most trips are less than 5 miles (8 km). This is
particularly important when outside temperatures
are below freezing.
Most trips include extensive idling (such as frequent
driving in stop-and-go traffic).
You frequently tow a trailer or use a carrier
on top
of your vehicle.
The vehicle is used for delivery service, police, tax1
or other commercial application.
Driving under these conditions causes engine oil
to
break down sooner. If any one of these is true for your
vehicle, then you need to change your oil and filter
every
3,000 miles (5 000 km) or 3 months - whichever
occurs first.
If none of them is true, use the long trip/highway
maintenance schedule. Change the oil and filter every
7,500 miles (1 2 500 km) or 12 months - whichever
occurs first. Driving a vehicle with a fully warmed engine
under highway conditions will cause engine oil
to
break down slower.
When to Change Engine Oil (Vehicles
With the
GM Oil Life SystemrM)
If so equipped, your vehicle has a computer system that
lets you know when to change the engine oil and
filter. This is based on engine revolutions and engine
temperature and not on mileage. Based on driving
conditions, the mileage at which an oil change will be
indicated can vary considerably. For the oil life system to
work properly, you must reset the system every time
the oil is changed.
When the system has calculated that oil life has been
diminished, it will indicate that an oil change is
necessary. An ENGINE
OIL CHANGE SOON message
will come on. Change your oil as soon as possible
within the next two times you stop for fuel. It is possible
that,
if you are driving under the best conditions, the
oil life system may not indicate that an oil change
is necessary for over a year. However, your engine oil
and filter must be changed at least once a year and
at this time the system must be reset. It is also
important to check your oil regularly and keep it at the
proper level.
If the system is ever reset accidentally, you must
change your oil at
3,000 miles (5 000 km) since your
last oil change. Remember
to reset the oil life system
whenever the oil is changed.
5-20
Page 280 of 418
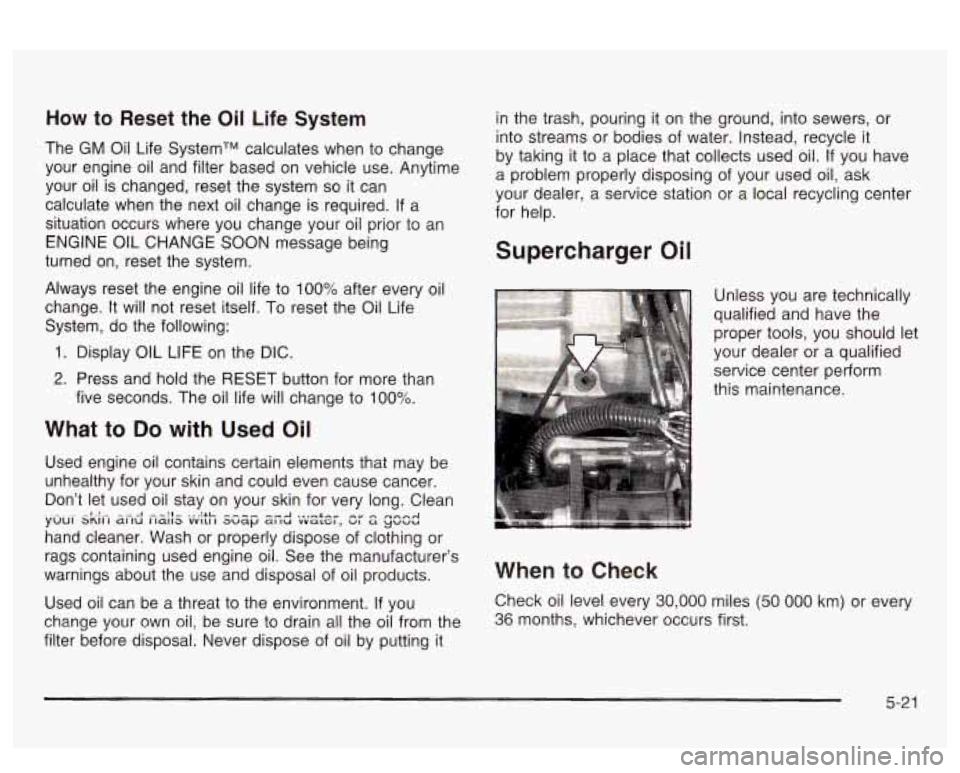
How to Reset the Oil Life System
The GM Oil Life SystemTM calculates when to change
your engine oil and filter based on vehicle use. Anytime
your oil is changed, reset the system
so it can
calculate when the next oil change is required.
If a
situation occurs where you change your oil prior to an
ENGINE
OIL CHANGE SOON message being
turned on, reset the system.
Always reset the engine oil life to
100% after every oil
change. It will not reset itself.
To reset the Oil Life
System, do the following:
1. Display OIL LIFE on the DIC.
2. Press and hold the RESET button for more than
five seconds. The oil life will change to
100%.
What to Do with Used Oil
Used engine oil contains certain elements that may be
unhealthy for your skin and could even cause cancer.
Don't let used oil stay on your skin for very long. Clean
hand cleaner. Wash or properly dispose of clothing or
rags containing used engine oil. See the manufacturer's
warnings about the use and disposal of oil products.
Used oil can be a threat to the environment.
If you
change your QW~ oil, be sure to drain all the oil from the
filter before disposal. Never dispose
of oil by putting it
~. -I.!.- -.--I --:I- ... :LC. ^^^_ --A ..._+_" _" ~ YOU1 SKII I ~IIU II~IIZY vvll11 auap a1 IU vvaLG1, VI u ywwu
in the trash, pouring it on the ground, into sewers, or
into streams or bodies of water. Instead, recycle it
by taking it to a place that collects used oil.
If you have
a problem properly disposing
of your used oil, ask
your dealer, a service station or a local recycling center
for help.
Supercharger Oil
Unless you are technically
qualified and have the
proper tools, you should let
your dealer or a qualified
service center perform
this maintenance.
When to Check
Check oil level every 30,000 miles (50 000 km) or every
36 months, whichever occurs first.
5-21
Page 311 of 418
Headlamp Aiming
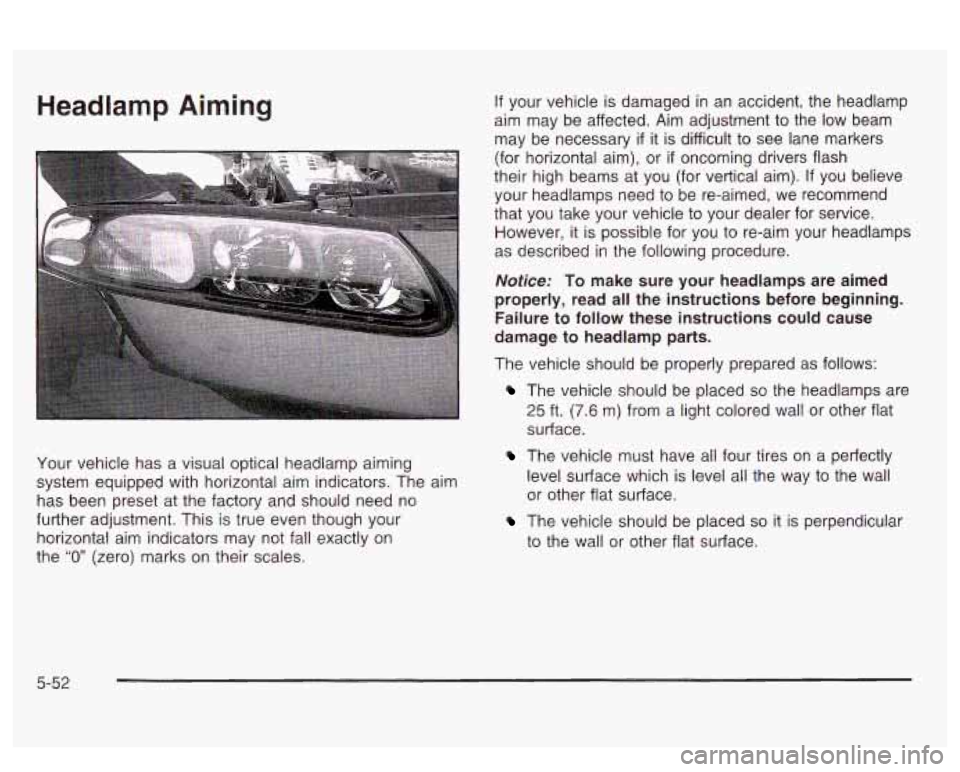
Your vehicle has a visual optical headlamp aiming
system equipped with horizontal aim indicators. The aim
has been preset at the factory and should need no
further adjustment. This is true even though your
horizontal aim indicators may not fall exactly on
the
“0” (zero) marks on their scales.
If your vehicle is damaged in an accident, the headlamp
aim may be affected. Aim adjustment to the
low beam
may be necessary
if it is difficult to see lane markers
(for horizontal aim), or
if oncoming drivers flash
their high beams at you (for vertical aim).
If you believe
your headlamps need to be re-aimed, we recommend
that you take your vehicle to your dealer for service.
However, it is possible for you to re-aim your headlamps
as described in the following procedure.
Notice: To make sure your headlamps are aimed
properly, read all the instructions before beginning.
Failure
to follow these instructions could cause
damage to headlamp parts.
The vehicle should be properly prepared as follows:
The vehicle should be placed so the headlamps are
25 ft. (7.6 m) from a light colored wall or other flat
surface.
The vehicle must have all four tires on a perfectly
level surface which is level all the way to the wall
or other flat surface.
The vehicle should be placed so it is perpendicular
to the wall or other flat surface.
5-52
Page 323 of 418
Check Tire Pressure System
The check tire pressure system can alert you to a large
change in the pressure of one tire. The system won’t
alert you before you drive that a tire is low or flat.
You must begin driving before the system will work
properly.
The CHECK TIRE PRESSURE message will appear on
the Driver Information Center (DIC) or the system
monitor TIRE PRESS light will come on
if pressure
difference (low pressure) is detected in one tire.
The check tire pressure system may not alert you
if:
more than one tire is low,
the vehicle is moving faster than 65 mph (105 km/h),
the system is not yet calibrated,
the compact spare tire is installed,
the tire treadwear is uneven,
tire chains are being used, or
the vehicle is being driven on a rough or
frozen road. If
the anti-lock brake system warning light comes on,
the check tire pressure system may not be working
properly. See your dealer for service. Also, see
Anti-Lock Brake System Warning Light on page 3-43.
The check tire pressure system detects differences
in tire rotation speeds that are caused by changes in tire
pressure. The system can alert you about a low
tire
- but it doesn’t replace normal tire maintenance.
See
Tires on page 5-62.
When the CHECK TIRE PRESSURE message appears
on the Driver Information Center (DIC) or the systems
monitor TIRE PRESS light comes on, you should
stop as soon as you can and check all your tires for
damage. If a tire is flat, see
If a Tire Goes Flat on
page
5-72. Also check the tire pressure in all four tires
as soon as you can. See
Inflation -- Tire Pressure
on page
5-62.
Any time you adjust a tire’s pressure or have one or more
tires repaired or replaced, you’ll need to reset (calibrate)
the check tire pressure system. You’ll also need to reset
the system whenever you rotate the tires, buy new tires
and install or remove the compact spare.
Don’t reset the check tire pressure system without first
correcting the cause of the problem and checking
and adjusting the pressure in all four tires.
If you reset
the system when the tire pressures are incorrect,
the check tire pressure system will not work properly
and may not alert you when a tire is low
or high.
5-64
Page 324 of 418
To reset (calibrate) the system with a Driver Information
Center (DIC):
1.
2.
3.
4.
5.
Turn the ignition switch to ON.
Using the MODE and SELECT buttons, change the The system Completes
the calibration process during
DIC to display TIRE PRESSURE. driving. Calibration time
can take
45 to 90 minutes, ..,
Press and hold the RESET button for about five
seconds.
The display should change to read TIRE
PRESSURE RESET. If TIRE PRESSURE RESET
does not appear on the display after about five
seconds, see your dealer for service.
When you release the button after seeing the TIRE
PRESSURE RESET message, the display will
change to read TIRE PRESSURE NORMAL.
1.
2.
4. Release the TIRE PRESS RESET button and the
system should reset. The TIRE PRESS light will
go out.
To reset (calibrate) the system with a systems monitor:
n 3.
Turn the ignition switch to ON.
Press and hold the TIRE PRESS RESET button for
about five seconds.
should begin to flash.
If the TIRE PRESS light
does not begin to flash after about five seconds, see
your dealer for service.
TIL- TI~T nnr-nn I:-.LL -- LL- -..-.I.--- I I le I 1nc r ncaa II~I 11 VI I 11 IC ayatcl I 13 I I IUI IILUI
depending on your driving habits. After the system has
been calibrated, the system will alert the driver that
a tire is low, up to a maximum speed of
65 mph
(1 05 km/h).
Tire Inspection and Rotation
Tires should be rotated every 6,000 to 8,000 miles
(10 000 to 13 000 km).
Any time you notice unusual wear rotate your tires as
soon as possible and check wheel alignment. Also
check for damaged tires or wheels. See
When It Is Time
for New Tires on page 5-67 and Wheel Replacement
on page 5-69 for more information.
Tne purpose
oi reguiar rorarion is io acnieve more
uniform wear for all tires on the vehicle. The first rotation
is the most important. See “Part A: Scheduled
Maintenance Services,” in Section
6, for scheduled
rotation intervals.
5-65
Page 328 of 418
a tire graded 100. The relative performance of tires
depends upon the actual conditions of their use,
however, and may depart significantly from the norm
due to variations in driving habits, service practices and
differences in road characteristics and climate.
Traction - AA, A, B, C
The traction grades, from highest to lowest, are AA, A,
B, and C. Those grades represent the tire’s ability
to stop on wet pavement as measured under controlled
conditions on specified government test surfaces
of
asphalt and concrete. A tire marked C may have poor
traction performance. Warning: The traction grade
assigned to this tire is based on straight-ahead braking
traction tests, and does not include acceleration,
cornering, hydroplaning, or peak traction characteristics.
Temperature - A, B, C
The temperature grades are A (the highest), B, and C,
representing the tire’s resistance to the generation
under controlled conditions on a specified indoor
laboratory
test wheel. Sustained high temperature can
cause the material of the tire to degenerate and
reduce tire life, and excessive temperature can lead to
sudden tire failure. The grade
C corresponds to a
level of performance which all passenger car tires must
meet under the Federal Motor Vehicle Safety Standard
ui ireai ar~d iis aLiiiiy iu dissip& i-ledf vvi-Iei-1 t&&
No. 109. Grades B and A represent higher levels of
performance on the laboratory test wheel than the
minimum required by law.
Warning: The temperature grade for this tire
is
established for a tire that is properly inflated and not
overloaded. Excessive speed, underinflation, or
excessive loading, either separately or in combination,
can cause heat buildup and possible tire failure.
Wheel Alignment and Tire Balance
The wheels on your vehicle were aligned and balanced
carefully at the factory to give you the longest tire life
and best overall performance.
Scheduled wheel alignment and wheel balancing are
not needed. However,
if you notice unusual tire wear or
your vehicle pulling one way or the other, the alignment
may need to be reset. If you notice your vehicle
vibrating when driving on a smooth road, your wheels
may need
to be rebalanced.
Wheel Replacement
Replace any wheel that is bent, cracked or badly rusted
or corroded.
If wheel nuts keep coming loose, the
wheel, wheel bolts and wheel nuts should be replaced.
If the wheel leaks air, replace it (except some
aluminum wheels, which can sometimes be repaired).
See your dealer
if any of these conditions exist.
Your dealer will know the kind of wheel you need.
5-69