2003 Oldsmobile Alero light
[x] Cancel search: lightPage 138 of 354

If the light continues to flash, when it is safe to do so,
stop the vehicle. Find a safe place to park your vehicle.
Turn the key off, wait at least
10 seconds and restart
the engine.
If the light remains on steady, see “If
the Light Is On Steady” following. If the light is still
flashing, follow the previous steps, and drive the vehicle
to your dealer or qualified service center for service.
If the Light Is On Steady
You may be able to correct the emission system
malfunction by considering the following:
Did you recently put fuel into your vehicle?
If so, reinstall the fuel cap, making sure to fully install
the cap. See
Filling Your Tank on page 5-7. The
diagnostic system can determine
if the fuel cap has
been left off or improperly installed.
A loose or missing
fuel cap will allow fuel to evaporate into the atmosphere.
A few driving trips with the cap properly installed
should turn the light
off.
Did you just drive through a deep puddle of water?
will usually be corrected when the electrical system
dries out.
A few driving trips should turn the light off.
Have you recently changed brands of fuel?
If
so, be sure to fuel your vehicle with quality fuel. See
cause your engine not to run as efficiently as designed.
You may notice this as stalling after start-up, stalling
if SU, yuuI &cti-ic& ~~~t6fi-1 i7-lZj be vvt;~. I I IC LUI IUILIUI I ...- TL - --.-A:&:--
Gasc/i,qe &fane cfi 5-5. fuel quality ;&/iff
when you put the vehicle into gear, misfiring, hesitation
on acceleration or stumbling on acceleration. (These
conditions may go away once the engine is warmed up.)
This will be detected by the system and cause the
light to turn on.
If you experience one or more of these conditions,
change the fuel brand you use.
It will require at least
one full tank of the proper fuel to turn the light off.
If none of the above steps have made the light turn off,
have your dealer or qualified service center check
the vehicle. Your dealer has the proper test equipment
and diagnostic tools to fix any mechanical or electrical
problems that may have developed.
Emissions Inspection and Maintenance
Programs
Some state/provincial and local governments have or
may begin programs to inspect the emission control
equipment on your vehicle. Failure to pass this
inspection could prevent you from getting a vehicle
registration.
Here are some things you need to know in order to help
your vehicle pass an inspection:
Your \.lehic!e wi!! not pass this inspectinn if the SERV!CE
ENGINE SOON or CHECK ENGINE light is on or not
working properly.
3-33
Page 139 of 354

Your vehicle will not pass this inspection if the OBD
(on-board diagnostic) system determines that critical
emission control systems have not been completely
diagnosed by the system. The vehicle would be
considered not ready for inspection. This can happen it
you have recently replaced your battery or
if your
battery has run down. The diagnostic system is
designed to evaluate critical emission control systems
during normal driving. This may take several days
of routine driving.
If you have done this and your vehicle
still does not pass the inspection for lack
of OBD
system readiness, see your dealer or qualified service
center to prepare the vehicle for inspection.
Oil Pressure Light
If you have a low engine
oil pressure problem, this
light will stay on after
you start your engine, or
come on and you will hear
a chime when you are
driving. This indicates that
your engine is not receiving enough
oil. The engine could be low on oil, or could have
some other oil problem. Have it fixed immediately.
When the ignition is on but the engine is not running,
the light will come on as a test to show you it is working,
but the light will go out when the engine is running. If
it doesn’t come on with the ignition
on, you may have a
problem with the bulb. Have it fixed right away.
Don’t keer ing
if the oil pressi.. - is low. If
you do, your engine can become so hot that it
catches fire. You or others could be burned.
Check your oil as soon as possible and have
your vehicle serviced.
Notice: Damage to your engine from neglected oil
problems can be costly and
is not covered by
your warranty.
3-34
Page 140 of 354

Low Oil Level Light
LOW
OIL
If your vehicle is equipped
with a
3400 V6 engine,
then you
will have a LOW
OIL light in your
instrument panel cluster.
This light will come on briefly when you start your
vehicle.
If the light stays on after starting your vehicle, or comes
on and chimes while you are driving, your engine
oil
level should be checked.
Prior to checking the oil level, be sure your vehicle has
been shut
off for several minutes and is on a level
surface. Check the oil level on your dipstick and bring it
to the proper level. See
Engine Oil on page 5-15.
The oil level monitoring system only checks oil level
during the brief period between when the key is on and
the engine is cranking. It does not monitor engine oil level
when the engine is running. Additionally, an oil level
check is only performed
if the engine has been turned off
for a considerable period of time allowing the oil normally
in circulation to drain back into the oil pan.
Change Engine Oil Light
CHANGE
OIL
The CHANGE OIL light
should come on briefly as
a bulb check when you
start the engine. If the light
' doesn't come on, have it
~ serviced.
I I
If the CHANGE OIL light comes on and stays on after
you start the engine, have the oil changed.
To reset the CHANGE
OIL light, see Engine Oil on
page 5- 15.
3-35
Page 141 of 354
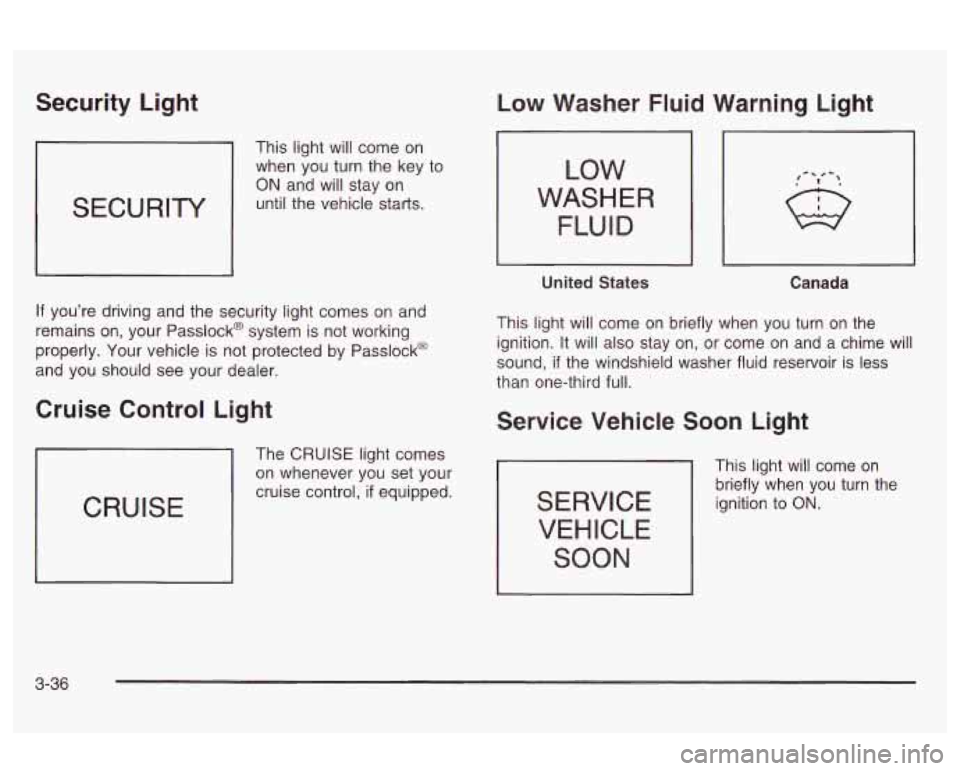
Security Light
SECURITY
This light will come on
when you turn the key to
ON and will stay on
until the vehicle starts.
If you’re driving and the security light comes on and
remains on, your Passlock@ system is not working
properly. Your vehicle is not protected by Passlock@
and you should see your dealer.
Cruise Control Light
CRUISE
The CRUISE light comes
on whenever you set your
cruise control,
if equipped.
Low Washer Fluid Warning Light
LOW
WASHER
FLUID
United States Canada
This light will come on briefly when you turn on the
ignition. It will also stay on, or come on and a chime will
sound,
if the windshield washer fluid reservoir is less
than one-third full.
Service Vehicle Soon Light
SERVICE VEHICLE
SOON
This light will come on
briefly when you turn the
ignition
to ON.
3-36
Page 142 of 354
It will stay on, or come on and a chime will sound if it
detects a problem on the vehicle, such as a Daytime
Running Lamps (DRL) or an automatic headlamp
system malfunction. If this happens, see your dealer as
soon as possible.
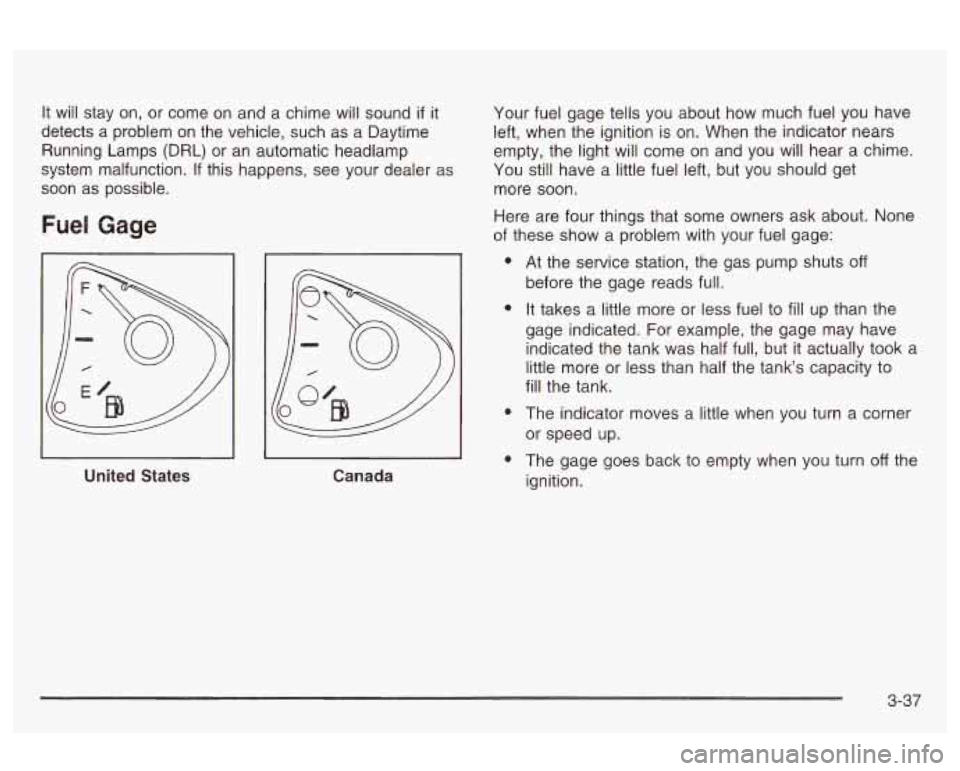
Fuel Gage
United States Canada Your
fuel gage tells you about how much fuel you have
left, when the ignition is on. When the indicator nears
empty, the light will come on and you will hear a chime.
You still have a little fuel left, but you should get
more soon.
Here are four things that some owners ask about. None
of these show a problem with your fuel gage:
e
e
e
e
At the service station, the gas pump shuts off
before the gage reads full.
It takes a little more or less fuel to
fill up than the
gage indicated. For example, the gage may have
indicated the tank was half full, but it actually took a
little more or less than half the tank’s capacity to
fill the tank.
The indicator moves a little when you turn a corner
or speed up.
The gage goes back to empty when you turn
off the
ignition.
3-37
Page 169 of 354
TP CD (Tape): Press this button to play a cassette
tape or a CD when listening to the radio. Press TP CD
to switch between the tape and compact disc
if both
are loaded. The inactive tape or CD will remain safely
inside the radio for future listening. The display will
show the
TAPE and CD symbols.
4 (Eject): Press this button to eject a CD. Eject may
be activated with either the ignition or radio
off. CDs
may be loaded with the radio and ignition
off if this
button is pressed first.
Compact Disc Messages
CHECK CD: If this message appears on the radio
display and the disc comes out,
it could be one of the
following reasons:
You’re driving on a very rough road. When the road
The disc is dirty, scratched, wet or upside down.
0 The air is very humid. If so, wait about an hour and
becomes
smoother, the disc should play.
try again.
If the CD is not playing correctly, for any other reason,
try a known good CD.
If any error occurs repeatedly or
if an error can’t be
corrected, contact your dealer.
If your radio displays an
error message, write it down and provide it to your
dealer when reporting the problem.
Theft-Deterrent Feature
(Non-RDS Radios)
THEFTLOCK@ is designed to discourage theft of your
radio. The feature works automatically by learning
a portion of the Vehicle Identification Number (VIN).
If
the radio is moved to a different vehicle, it will not
operate and LOC will be displayed.
With THEFTLOCK@ activated, your radio will not operate
if stolen.
Theft-Deterrent Feature
(RDS Radios)
THEFTLOCK@ is designed to discourage theft of your
radio. The feature works automatically by learning
a portion of the Vehicle Identification Number (VIN).
It
the radio is moved to a different vehicle, it will not
operate and LOCKED will be displayed.
When the radio and vehicle are turned off, the blinking
red light indicates that THEFTLOCK@ is armed.
With THEFTLOCK@ activated, your radio will not operate
if stolen.
3-64
Page 170 of 354
Understanding Radio Reception
AM
The range for most AM stations is greater than for FM,
especially at night. The longer range, however, can
cause stations to interfere with each other. AM can pick
up noise from things like storms and power lines. Try
reducing the treble to reduce this noise
if you ever get it.
FM Stereo
FM stereo will give you the best sound, but FM signals
will reach only about
10 to 40 miles (16 to 65 km).
Tall buildings or hills can interfere with FM signals,
causing the sound to come and go.
XMTM Satellite Radio Service
XMTM Satellite Radio gives you digital radio reception
from coast to coast. Just as with FM, tall buildings
or hills can interfere with Satellite radio signals, causing
the sound to come and
so. Your radio may display
“NO SIGNAL” to indicate interference.
DAB Radio
DAB gives you digital radio reception. Just as with FM,
tall buildings or hills can interfere with radio signals,
causing the sound to come and go. Your radio
may display “NO
SIGNAL” to indicate interference,
Care of Your Cassette Tape Player
A tape player that is not cleaned regularly can cause
reduced sound quality, ruined cassettes or a damaged
mechanism. Cassette tapes should be stored in their
cases away from contaminants, direct sunlight and
extreme heat.
If they aren’t, they may not operate
properly or may cause failure of the tape player.
Your tape player should be cleaned regularly after every
50 hours of use. Your radio may display CLEAN
PLAYR to indicate that you have used your tape player
for 50 hours without resetting the tape clean timer.
If
this message appears on the display, your cassette tape
player needs to be cleaned. It will still play tapes, but
you should clean
it as soon as possible to prevent
damage to your tapes and player.
If you notice a
reduction in sound quality, try a known good cassette to
see
if the tape or the tape player is at fault. If this
other cassette has no improvement in sound quality,
clean the tape player.
For best results, use a scrubbing action, non-abrasive
head as the hubs of the cleaner cassette turn. The
recommended cleaning cassette is available through
your dealership.
WGUI III ty baaacttc VVILI I paua VVI IILI I X,IUIJ LI te tape nlhnn;,..r* ,-..-..-.--++e ... :rL ...-A- ..,L:-L *I- - I-.- -
3-65
Page 171 of 354
The cut tape detection feature of your cassette tape
player may identify the cleaning cassette as a damaged
tape, in error. To prevent the cleaning cassette from
being ejected, use the following steps.
1. Turn the ignition on.
2. Turn the radio off.
3. Press and hold the TP CD button for five seconds.
4. Insert the scrubbing action cleaning cassette.
5. Eject the cleaning cassette after the manufacturer’s
recommended cleaning time.
You may also choose a non-scrubbing action, wet-type
cleaner which uses a cassette with a fabric belt to
clean the tape head. This type
of cleaning cassette will
not eject on its own. A non-scrubbing action cleaner
may not clean as thoroughly as the scrubbing type
cleaner. The use of a non-scrubbing action, dry-type
cleaning cassette is not recommended.
After you clean the player, press and hold the eject
button for five seconds to reset the CLEAN PLAYR
indicator. The radio will display CLEANED to show the
indicator was reset.
Cassettes are subject to wear and the sound quality
may degrade over time. Always make sure the cassette
tape is in good condition before you have your tape
player serviced.
Care of Your CDs
Handle discs carefully. Store them in their original cases
or other protective cases and away from direct sunlight
and dust.
If the surface of a disc is soiled, dampen
a clean, soft cloth in a mild, neutral detergent solution
and clean
it, wiping from the center to the edge.
Be sure never to touch the side without writing when
handling discs. Pick up discs by grasping the outer
edges or the edge of the hole and the outer edge.
Care of Your CD Player
The use of CD lens cleaner discs is not advised, due to
the risk of contaminating the lens of the CD optics
with lubricants internal to the CD mechanism.
Backglass Antenna
Your AM-FM antenna is integrated with your rear
window defogger, located in the rear window. Be sure
that the inside surface of the rear window is not
scratched and that the lines on the glass are not
damaged.
If the inside surface is damaged, it could
interfere with radio reception.
3-66