2003 Oldsmobile Alero light
[x] Cancel search: lightPage 116 of 354
The cruise control will turn off when any of the
following occur:
The brakes are applied,
the clutch is applied (manual transaxle),
the parking brake is applied, or
the brake system warning light is on.
Cruise control can be dangerous where
you can’t drive safely at a steady speed.
So, don’t use your cruise control on
winding roads or
in heavy traffic.
0 Cruise control can be dangerous on
slippery roads. On such roads, fast
changes in tire traction can cause
needless wheel spinning, and you could
lose control. Don’t use cruise control on
slippery roads.
If your vehicle is in cruise control when the enhanced
traction system,
if your vehicle has this feature, begins to
limit wheel spin, the cruise control will automatically
disengx~e. See Enhanced Trac?im Sys?m (ETSI ar?
page 4-9. When road conditions allow you to safely use
it again, you may turn the cruise control back on.
:ing Cruise Contrc
If you leave your cruise control on when you’re
not using cruise, you might hit a button and go
into cruise when you don’t want to. You could
be startled and even lose control. Keep the
cruise control switch
off until you want to use
cruise control.
1. Press the cruise control
ON OFF button. The
indicator light above the button will turn on.
2. Get up to the speed you want.
3. Press the CST SET (Coast Set) button and release
it. The
CRUISE light on the instrument panel cluster
will come on.
3-1 1
Page 119 of 354
The exterior lamps control has three positions:
pf (Parking Lamps): Turn the control to this position
to turn on the parking lamps, together with the
following.
Sidemarker Lamps
Taillamps
License Plate Lamps
0 Instrument Panel Lights
- - EO (Headlamps): Turn the control to this position to
turn on the headlamps, together with the previously
listed lamps and lights.
AUTO: Turn the control to this position to turn the
headlamps, taillamps and parking lamps on and
off automatically while the ignition is on, by sensing how
dark it is outside. For more information see Automatic
Headlamp System later in this section.
Daytime Running Lamps (DRL)
Daytime Running Lamps (DRL) can make it easier for
others to see the front
of your vehicle during the
day. DRL can be helpful
in many different driving
conditions, but they can be especially helpful in the
short
periods after dawn and before sunset. Fully functional
daytime running lamps are required on all vehicles
first sold in Canada. The DRL
system will make your low-beam headlamps
come on at a reduced brightness when the following
conditions are met:
The ignition is on.
the exterior lamps control is in AUTO or the parking
the light sensor detects daytime light,
lamps
only position.
the parking brake is released, and
the shift lever is not in PARK (P) on vehicles with
When the DRL system
is on, the taillamps, sidemarker
lamps, parking lamps and instrument panel lights
will not be illuminated unless you have turned the
exterior lamps control to the parking lamp position.
As with any vehicle, you should turn on the regular
headlamp system when you need it. an
automatic transaxle only.
Automatic Headlamp System
When it is dark enough outside, your Automatic
Headlamp System will turn on your headlamps at the
normal brightness along with other lamps such as
the taillamps, sidemarker, parking lamps and the
instrument panel lights. The radio lights will also be dim.
Your vehicle is equipped with a light sensor on the
top of the instrument panel under the defroster grill,
so
be sure it is not covered which will cause the system
to be on whenever the ignition
is on.
3-1 4
Page 120 of 354

The system may also be on when driving through a
parking garage, heavy overcast weather or a tunnel.
This is normal.
There is a delay in the transition between the daytime
and nighttime operation of the DRL and the Automatic
Headlamp System
so that driving under bridges or bright
overhead street lights does not affect the system. The
DRL and Automatic Headlamp Systems will only be
affected when the light sensor sees a change in lighting
lasting longer than this delay.
To idle your vehicle with the system off, set the parkin9
brake while the ignition is
off. Then start the vehicle.
The system will stay
off until you release the parking
brake.
As with any vehicle, you should turn on the regular
headlamps when you need them.
Headlamps Off in PARK (P)
To turn the headlamps off when it is dark outside, turn
the exterior lamps control
to the parking lamp position.
In this position, the parking lamps, sidemarker lamps,
taillamps, license plate lamps and instrument panel
lights will be on, but the headlamps will be off.
To turn on the headlamps along with the other lamps
when it is dark outside, turn the exterior lamps control
to
the AUTO or headlamp position.
Delayed Headlamps
The delayed headlamps feature will continue to
illuminate the headlamps for
20 seconds after the key is
turned to
OFF, then the headlamps will automatically
turn off.
To override the
20 second delayed headlamp feature
while it is active turn the turn signal/muItifunction
lever up one position and then back
to AUTO.
Fog Lamps
If your vehicle has this feature, the button for your fog
lamps is located on the instrument panel, to the left
of the steering wheel, beside the instrument panel
brightness thumbwheel.
When using the fog lamps, the ignition must be on as
well as the parking lamps or the low-beam headlamps.
Press the button to turn the fog lamps on. An indicator
light on the button will glow when the fog lamps are on.
Press the button again to turn the fog lamps off.
TI-- I--. I ... :I1 I ..... LT . I. . . I I luy I~III~ WIII Lull1 UII WII~II~V~I iile iliyil-bed1r1
headlamps are turned on. When the high beams
are turned off, the fog lamps will come on again.
3-1 5
Page 121 of 354
Interior Lamps
Instrument Panel Brightness
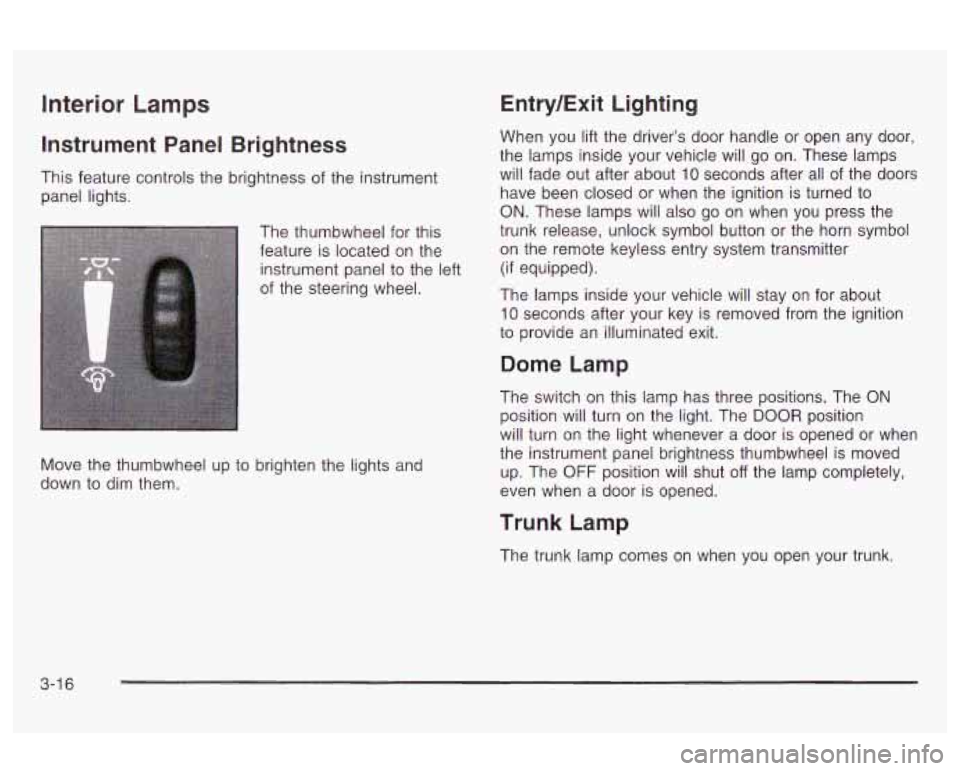
This feature controls the brightness of the instrument
panel lights.
The thumbwheel for this
feature is located on the
instrument panel to the left
of the steering wheel.
Move the thumbwheel up to brighten the lights and
down to dim them.
Entry/Exit Lighting
When you lift the driver’s door handle or open any door,
the lamps inside your vehicle will go on. These lamps
will fade out after about
10 seconds after all of the doors
have been closed or when the ignition is turned to
ON. These lamps will also go on when you press the
trunk release, unlock symbol button or the horn symbol
on the remote keyless entry system transmitter
(if equipped).
The lamps inside your vehicle will stay on for about
10 seconds after your key is removed from the ignition
to provide an illuminated exit.
Dome Lamp
The switch on this lamp has three positions. The ON
position will turn on the light. The DOOR position
will turn on the light whenever a door is opened or when
the instrument panel brightness thumbwheel is moved
up. The
OFF position will shut off the lamp completely,
even when a door is opened.
Trunk Lamp
The trunk lamp comes on when you open your trunk.
3-1 6
Page 123 of 354
Certain electrical accessories may not be compatible
with the accessory power outlet and could result
in blown vehicle or adapter fuses.
If you experience a
problem, see your dealer for additional information
on accessory power outlets.
Notice: Adding some electrical equipment to your
vehicle can damage
it or keep other things from
working as they should. This wouldn’t be covered by
your warranty. Check with your dealer before adding electrical equipment, and never use anything
that exceeds the amperage rating.
When adding electrical equipment, be sure to follow the
proper installation instructions included with the
equipment.
Notice: Power outlets are designed for accessory
plugs only. Do not hang any type of accessory
or accessory bracket from the plug. Improper use of
the power outlet can cause damage not covered by your warranty.
Ashtrays and Cigarette Lighter
To use the lighter, just push it in all the way and let go.
Notices Don’t put papers or other flammable
items into your ashtrays. Hot cigarettes
or other
smoking materials could ignite them, causing
a damaging fire.
Notice: Don’t hold a cigarette lighter in with your
hand while
it is heating. If you do, it won’t be able to
back away from the heating element when it’s
ready. That can make
it overheat, damaging the
lighter and the heating element.
It can also blow
the fuse.
3-1 8
Page 125 of 354

When you switch to the defog or defrost modes the
system will automatically move from recirculation to
outside air. When you move the mode knob back to
another mode, the system will move back into
recirculation. When the car is turned off and back on the
system will default to outside air automatically.
Temperature Control: Turn the center knob clockwise
or counterclockwise to manually increase or decrease
the temperature inside your vehicle.
When it’s cold outside
0°F (-18°C) or lower, use the
engine coolant heater,
if equipped, to provide warmer air
faster to your vehicle. An engine coolant heater warms
the coolant that the engine uses to provide heat to
warm the inside of your vehicle. For more information,
see
Engine Coolant Heater on page 2-20.
A/C (Air Conditioning): Press this button to turn the
air-conditioning system on or off. When
A/C is pressed,
an indicator light in the button will come on to let you
know that air conditioning is activated.
The fan knob must be set to a speed for the air
conditioning to operate.
On hot days, open the windows to let hot inside air
escape; then close them. This helps to reduce the time
it takes for your vehicle to cool down. It also helps
the system to operate more efficiently. For
quick cool down
on hot days:
1. Select the vent mode.
2. Select the highest fan speed.
3. Select A/C.
4. Select the recirculation mode.
5. Select the coolest temperature.
Using these settings together for long periods of time
may cause the air inside of your vehicle to become too
dry. To prevent this from happening, after the air in
your vehicle is cooled, turn the recirculation mode off.
The air-conditioning system removes moisture from
the air,
so you may sometimes notice a small amount of
water dripping underneath your vehicle while idling or
after turning off the engine. This is normal.
Defogging and Defrosting
There are two modes to choose from to clear fog or
frost from your windshield. Use the defog mode to clear
the windows of fog or moisture and warm the
passengers. Use the defrost mode to remove fog or
frost from the windshield more quickly.
Turn the right knob to select the defog or defrost mode.
3-20
Page 126 of 354
+3 (Defog): This mode directs half of the air to the
windshield and most of the remaining air to the
floor outlets with a small amount directed at the side
windows. When you select this mode, the system turns
off recirculation and runs the air-conditioning
compressor unless the outside temperature is at or
below freezing. The recirculation mode cannot be
selected while in the defog mode.
To help clear the side windows quickly while using air
conditioning, do the following:
1. Select the bi-level mode.
2. Select the highest fan speed.
3. Select NC.
4. Select the temperature.
9 (Defrost): This mode directs most of the air to
the windshield with some air directed to the floor
outlets. In this mode, the system will automatically
turn
off recirculation and run the air-conditioning
compressor, unless the outside temperature is at
or
in the defrost mode.
To help clear the windshield quickly, do the following:
L-I -... r ”--- :-.- ne-: --.. I-&:-.- I I- - I- _I_ -I ... 1.11- uctuvv tt GGLII ty. ncx,lIbuIauuI I l,cu II 161 ue SeIe‘uttw WI III~
1. Select the defrost mode.
2. Select the outside air mode.
3. Select the highest temperature.
4. Select the highest fan speed. Your
vehicle is equipped with side window defogger
outlets located above the side instrument panel outlets.
To help clear the side windows quickly, do the following:
1. Select the floor mode.
2. Select the outside air mode.
3. Select the highest temperature.
4. Select the highest fan speed.
Rear Window Defogger
The rear window defogger uses a warming grid to
remove fog from the rear window.
Lut] REAR: Press this button to turn the rear window
defogger on or
off. An indicator light in the button
will come on to let you know that the rear window
defogger is activated. Be sure to clear as much snow
from the rear window as possible.
The rear window defogger will turn
off approximately
10 minutes after the button is pressed. If turned on
again, the defogger will only run for approximately
five minutes before turning
off. The defogger can also
be turned
off by pressing the button again or by turning
off the engine.
Notice: Don’t use anything sharp on the inside of
the rear window. If you do, you could cut or damage
the warming grid, and the repairs wouldn’t
be
vehicle license, tape, a decal or anything similar
to the defogger grid.
cGvered by ycx: warranty. oc not attach a temporaiy
3-2 1
Page 128 of 354

Warning Lights, Gages and
Indicators
This part describes the warning lights and gages
that may be on your vehicle. The pictures will help
you locate them.
Warning lights and gages can signal that something is
wrong before it becomes serious enough to cause
an expensive repair or replacement. Paying attention to
your warning lights and gages could also save you
or others from injury.
Warning lights come on when there may be or is a
problem with one of your vehicle’s functions.
As you will
see in the details on the next few pages, some
warning lights come on briefly when you start the
engine just to let you know they’re working.
If you are
familiar with this section, you should not be alarmed
when this happens. Gages can
indicate when there may be or is a problem
with one of your vehicle’s functions. Often gages
and warning lights work together
to let you know when
there’s a problem with your vehicle.
When one of the warning lights comes on and stays on
when you are driving,
or when one of the gages
shows there may be a problem, check the section that
tells you what to do about
it. Please follow this
manual’s advice. Waiting to do repairs can be
costly
- and even dangerous. So please get to know
your warning lights and gages. They’re a big help.
3-23