2003 Oldsmobile Alero instrument panel
[x] Cancel search: instrument panelPage 251 of 354
How to Check Power Steering Fluid
Turn the key off, let the engine compartment cool down,
wipe the cap and the top of the reservoir clean, then
unscrew the cap and wipe the dipstick with a clean rag.
Replace the cap and completely tighten it. Then
remove the cap again and look at the fluid level on the
dipstick.
The level should be at the
FULL COLD mark. If
necessary, add only enough fluid
to bring the level up to
the mark.
What to Use
To determine what kind of fluid to use, see Part Dr
Recommended Fluids and Lubricants on page 6- 15.
Always use the proper fluid. Failure to use the proper
fluid can cause leaks and damage hoses and seals.
Windshield Washer Fluid
What to Use
When you need windshield washer fluid, be sure to read
the manufacturer’s instructions before use.
If you will
be operating your vehicle in an area where the
temperature may fall below freezing, use
a fluid that has
sufficient protection against freezing. See
Engine
Compartment Overview on page
5-12 for reservoir
location.
Adding Washer Fluid
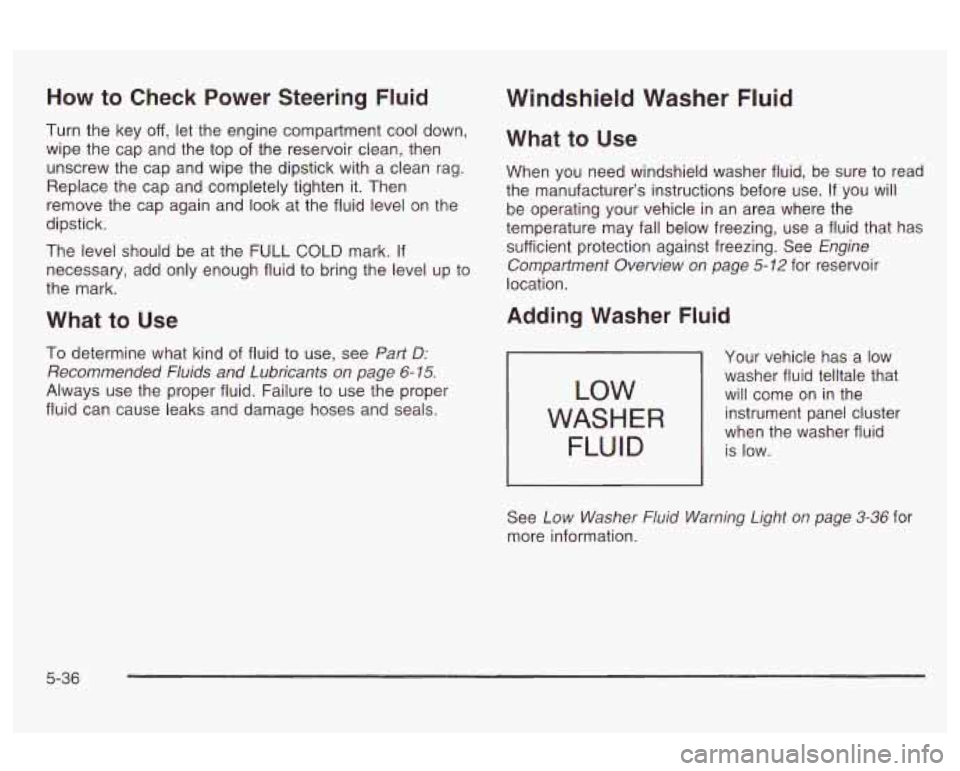
Your vehicle has a low
washer fluid telltale that
will come on in the
WASHER
FLU ID
instrument panel cluster
when the washer fluid
is low.
See
Low Washer Fluid Warning Light on page 3-36 for
more information.
5-36
Page 289 of 354
Vinyl
Use warm water and a clean cloth.
0 Rub with a clean, damp cloth to remove dirt. You
may have to do this more than once.
Things like tar, asphalt and shoe polish will stain if
you don’t get them off quickly. Use a clean cloth
and vinyl/leather cleaner. See your dealer for
this product.
Leather
Use a soft cloth with lukewarm water and a mild soap or
saddle soap and wipe dry with a soft cloth. Then, let
the leather dry naturally.
Do not use heat to dry.
For stubborn stains, use a leather cleaner. See your
dealer for this product.
Never use oils, varnishes, solvent-based or abrasive
cleaners, furniture polish or shoe polish on leather.
Soiled or stained leather should be cleaned
immediately. If dirt is allowed
to work into the finish,
it can harm the leather.
Top of the Instrument Panel
Use only mild soap and water to clean the top surfaces
of the instrument panel. Sprays containing silicones
or waxes may cause annoying reflections in the
windshield and even make it difficult to see through the
windshield under certain conditions.
Interior Plastic Components
Use only a mild soap and water solution on a soft cloth
or sponge. Commercial cleaners may affect the
surface finish.
Glass Surfaces
Glass should be cleaned often. GM Glass Cleaner or a
liquid household glass cleaner will remove normal
tobacco smoke and dust films on interior glass. See
GM
Vehicle Care/Appearance Materials on page
5-78.
Notice: Don’t use abrasive cleaners on glass,
because they may cause scratches. Avoid placing
decals on the inside rear window, since they
may have to be scraped
off later. If abrasive cleaners
are used on the inside
of the rear window, an
electric defogger element may be damaged. Any
temporary license should not be attached across the
defogger grid.
5-74
Page 295 of 354
Vehicle Identification
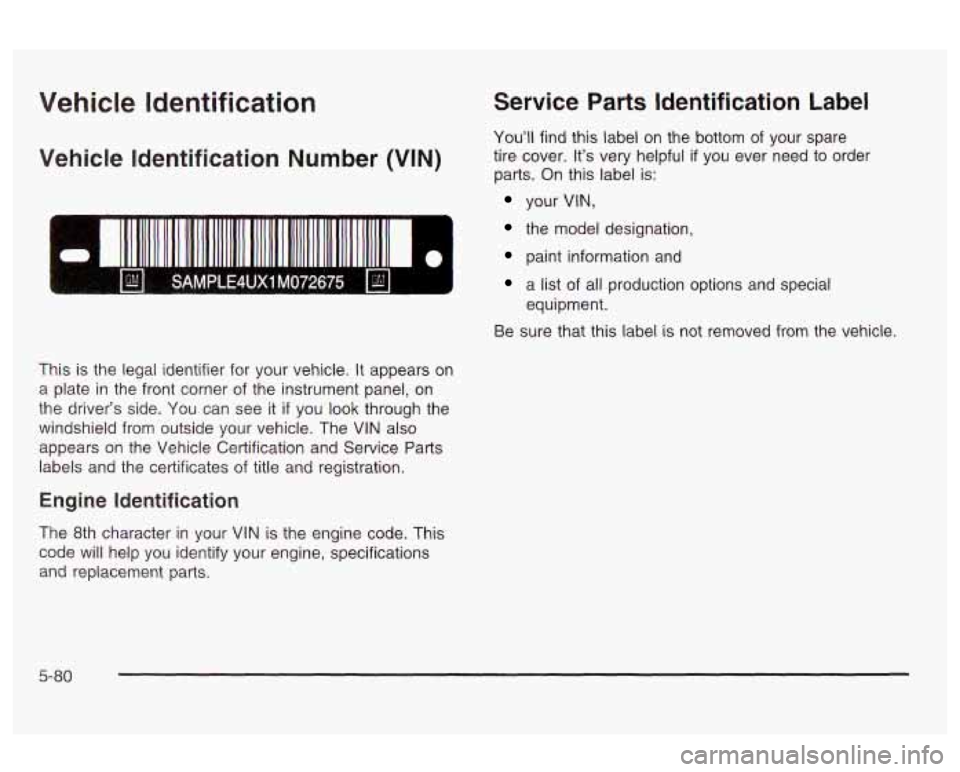
Vehicle Identification Number (VIN)
0 I
Service Parts Identification Label
You’ll find this label on the bottom of your spare
tire cover. It’s very helpful
if you ever need to order
parts. On this label
is:
your VIN,
the model designation,
paint information and
a list of all production options and special
equipment.
Be sure that this label is not removed from the vehicle.
This is the legal identifier for your vehicle.
It appears on
a plate in the front corner of the instrument panel, on
the driver‘s side. You can see it
if you look through the
windshield from outside your vehicle. The VIN also
appears on the Vehicle Certification and Service Parts
labels and the certificates of title and registration.
Engine Identification
The 8th character in your VIN is the engine code. This
code will help you identify your engine, specifications
and replacement parts.
5-80
Page 296 of 354
Electrical System
Add-On Electrical Equipment
Notice: Don’t add anything electrical to your
vehicle unless you check with your dealer first.
Some electrical equipment can damage your vehicle
and the damage wouldn’t be covered by your
warranty. Some add-on electrical equipment can
keep other components from working as they
should.
Your vehicle has an air bag system. Before attempting
to add anything electrical to your vehicle, see
Servicing Your Air Bag-Equipped Vehicle on page 1-59.
Windshield Wiper Fuses
The windshield wiper motor is protected by a circuit
breaker and a fuse. If the motor overheats due to heavy
the overload is caused by some electrical problem, have
it fixed. snow,
eic., iile wiper wiii siup ui-liii ti-le i-hstci- GS~S. If
Power Windows and Other Power
Options
A circuit breaker in the fuse panel protects the power
windows. When the current load is too heavy, the circuit
breaker opens and closes, protecting the circuit until
the problem is fixed.
Fuses and Circuit Breakers
The wiring circuits in your vehicle are protected from
short circuits by a combination
of fuses, circuit breakers
and fusible links. This greatly reduces the chance of
damage caused by electrical problems.
There are three fuse blocks in your vehicle: two
instrument panel fuse blocks and the engine
compartment fuse block.
There are four spare fuses located in the driver’s side
instrument panel end cap for your use.
Instrument Panel Fuse Blocks
There are two fuse panels for your vehicle. One is
located on the driver’s side of the instrument panel and
the other is located on the passenger’s side.
5-81
Page 297 of 354
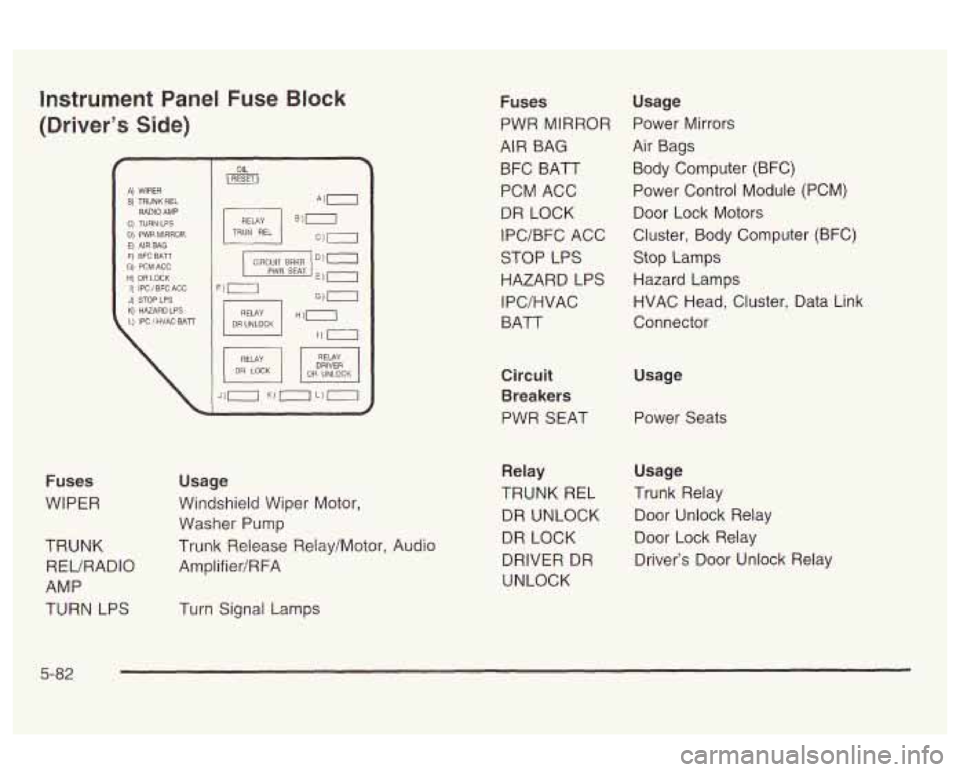
Instrument Panel Fuse Block
(Driver's Side)
f I A) WIPER I
F) EFC BATT G) PCMACC I ti: DALOCK I PWR SEAT E) 0 I) IPC / BFC ACG F) .
DRIVER
Fuses
WIPER
TRUNK REURADIO
AMP
TURN LPS Usage
Windshield Wiper Motor,
Washer Pump
Trunk Release Relay/Motor, Audio
Amplifier/RFA
Turn Signal Lamps
Fuses
PWR MIRROR
AIR BAG
BFC BATT
PCM ACC
DR LOCK
IPC/BFC ACC
STOP LPS
HAZARD LPS
I PC/HVAC
BATT
Circuit Breakers
PWR SEAT Usage
Power Mirrors
Air Bags Body Computer (BFC)
Power Control Module (PCM) Door Lock Motors
Cluster, Body Computer (BFC) Stop Lamps
Hazard Lamps
HVAC Head, Cluster, Data Link
Connector
Usage Power Seats
Relay Usage
TRUNK
REL Trunk Relay
DR UNLOCK Door Unlock Relay
DR LOCK Door Lock Relay
DRIVER DR Driver's Door Unlock Relay
UNLOCK
5-82
Page 298 of 354
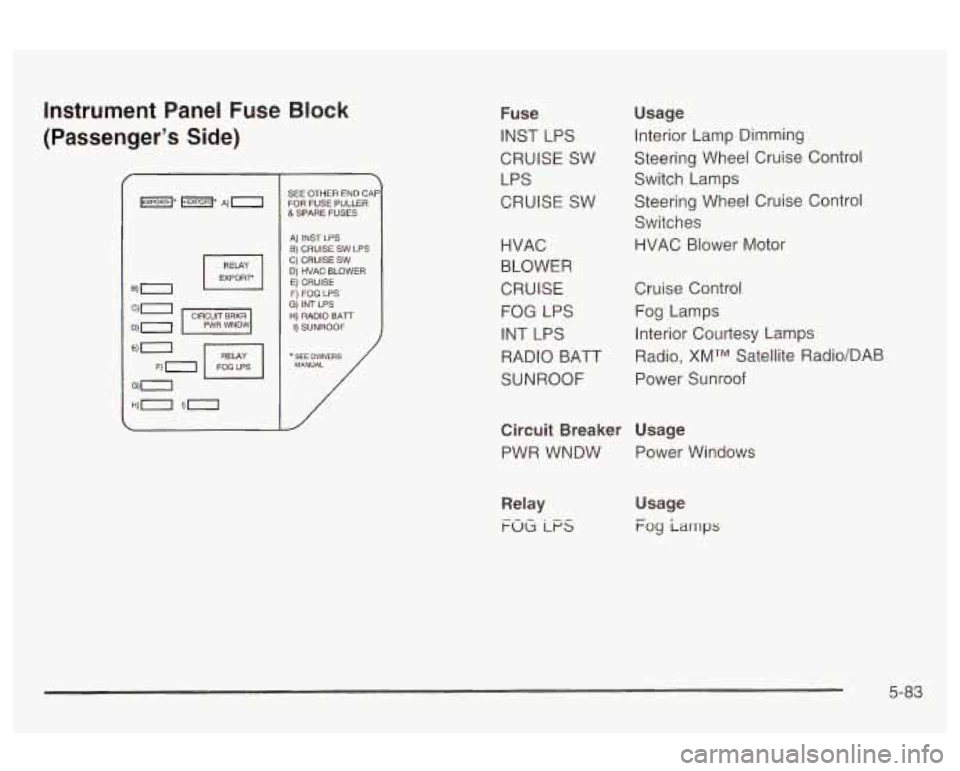
Instrument Panel Fuse Block
(Passenger’s Side)
SEE OTHER END CAF FOR FUSE PULLER &SPARE FUSES
A) INST LPS
C) CRUISE
SW B) CRUISE SW LPS
0) HVAC BLOWER E) CRUISE F) FOG LPS G) INT LPS H) RADIO BATr I) SUNROOF
* SEE OWNERS MANUAL /
1’
Fuse
INST LPS
CRUISE SW LPS
CRUISE SW Usage
Interior Lamp Dimming
Steering Wheel Cruise Control
Switch Lamps
Steering Wheel Cruise Control
Switches
HVAC Blower Motor
HVAC
BLOWER
CRUISE Cruise Control
FOG LPS
Fog Lamps
INT LPS Interior Courtesy Lamps
RADIO BAT Radio, XMTM Satellite Radio/DAB
SUNROOF Power Sunroof
Circuit Breaker Usage
PWR WNDW Power Windows
Relay
FOG LFS
Usage
Fog iarnps
5-83
Page 323 of 354
Customer Assistance
Information
Customer Satisfaction Procedure
Your satisfaction and goodwill are important to
your dealer and to Oldsmobile. Normally, any concerns
with the sales transaction or the operation of your
vehicle will be resolved by your dealer’s sales or service
departments. Sometimes, however, despite the best
intentions of all concerned, misunderstandings can
occur. If your concern has not been resolved to your
satisfaction, the following steps should be taken:
STEP
ONE: Discuss your concern with a member of
dealership management. Normally, concerns can
be quickly resolved at that level.
If the matter has
already been reviewed with the sales, service or parts
manager, contact the owner of the dealership or
the general manager.
STEP TWO:
If after contacting a member of dealership
management, it appears your concern cannot be
resolved by the dealership without further help, contact
the Oldsmobile Customer Assistance Center by
calling 1-800-442-6537. In Canada, contact GM of
Canada Customer Communication Centre in
Oshawa by calling 1-800-263-3777 (English) or
1-800-263-7854 (French). We encourage
you to call the toll-free number in order
to give your inquiry prompt attention. Please have
the following information available to give the Customer
Assistance Representative:
Vehicle Identification Number (This is available from
the vehicle registration or title, or the plate at the
top left of the instrument panel and visible through
the windshield.)
Dealership name and location
Vehicle delivery date and present mileage
When contacting Oldsmobile, please remember that
your concern will likely be resolved at a dealer’s facility.
That is why we suggest you follow Step One first
if
you have a concern.
STEP
THREE: Both General Motors and your dealer
are committed to making sure you are completely
satisfied with your new vehicle. However,
if you continue
to remain unsatisfied after following the procedure
outlined in Steps One and Two, you should file with the
GM/BBB Auto Line Program to enforce any additional
rights you may have. Canadian owners refer to
your Warranty and Owner Assistance Information
booklet for information on the Canadian Motor Vehicle
Arbitration Plan (CAMVAP).
7-2
Page 340 of 354
Inspection Brake System
............................................. 6-14
Engine Cooling System
................................ 6-14
Fuel System
............................................... 6-14
Part C
. Periodic Maintenance ....................... 6-13
Steering. Suspension and Front Drive Axle
Boot and Seal
......................................... 6-1 3
Throttle System
.................................... 6-1 4
Cluster
....................................................... 3-24
Overview
..................................................... 3-4
Instrument Panel Brightness
............................. 3-1 6
Instrument Panel Fuse Block
(Passenger's Side)
....................................... 5-83
instrument Panel Fuse Block
(Driver's Side)
............................................. 5-82
Instrument Panel Fuse Blocks
........................... 5-81
Exhaust System
.......................................... 6-13
Instrument Panel
Interior Lamps
................................................ 3-16
Interior Plastic Components
.............................. 5-74
J
Jump Starting ................................................. 5-42
Key Lock Cylinders Service
.............................. 6-10
Key Removal
................................................. 2-29 Keyless
Entry System
....................................... 2-3
Keys
............................................................... 2-2
L
Lamps
Exterior
............ .... ........ 3-13
Interior
....................................................... 3-16
Lap Belt
........................................................ 1-27
Lap-Shoulder Belt
................................... 1.15. 1-24
LATCH System Child Restraints
........................................... 1-43
Securing a Child Restraint Designed for the
LATCH System
........................................ 1-45
Latches,
Seatback ............................................ 1-5
Leather ......................................................... 5-74
Leaving Your Vehicle
....................................... 2-11
Leaving Your Vehicle With the
Engine Running
.......................................... 2-28
Lift Seat, Power
....................... ......... 1-6
Light
................................... 3-26
Anti-Lock Brake System Warning ................... 3-29
Brake System Warning
................................. 3-28
Change Engine Oil
...................................... 3-35
Charging System
......................................... 3-27
Cruise Control
............................................. 3-36
Enhanced Traction System Warning
............... 3-29
Low Coolant Warning
................................... 3-31
. A-ir -"a Ran Rnadinncc .V UU ... YYY
LI c+,,,, I talIbGd T;actior; System Active J-JO QQ ..................
7