Page 122 of 354

Battery Run-Down Protection
Your vehicle has a battery run-down protection feature
designed to protect your vehicle's battery.
When any interior lamp (trunk, mirror reading lamps,
dome lamp or glove box) is left on when the ignition is
turned
off, the battery saver system will automatically
shut the lamp
off after 20 minutes. This will avoid
draining the battery.
Accessory Power Outlets
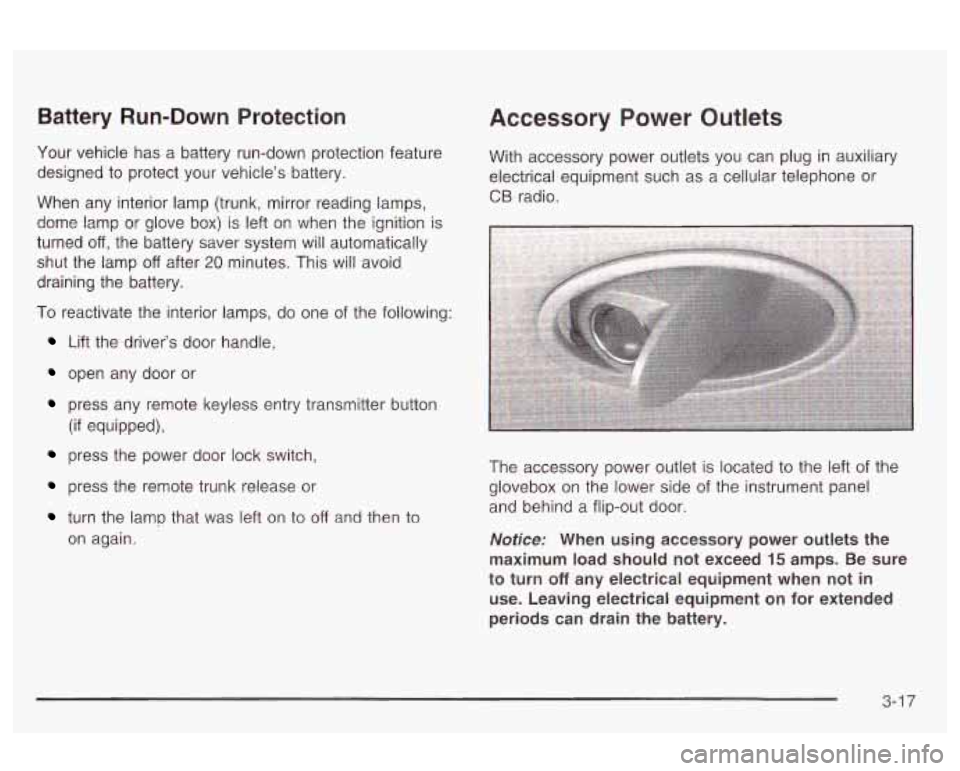
With accessory power outlets you can plug in auxiliary
electrical equipment such as a cellular telephone or
CB radio.
I
To reactivate the interior lamps, do one of the following: I
Lift the driver's door handle,
open any door or
press any remote keyless entry transmitter button
(if equipped),
press the power door lock switch,
press the remote trunk release or
turn the lamp that was left on to off and then to
on again. The accessory power
outlet is located to the left of the
glovebox on the lower side of the instrument panel
and behind a flip-out door.
Notice: When using accessory power outlets the
maximum load should not exceed
15 amps. Be sure
to turn
off any electrical equipment when not in
use. Leaving electrical equipment on for extended
periods can drain the battery.
3-1 7
Page 198 of 354
Winter Driving
Here are some tips for winter driving:
Have your vehicle in good shape tor winter.
You may want to put winter emergency supplies in
your trunk. Include an ice scraper,
a small brush or broom, a
supply of windshield washer fluid, a rag, some winter
outer clothing, a small shovel, a flashlight, a red
you will be driving under severe conditions, include a
small bag of sand, a piece of old carpet or a couple of
burlap bags to help provide traction. Be sure you
properly secure these items in your vehicle.
-l-LL -.--I - --..-Ir -x -,.SI--+:.,- +v:nnmlnc wuu I a1 Iu a t,uuplc uI ImltuIvc vval I 19 lul tylbd. AA, if
4-25
Page 208 of 354
And, if you do have a heavy load, you should spread
it out. Don’t carry more than
132 Ibs. (60 kg) in
your trunk.
Things you put inside your vehicle can ,ike
and injure people
in a sudden stop or turn, or
in a crash.
Do not load your vehicle any heavier than the
GVWR, or either the maximum front or rear
GAWR. If you do, parts on your vehicle can
break, and
it can change the way your vehicle
handles. These could cause you to lose
control and crash. Also, overloading can
shorten the iife of your vehicle.
e
e
e
Put things in the trunk of your vehicle. In a
trunk, put them as far forward as you can.
Try to spread the weight evenly.
Never stack heavier things, like suitcases,
inside the vehicle
so that some of them
are above the tops of the seats.
Don’t leave an unsecured child restraint
in
When you carry something inside the
vehicle, secure
it whenever you can.
Don’t leave a seat folded down unless you
need to.
your vehicie.
4-35
Page 223 of 354

If you get fuel on yourself and then somett --g
ignites it, you could be badly burned. Fuel can
spray out on you if you open the fuel cap too
quickly. This spray can happen
if your tank is
nearly full, and
is more likely in hot weather.
Open the fuel cap slowly and wait for any “hiss” noise to stop. Then unscrew the cap all the way.
Be careful not to spill fuel. Clean fuel from painted
surfaces as soon as possible. See
Cleaning the Outside
of Your Vehicle on page 5-75.
When you put the fuel cap back on, turn it to the right
(clockwise) until you hear a clicking sound. Make
sure you fully install the cap. The diagnostic system can
determine
if the fuel cap has been left off or improperly
installed. This would allow fuel to evaporate into the
atmosphere. See
Malfunction lndicator Lamp on
page
3-31.
Notice: If you need a new fuel cap, be sure to get
the
right type. Your dealer can get one for you. If you
get the wrong type,
it may not fit properly. This may
cause your malfunction indicator lamp to light and
may damage your fuel tank and emissions system.
See “Malfunction lndicator Lamp”
in the Index.
Filling a Portable Fuel Container
m-=
Never fill a portable fuel container while it is in
your vehicle. Static electricity discharge from
the container can ignite the gasoline vapor.
You can be badly burned and your vehicle
damaged if this occurs. To help avoid injury to
you and others:
Dispense gasoline only into approved
containers.
Do not fill a container while it is inside a
vehicle, in a vehicle’s trunk, pickup bed or
on any surface other than the ground.
Bring the fill nozzle in contact with the
inside of the fill opening before operating
the nozzle. Contact should be maintained until the filling is complete.
Don’t smoke while pumping gasoline.
5-8
Page 265 of 354
Front Turn Signal and
Parking Lamps
1. Remove the headlamp assembly. Refer to the
removal procedure earlier in this section.
2. Turn the bulb assembly retainer and pull out
the bulb.
3. Unclip the bulb assembly from the wiring harness.
4. When replacing the bulb, be sure to properly
align the bulb with the locating feature in the
assembly.
5. Reverse Steps 1 through 3 to reinstall the bulb
assembly.
Center High-Mounted
Stoplamp (CHMSL)
1. Open the trunk lid and locate the center
high-mounted stop lamp on the inside
of the lid.
2. Use a tool to remove the three screws.
3. Gently remove and replace the bulb(s).
4. Reverse this procedure to reassemble the lamp.
Taillamps, Turn Signal, and
Stoplamps
I /---
A. Taillamp
6. TaiVBrake Lamp
C. Taillamp
D. Turn Signal
E. Back-up Lamp
5-50
Page 266 of 354
1. Disconnect the cargo net in the trunk.
2. Pull back the trunk trim.
3. Remove the three wing nut bolts which fasten the
taillamp lens to the vehicle.
4. Carefully remove the taillamp lens from the body
and avoid scratching the paint or dropping it.
5. Turn the bulb socket 1/6 of a turn counterclockwise
and pull out the bulb assembly.
6. To remove a bulb, gently pull the bulb out from the
socket. Put in a new bulb.
7. Reverse Steps 3 through 5 to reassemble the
taillamp.
Replacement Bulbs
5-51
Page 278 of 354
Removing the Spare Tire and Tools
The equipment you’ll need
is in the trunk.
3. Turn the wing nut
counterclockwise and
remove it. Then lift
off the
spacer and remove the
compact spare tire.
See
Compact Spare Tire
on page 5-71 for more
information about
the compact spare.
1. Puii the carpeting from the iioor of the trunk. Turn
the center retainer nut on the compact spare tire
cover counterclockwise to remove it. 4. Remove the jack and wheel wrench from the trunk.
Your vehicle’s jack and wheel wrench are stored in
a foam tray. Remove the band around the jack.
2. Lift and remove the cover
5-63
Page 297 of 354
Instrument Panel Fuse Block
(Driver's Side)
f I A) WIPER I
F) EFC BATT G) PCMACC I ti: DALOCK I PWR SEAT E) 0 I) IPC / BFC ACG F) .
DRIVER
Fuses
WIPER
TRUNK REURADIO
AMP
TURN LPS Usage
Windshield Wiper Motor,
Washer Pump
Trunk Release Relay/Motor, Audio
Amplifier/RFA
Turn Signal Lamps
Fuses
PWR MIRROR
AIR BAG
BFC BATT
PCM ACC
DR LOCK
IPC/BFC ACC
STOP LPS
HAZARD LPS
I PC/HVAC
BATT
Circuit Breakers
PWR SEAT Usage
Power Mirrors
Air Bags Body Computer (BFC)
Power Control Module (PCM) Door Lock Motors
Cluster, Body Computer (BFC) Stop Lamps
Hazard Lamps
HVAC Head, Cluster, Data Link
Connector
Usage Power Seats
Relay Usage
TRUNK
REL Trunk Relay
DR UNLOCK Door Unlock Relay
DR LOCK Door Lock Relay
DRIVER DR Driver's Door Unlock Relay
UNLOCK
5-82