Page 2 of 354

The 2003 Oldsmobile Alero Owner Manual a
Seats and Restraint Systems ........................... 1-1
Front Seats
............................................... 1-2
Rear Seats
............................................... 1-8
Safety Belts
.............................................. 1-9
Child Restraints
....................................... 1-32
Supplemental Restraint System (SRS)
...................................... 1-53
Restraint System Check
............................ 1-60
Keys
........................................................ 2-2
Doors and Locks
....................................... 2-7
Windows
................................................. 2-1 4
Theft-Deterrent Systems ............................ 2-1 6
Starting and Operating Your Vehicle
........... 2-17
Mirrors
.................................................... 2-32
Siorage Areas
......................................... 2-34
Sunroof .................................................. 2-35
Instrument Panel Overview
.......................... 3-4
Climate Controls
...................................... 3-1 9
.w .arning Lights, Gages and indicators ......... 3-23
Audio System(s) ....................................... 3-38
Features and Controls
..................................... 2-1
Instrument Panel
............................................. 3-1 Driving Your Vehicle
....................................... 4-1
Your Driving, the Road, and Your Vehicle
..... 4-2
Towing
................................................... 4-31
Service
..................................................... 5-3
Fuel ......................................................... 5-5
Checking Things Under
the
Hood ............................................... 5-9
Headlamp Aiming
..................................... 5-47
Bulb Replacement .................................... 5-49
Windshield Wiper Blade Replacement
......... 5-52
Tires
...................................................... 5-53
Appearance Care
..................................... 5-72
Vehicle Identification
................................. 5-80
Electrical System
...................................... 5-81
Zapai;iiit=s at-tii ~J~LIIIL~LIUI I> 5-w~
Normal Maintenance Replacement Parts ...... 5-88
Maintenance Schedule ........................... ... 6-1
Maintenance Schedule
................................ 6-2
Customer Assistance Information
.................... 7-1
Customer
Assistance iniorrnation .................. 7-2
Index ................................................................. 1
Service
and Appearance Care
.......................... 5-1
n.- - -:I: - -1: - .- - .....................
Page 6 of 354
These are some examples of vehicle symbols you may find on your vehicle:
POSSIBLE A
CAUTION
INJURY
PROTECT EYES BY
SHIELDING
CAUSTIC
BATTERY
ACID COULD CAUSE
BURNS
AVO1 D
1 SPARKS OR
1 FLAMES
1 BATTERY LATCH BOTH LAP AND
SHOULDER BELTS TO
PROTECT OCCUPANT
48: @
DO NOT TWIST SAFETY
BELT WHEN ATTACHING
FASTEN SEAT
BELTS
MOVE SEAT FULLY
\!$
REARWARD+ /z
SECURE
CHILD SEAT
PULL BELT
COMPLETELY
THEN SECURE CHILD SEAT
I
1
DO NOT INSTALL
A REAR-FACING
CHILD RESTRAINT IN THIS SEATING
POSITION
DO NOT INSTALL A
'ORWARD-FACING CHILD RESTRAINT
IN THIS SEATING
POSITION
--,.-. ,.,.,, a uvun Luun
UNLOCK JGHTING
- MASTER SWITCH B- / ,
SIGNALS @+
TURN
PARKING
pf
LAMPS
DAYTIME
**a
RUNNING y.:
LAMPS 0
ENGINE
COOLANT TEMP
CHARGING
I-]
BATTERY SYSTEM
COOLANT
d
ENGINE OIL
PRESSURE
Wb
ENGINE
COOLANT FAN
OWNERS MANUAL
SERVICE
SFRVICF
MANUAL
V
Page 9 of 354
Front Seats
Manual Seats
1 "J can lose control of the vehicle if you try to
adjust a manual driver's seat while the vehicle
is moving. The sudden movement could startle
and confuse you,
or make you push a pedal
when you don't want to. Adjust the driver's
seat only when the vehicle is not moving.
I Lift the bar located under the front of the seat to unlock
it. Slide the seat to where you want it and release
the bar.
Try to move the seat with your body to be sure
the seat is locked in place.
1-2
Page 10 of 354
Six-Way Power Driver Seat Reclining Seatbacks
If your vehicle has this
feature, the power seat
control is located on
the outboard side of the
driver's seat.
This control allows you to move the seat
up, down,
forward, or backward. It will also move the front or rear
of the seat cushion up or down.
Move the seat forward or rearward by pushing the
control toward the front or rear of the vehicle.
Raise or lower the entire seat cushion by holding II- - - -.-1..-I . "- ^- A -...- 11 le LUI ILIUI up VI UUVVI I.
Raise or lower the front of the seat cushion by
holding the front
of the control up or down.
To adjust the seatback, lift the lever located on the
outboard side of the seat and move the seatback
to where you want it. Release the lever to lock the
seatback. Pull up on the lever without pushing on the
snrthzck IPC! !he seafhack will 20 to an upright position.
0 Raise or lower the rear of the seat cushion by
holding the rear of the control up or down.
1-3
Page 12 of 354
Head Restraints Seatback Latches
For two-door model vehicles, the front seatbacks fold
forward to let people get into the back seat. The
seatback latch is designed for one-handed operation.
To fold a front seatback forward, lift the seatback
latch fully without pushing forward on the seatback to
unlock it. Then the seatback will fold forward.
1 Push the seatback to its original position, and the
seatback will lock.
If the seatback isn't locked, it could move
forward
in a sudden stop or crash. That could
cause injury to the person sitting there. Always
press rearward on the seatback to
be sure it is
locked.
1 -5
Page 13 of 354

Easy Entry Seat
For two-door model vehicles, the right front seat of your
vehicle makes it easy for people to get in and out of
the rear seat.
1. Fold the right front seatback forward by lifting the
2. The seat will slide forward to allow someone to get
seatback latch fully.
into the rear seat area.
3. Push the seatback upright to lock it and slide the
seat fully rearward to lock it.
4. Adjust the seat to the desired position.
5. The front passenger should try to move the seat to
make
sllrc’! the seat is Inckeri intn place.
If the easy try right frc
can move. In a sudden stop or crash, the
person sitting there could be injured. After
you’ve used it, be sure to push rearward on an
easy entry seat
to be sure it is locked.
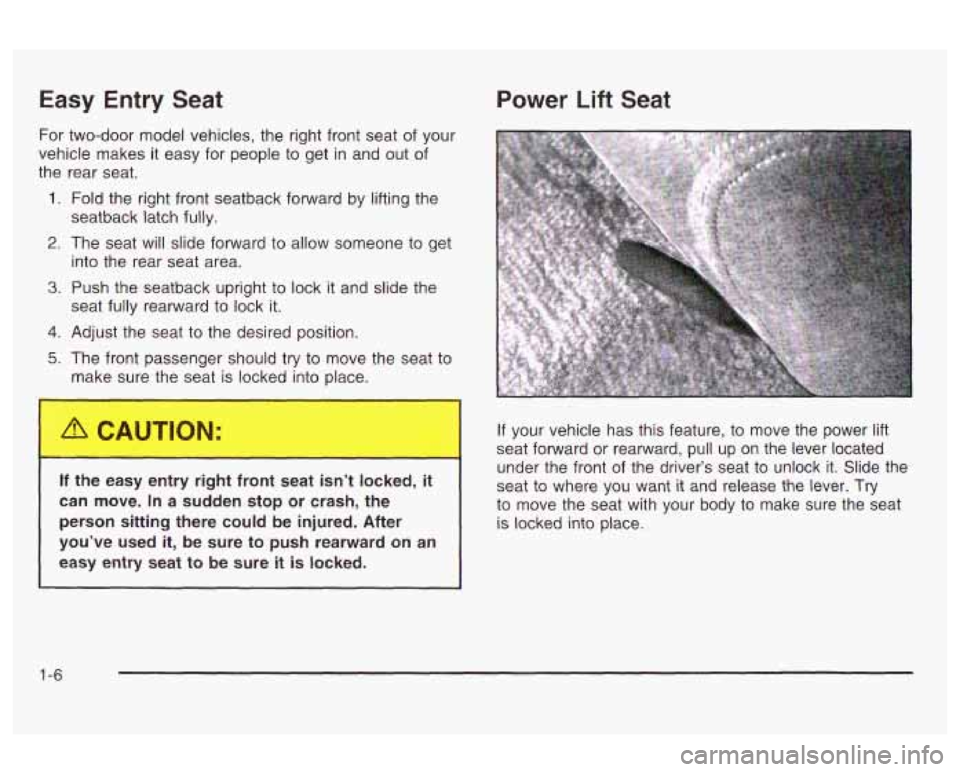
Power Lift Seat
If your vehicle has this feature, to move the power lift
seat forward or rearward, pull
up on the lever located
under the front of the driver’s seat to unlock
it. Slide the
seat to where you want it and release the lever. Try
to move the seat with your body to make sure the seat
is locked into place.
1 -6
Page 22 of 354
Driver Position
This part describes the driver’s restraint system.
Lap-Shoulder Belt
The driver has a lap-shoulder belt. Here’s how to wear it
properly.
1. Close and lock the door.
2. Adjust the seat so you can sit up straight. To see
how, see
Manual Seats on page 1-2 or Six-Way
Power Driver Seat on page
1-3.
3. Pick up the latch plate and pull the belt across you.
Don’t let it get twisted.
The shoulder belt may lock
if you pull the belt
go back slightly to unlock it. Then pull the belt
across you more slowly.
isruss yuu very qui&iy. II tr11s i~apper~s, iei ttt. ijt.ii .I *I *
1-15
Page 23 of 354

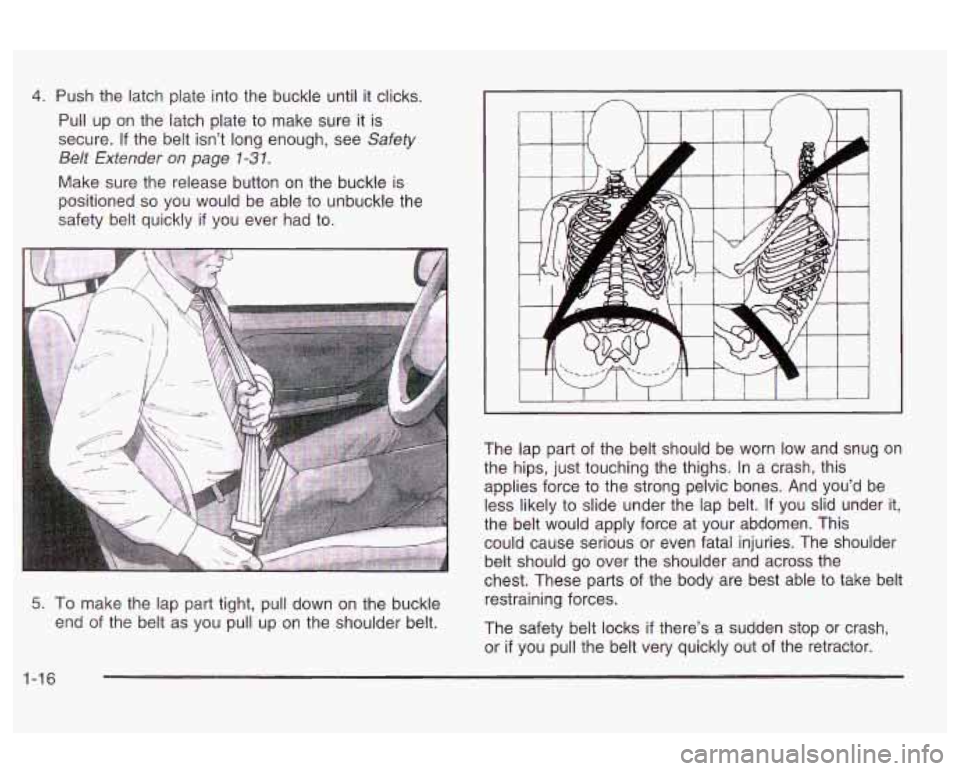
4. Push the latch plate into the buckle until it clicks.
Pull up on the latch plate to make sure it is
secure.
If the belt isn’t long enough, see Safety
Belt Extender
on page 1-3 1.
Make sure the release button on the buckle is
positioned
so you would be able to unbuckle the
safety belt quickly
if you ever had to.
5. To make the lap part tight, pull down on the buckle
end of the belt as you pull up on the shoulder belt.
I I--
The lap part of the belt should be worn low and snug on
the hips, just touching the thighs. In a crash, this
applies force to the strong pelvic bones. And you’d be
less likely to slide under the lap belt.
If you slid under it.
the belt would apply force at your abdomen. This
could cause serious or even fatal injuries. The shoulder
belt should go over the shoulder and across the
chest. These parts of the body are best able to take belt
restraining forces.
The safety belt locks if there’s a sudden stop or crash,
or
if you pull the belt very quickly out of the retractor.
1-16