2003 NISSAN MAXIMA trunk
[x] Cancel search: trunkPage 10 of 247

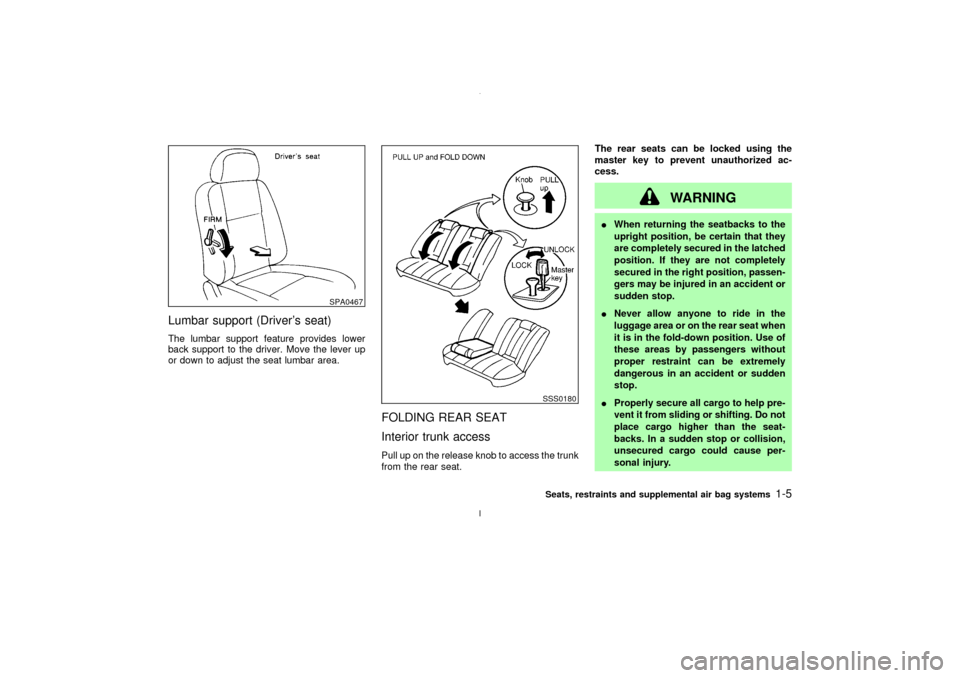
Lumbar support (Driver's seat)The lumbar support feature provides lower
back support to the driver. Move the lever up
or down to adjust the seat lumbar area.
FOLDING REAR SEAT
Interior trunk accessPull up on the release knob to access the trunk
from the rear seat.The rear seats can be locked using the
master key to prevent unauthorized ac-
cess.
WARNING
IWhen returning the seatbacks to the
upright position, be certain that they
are completely secured in the latched
position. If they are not completely
secured in the right position, passen-
gers may be injured in an accident or
sudden stop.
INever allow anyone to ride in the
luggage area or on the rear seat when
it is in the fold-down position. Use of
these areas by passengers without
proper restraint can be extremely
dangerous in an accident or sudden
stop.
IProperly secure all cargo to help pre-
vent it from sliding or shifting. Do not
place cargo higher than the seat-
backs. In a sudden stop or collision,
unsecured cargo could cause per-
sonal injury.
SPA0467
SSS0180Seats, restraints and supplemental air bag systems
1-5
Z
02.7.12/A33-D/V5.0
X
Page 11 of 247

IClosely supervise children when they
are around cars to prevent them from
playing and becoming locked in the
trunk where they could be seriously
injured. Keep the car locked with the
rear seatback securely latched when
not in use, and prevent children's
access to car keys.
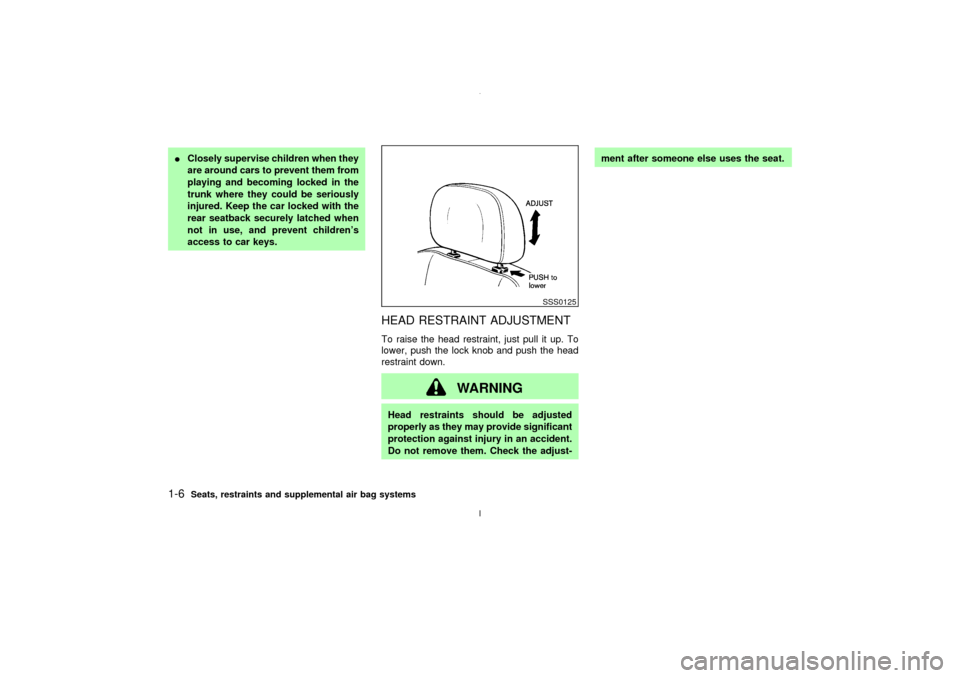
HEAD RESTRAINT ADJUSTMENTTo raise the head restraint, just pull it up. To
lower, push the lock knob and push the head
restraint down.
WARNING
Head restraints should be adjusted
properly as they may provide significant
protection against injury in an accident.
Do not remove them. Check the adjust-ment after someone else uses the seat.
SSS0125
1-6
Seats, restraints and supplemental air bag systems
Z
02.7.12/A33-D/V5.0
X
Page 33 of 247

Vehicle Safety Standard 213 or Canadian
Motor Vehicle Safety Standard 213.
Icheck the child restraint in your vehicle to
be sure it is compatible with the vehicle's
seat and seat belt system.
Iif the child restraint is compatible with your
vehicle, place your child in the child re-
straint and check the various adjustments
to be sure the child restraint is compatible
with your child. Always follow all recom-
mended procedures.
All US states and Canadian provinces re-
quire that infants and small children be
restrained in approved child restraints at
all times while the vehicle is being oper-
ated.
WARNING
IImproper use of a child restraint can
result in increased injuries for both
the infant or child and other occu-
pants in the vehicle.
IFollow all of the child restraint manu-
facturer's instructions for installation
and use. When purchasing a childrestraint, be sure to select one which
will fit your child and vehicle. It may
not be possible to properly install
some types of child restraints in your
vehicle.
IIf the child restraint is not anchored
properly, the risk of a child being
injured in a collision or a sudden stop
greatly increases.
IAdjustable seatbacks should be posi-
tioned to fit the child restraint, but as
upright as possible.
IAfter attaching the child restraint,
test it before you place the child in it.
Tilt it from side to side. Try to tug it
forward and check to see if the belt
holds the restraint in place. If the
restraint is not secure, tighten the
belt as necessary, or put the restraint
in another seat and test it again.
IFor a front facing child restraint,
check to make sure the shoulder belt
does not go in front of the child's face
or neck. If it does, put the shoulder
belt behind the child restraint. If youmust install a front facing child re-
straint in the front seat, see instruc-
tions later in this section.
IWhen your child restraint is not in
use, store it in the trunk or keep it
secured with a seat belt to prevent it
from being thrown around in case of
a sudden stop or accident.
CAUTION
Remember that a child restraint left in a
closed vehicle can become very hot.
Check the seating surface and buckles
before placing your child in the child
restraint.
1-28
Seats, restraints and supplemental air bag systems
Z
02.7.12/A33-D/V5.0
X
Page 46 of 247

Vanity mirror light (if so equipped) .......................... 2-36
Trunk light ............................................................... 2-36
HomeLink
Universal Transceiver
(if so equipped) ....................................................... 2-37
Programming HomeLink
................................... 2-37
Programming HomeLinkfor Canadian
customers ........................................................... 2-39Operating the HomeLink
Universal
Transceiver ......................................................... 2-39
Programming trouble diagnosis.......................... 2-39
Clearing the programmed information................ 2-39
Reprogramming a single HomeLink
button...... 2-40
If your vehicle is stolen ...................................... 2-40
Z
02.7.12/A33-D/V5.0
X
Page 54 of 247

or
Anti-lock brake warning light
Low washer fluid warning light
High beam indicator light (Blue)
A/T check warning light (A/T models)
Seat belt warning light
Malfunction indicator lamp (MIL)
or
Brake warning light
Stop/tail warning light
Slip indicator light
Charge warning light
Supplemental air bag warning light
Traction control system indicator light
Door open warning light
Trunk lid open warning light
Turn signal/hazard indicator lights
Engine oil pressure warning light
Cruise main switch indicator light
Low fuel warning light
Cruise set indicator light
CHECKING BULBSApply the parking brake and turn the ignition
key to ON without starting the engine. The
following lights will come on:
,
or
,
,
The following lights come on briefly and then
go off:
,
or
,
,
,
If any light fails to come on, it may indicate a
burned-out bulb or an open circuit in the elec-trical system. Have the system repaired
promptly.
WARNING LIGHTS
or
Anti-lock brake
warning light
After turning the ignition key to the ON posi-
tion, the light will illuminate. The light will turn
off after about 2 seconds if the system is
operational.
If the light comes on while the engine isrunning, it may indicate that the anti-lock brake
system is not functioning properly. Have the
system checked by your NISSAN dealer.
If an abnormality occurs in the system, the
anti-lock function will cease but the ordinary
brakes will continue to operate normally.
If the light comes on while you are driving,
contact your NISSAN dealer for repair.
WARNING/INDICATOR LIGHTS
AND AUDIBLE REMINDERS
Instruments and controls
2-9
Z
02.7.12/A33-D/V5.0
X
Page 57 of 247

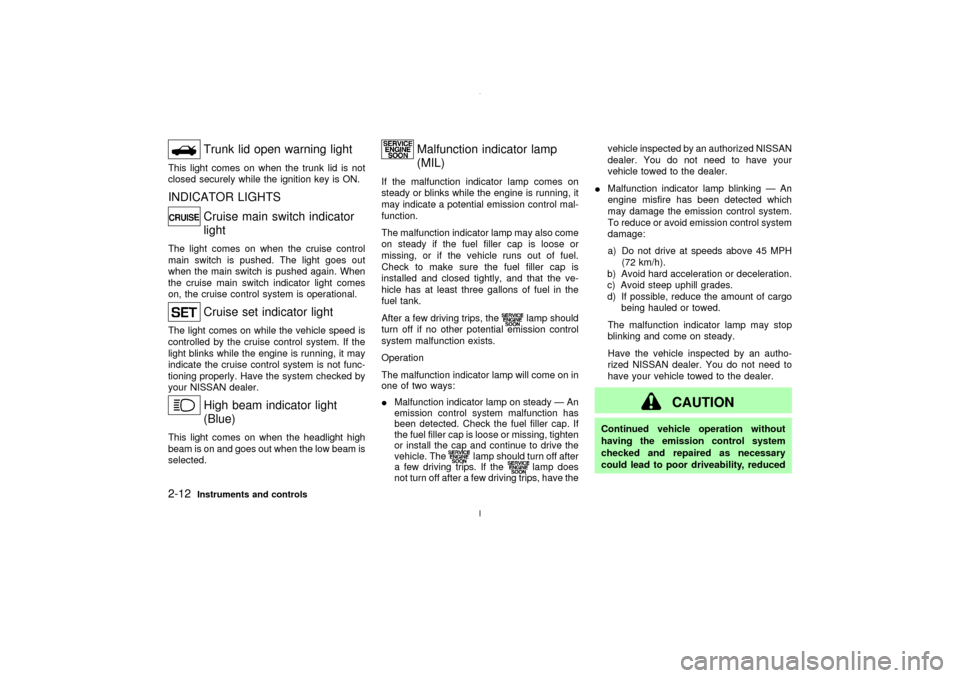
Trunk lid open warning light
This light comes on when the trunk lid is not
closed securely while the ignition key is ON.INDICATOR LIGHTS
Cruise main switch indicator
light
The light comes on when the cruise control
main switch is pushed. The light goes out
when the main switch is pushed again. When
the cruise main switch indicator light comes
on, the cruise control system is operational.
Cruise set indicator light
The light comes on while the vehicle speed is
controlled by the cruise control system. If the
light blinks while the engine is running, it may
indicate the cruise control system is not func-
tioning properly. Have the system checked by
your NISSAN dealer.
High beam indicator light
(Blue)
This light comes on when the headlight high
beam is on and goes out when the low beam is
selected.
Malfunction indicator lamp
(MIL)
If the malfunction indicator lamp comes on
steady or blinks while the engine is running, it
may indicate a potential emission control mal-
function.
The malfunction indicator lamp may also come
on steady if the fuel filler cap is loose or
missing, or if the vehicle runs out of fuel.
Check to make sure the fuel filler cap is
installed and closed tightly, and that the ve-
hicle has at least three gallons of fuel in the
fuel tank.
After a few driving trips, the
lamp should
turn off if no other potential emission control
system malfunction exists.
Operation
The malfunction indicator lamp will come on in
one of two ways:
IMalfunction indicator lamp on steady Ð An
emission control system malfunction has
been detected. Check the fuel filler cap. If
the fuel filler cap is loose or missing, tighten
or install the cap and continue to drive the
vehicle. The
lamp should turn off after
a few driving trips. If the
lamp does
not turn off after a few driving trips, have thevehicle inspected by an authorized NISSAN
dealer. You do not need to have your
vehicle towed to the dealer.
IMalfunction indicator lamp blinking Ð An
engine misfire has been detected which
may damage the emission control system.
To reduce or avoid emission control system
damage:
a) Do not drive at speeds above 45 MPH
(72 km/h).
b) Avoid hard acceleration or deceleration.
c) Avoid steep uphill grades.
d) If possible, reduce the amount of cargo
being hauled or towed.
The malfunction indicator lamp may stop
blinking and come on steady.
Have the vehicle inspected by an autho-
rized NISSAN dealer. You do not need to
have your vehicle towed to the dealer.
CAUTION
Continued vehicle operation without
having the emission control system
checked and repaired as necessary
could lead to poor driveability, reduced
2-12
Instruments and controls
Z
02.7.12/A33-D/V5.0
X
Page 59 of 247

it will make a high pitched scraping sound
when the vehicle is in motion whether or not
the brake pedal is depressed. Have the brakes
checked as soon as possible if the warning
sound is heard.
Your vehicle has two types of security sys-
tems, as follows:
IVehicle Security System
INissan Vehicle Immobilizer System
The security condition will be shown by the
security indicator light.
VEHICLE SECURITY SYSTEMThe vehicle security system provides visual
and audio alarm signals if parts of the vehicle
are disturbed.
How to activate the vehicle security
system1. Close all windows.
The system can be activated even if the
windows are open.
2. Remove the key from the ignition switch.
3. Close and lock all doors, hood and trunk lid.
Lock all doors by pressing the LOCK button
on the keyfob. When using the keyfob, the
hazard indicators flash twice to indicate all
doors are locked.
4. Confirm that the SECURITY indicator light
IC0005
SIC1228
SECURITY SYSTEMS
2-14
Instruments and controls
Z
02.7.12/A33-D/V5.0
X
Page 60 of 247

comes on. The SECURITY indicator light
glows for about 30 seconds and then blinks.
The system is now activated. If, during this
30 second time period, the door is unlocked
by the key or the keyfob, or the ignition key
is turned to ACC or ON, the system will not
activate.
IIf the key is turned slowly toward the
front of the vehicle when locking the
door, the system may not activate. If the
key is returned beyond the vertical po-
sition toward the rear of the vehicle to
remove the key, the system may be
deactivated. If the indicator light fails to
glow for 30 seconds, unlock the door
once and lock it again.
IEven when the driver and/or passengers
are in the vehicle, the system will acti-
vate with all doors, hood and trunk lid
locked and ignition key off. Turn the
ignition key to ACC to turn the system
off.
Vehicle security system operationThe security system will give the following
alarm:
IThe headlights blink and the horn sounds
intermittently.
IThe alarm automatically turns off after ap-proximately 1 minute. However, the alarm
reactivates if the vehicle is tampered with
again. The alarm can be shut off by unlock-
ing a door or trunk lid with the key, or by
pressing the UNLOCK button on the key-
fob.
The alarm is activated by:
IOpening the door without using the key or
keyfob.
IOpening the trunk lid without using the key
or keyfob.
IOpening the hood.
How to stop alarmThe alarm will stop only by unlocking a door or
trunk lid with the key, or by pressing the
UNLOCK button on keyfob. The alarm will not
stop if the ignition switch is turned to ACC or
ON.
If the system does not operate as de-
scribed above, have it checked by your
NISSAN dealer.NISSAN VEHICLE IMMOBILIZER
SYSTEMThe Nissan Vehicle Immobilizer System will
not allow the engine to start without the use ofthe registered Nissan Vehicle Immobilizer Sys-
tem key.
If the engine fails to start using the registered
Nissan Vehicle Immobilizer System key, it may
be due to interference caused by another
Nissan Vehicle Immobilizer System key, an
automated toll road device or automated pay-
ment device on the key ring. Restart the en-
gine using the following procedures:
1. Leave the ignition switch in the ON position
for approximately 5 seconds.
2. Turn the ignition switch to the OFF or LOCK
position and wait approximately 10 sec-
onds.
3. Repeat step 1 and 2 again.
4. Restart the engine while holding the device
(which may have caused the interference)
separate from the registered Nissan Ve-
hicle Immobilizer System key.
If this procedure allows the engine to start,
NISSAN recommends placing the regis-
tered Nissan Vehicle Immobilizer System
key on a separate key ring to avoid inter-
ference from other devices.
Statement related to section 15 of FCC
rules for Nissan Vehicle Immobilizer Sys-
Instruments and controls
2-15
Z
02.7.12/A33-D/V5.0
X