2003 NISSAN 350Z lights
[x] Cancel search: lightsPage 62 of 227
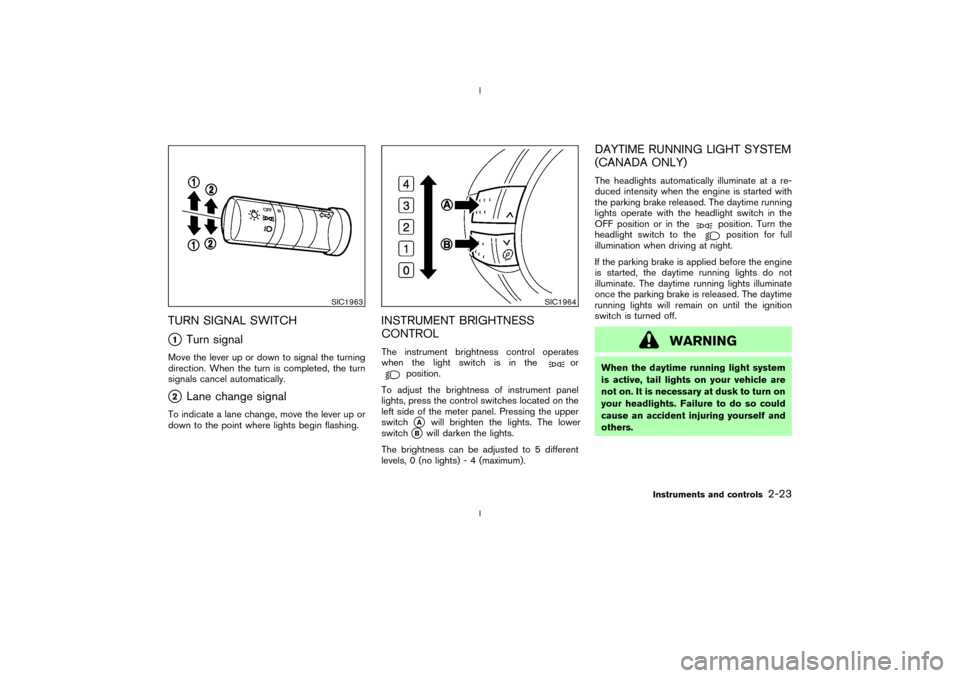
TURN SIGNAL SWITCHq1
Turn signal
Move the lever up or down to signal the turning
direction. When the turn is completed, the turn
signals cancel automatically.q2
Lane change signal
To indicate a lane change, move the lever up or
down to the point where lights begin flashing.
INSTRUMENT BRIGHTNESS
CONTROLThe instrument brightness control operates
when the light switch is in the
or
position.
To adjust the brightness of instrument panel
lights, press the control switches located on the
left side of the meter panel. Pressing the upper
switchqA
will brighten the lights. The lower
switch
qB
will darken the lights.
The brightness can be adjusted to 5 different
levels, 0 (no lights) - 4 (maximum).
DAYTIME RUNNING LIGHT SYSTEM
(CANADA ONLY)The headlights automatically illuminate at a re-
duced intensity when the engine is started with
the parking brake released. The daytime running
lights operate with the headlight switch in the
OFF position or in the
position. Turn the
headlight switch to theposition for full
illumination when driving at night.
If the parking brake is applied before the engine
is started, the daytime running lights do not
illuminate. The daytime running lights illuminate
once the parking brake is released. The daytime
running lights will remain on until the ignition
switch is turned off.
WARNING
When the daytime running light system
is active, tail lights on your vehicle are
not on. It is necessary at dusk to turn on
your headlights. Failure to do so could
cause an accident injuring yourself and
others.
SIC1963
SIC1964
Instruments and controls
2-23
Z
02.9.13/Z33-D/V5.0
X
Page 63 of 227
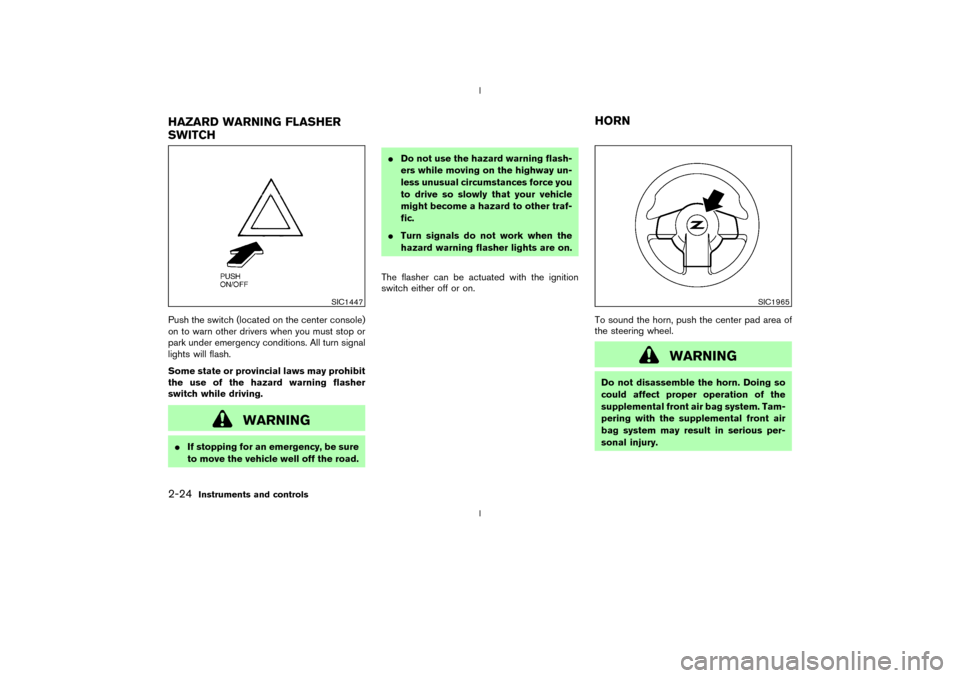
Push the switch (located on the center console)
on to warn other drivers when you must stop or
park under emergency conditions. All turn signal
lights will flash.
Some state or provincial laws may prohibit
the use of the hazard warning flasher
switch while driving.
WARNING
IIf stopping for an emergency, be sure
to move the vehicle well off the road.IDo not use the hazard warning flash-
ers while moving on the highway un-
less unusual circumstances force you
to drive so slowly that your vehicle
might become a hazard to other traf-
fic.
ITurn signals do not work when the
hazard warning flasher lights are on.
The flasher can be actuated with the ignition
switch either off or on.
To sound the horn, push the center pad area of
the steering wheel.
WARNING
Do not disassemble the horn. Doing so
could affect proper operation of the
supplemental front air bag system. Tam-
pering with the supplemental front air
bag system may result in serious per-
sonal injury.
SIC1447
SIC1965
HAZARD WARNING FLASHER
SWITCHHORN2-24
Instruments and controls
Z
02.9.13/Z33-D/V5.0
X
Page 67 of 227
draw. Do not use double adapters or
more than one electrical accessory.
IUse this power outlet with the engine
running. (If the engine is stopped,
this could result in a discharged bat-
tery.)
IAvoid using when the air conditioner,
headlights or rear window defroster
is on.
IBefore inserting or disconnecting a
plug, be sure to turn off the power
switch of electrical accessory being
used or the ACC power of the vehicle.
IPush the plug in as far as it will go. If
good contact is not made, the plug
may overheat or the internal tem-
perature fuse may blow.
IWhen not in use, be sure to close the
cap. Do not allow water to contact
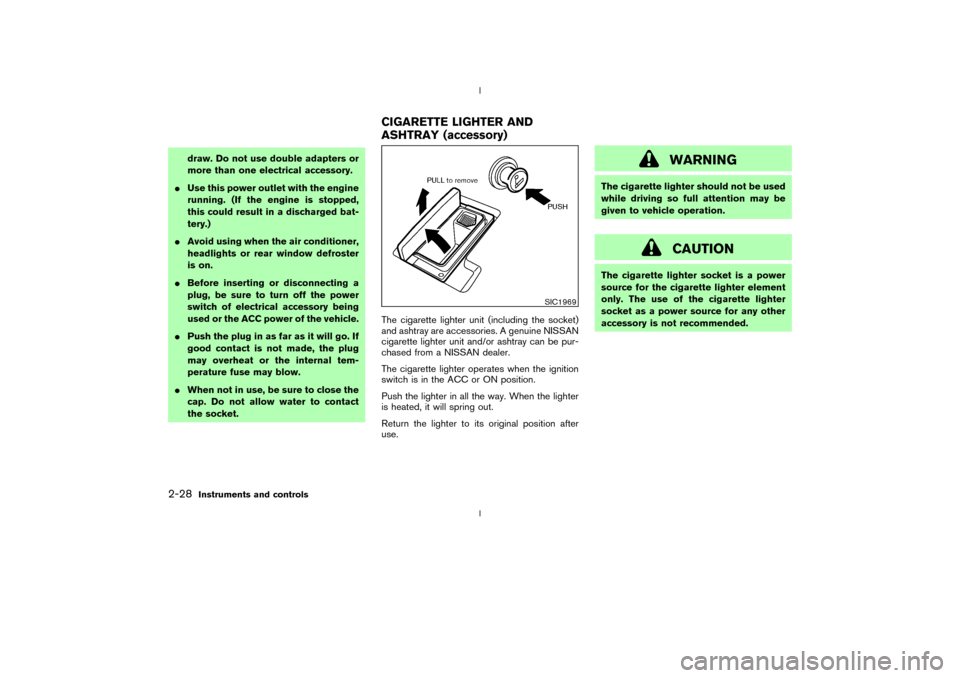
the socket.The cigarette lighter unit (including the socket)
and ashtray are accessories. A genuine NISSAN
cigarette lighter unit and/or ashtray can be pur-
chased from a NISSAN dealer.
The cigarette lighter operates when the ignition
switch is in the ACC or ON position.
Push the lighter in all the way. When the lighter
is heated, it will spring out.
Return the lighter to its original position after
use.
WARNING
The cigarette lighter should not be used
while driving so full attention may be
given to vehicle operation.
CAUTION
The cigarette lighter socket is a power
source for the cigarette lighter element
only. The use of the cigarette lighter
socket as a power source for any other
accessory is not recommended.
SIC1969
CIGARETTE LIGHTER AND
ASHTRAY (accessory)
2-28
Instruments and controls
Z
02.9.13/Z33-D/V5.0
X
Page 74 of 227
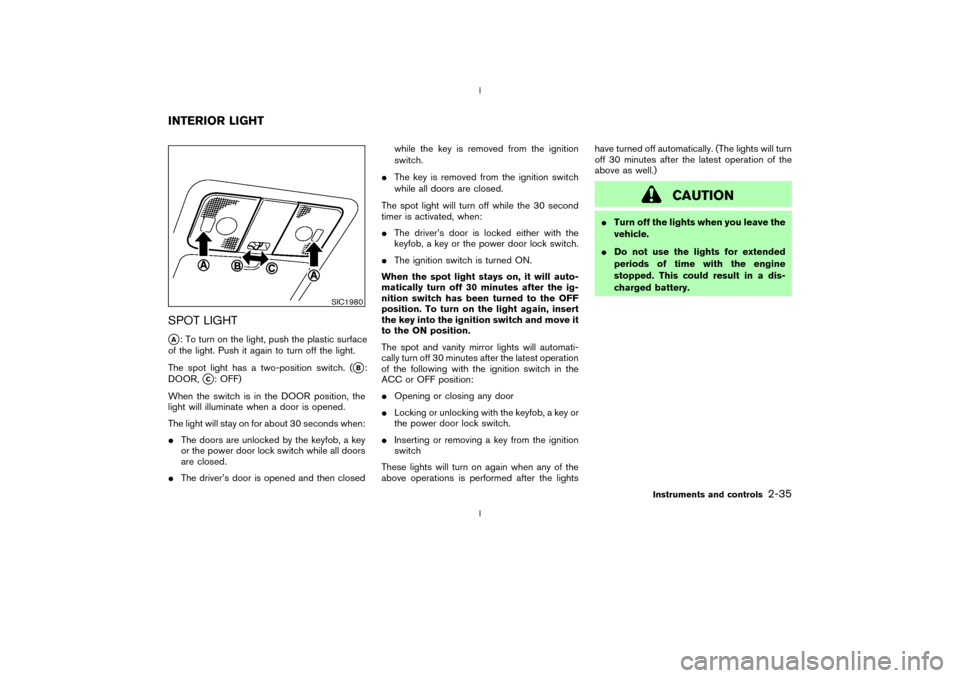
SPOT LIGHTqA: To turn on the light, push the plastic surface
of the light. Push it again to turn off the light.
The spot light has a two-position switch. (
qB:
DOOR,
qC: OFF)
When the switch is in the DOOR position, the
light will illuminate when a door is opened.
The light will stay on for about 30 seconds when:
IThe doors are unlocked by the keyfob, a key
or the power door lock switch while all doors
are closed.
IThe driver's door is opened and then closedwhile the key is removed from the ignition
switch.
IThe key is removed from the ignition switch
while all doors are closed.
The spot light will turn off while the 30 second
timer is activated, when:
IThe driver's door is locked either with the
keyfob, a key or the power door lock switch.
IThe ignition switch is turned ON.
When the spot light stays on, it will auto-
matically turn off 30 minutes after the ig-
nition switch has been turned to the OFF
position. To turn on the light again, insert
the key into the ignition switch and move it
to the ON position.
The spot and vanity mirror lights will automati-
cally turn off 30 minutes after the latest operation
of the following with the ignition switch in the
ACC or OFF position:
IOpening or closing any door
ILocking or unlocking with the keyfob, a key or
the power door lock switch.
IInserting or removing a key from the ignition
switch
These lights will turn on again when any of the
above operations is performed after the lightshave turned off automatically. (The lights will turn
off 30 minutes after the latest operation of the
above as well.)
CAUTION
ITurn off the lights when you leave the
vehicle.
IDo not use the lights for extended
periods of time with the engine
stopped. This could result in a dis-
charged battery.
SIC1980
INTERIOR LIGHT
Instruments and controls
2-35
Z
02.9.13/Z33-D/V5.0
X
Page 88 of 227
LOCK button again for 3 more seconds.Releasing the rear hatch1. Push the REAR HATCH button on the keyfob
for longer than 0.5 seconds with the key
removed from the ignition key cylinder.
2. The rear hatch opens.Using the panic alarmIf you are near your vehicle and feel threatened,
you may activate the alarm to call attention as
follows:
1. Push the PANIC button on the keyfob for
longer than 0.5 secondswith the key
removed from the ignition key cylinder.
2. The theft warning alarm and headlights will
stay on for 30 seconds.
3. The panic alarm stops when:
IIt has run for 30 seconds, or
IThe LOCK or the UNLOCK button is
pressed, or
IThe PANIC or the REAR HATCH button is
pushed on the keyfob for longer than 0.5
seconds.
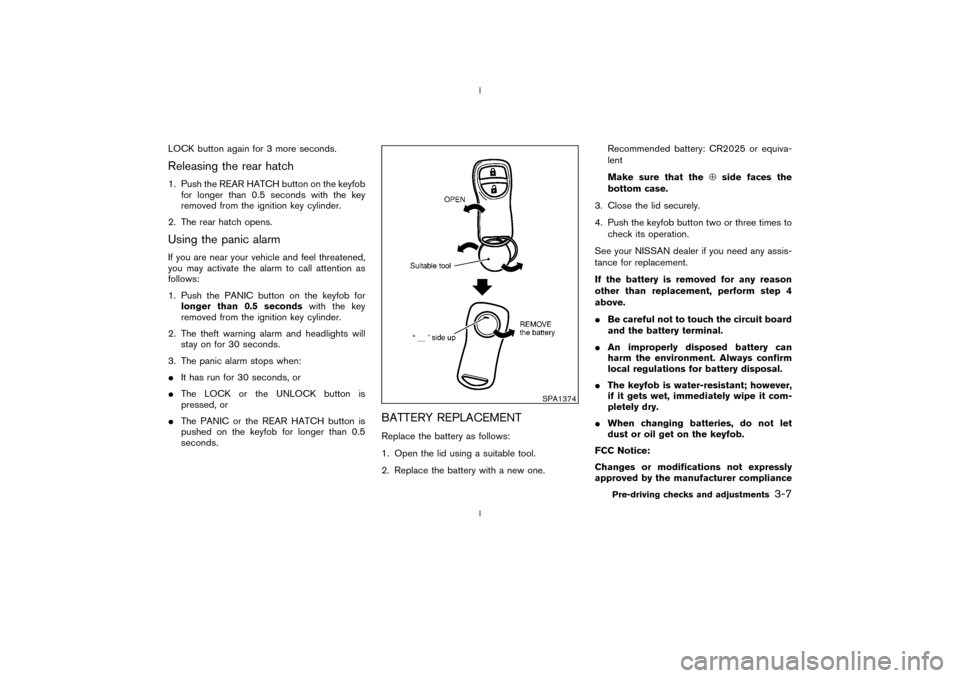
BATTERY REPLACEMENTReplace the battery as follows:
1. Open the lid using a suitable tool.
2. Replace the battery with a new one.Recommended battery: CR2025 or equiva-
lent
Make sure that theÅside faces the
bottom case.
3. Close the lid securely.
4. Push the keyfob button two or three times to
check its operation.
See your NISSAN dealer if you need any assis-
tance for replacement.
If the battery is removed for any reason
other than replacement, perform step 4
above.
IBe careful not to touch the circuit board
and the battery terminal.
IAn improperly disposed battery can
harm the environment. Always confirm
local regulations for battery disposal.
IThe keyfob is water-resistant; however,
if it gets wet, immediately wipe it com-
pletely dry.
IWhen changing batteries, do not let
dust or oil get on the keyfob.
FCC Notice:
Changes or modifications not expressly
approved by the manufacturer compliance
SPA1374
Pre-driving checks and adjustments
3-7
Z
02.9.13/Z33-D/V5.0
X
Page 90 of 227
WARNING
Do not drive with the rear hatch open.
This could allow dangerous exhaust
gases to be drawn into the vehicle. See
ªPrecautions when starting and drivingº
in the ª5. Starting and drivingº section
for exhaust gas.
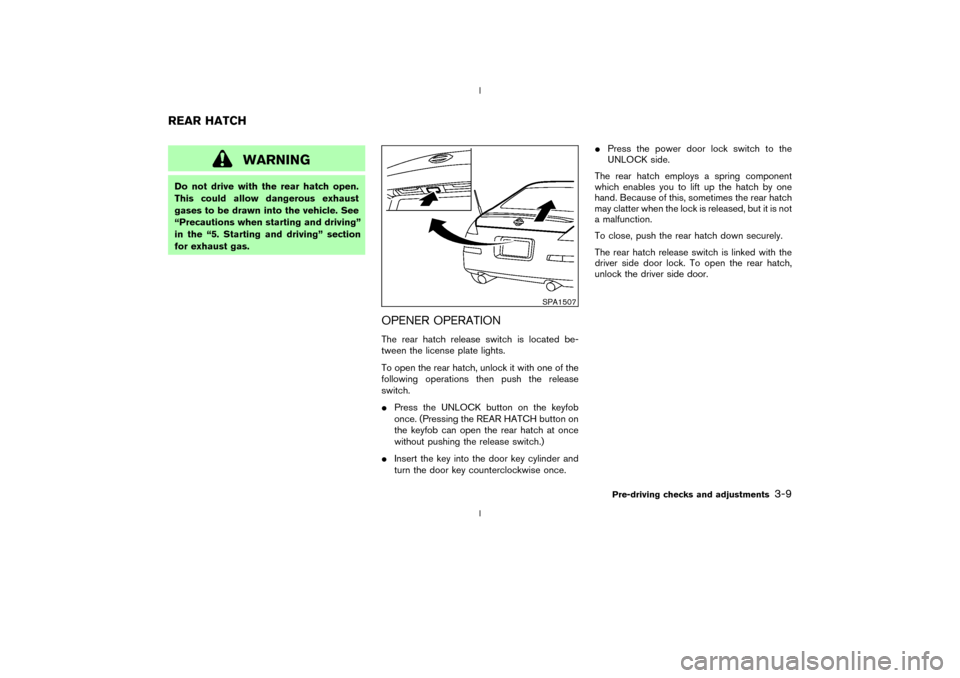
OPENER OPERATIONThe rear hatch release switch is located be-
tween the license plate lights.
To open the rear hatch, unlock it with one of the
following operations then push the release
switch.
IPress the UNLOCK button on the keyfob
once. (Pressing the REAR HATCH button on
the keyfob can open the rear hatch at once
without pushing the release switch.)
IInsert the key into the door key cylinder and
turn the door key counterclockwise once.IPress the power door lock switch to the
UNLOCK side.
The rear hatch employs a spring component
which enables you to lift up the hatch by one
hand. Because of this, sometimes the rear hatch
may clatter when the lock is released, but it is not
a malfunction.
To close, push the rear hatch down securely.
The rear hatch release switch is linked with the
driver side door lock. To open the rear hatch,
unlock the driver side door.
SPA1507
REAR HATCH
Pre-driving checks and adjustments
3-9
Z
02.9.13/Z33-D/V5.0
X
Page 94 of 227
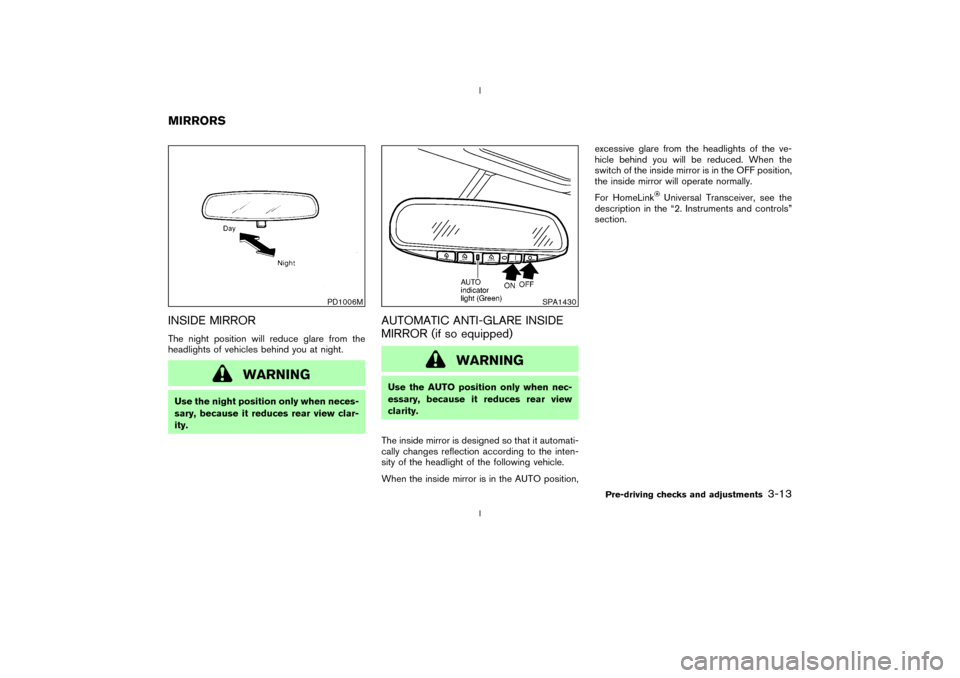
INSIDE MIRRORThe night position will reduce glare from the
headlights of vehicles behind you at night.
WARNING
Use the night position only when neces-
sary, because it reduces rear view clar-
ity.
AUTOMATIC ANTI-GLARE INSIDE
MIRROR (if so equipped)
WARNING
Use the AUTO position only when nec-
essary, because it reduces rear view
clarity.
The inside mirror is designed so that it automati-
cally changes reflection according to the inten-
sity of the headlight of the following vehicle.
When the inside mirror is in the AUTO position,excessive glare from the headlights of the ve-
hicle behind you will be reduced. When the
switch of the inside mirror is in the OFF position,
the inside mirror will operate normally.
For HomeLink
Universal Transceiver, see the
description in the ª2. Instruments and controlsº
section.
PD1006M
SPA1430
MIRRORS
Pre-driving checks and adjustments
3-13
Z
02.9.13/Z33-D/V5.0
X
Page 101 of 227

AUTOMATIC OPERATION
Cooling and/or dehumidified heating
(AUTO)This mode may be normally used all year round
as the system automatically works to keep a
constant temperature. Air flow distribution and
fan speed are also controlled automatically.
1. Turn the fan control dial and air flow control
dial to the AUTO position.
2. Turn the temperature control dial to set the
desired temperature.
IAdjust the temperature to about 75ÉF (24ÉC)
for normal operation.
IThe temperature of the passenger compart-
ment will be maintained automatically. Air
flow distribution and fan speed are also con-
trolled automatically.Heating (AUTO; A/C off)The air conditioner does not activate. When you
need to heat only, use this mode.
1. Turn the fan control dial and air flow control
dial to the AUTO position.
2. Push the A/C button to turn off the air
conditioner. (The A/C button indicator light
will turn off.)3. Turn the temperature control dial to set the
desired temperature.
IThe temperature of the passenger compart-
ment will be maintained automatically. Air
flow distribution and fan speed are also con-
trolled automatically.
IDo not set the temperature lower than the
outside air temperature. Otherwise the sys-
tem may not work properly.
INot recommended if windows fog up.
Dehumidified defrosting or defogging1. Turn the fan control dial to the desired posi-
tion.
2. Turn the air flow control dial to the DEF
position.
3. Turn the temperature control dial to set the
desired temperature.
ITo quickly remove ice from the outside of the
windows, turn the fan control dial to the
maximum position.
IAs soon as possible after the windshield is
clean, turn the air flow control dial to the
AUTO position to return to the auto mode.
IWhen the air flow control dial is turned to theor
position, the air conditioner
will automatically be turned on at outsidetemperatures above 23ÉF (þ5ÉC) to defog
the windshield, and the air recirculate mode
will automatically be turned off.
Outside air is drawn into the passenger
compartment to improve the defogging per-
formance.
MANUAL OPERATION
Fan speed controlTurn the fan control dial
to manually con-
trol the fan speed.
Turn the dial to the AUTO position to return to
automatic control of the fan speed.
Air recirculation/Fresh airEach time the air intake button is pushed, the
indicator light on the button will alternate
(Air recirculation) and
(Fresh air).
When the
indicator light is on, the interior
air is recirculated. (When the air recirculation
mode is selected with the A/C indicator off while
the fan control dial is in the AUTO position, the
air conditioner will turn on.)
When theindicator light is on, the outside
air is drawn into the passenger compartment.
IWhen the air intake button is pushed for
longer than 1.5 seconds, both indicator lights
4-4
Heater, air conditioner and audio systems
Z
02.9.13/Z33-D/V5.0
X