Page 243 of 360

243 Practical hints
What to do if …
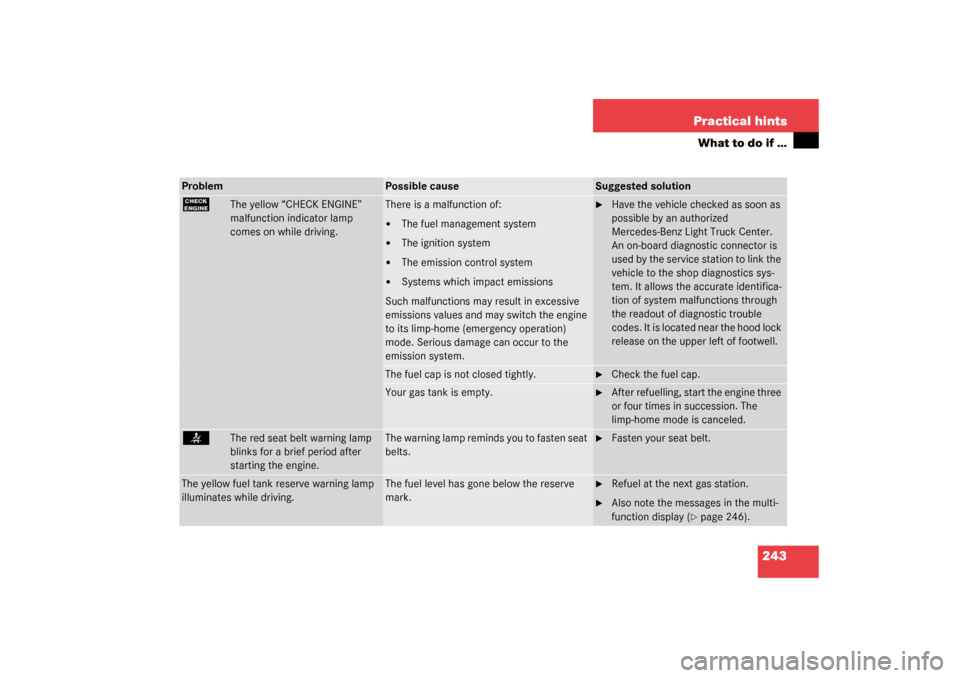
Problem
Possible cause
Suggested solution
?
The yellow “CHECK ENGINE”
malfunction indicator lamp
comes on while driving.
There is a malfunction of:�
The fuel management system
�
The ignition system
�
The emission control system
�
Systems which impact emissions
Such malfunctions may result in excessive
emissions values and may switch the engine
to its limp-home (emergency operation)
mode. Serious damage can occur to the
emission system.
�
Have the vehicle checked as soon as
possible by an authorized
Mercedes-Benz Light Truck Center.
An on-board diagnostic connector is
used by the service station to link the
vehicle to the shop diagnostics sys-
tem. It allows the accurate identifica-
tion of system malfunctions through
the readout of diagnostic trouble
c o d e s . I t i s l o c a t e d n e a r t h e h o o d l o c k
release on the upper left of footwell.
The fuel cap is not closed tightly.
�
Check the fuel cap.
Your gas tank is empty.
�
After refuelling, start the engine three
or four times in succession. The
limp-home mode is canceled.
<
The red seat belt warning lamp
blinks for a brief period after
starting the engine.
The warning lamp reminds you to fasten seat
belts.
�
Fasten your seat belt.
The yellow fuel tank reserve warning lamp
illuminates while driving.
The fuel level has gone below the reserve
mark.
�
Refuel at the next gas station.
�
Also note the messages in the multi-
function display (
�page 246).
Page 244 of 360
244 Practical hintsWhat to do if …Lamp in center consoleProblem
Possible cause
Suggested solution
The yellow fuel tank reserve warning lamp is
blinking.
The fuel cap is not closed tight.
�
Check the fuel cap.
Problem
Possible cause
Suggested solution
7
The indicator lamp lights up.
A BabySmart
TM child seat is installed on the
front passenger seat. Therefore the front
passenger airbag is switched off.
The system is malfunctioning when there is
no BabySmart
TM child seat installed on the
front passenger seat.
�
Have the system checked as soon as
possible by an authorized
Mercedes-Benz Light Truck Center.
Page 263 of 360

263 Practical hints
What to do if …
.
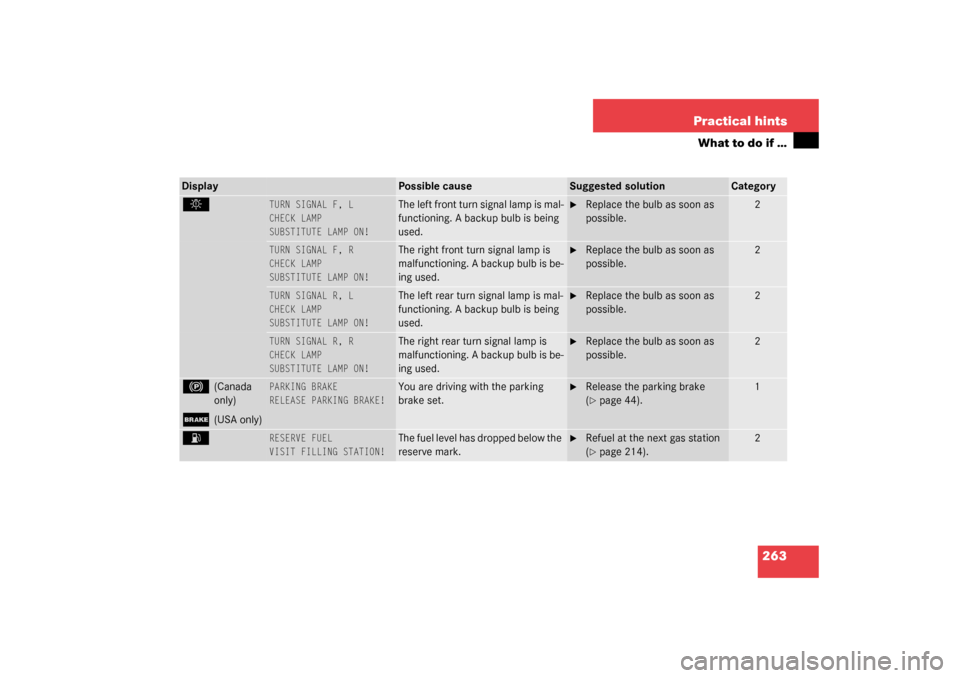
TURN SIGNAL F, L
CHECK LAMP
SUBSTITUTE LAMP ON!
The left front turn signal lamp is mal-
functioning. A backup bulb is being
used.
�
Replace the bulb as soon as
possible.
2
TURN SIGNAL F, R
CHECK LAMP
SUBSTITUTE LAMP ON!
The right front turn signal lamp is
malfunctioning. A backup bulb is be-
ing used.
�
Replace the bulb as soon as
possible.
2
TURN SIGNAL R, L
CHECK LAMP
SUBSTITUTE LAMP ON!
The left rear turn signal lamp is mal-
functioning. A backup bulb is being
used.
�
Replace the bulb as soon as
possible.
2
TURN SIGNAL R, R
CHECK LAMP
SUBSTITUTE LAMP ON!
The right rear turn signal lamp is
malfunctioning. A backup bulb is be-
ing used.
�
Replace the bulb as soon as
possible.
2
!
(Canada
only)
;
(USA only)
PARKING BRAKE
RELEASE PARKING BRAKE!
You are driving with the parking
brake set.
�
Release the parking brake
(�page 44).
1
A
RESERVE FUEL
VISIT FILLING STATION!
The fuel level has dropped below the
reserve mark.
�
Refuel at the next gas station
(�page 214).
2
Display
Possible cause
Suggested solution
Category
Page 274 of 360
274 Practical hintsUnlocking/locking in an emergency�
Remove mechanical key1
(�page 272).
�
Insert the mechanical key in side open-
ing and push briefly gray slide.
Battery compartment2 is unlatched.
�
Pull battery compartment2 out of the
key housing in direction of arrow.
�
Remove the batteries.
3Battery
4Contact spring
�
Using a lint-free cloth, insert new bat-
teries under the contact spring with the
plus (+) side facing up.
�
Return battery compartment into hous-
ing until locked in place.
�
Slide mechanical key1 back into the
SmartKey.
Fuel filler flap
The emergency release is in the cargo area
behind the rear panel trim.
1Edge protection
2Rear panel trim�
Open the tailgate.
�
Remove edge protection1 from the
door pillar.
�
Remove rear panel trim2.
iWhen inserting the batteries, make
sure that they are clean and free of lint.
��
Page 275 of 360
275 Practical hints
Unlocking/locking in an emergency
3Release strap�
Pull strap 3 upwards.
The fuel filler flap is unlocked and can
be opened. Manually unlocking the transmission
selector lever
In the case of power failure the transmis-
sion selector lever can be manually un-
locked, e.g. to tow the vehicle.
1Pin
�
Insert a pin1, e.g. ball point pen, into
the covered opening.
�
Perform the following two steps simul-
taneously:�
Push pin1 down.
�
Move selector lever from
positionP.
�
Remove pin1.iAfter removal of the pin from the open-
ing, the cover will not close fully. Only
after moving the selector lever to posi-
tions D+ and D- does the cover return
to its closed position.
The selector lever is locked again when
moving it to positionP.
Page 294 of 360

294 Practical hintsFlat tireLowering the vehicle�
Using the pump lever, open the lower-
ing screw on the jack approximately
one turn (
�page 292).
The vehicle is resting fully on its own
weight.
�
Remove the jack.
After use, disassemble pump handle
(�page 292) and store jack in the des-
ignated storage compartment
(�page 269).
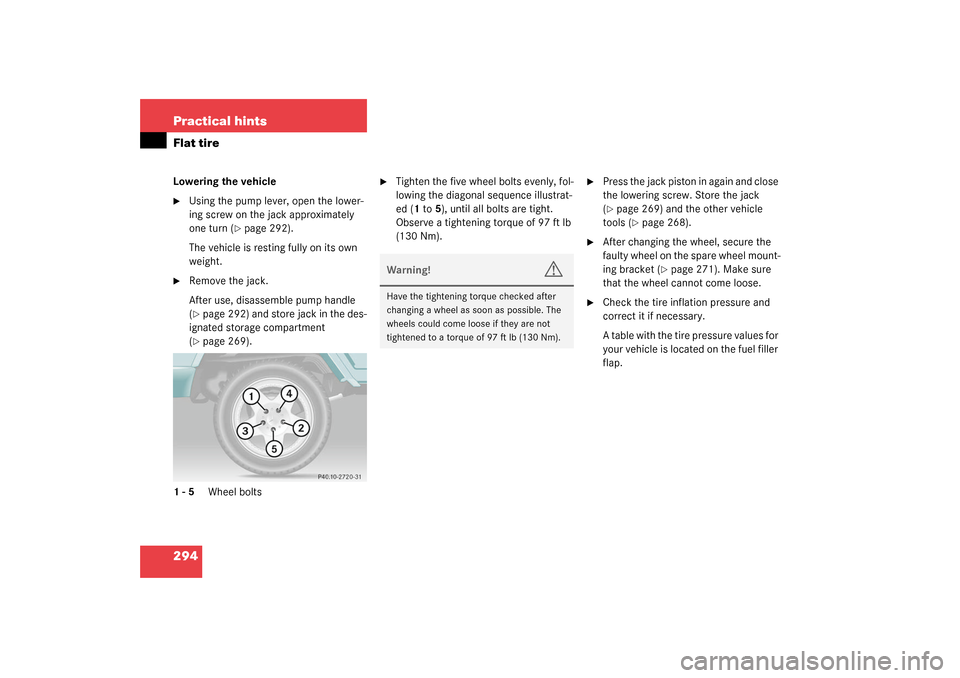
1-5 Wheel bolts
�
Tighten the five wheel bolts evenly, fol-
lowing the diagonal sequence illustrat-
ed (1 to 5), until all bolts are tight.
Observe a tightening torque of 97 ft lb
(130 Nm).
�
Press the jack piston in again and close
the lowering screw. Store the jack
(�page 269) and the other vehicle
tools (
�page 268).
�
After changing the wheel, secure the
faulty wheel on the spare wheel mount-
ing bracket (
�page 271). Make sure
that the wheel cannot come loose.
�
Check the tire inflation pressure and
correct it if necessary.
A table with the tire pressure values for
your vehicle is located on the fuel filler
flap.
Warning!
G
Have the tightening torque checked after
changing a wheel as soon as possible. The
wheels could come loose if they are not
tightened to a torque of 97 ft lb (130 Nm).
Page 297 of 360

297 Practical hints
Jump starting
Jump starting
If the battery is discharged, the engine can
be started with jumper cables and the bat-
tery of another vehicle. Observe the follow-
ing:�
Jump starting should only be performed
when the engine and catalytic convert-
er are cold.
�
Do not start the engine if the battery is
frozen. Let the battery thaw out first.
�
Only use 12 V battery to jump start
your vehicle. Jump starting with a more
powerful battery could damage the ve-
hicle’s electrical system, which will not
be covered by the Mercedes-Benz Lim-
ited Warranty.
�
Use only jumper cables with sufficient
cross-section and insulated terminal
clamps.
�
Always make sure that the jumper ca-
bles are not on or near pulleys, fans, or
other parts that move when an engine
is started or running.
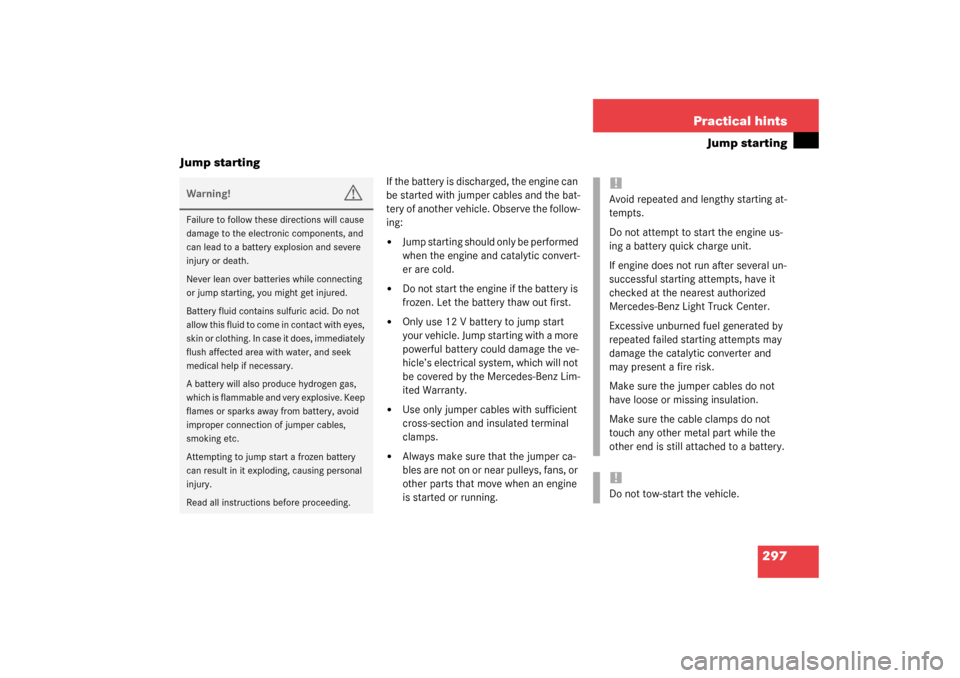
Warning!
G
Failure to follow these directions will cause
damage to the electronic components, and
can lead to a battery explosion and severe
injury or death.
Never lean over batteries while connecting
or jump starting, you might get injured.
Battery fluid contains sulfuric acid. Do not
allow this fluid to come in contact with eyes,
skin or clothing. In case it does, immediately
flush affected area with water, and seek
medical help if necessary.
A battery will also produce hydrogen gas,
which is flammable and very explosive. Keep
flames or sparks away from battery, avoid
improper connection of jumper cables,
smoking etc.
Attempting to jump start a frozen battery
can result in it exploding, causing personal
injury.
Read all instructions before proceeding.
!Avoid repeated and lengthy starting at-
tempts.
Do not attempt to start the engine us-
ing a battery quick charge unit.
If engine does not run after several un-
successful starting attempts, have it
checked at the nearest authorized
Mercedes-Benz Light Truck Center.
Excessive unburned fuel generated by
repeated failed starting attempts may
damage the catalytic converter and
may present a fire risk.
Make sure the jumper cables do not
have loose or missing insulation.
Make sure the cable clamps do not
touch any other metal part while the
other end is still attached to a battery.!Do not tow-start the vehicle.
Page 307 of 360
307 Technical data
Spare parts service
Warranty coverage
Identification labels
Layout of poly-V-belt drive
Engine
Rims and tires
Electrical system
Main dimensions, vehicle weights and ratings
Fuels, coolants, lubricants etc.
Consumer information