Page 197 of 225
189 Info Services/System settings
System settings
�
Turn the right-hand rotary/push-button
v to highlight “Settings” in the main
system settings menu and press to
confirm.
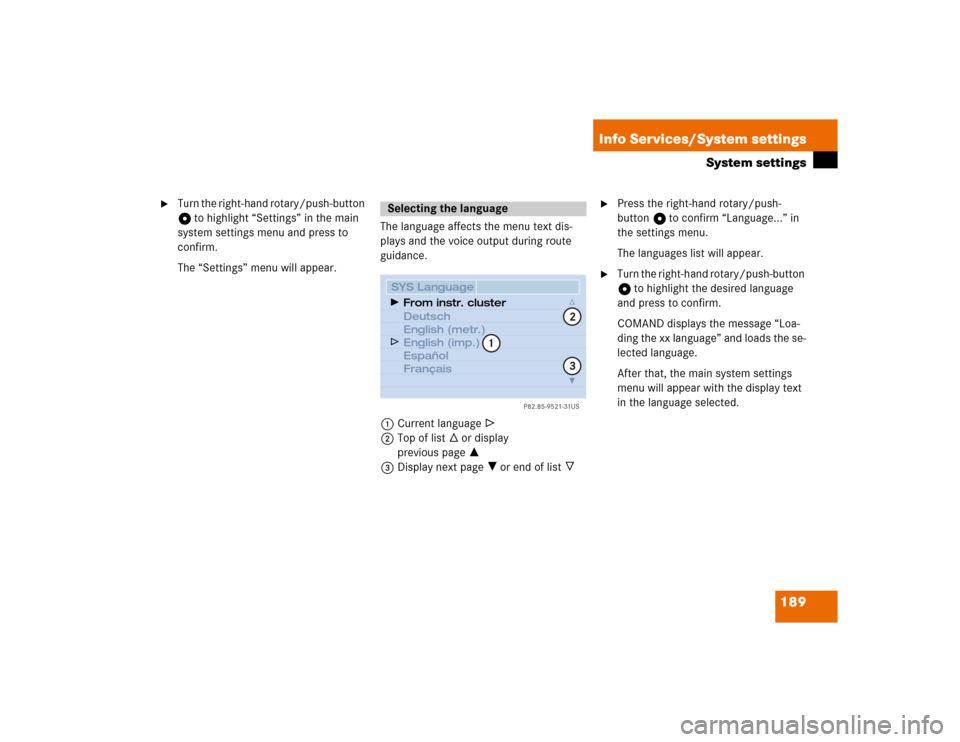
The “Settings” menu will appear.The language affects the menu text dis-
plays and the voice output during route
guidance.
1Current language R
2Top of list - or display
previous page =
3Display next page ? or end of list _
�
Press the right-hand rotary/push-
button v to confirm “Language...” in
the settings menu.
The languages list will appear.
�
Turn the right-hand rotary/push-button
v to highlight the desired language
and press to confirm.
COMAND displays the message “Loa-
ding the xx language” and loads the se-
lected language.
After that, the main system settings
menu will appear with the display text
in the language selected.
Selecting the language
P82.85-9521-31US
SYS Language
Deutsch
English (metr.)
English (imp.)
Español
FrançaisFrom instr. cluster
1
23
Page 199 of 225
 in increments of 30 minutes.
1COMAND receives")
191 Info Services/System settings
System settings
Setting the time in increments of 30 mi-
nutes
You can set the the time to any local time
(time zone) in increments of 30 minutes.
1COMAND receives GPS time
2Setting the clock (increments of 30 mi-
nutes)
3Selecting the country and the time
zone (
�page 192)
4Selecting the time format (
�page 196)
�
Turn the right-hand rotary/push-button
v to highlight “Date/Time...” in the
settings menu and press to confirm.
The menu displays the date and the
time, minutes are highlighted (black).Activating the setting mode
�
Press the right-hand rotary/push-
button v.
Setting mode is active.
Altering the time
�
Setting the clock ahead�
Turn the right-hand rotary/push-
button v to the right.
Each click will move the time 30 mi-
nutes ahead.
�
Setting the clock back�
Turn the right-hand rotary/push-
button v to the left.
Each click will move the time 30 mi-
nutes back.
P82.85-9522-31US
SYS Date/Time
Date
01.01.2002
Ti m e
01: AM59Country (Time)
Time Format
1
2
4
3
Page 200 of 225

192 Info Services/System settingsSystem settingsCanceling setting mode�
Press the right-hand rotary/push-
button v.
The minutes appear in black lettering.
Switching back to the main system set-
tings menu
�
Press
*
.
or
�
Press the right-hand rotary/push-
button v longer than 2 seconds.
You will see the new time.
Selecting the country and the time
zone
You can select among several countries. If
a country has multiple time zones, e.g.
Canada and USA, you can select the appli-
cable time zone.
COMAND will indicate this information in
the main system settings menu.
1Input line
2Activates country list
�
Turn the right-hand rotary/push-button
v to highlight “Country (Time)...” in
the settings menu and press to con-
firm.
An input menu will appear.
�
Turn the right-hand rotary/push-button
v to highlight the initial letter for the
country name and press to confirm.
The letter appears in 1.
�
Enter additional letters.
�
Press the right-hand rotary/push-
button v longer than 2 seconds.
or
�
Turn the right-hand rotary/push-button
v to highlight “Country List” and press
to confirm.
The country list appears.
P82.85-9523-31US
SYS Country (Time)BCDEFGHIJKLMNO
PQRSTUVWXYZ
_1234567890,.�:‘/ CanadaCountry List
1
2
A
Page 201 of 225
193 Info Services/System settings
System settings
Country list3Country entered previously
4Pages back for more countries
5Pages forward for more countries
�
Turn the right-hand rotary/push-button
v to highlight the desired country in
the list and press to confirm.
The time zone list appears for countries
with several time zones (e.g. Canada,
USA).Selecting time zone
�
Press the right-hand rotary/push-
button v longer than 2 seconds to
confirm the country.
The “Timezone” menu will appear sho-
wing the available time zones.
�
Turn the right-hand rotary/push-button
v to highlight the required time zone
and press to confirm.
�
Then set the automatic time conversi-
on as described next.
P82.85-9524-31US
SYS Country (Time)Canada
Chile
Colombia
Costa Rica
Cuba
Ecuador
3
45
Page 203 of 225

195 Info Services/System settings
System settings
Manually setting date and clock
You must manually set the date and clock,
if�
COMAND does not receive a GPS time
�
the clock has been disconnected from
the vehicle battery
�
the dates of the change between sum-
mer and winter time are not available
Date/time menu1Day, month, year, hours, minutes
Day is highlighted when the menu
appears�
Turn the right-hand rotary/push-button
v to highlight “Date/Time...” in the
settings menu (
�page 188) and press
to confirm.
The menu displays date and time.Setting
Activating the setting mode
�
Press the right-hand rotary/push-
button v.
Setting mode is active R.
Move the day forwards or back
�
Turn the right-hand rotary/push-button
v to the right or left.
Cancelling setting mode
�
Press the right-hand rotary/push-
button v.
Setting mode is switched off V. The
cursor moves one position to the right.
�
Repeat the operating steps to subse-
quently change month, year, hours and
minutes.
P82.85-9531-31US
SYS Date/TimeDate
01. 2002
Ti m e
10:24 AM 01.
Country (Time)
Time Format
1
Page 204 of 225

196 Info Services/System settingsSystem settingsAdopting settings�
Press the right-hand rotary/push-
button v longer than 2 seconds.
The main system settings menu will ap-
pear with the changed settings.
With the number keys
�
Enter date and time using the number
keys 0 through 9.
The cursor moves onto the next entry if
you enter a value completely, e.g. “06”
for the month.
Adopt the settings as described above.Selecting the time format
1Date display in day, month format
2Date display in month, day format
3Time display in 24-hour format
4Time display in 12-hour format
P Setting is active
Q Setting is not activeIn the “Date/Time” menu
�
Turn the right-hand rotary/push-button
v to highlight “Time Format” and
press to confirm.
The “Time Format” menu will appear.
Setting
�
Turn the right-hand rotary/push-button
v to highlight the desired entry and
press to confirm. A checkmark will ap-
pear P.
iIf you have selected an invalid setting,
the message “Invalid input” will appear.
P82.85-9526-31US
SYS Time Format
Date Display: DD.MM
Time Display: 24h
Time Display: AM/PM Date Display: MM.TT
1243
iIf the 12-hour format is selected, either
AM (a
nte m
eridiem) or PM (p
ost m
eri-
diem) will appear after the time.
Page 205 of 225
197 Info Services/System settings
System settings
Adopting settings�
Press the right-hand rotary/push-
button v longer than 2 seconds.
The main system setting menu will ap-
pear.
or
�
Press *.
The “Date/Time” menu will appear.
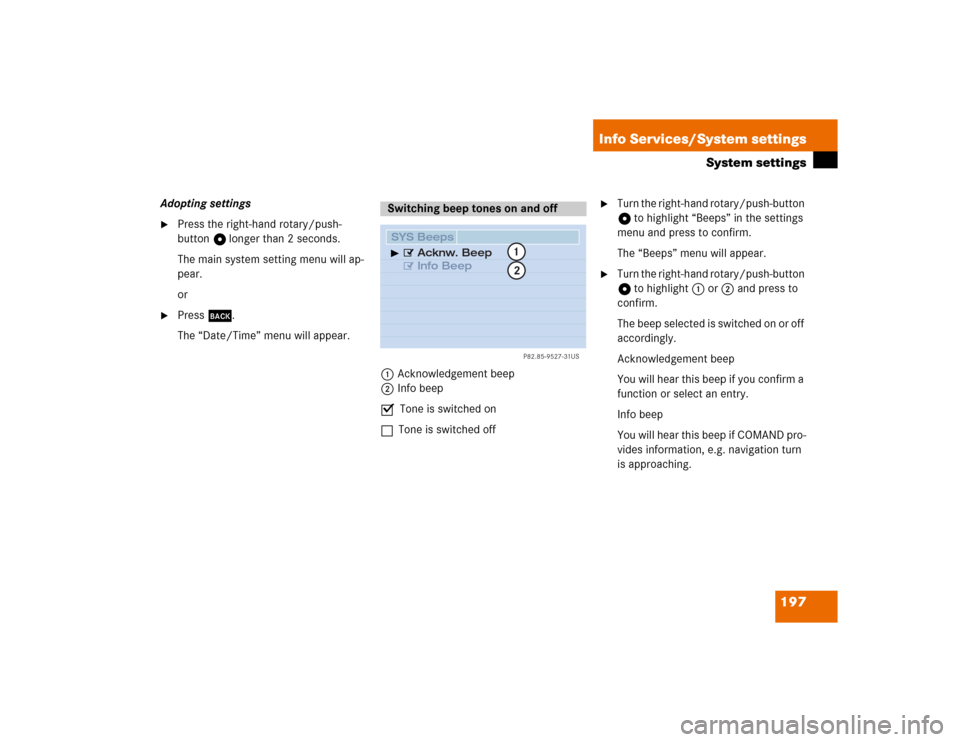
1Acknowledgement beep
2Info beep
P Tone is switched on
Q Tone is switched off
�
Turn the right-hand rotary/push-button
v to highlight “Beeps” in the settings
menu and press to confirm.
The “Beeps” menu will appear.
�
Turn the right-hand rotary/push-button
v to highlight 1 or 2 and press to
confirm.
The beep selected is switched on or off
accordingly.
Acknowledgement beep
You will hear this beep if you confirm a
function or select an entry.
Info beep
You will hear this beep if COMAND pro-
vides information, e.g. navigation turn
is approaching.
Switching beep tones on and off
P82.85-9527-31US
SYS Beeps
Acknw. Beep
Info Beep
12
Page 206 of 225

198 Info Services/System settingsSystem settings1Changes by pressing Ä
2Changes by pressing Ä and light
sensor in the roof control unit
P Setting active
Q Setting not activeIf the settings menu (
�page 188) is dis-
played
�
Turn the right-hand rotary/push-button
v to highlight “Display (day/night)...”
and press to confirm.
The “Display (Day/Night)” menu will
appear. The setting 2 is active, when
calling up the menu for the first time.
�
Turn the right-hand rotary/push-button
v to highlight the desired setting and
press to confirm.
The desired setting is active P.
Setting 2 has been selected
If the light sensor recognizes darkness or
twilight, the screen will change to night
display.Changing the display
�
Press Ä to access the following dis-
plays in succession.�
Day display
�
Night display
�
Screen off
�
and the Day display again
Setting the display dimming charac-
teristics (day and night display)
P82.85-9528-31US
SYS Change display mode
Display Button
Display Button and
light sensor
1
2
Day/Night setting via