Page 49 of 245

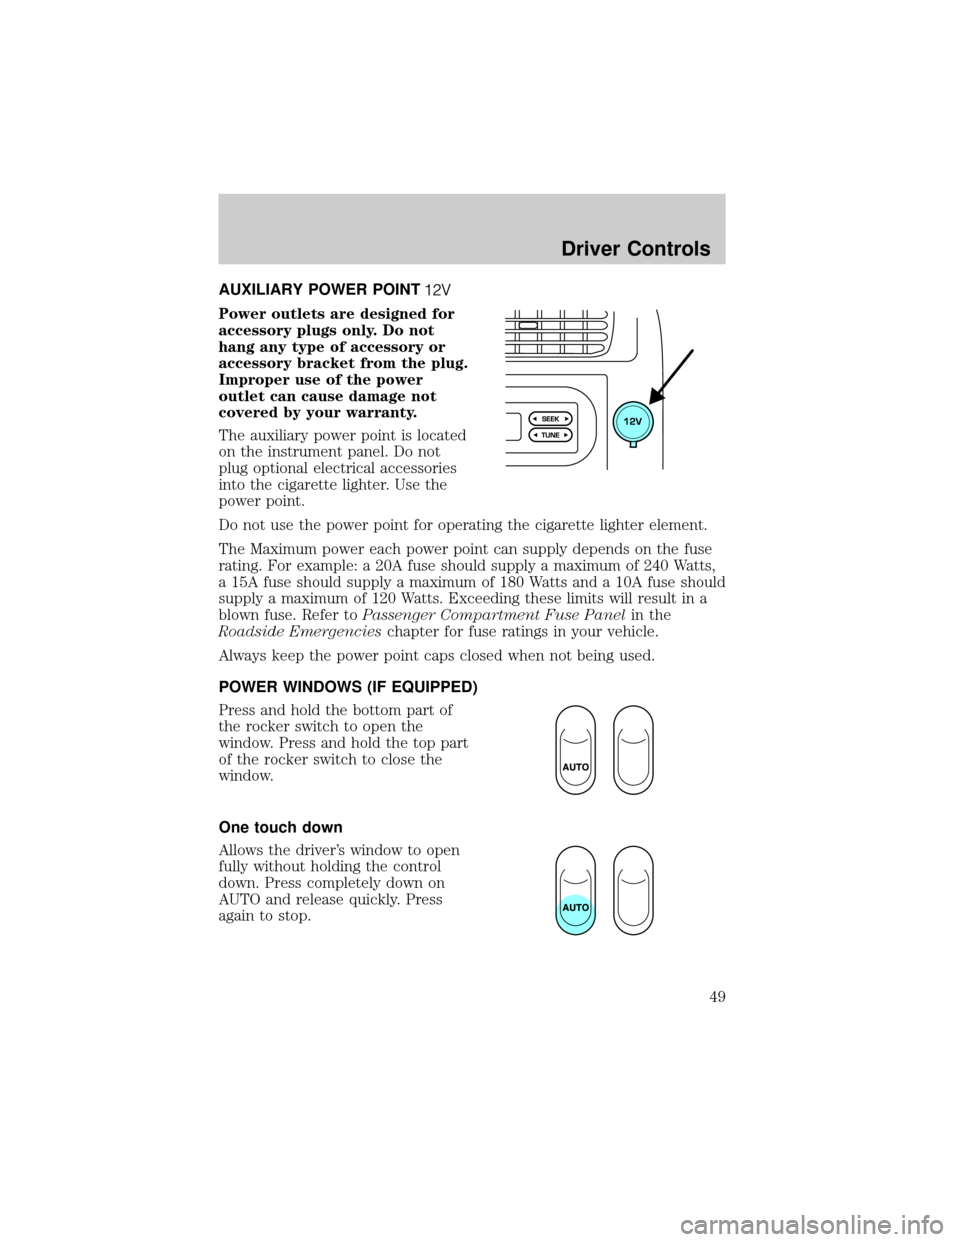
AUXILIARY POWER POINT
Power outlets are designed for
accessory plugs only. Do not
hang any type of accessory or
accessory bracket from the plug.
Improper use of the power
outlet can cause damage not
covered by your warranty.
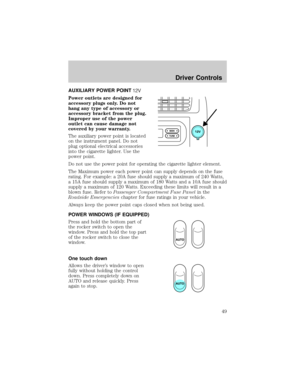
The auxiliary power point is located
on the instrument panel. Do not
plug optional electrical accessories
into the cigarette lighter. Use the
power point.
Do not use the power point for operating the cigarette lighter element.
The Maximum power each power point can supply depends on the fuse
rating. For example: a 20A fuse should supply a maximum of 240 Watts,
a 15A fuse should supply a maximum of 180 Watts and a 10A fuse should
supply a maximum of 120 Watts. Exceeding these limits will result in a
blown fuse. Refer toPassenger Compartment Fuse Panelin the
Roadside Emergencieschapter for fuse ratings in your vehicle.
Always keep the power point caps closed when not being used.
POWER WINDOWS (IF EQUIPPED)
Press and hold the bottom part of
the rocker switch to open the
window. Press and hold the top part
of the rocker switch to close the
window.
One touch down
Allows the driver's window to open
fully without holding the control
down. Press completely down on
AUTO and release quickly. Press
again to stop.
Driver Controls
49
Page 50 of 245

AUTOMATIC DIMMING REAR VIEW MIRRORS (IF EQUIPPED)
The electronic day/night mirror will change from the normal state to the
non-glare state when bright lights (glare) reach the inside rear view
mirror. When the inside rear view mirror detects bright light from behind
the vehicle, the inside rear view mirror will automatically adjust (darken)
to minimize glare.
Do not block the sensor on the backside of the inside rear view mirror
since this may impair proper system performance.
Press the left button on the mirror
to turn the auto dimming ON or
OFF. The green indicator light left
of the display will illuminate when
this feature is ON.
The mirror will automatically return
to the normal state whenever the
vehicle is placed in R
(Reverse)(when the mirror is on) to
ensure a bright clear view when
backing up.
COMPASS/TEMPERATURE EC MIRROR (IF EQUIPPED)
The compass reading may be affected when you drive near large
buildings, bridges, power lines and powerful broadcast antennas.
Magnetic or metallic objects placed in, on or near the vehicle may also
affect compass accuracy.
Usually, when something affects the compass readings, the compass will
correct itself after a few days of operating your vehicle in normal
conditions. If the compass still appears to be inaccurate, a manual
calibration may be necessary. Refer toCompass calibration
adjustment.
Most geographic areas (zones) have a magnetic north compass point that
varies slightly from the northerly direction on maps. This variation is four
degrees between adjacent zones and will become noticeable as the
vehicle crosses multiple zones. A correct zone setting will eliminate this
error. Refer toCompass zone adjustment.
Driver Controls
50
Page 51 of 245
Outside air temperature
Display operation of the mirror with
the compass feature:
²Press the right button to toggle
the display between the compass
direction and no display.
Display operation of mirror with
temperature and compass feature:
²Press the right button once to
display temperature ÉF and
compass.
²Press the right button twice to display temperature ÉC and compass.
²Press the right button three times to turn the display OFF.
WARNING: The outside temperature indicator is not designed
to serve as an ICE warning device and is therefore unsuitable
for that purpose. Indicated temperatures just above the
freezing point do not guarantee that the road surface is free of
ice.
Compass zone adjustment
1. Determine which compass zone
you are in by referring to the
zone map.
2. Turn ignition to the ON
position.
1 2 3
4
5
6 7 8 9 101112 13 14 15
Driver Controls
51
Page 52 of 245

3. To change the zone setting,
push and hold the right button
until ZONE appears in the
display.
4. Press the right button
repeatedly until desired
compass zone number is
displayed. The display will
change back to the compass
direction after 3 seconds when
the button is not activated.
Compass calibration adjustment
The compass calibrates itself under normal driving conditions. There is
not a need for manual compass calibration. If calibration is still desired,
follow these instructions:
1. Start the vehicle.
2. For optimum calibration, turn off all electrical accessories and make
sure that all vehicle doors are shut.
3. Perform this adjustment in an open area free from steel structures
and high voltage lines.
4. Press and hold the left button
for approximately 3 seconds
until CAL appears in the display.
Release the left button to enter
the calibration mode.
5. Drive the vehicle slowly (less
than 5 km/h [3 mph] in a circle
until CAL indicator disappears
in the display (about two or
three circles).
6. The compass is now calibrated.
Driver Controls
52
Page 53 of 245
POWER MIRROR CONTROL (IF EQUIPPED)
To adjust your mirrors:
1. Select
to adjust the left
mirror or
to adjust the right
mirror.
2. Move the control in the
direction you wish to tilt the
mirror.
3. Return to the center position to
lock mirrors in place.
SPEED CONTROL (IF EQUIPPED)
With speed control set, you can
maintain a speed of 48 km/h (30 mph)
or more without keeping your foot
on the accelerator pedal. Speed
control does not work at speeds
below 48 km/h (30 mph).
WARNING: Do not use the
speed control in heavy traffic
or on roads that are winding,
slippery, or unpaved. You may
lose control of the vehicle.
WARNING: Do not shift the
gearshift lever into N
(Neutral) with the speed
control on. You may lose
control of the vehicle or cause
engine system damage.
Driver Controls
53
Page 54 of 245
Setting speed control
The controls for using your speed
control are located on the steering
wheel for your convenience.
1. Press the ON control and
release it.
2. Accelerate to the desired speed.
3. Press the SET ACC control and
release it.
4. Take your foot off the
accelerator pedal.
5. The indicator light
SPEED
CONTon the
instrument cluster will turn on.
Note:
²Vehicle speed may vary momentarily when driving up and down a
steep hill.
²If the vehicle speed increases above the set speed on a downhill, you
may want to apply the brakes to reduce the speed.
²If the vehicle speed decreases more than 16 km/h (10 mph) below
your set speed on an uphill, your speed control will disengage.
Resuming a set speed
Press the RSM (resume) control and
release it. This will automatically
return the vehicle to the previously
set speed. The RSM control will not
work if the vehicle speed is not
faster than 48 km/h (30 mph).
Driver Controls
54
Page 55 of 245

Increasing speed while using speed control
There are two ways to set a higher
speed:
²Press and hold the SET ACC
control until you get to the
desired speed, then release the
control. You can also use the SET
ACC control to operate the
Tap-Up function. Press and
release this control to increase the vehicle set speed in small amounts
by 1.6 km/h (1 mph).
²Use the accelerator pedal to get to the desired speed. When the
vehicle reaches that speed, press and release the SET ACC control.
Reducing speed while using speed control
There are two ways to reduce a set
speed:
²Press and hold the COAST
control until you get to the
desired speed, then release the
control. You can also use the
COAST control to operate the
Tap-Down function. Press and
release this control to decrease the vehicle set speed in small amounts
by 1.6 km/h (1 mph).
²Depress the brake pedal until the
desired vehicle speed is reached,
press the SET ACC control.
Turning off speed control
There are two ways to turn off the speed control:
²Depress the brake pedal or the clutch pedal (if equipped). This will
not erase your vehicles previously set speed.
Driver Controls
55
Page 56 of 245

²Press the speed control OFF
control.
Note:When you turn off the speed
control or the ignition, your speed
control set speed memory is erased.
OVERDRIVE CONTROL (IF EQUIPPED)
Activating overdrive
(Overdrive) is the normal drive position for the best fuel economy.
The overdrive function allows automatic upshifts and downshifts through
all available gears.
Deactivating overdrive
Press the Transmission Control
Switch (TCS) located on the end of
the gearshift lever. The O/D Off
indicator light will illuminate on the
instrument cluster. The transmission
will operate in all gears except overdrive.
To return to normal overdrive mode,
press the Transmission Control
Switch again. The O/D Off indicator
light will no longer be illuminated.
When you shut off and re-start your
vehicle, the transmission will automatically return to normal
(Overdrive) mode.
For additional information about the gearshift lever and the transmission
control switch operation refer to theAutomatic Transmission
Operationsection of theDrivingchapter.
O/D
ON/OFF
O/D
ON/OFF
Driver Controls
56