2003 LINCOLN LS interior lights
[x] Cancel search: interior lightsPage 10 of 288

WARNING LIGHTS AND CHIMES
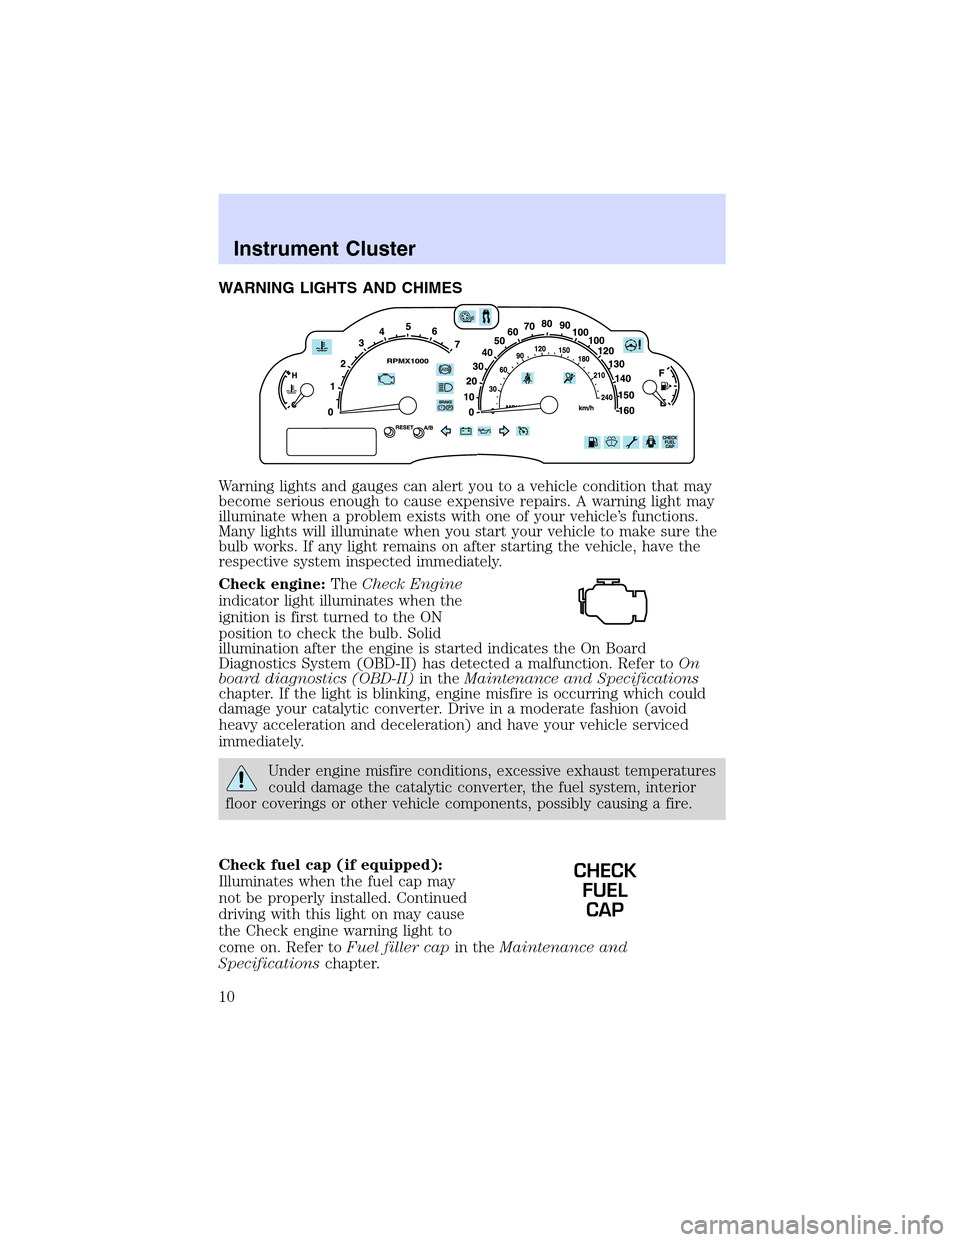
Warning lights and gauges can alert you to a vehicle condition that may
become serious enough to cause expensive repairs. A warning light may
illuminate when a problem exists with one of your vehicle’s functions.
Many lights will illuminate when you start your vehicle to make sure the
bulb works. If any light remains on after starting the vehicle, have the
respective system inspected immediately.
Check engine:TheCheck Engine
indicator light illuminates when the
ignition is first turned to the ON
position to check the bulb. Solid
illumination after the engine is started indicates the On Board
Diagnostics System (OBD-II) has detected a malfunction. Refer toOn
board diagnostics (OBD-II)in theMaintenance and Specifications
chapter. If the light is blinking, engine misfire is occurring which could
damage your catalytic converter. Drive in a moderate fashion (avoid
heavy acceleration and deceleration) and have your vehicle serviced
immediately.
Under engine misfire conditions, excessive exhaust temperatures
could damage the catalytic converter, the fuel system, interior
floor coverings or other vehicle components, possibly causing a fire.
Check fuel cap (if equipped):
Illuminates when the fuel cap may
not be properly installed. Continued
driving with this light on may cause
the Check engine warning light to
come on. Refer toFuel filler capin theMaintenance and
Specificationschapter.
CHECK
FUEL
CAP
Instrument Cluster
10
Page 72 of 288

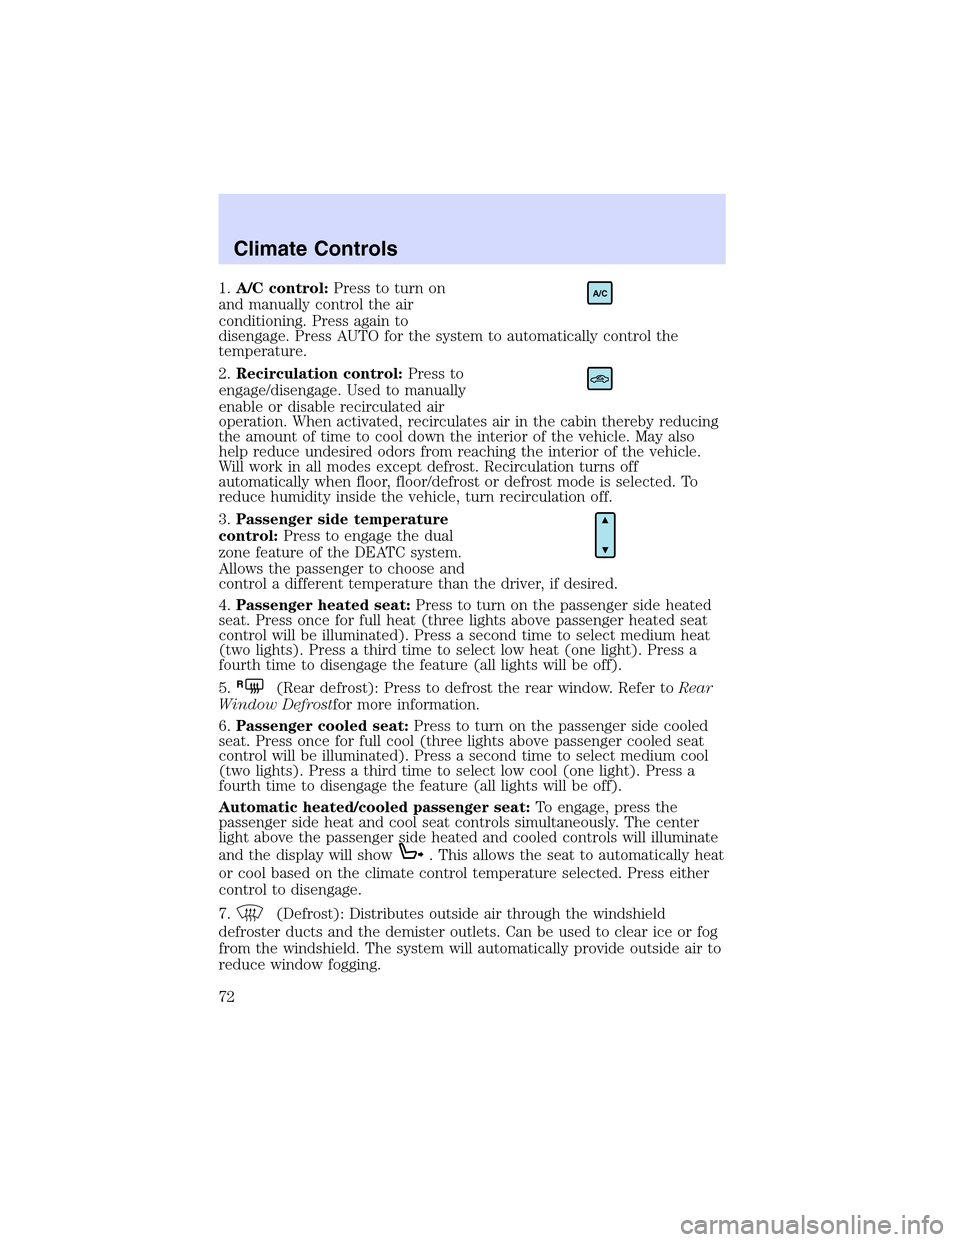
1.A/C control:Press to turn on
and manually control the air
conditioning. Press again to
disengage. Press AUTO for the system to automatically control the
temperature.
2.Recirculation control:Press to
engage/disengage. Used to manually
enable or disable recirculated air
operation. When activated, recirculates air in the cabin thereby reducing
the amount of time to cool down the interior of the vehicle. May also
help reduce undesired odors from reaching the interior of the vehicle.
Will work in all modes except defrost. Recirculation turns off
automatically when floor, floor/defrost or defrost mode is selected. To
reduce humidity inside the vehicle, turn recirculation off.
3.Passenger side temperature
control:Press to engage the dual
zone feature of the DEATC system.
Allows the passenger to choose and
control a different temperature than the driver, if desired.
4.Passenger heated seat:Press to turn on the passenger side heated
seat. Press once for full heat (three lights above passenger heated seat
control will be illuminated). Press a second time to select medium heat
(two lights). Press a third time to select low heat (one light). Press a
fourth time to disengage the feature (all lights will be off).
5.
R(Rear defrost): Press to defrost the rear window. Refer toRear
Window Defrostfor more information.
6.Passenger cooled seat:Press to turn on the passenger side cooled
seat. Press once for full cool (three lights above passenger cooled seat
control will be illuminated). Press a second time to select medium cool
(two lights). Press a third time to select low cool (one light). Press a
fourth time to disengage the feature (all lights will be off).
Automatic heated/cooled passenger seat:To engage, press the
passenger side heat and cool seat controls simultaneously. The center
light above the passenger side heated and cooled controls will illuminate
and the display will show
. This allows the seat to automatically heat
or cool based on the climate control temperature selected. Press either
control to disengage.
7.
(Defrost): Distributes outside air through the windshield
defroster ducts and the demister outlets. Can be used to clear ice or fog
from the windshield. The system will automatically provide outside air to
reduce window fogging.
A/C
Climate Controls
72
Page 79 of 288

Alwaysremembertoturn on your headlamps at dusk or during
inclement weather. The Daytime Running Light (DRL) System
does not activate your tail lamps and generally may not provide
adequate lighting during these conditions. Failure to activate your
headlamps under these conditions may result in a collision.
High beams
Pull toward you until control stops
to activate. Repeat to deactivate.
Flash to pass
Pull toward you slightly to activate
and release to deactivate.
PANEL DIMMER CONTROL
Use to adjust the brightness of the
instrument panel during parklamp,
headlamp and autolamp operation.
•Rotate up to brighten.
•Rotate down to dim.
•Rotate fully up to turn on the
interior lights.
Note: The panel dimmer control is not active when the autolamp system
has determined that it is daytime.
Lights
79
Page 81 of 288

7. Close the hood and turn off the lamps.
TURN SIGNAL CONTROL
•Push down to activate the left
turn signal.
•Push up to activate the right turn
signal.
INTERIOR LAMPS
Map lamps (if equipped)
The map lamps and controls are
located on the dome lamp. Press the
controls in front of each map lamp
to activate the lamps.
BULBS
Replacing exterior bulbs
Check the operation of all the bulbs frequently.
Using the right bulbs
Replacement bulbs are specified in the chart below. Headlamp bulbs must
be marked with an authorized“D.O.T.”for North America and an“E”for
Europe to assure lamp performance, light brightness and pattern and safe
visibility. The correct bulbs will not damage the lamp assembly or void the
lamp assembly warranty and will provide quality bulb burn time.
Function Trade Number
Headlamp low beam H11
Headlamp low beam (HID) D2R
Headlamp high beam 9005
Park and turn lamp (front) 3457 A/K (amber)
Side marker lamp (front) 3W4Z–15A424–5–AA
Lights
81
Page 82 of 288

Function Trade Number
Foglamp 9145
Tail lamp, brakelamp, side lamp 3157K
Rear turn lamp 3157 A/K (amber)
Backup lamp 921
License plate lamp 168
High-mount brakelamp 3W4Z–13A613–AA
Map lamp (with moon roof) 906
Rail lamp (rear) 168
Map lamp (front) 906
Sun visor lighted mirror lamp Part # E9SB-13465-BA
Glove compartment 194
Ashtray 194
Luggage compartment lamp 212-2
All replacement bulbs are clear in color except where noted.
To replace all instrument panel lights - see your dealer.
Interior bulbs
Check the operation of all bulbs frequently.
Map lamps
For bulb replacement, see a qualified service technician or your dealer.
Replacing headlamp bulbs
The headlamp assembly contains the low beam bulb, the high beam bulb,
park/turn lamp bulb and led side marker. To replace any of these items,
the headlamp assembly must be removed from the vehicle as follows:
1. Make sure headlamp switch is in
the OFF position, then open the
hood.
2. Lift the hood and remove the
upper and lower sight shields by
removing the seven plastic retaining
pins.
3. On the headlamp assembly,
remove the three headlamp
attaching bolts (8mm socket).
Lights
82
Page 124 of 288

•operate the memory seat/mirror/steering column/adjustable pedals
feature (if equipped).
•enable/disable the two-stage unlocking feature.
When the vehicle is armed, the interior power door lock controls and
remote interior trunk release control are disabled. These features will not
work until the vehicle is disarmed. Refer toCentral locking/Two-stage
unlockinginformation in this chapter.
If there is any potential remote keyless entry problem with your vehicle,
ensureALL remote entry transmittersare taken to the dealership to
aid in troubleshooting.
Unlocking the doors
1. Pressand release to:
•unlock the driver’s door only, if the two-stage unlocking feature is
enabled.
•unlock all doors, if the two-stage unlocking feature is disabled.
•deactivate the perimeter alarm (if activated).Note:The interior lamps
will illuminate and the turn signal lamps will display two short flashes
to indicate the deactivation of the perimeter alarm. Additionally, if the
memory seat/mirror/steering column/adjustable pedals feature (if
equipped) is activated, the corresponding seat/mirror/steering
column/adjustable pedals positions will be recalled.
2. Press
and release again within five seconds to unlock all the doors.
The remote entry system comes with an illuminated entry feature. This
feature turns on the puddle lamps and the interior lamps for 20 seconds
or until the ignition is turned to the START position.
The inside lights will not turn off if:
•they have been turned on using the dimmer control or
•any door is open.
The battery saver feature will turn off the interior lamps 40 minutes after
the ignition is turned to the OFF position.
Opening all windows and moonroof (if equipped)
Pressand hold for more than two seconds in order to begin opening
the windows and moonroof (if equipped).
•The
control can then be released and the windows and moonroof
will complete the opening operation.Note:If the moonroof is in the
vent range, the moonroof will move to full vent.
Locks and Security
124
Page 127 of 288

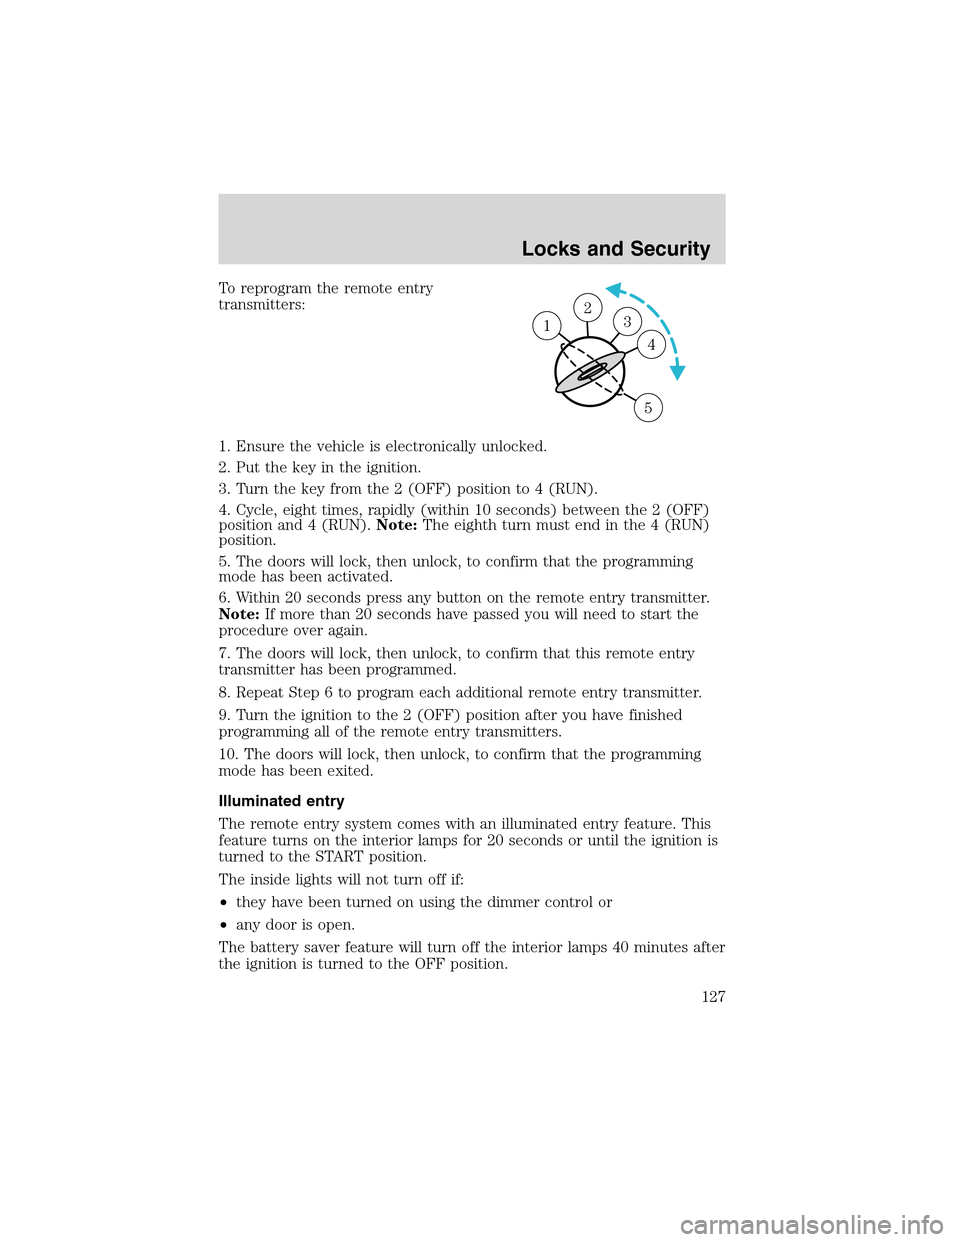
To reprogram the remote entry
transmitters:
1. Ensure the vehicle is electronically unlocked.
2. Put the key in the ignition.
3. Turn the key from the 2 (OFF) position to 4 (RUN).
4. Cycle, eight times, rapidly (within 10 seconds) between the 2 (OFF)
position and 4 (RUN).Note:The eighth turn must end in the 4 (RUN)
position.
5. The doors will lock, then unlock, to confirm that the programming
mode has been activated.
6. Within 20 seconds press any button on the remote entry transmitter.
Note:If more than 20 seconds have passed you will need to start the
procedure over again.
7. The doors will lock, then unlock, to confirm that this remote entry
transmitter has been programmed.
8. Repeat Step 6 to program each additional remote entry transmitter.
9. Turn the ignition to the 2 (OFF) position after you have finished
programming all of the remote entry transmitters.
10. The doors will lock, then unlock, to confirm that the programming
mode has been exited.
Illuminated entry
The remote entry system comes with an illuminated entry feature. This
feature turns on the interior lamps for 20 seconds or until the ignition is
turned to the START position.
The inside lights will not turn off if:
•they have been turned on using the dimmer control or
•any door is open.
The battery saver feature will turn off the interior lamps 40 minutes after
the ignition is turned to the OFF position.
23 1
4
5
Locks and Security
127
Page 283 of 288

F
Fail safe cooling ........................253
Floor mats .................................119
Fluid capacities .........................272
Foglamps .....................................78
Fuel ............................................254
calculating fuel economy ......108,
259
cap ...........................................256
capacity ...................................272
choosing the right fuel ...........257
comparisons with EPA
fuel economy estimates .........261
detergent in fuel .....................258
filling your vehicle
with fuel ..................254, 256, 259
filter, specifications ........258, 271
improving fuel economy ........259
octane rating ...........257, 275–276
quality ......................................257
running out of fuel .................258
safety information relating
to automotive fuels ................254
Fuses ..................................202–203
G
Garage door opener ..................102
Gas cap (see Fuel cap) ............256
Gas mileage (see Fuel
economy) ...................................259
Gauges .........................................14
GAWR (Gross Axle
Weight Rating) ..........................198
definition .................................198
driving with a heavy load ......198
location ....................................198GVWR (Gross Vehicle
Weight Rating) ..........................198
calculating ...............................198
definition .................................198
driving with a heavy load ......198
location ....................................198
H
Head restraints .................135, 140
Headlamps ...................................77
aiming ........................................80
autolamp system .......................77
bulb specifications ....................81
daytime running lights .............78
flash to pass ..............................79
replacing bulbs ...................82–83
turning on and off ....................77
Heating
heating and air conditioning
system .................................69, 71
HomeLink universal
transceiver (see Garage
door opener) .............102–103, 105
Hood ..........................................240
I
Ignition .......................181, 275–276
Infant seats
(see Safety seats) .....................172
Inspection/maintenance
(I/M) testing ..............................263
Instrument panel
cleaning ...................................236
cluster ........................................10
lighting up panel
and interior ...............................79
Index
283