2003 LINCOLN BLACKWOOD park assist
[x] Cancel search: park assistPage 167 of 280

Preparing to tow
Use the proper equipment for towing a trailer and make sure it is
properly attached to your vehicle. See your dealer or a reliable trailer
dealer if you require assistance.
Hitches
Do not use hitches that clamp onto the vehicle’s bumper or attach to the
axle. You must distribute the load in your trailer so that 10%–15% of the
total weight of the trailer is on the tongue.
Load equalizing hitch
When hooking up a trailer using a load equalizing hitch, always use the
following procedure:
1. Park the unloaded vehicle on a level surface. With the ignition on and
all doors closed, allow the vehicle to stand for several minutes so that it
can level.
2. Measure the height of a reference point on the front and rear bumpers
at the center of the vehicle.
3. Attach the trailer to the vehicle and adjust the hitch equalizers so that
the front bumper height is within 0–13 mm (0.5 in) of the reference
point. After proper adjustment, the rear bumper should be no higher
than in Step 2.
Note:Adjusting an equalizing hitch so the rear bumper of the vehicle is
higher than it was unloaded will defeat the function of the load
equalizing hitch and may cause unpredictable handling.
Safety chains
Always connect the trailer’s safety chains to the frame or hook retainers
of the vehicle hitch. To connect the trailer’s safety chains, cross the
chains under the trailer tongue and allow slack for turning corners.
If you use a rental trailer, follow the instructions that the rental agency
gives to you.
Do not attach safety chains to the bumper.
Driving
167
Page 191 of 280

Stowing the flat/spare tire
1. Lay the tire on the ground with the valve stem facing in the direction
specified on the Tire Changing Instructions located with the jack
hardware.
2. Slide the wheel partially under the vehicle and install the retainer
through the wheel center. Pull on the cable to align the components at
the end of the cable.
3. Turn the jack handle clockwise until the tire is raised to its stowed
position underneath the vehicle. The effort to turn the jack handle
increases significantly and the spare tire carrier ratchets or slips when
the tire is raised to the maximum tightness. Tighten to the best of your
ability, to the point where the ratchet/slip occurs, if possible. The spare
tire carrier will not allow you to overtighten. If the spare tire carrier
ratchets or slips with little effort, take the vehicle to your dealer for
assistance at your earliest convenience.
4. Check that the tire lies flat against the frame and is properly
tightened. Try to push or pull, then turn the tire to be sure it will not
move. Loosen and retighten, if necessary. Failure to properly stow the
spare tire may result in failure of the winch cable and loss of the tire.
5. Repeat this tightness check procedure when servicing the spare tire
pressure (every six months, per scheduled maintenance guide), or at any
time that the spare tire is disturbed through service of other
components.
6. If removed, install the spare tire lock (if equipped) into the bumper
drive tube with the spare tire lock key (if equipped) and jack handle.
JUMP STARTING YOUR VEHICLE
The gases around the battery can explode if exposed to flames,
sparks, or lit cigarettes. An explosion could result in injury or
vehicle damage.
Batteries contain sulfuric acid which can burn skin, eyes and
clothing, if contacted.
Do not attempt to push-start your vehicle. Automatic
transmissions do not have push-start capability; also, the
catalytic converter may become damaged.
Roadside Emergencies
191
Page 192 of 280

Preparing your vehicle
When the battery is disconnected or a new battery is installed, the
transmission must relearn its shift strategy. As a result, the transmission
may have firm and/or soft shifts. This operation is considered normal and
will not affect function or durability of the transmission. Over time, the
adaptive learning process will fully update transmission operation.
1.Use only a 12–volt supply to start your vehicle.
2. Do not disconnect the battery of the disabled vehicle as this could
damage the vehicle’s electrical system.
3. Park the booster vehicle close to the hood of the disabled vehicle
making sure the two vehiclesdo nottouch. Set the parking brake on
both vehicles and stay clear of the engine cooling fan and other moving
parts.
4. Check all battery terminals and remove any excessive corrosion before
you attach the battery cables. Ensure that vent caps are tight and level.
5. Turn the heater fan on in both vehicles to protect any electrical
surges. Turn all other accessories off.
Connecting the jumper cables
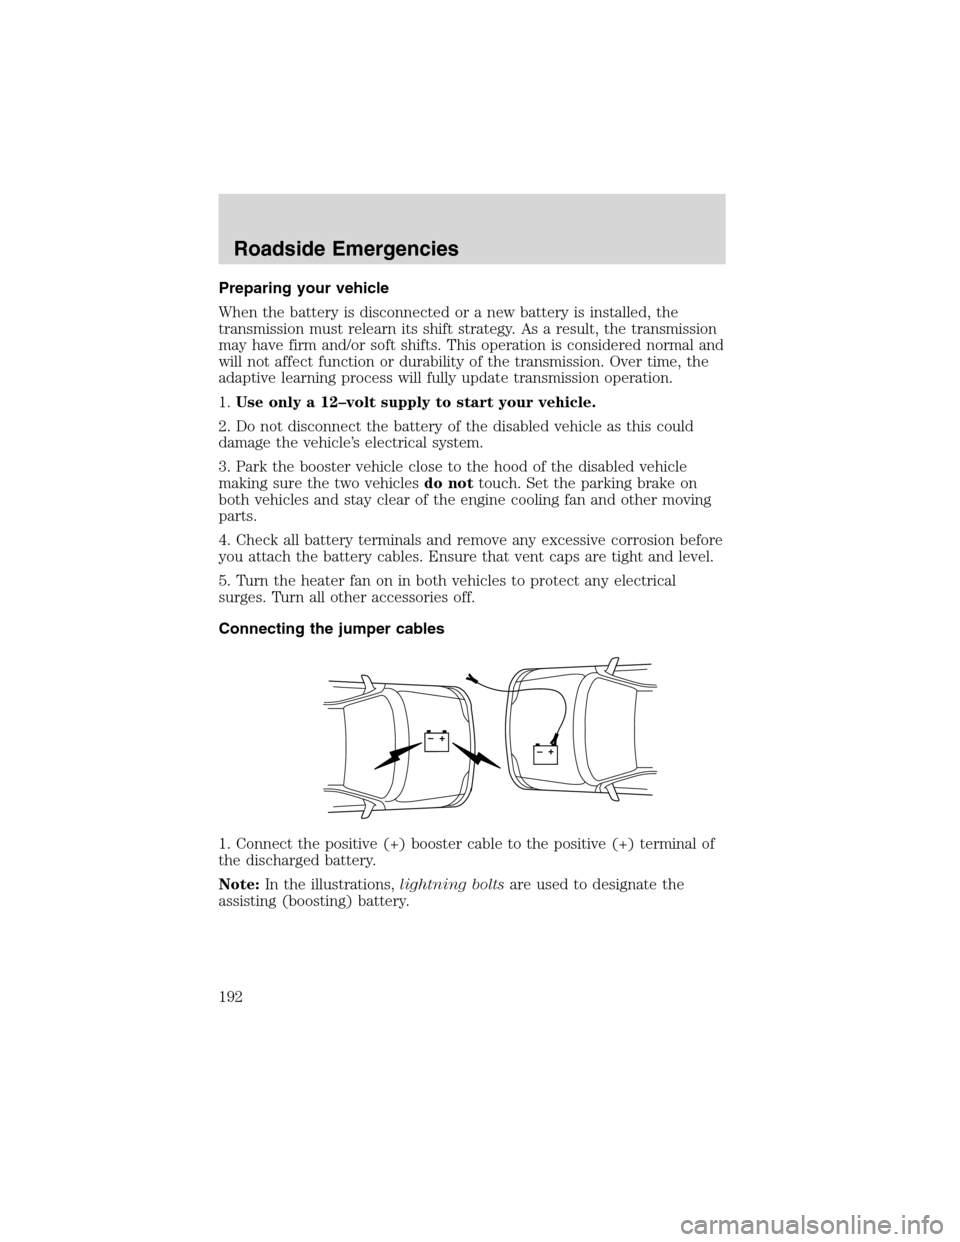
1. Connect the positive (+) booster cable to the positive (+) terminal of
the discharged battery.
Note:In the illustrations,lightning boltsare used to designate the
assisting (boosting) battery.
+–+–
Roadside Emergencies
192
Page 205 of 280

If your vehicle must be serviced while you are traveling or living in
Central or South America, the Caribbean, or the Middle East, contact the
nearest Ford dealership. If the dealership cannot help you, write or call:
FORD MOTOR COMPANY
WORLDWIDE DIRECT MARKET OPERATIONS
1555 Fairlane Drive
Fairlane Business Park #3
Allen Park, Michigan 48101
U.S.A.
Telephone: (313) 594-4857
FAX: (313) 390-0804
If you are in another foreign country, contact the nearest Ford
dealership. If the dealership employees cannot help you, they can direct
you to the nearest Ford affiliate office.
If you buy your vehicle in North America and then relocate outside of
the U.S. or Canada, register your vehicle identification number (VIN) and
new address with Ford Motor Company Worldwide Direct Market
Operations.
ORDERING ADDITIONAL OWNER’S LITERATURE
To order the publications in this portfolio, contact Helm, Incorporated at:
HELM, INCORPORATED
P.O. Box 07150
Detroit, Michigan 48207
Or call:
For a free publication catalog, order toll free: 1-800-782-4356
Monday-Friday 8:00 a.m. - 6:00 p.m. EST
Helm, Incorporated can also be reached by their website:
www.helminc.com.
(Items in this catalog may be purchased by credit card, check or
money order.)
Obtaining a French owner’s guide
French Owner’s Guides can be obtained from your dealer or by writing to
Ford Motor Company of Canada, Limited, Service Publications, P.O. Box
1580, Station B, Mississauga, Ontario L4Y 4G3.
Customer Assistance
205
Page 277 of 280

Pedals (see Power
adjustable foot pedals) ...............63
Power adjustable foot pedals .....63
Power distribution box
(see Fuses) ...............................180
Power door locks ........................78
Power point .................................59
Power steering ..........................141
fluid, checking and adding ....243
fluid, refill capacity ................256
fluid, specifications .........259, 262
Power Windows ...........................60
Preparing to drive
your vehicle ...............................142
R
Radio ..........................19, 25, 28, 31
Relays ........................................176
Remote entry system .................81
illuminated entry ......................83
locking/unlocking doors ...........78
Roadside assistance ..................174
S
Safety belts (see Safety
restraints) ......98–99, 101–102, 104
Safety defects, reporting ..........207
Safety restraints .... 98–99, 101–104
belt minder .............................106
cleaning the safety belts ........110
extension assembly ................110
for adults ...................99, 101–102
for children .....................119–120
lap belt ....................................105
warning light and chime ........106
Safety seats for children ..........123Seat belts (see
Safety restraints) ........................98
Seats ............................................90
child safety seats ....................123
cleaning ...................................213
Servicing your vehicle ..............216
Snowplowing .................7, 170–172
Spare tire (see
Changing the Tire) ...................185
Spark plugs, specifications ......255,
262
Special notice ................................9
ambulance conversions ..............8
four-wheel drive
vehicles ............................172–173
utility-type vehicles ....................8
Specification chart,
lubricants ...........................259, 262
Speed control ..............................63
Starting your vehicle .......135–136,
139
jump starting ..........................191
Steering wheel
tilting .........................................55
T
Tailgate ..................................72–73
Tires ...........................184, 251–252
changing ..................184–185, 187
checking the pressure ............252
replacing ..................................254
rotating ....................................253
snow tires and chains ............255
tire grades ...............................252
treadwear ................................251
Tonneau cover .......................74, 77
Towing .......................................163
Index
277