Page 38 of 280
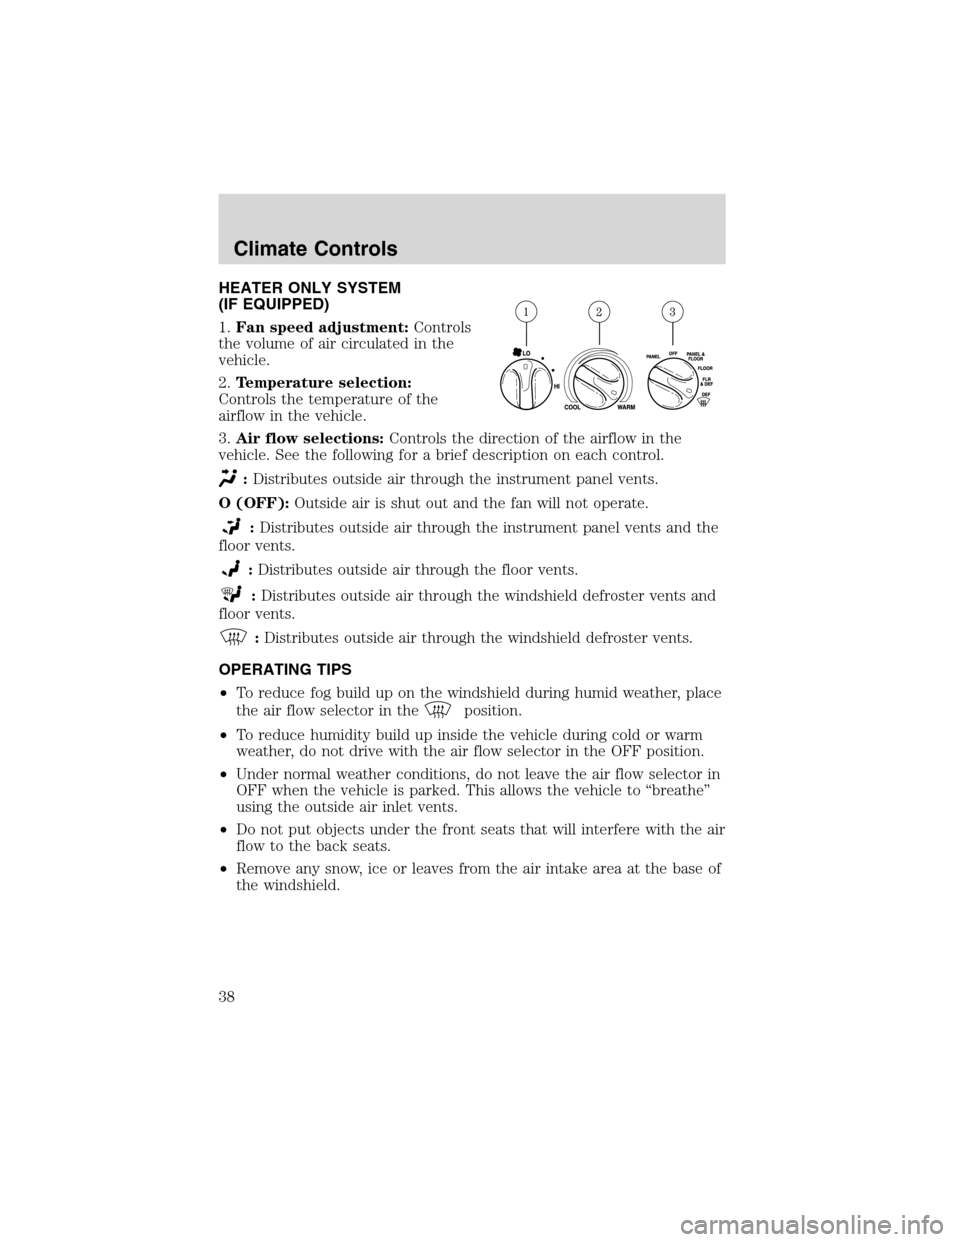
HEATER ONLY SYSTEM
(IF EQUIPPED)
1.Fan speed adjustment:Controls
the volume of air circulated in the
vehicle.
2.Temperature selection:
Controls the temperature of the
airflow in the vehicle.
3.Air flow selections:Controls the direction of the airflow in the
vehicle. See the following for a brief description on each control.
:Distributes outside air through the instrument panel vents.
O (OFF):Outside air is shut out and the fan will not operate.
:Distributes outside air through the instrument panel vents and the
floor vents.
:Distributes outside air through the floor vents.
:Distributes outside air through the windshield defroster vents and
floor vents.
:Distributes outside air through the windshield defroster vents.
OPERATING TIPS
•To reduce fog build up on the windshield during humid weather, place
the air flow selector in the
position.
•To reduce humidity build up inside the vehicle during cold or warm
weather, do not drive with the air flow selector in the OFF position.
•Under normal weather conditions, do not leave the air flow selector in
OFF when the vehicle is parked. This allows the vehicle to“breathe”
using the outside air inlet vents.
•Do not put objects under the front seats that will interfere with the air
flow to the back seats.
•Remove any snow, ice or leaves from the air intake area at the base of
the windshield.
Climate Controls
38
Page 40 of 280
OPERATING TIPS
•To reduce fog build up on the windshield during humid weather, place
the air flow selector in the
position.
•To reduce humidity build up inside the vehicle: do not drive with the
air flow selector in the OFF or MAX A/C position.
•Under normal weather conditions, do not leave the air flow selector in
MAX A/C or OFF when the vehicle is parked. This allows the vehicle
to“breathe”using the outside air inlet vents.
•Do not put objects under the front seats that will interfere with the
airflow to the back seats.
•Remove any snow, ice or leaves from the air intake area at the base of
the windshield.
To aid in side window defogging/demisting in cold weather:
1. Select
2. Select A/C
3. Modulate the temperature control to maintain comfort.
4. Set the fan speed to HI
5. Direct the outer instrument panel vents towards the side windows
To increase airflow to the outer instrument panel vents, close the vents
located in the middle of the instrument panel.
Do not place objects on top of the instrument panel as these
objects may become projectiles in a collision or sudden stop.
Climate Controls
40
Page 43 of 280
OPERATING TIPS
•To reduce fog build up on the windshield during humid weather, place
the air flow selector in the
position.
•To reduce humidity build up inside the vehicle: do not drive with the
air flow selector in the OFF or MAX A/C position.
•Under normal weather conditions, do not leave the air flow selector in
MAX A/C or OFF when the vehicle is parked. This allows the vehicle
to“breathe”using the outside air inlet vents.
•Do not put objects under the front seats that will interfere with the
airflow to the back seats.
•Remove any snow, ice or leaves from the air intake area at the base of
the windshield.
To aid in side window defogging/demisting in cold weather:
1. Select
2. Select A/C
3. Modulate the temperature control to maintain comfort.
4. Set the fan speed to HI
5. Direct the outer instrument panel vents towards the side windows
To increase airflow to the outer instrument panel vents, close the vents
located in the middle of the instrument panel.
Do not place objects on top of the instrument panel as these
objects may become projectiles in a collision or sudden stop.
REAR WINDOW DEFROSTER (IF EQUIPPED)
The rear defroster control is located on the climate control panel and
works to defrost your windshield from fog and ice.
Ensure that the ignition is ON position. Press to turn the defroster
ON/OFF. The indicator light will illuminate when ON.
Climate Controls
43
Page 96 of 280
Folding down the rear seats (SuperCrew only)
The rear seatback has a split 60/40 seat. Each seat can be folded down
into the load floor position.
1. Remove the head restraint. Push
the release button at the base of the
head restraint post and pull the
head restraint up and out.
2. Pull control to release seat.
3. Pull seatback toward front seat
and down into load floor position.
Seating and Safety Restraints
96
Page 100 of 280
•Front seats
•Rear seats (if equipped)
2. To unfasten, push the release button and remove the tongue from the
buckle.
•Front seats
Seating and Safety Restraints
100
Page 101 of 280
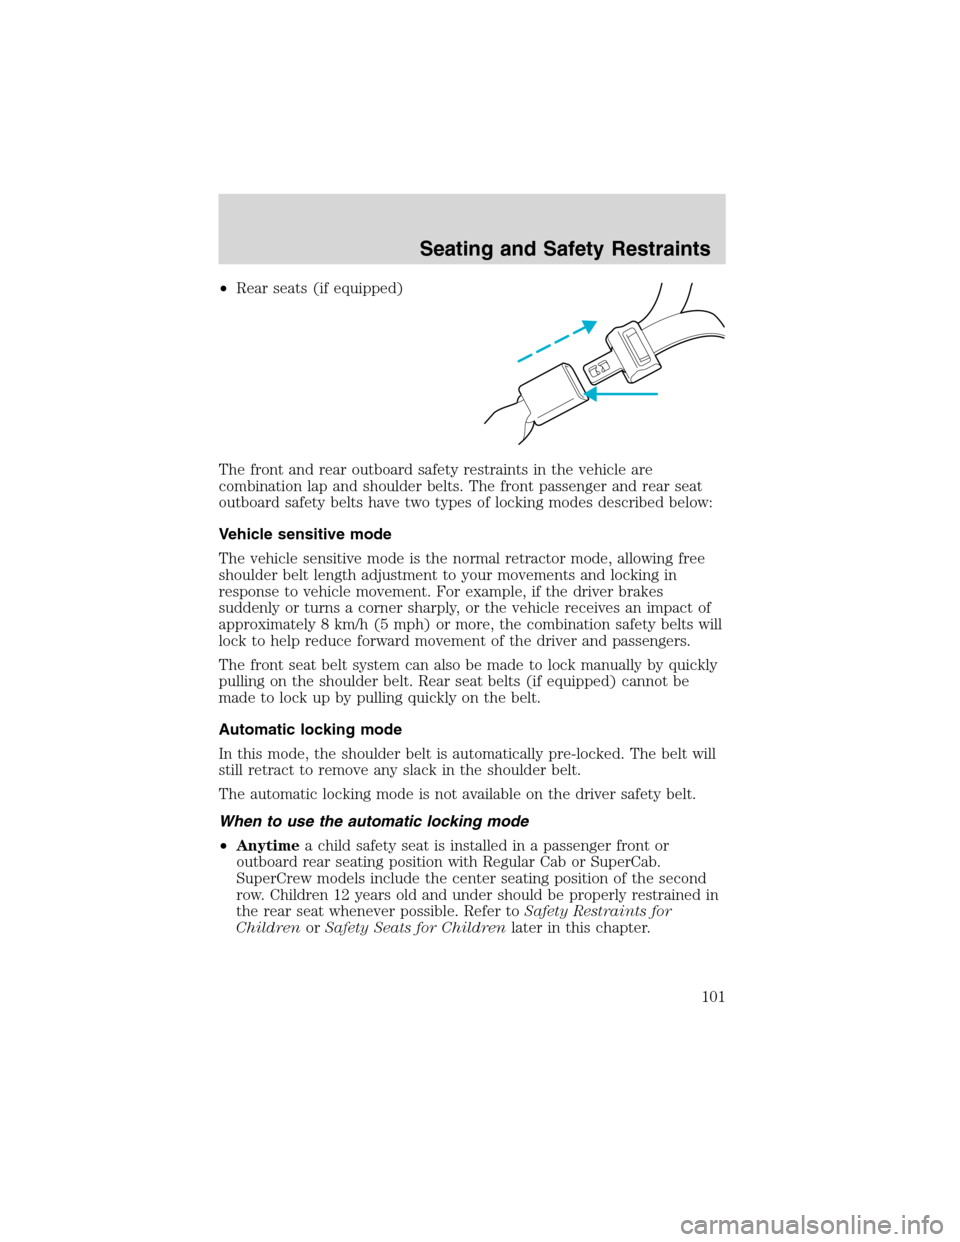
•Rear seats (if equipped)
The front and rear outboard safety restraints in the vehicle are
combination lap and shoulder belts. The front passenger and rear seat
outboard safety belts have two types of locking modes described below:
Vehicle sensitive mode
The vehicle sensitive mode is the normal retractor mode, allowing free
shoulder belt length adjustment to your movements and locking in
response to vehicle movement. For example, if the driver brakes
suddenly or turns a corner sharply, or the vehicle receives an impact of
approximately 8 km/h (5 mph) or more, the combination safety belts will
lock to help reduce forward movement of the driver and passengers.
The front seat belt system can also be made to lock manually by quickly
pulling on the shoulder belt. Rear seat belts (if equipped) cannot be
made to lock up by pulling quickly on the belt.
Automatic locking mode
In this mode, the shoulder belt is automatically pre-locked. The belt will
still retract to remove any slack in the shoulder belt.
The automatic locking mode is not available on the driver safety belt.
When to use the automatic locking mode
•Anytimea child safety seat is installed in a passenger front or
outboard rear seating position with Regular Cab or SuperCab.
SuperCrew models include the center seating position of the second
row. Children 12 years old and under should be properly restrained in
the rear seat whenever possible. Refer toSafety Restraints for
ChildrenorSafety Seats for Childrenlater in this chapter.
Seating and Safety Restraints
101
Page 121 of 280
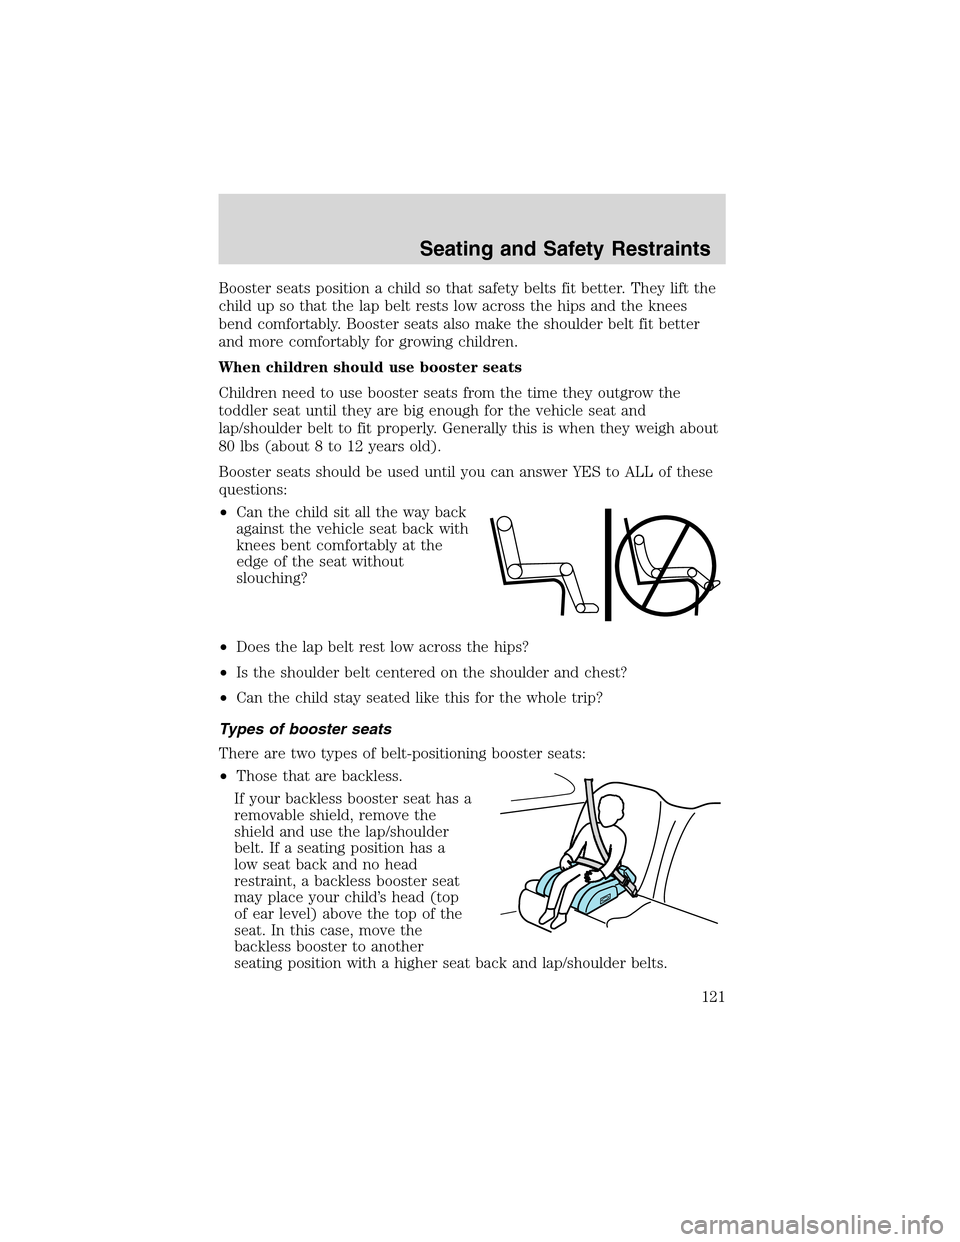
Booster seats position a child so that safety belts fit better. They lift the
child up so that the lap belt rests low across the hips and the knees
bend comfortably. Booster seats also make the shoulder belt fit better
and more comfortably for growing children.
When children should use booster seats
Children need to use booster seats from the time they outgrow the
toddler seat until they are big enough for the vehicle seat and
lap/shoulder belt to fit properly. Generally this is when they weigh about
80 lbs (about 8 to 12 years old).
Booster seats should be used until you can answer YES to ALL of these
questions:
•Can the child sit all the way back
against the vehicle seat back with
knees bent comfortably at the
edge of the seat without
slouching?
•Does the lap belt rest low across the hips?
•Is the shoulder belt centered on the shoulder and chest?
•Can the child stay seated like this for the whole trip?
Types of booster seats
There are two types of belt-positioning booster seats:
•Those that are backless.
If your backless booster seat has a
removable shield, remove the
shield and use the lap/shoulder
belt. If a seating position has a
low seat back and no head
restraint, a backless booster seat
may place your child’s head (top
of ear level) above the top of the
seat. In this case, move the
backless booster to another
seating position with a higher seat back and lap/shoulder belts.
Seating and Safety Restraints
121
Page 127 of 280
Installing child safety seats in the front row lap belt seating
positions
1. Lengthen the lap belt. To lengthen the belt, hold the tongue so that its
bottom is perpendicular to the direction of webbing while sliding the
tongue up the webbing.
2. Place the child safety seat in the center seating position.
3. Route the tongue and webbing through the child seat according to the
child seat manufacturer’s instructions.
4. Insert the belt tongue into the proper buckle for the center seating
position until you hear a snap and feel it latch. Make sure the tongue is
securely fastened to the buckle by pulling on tongue.
5. Push down on the child seat while pulling on the loose end of the lap
belt webbing to tighten the belt.
6. Before placing the child into the child seat, forcibly tilt the child seat
from side to side and in forward direction to make sure that the seat is
held securely in place. If the child seat moves excessively, repeat steps 5
through 6, or properly install the child seat in a different position.
Installing child safety seat in the second row center seating
position with an automatic locking retractor
1. Place the child safety seat in the center seating position.
2. In a continuous motion, pull out enough webbing from the retractor to
route the tongue through the child seat.
3. While holding the webbing to prevent it from retracting, route the
webbing through the child seat according to the child seat
manufacturer’s instructions. Be sure the belt webbing is not twisted.
4. Insert the tongue into the correct buckle for that seating position until
you hear and feel the buckle engage. Make sure the buckle is latched
securely by pulling on the webbing.
5. If you have not pulled out enough webbing to reach, allow the
webbing to fully retract before attempting to pull it out again and repeat
steps 2 through 4.
6. Pull the webbing through the child seat toward the retractor while
pushing down with your knee on the child seat.
7. Allow the safety belt to retract to remove any slack in the belt. It will
make a clicking noise while doing this.
8. Before placing the child in the seat, forcibly move the seat forward
and side-to-side to make sure the seat is securely held in place.
Seating and Safety Restraints
127