Page 7 of 280
Special instructions
For your added safety, your vehicle is fitted with sophisticated electronic
controls.
Please read the sectionAir bagin theSeating and safety
restraintschapter. Failure to follow the specific warnings and
instructions could result in personal injury.
Front seat mounted rear facing child or infant seats should
NEVERbe used in front of a passenger side air bag unless the
air bag can be and is turned OFF.
Snowplowing
Ford recommends the following specifications for low speed, personal
use snow removal:
•F-150 4x4 (except F-150 Supercrew, Lightning and Harley-Davidson
models)
•5.4L engine
•Heavy-duty service package
•Super engine cooling
•Heavy-duty front suspension package
•Automatic transmission with auxiliary automatic transmission fluid
cooling
•All-terrain tires
•Limited slip and optional axle ratio.
Do not install a snowplow and plow with your vehicle until it has been
driven at least 800 km (500 miles).
F150 SuperCrew, F150 5.4L Supercharged “Lightning” and
Harley-Davidson F-150 Owners: Snowplowing
Your vehicle is not recommended for snowplowing. Ford makes no
representation as to the suitability of your vehicle for snowplowing, in
particular regarding the potential for exceeding vehicle weight limits,
airbag (SRS) deployment sensitivity, vehicle crash integrity, or
powertrain durability. The Snowplow Package Option is not available.
Introduction
7
Page 141 of 280
Even when the ABS is disabled,
normal braking is still effective. (If
your BRAKE warning lamp
illuminates with the parking brake
released, have your brake system serviced immediately.)
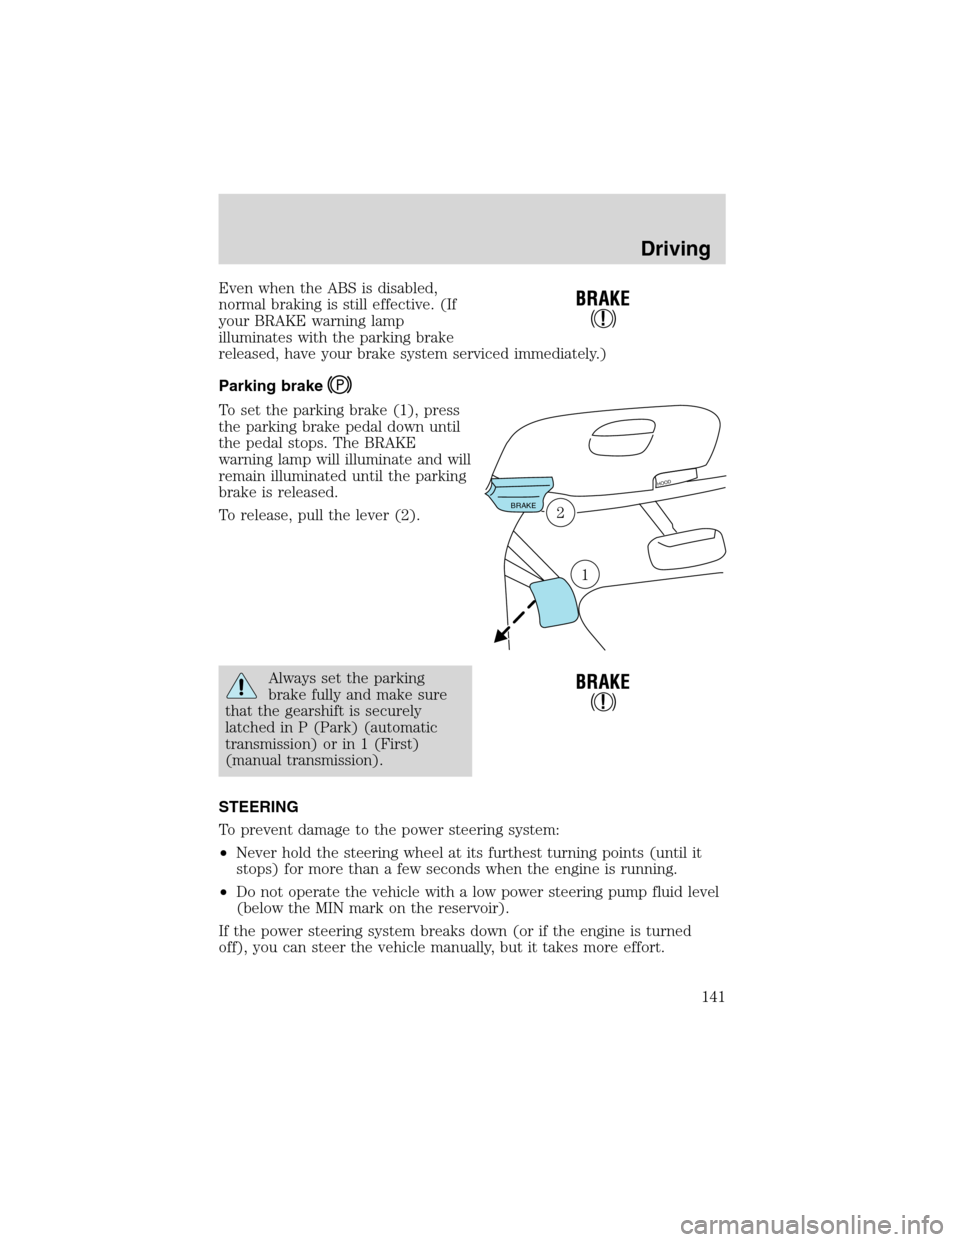
Parking brake
To set the parking brake (1), press
the parking brake pedal down until
the pedal stops. The BRAKE
warning lamp will illuminate and will
remain illuminated until the parking
brake is released.
To release, pull the lever (2).
Always set the parking
brake fully and make sure
that the gearshift is securely
latched in P (Park) (automatic
transmission) or in 1 (First)
(manual transmission).
STEERING
To prevent damage to the power steering system:
•Never hold the steering wheel at its furthest turning points (until it
stops) for more than a few seconds when the engine is running.
•Do not operate the vehicle with a low power steering pump fluid level
(below the MIN mark on the reservoir).
If the power steering system breaks down (or if the engine is turned
off), you can steer the vehicle manually, but it takes more effort.
BRAKE
H
OOD
2
1
Driving
141
Page 170 of 280
2WD vehicles (with automatic transmissions):
•Place the transmission in N (Neutral)
•Maximum speed is 56 km (35 mph)
•Maximum distance is 80 km (50 miles)
If a distance of 80 km (50 miles) or a speed of 56 km (35 mph) must be
exceeded, the drive shaft will have to be removed before the vehicle is
towed.
Ford recommends the driveshaft be removed/installed only by a qualified
technician. See your local dealer for driveshaft removal/installation.
Improper removal/installation of the driveshaft can cause
transmission fluid loss, damage to the driveshaft and internal
transmission components.
4WD vehicles electronic shift transfer case (with automatic
transmissions):
4x4 vehicles with electronic shift on the fly cannot be towed with any
wheels on the ground.
SNOWPLOWING
Ford recommends the following specifications for low speed, personal
use snow removal:
•F-150 4x4 (except F-150 Supercrew, Lightning and Harley-Davidson
models)
•5.4L engine
•Heavy-duty service package
•Super engine cooling
•Heavy-duty front suspension package
•Automatic transmission with auxiliary automatic transmission fluid
cooling
•All-terrain tires
•Limited slip and optional axle ratio.
Do not install a snowplow and plow with your vehicle until it has been
driven at least 800 km (500 miles).
Driving
170
Page 216 of 280

SERVICE RECOMMENDATIONS
To help you service your vehicle:
•We highlight do-it-yourself items in the engine compartment for easy
location.
•We provide a scheduled maintenance guide which makes tracking
routine service easy.
If your vehicle requires professional service, your dealership can provide
the necessary parts and service. Check yourWarranty Guide/Owner
Information Guideto find out which parts and services are covered.
Use only recommended fuels, lubricants, fluids and service parts
conforming to specifications. Motorcraft parts are designed and built to
provide the best performance in your vehicle.
PRECAUTIONS WHEN SERVICING YOUR VEHICLE
•Do not work on a hot engine.
•Make sure that nothing gets caught in moving parts.
•Do not work on a vehicle with the engine running in an enclosed
space, unless you are sure you have enough ventilation.
•Keep all open flames and other burning (cigarettes) material away
from the battery and all fuel related parts.
Working with the engine off
•Automatic transmission:
1. Set the parking brake and shift to P (Park).
2. Turn off the engine and remove the key.
3. Block the wheels.
•Manual transmission:
1. Set the parking brake, depress the clutch and place the gearshift in 1
(First).
2. Turn off the engine and remove the key.
3. Block the wheels.
Maintenance and Specifications
216
Page 218 of 280
IDENTIFYING COMPONENTS IN THE ENGINE COMPARTMENT
4.2L V6 engine
1. Battery
2. Engine oil filler cap
3. Engine oil dipstick
4. Clutch fluid reservoir (manual transmission)
5. Brake fluid reservoir
6. Power distribution box
7. Engine coolant reservoir
8. Air filter assembly
9. Power steering fluid reservoir
10. Transmission fluid dipstick (automatic transmission)
11. Windshield washer fluid reservoir
Maintenance and Specifications
218
Page 219 of 280
4.6L V8/5.4L V8 engines
1. Power steering fluid reservoir
2. Clutch fluid reservoir (manual transmission)
3. Engine oil dipstick
4. Brake fluid reservoir
5. Power distribution box
6. Air filter assembly
7. Engine coolant reservoir
8. Windshield washer fluid reservoir
9. Battery
10. Transmission fluid dipstick (automatic transmission)
11. Engine oil filler cap
Maintenance and Specifications
219
Page 221 of 280
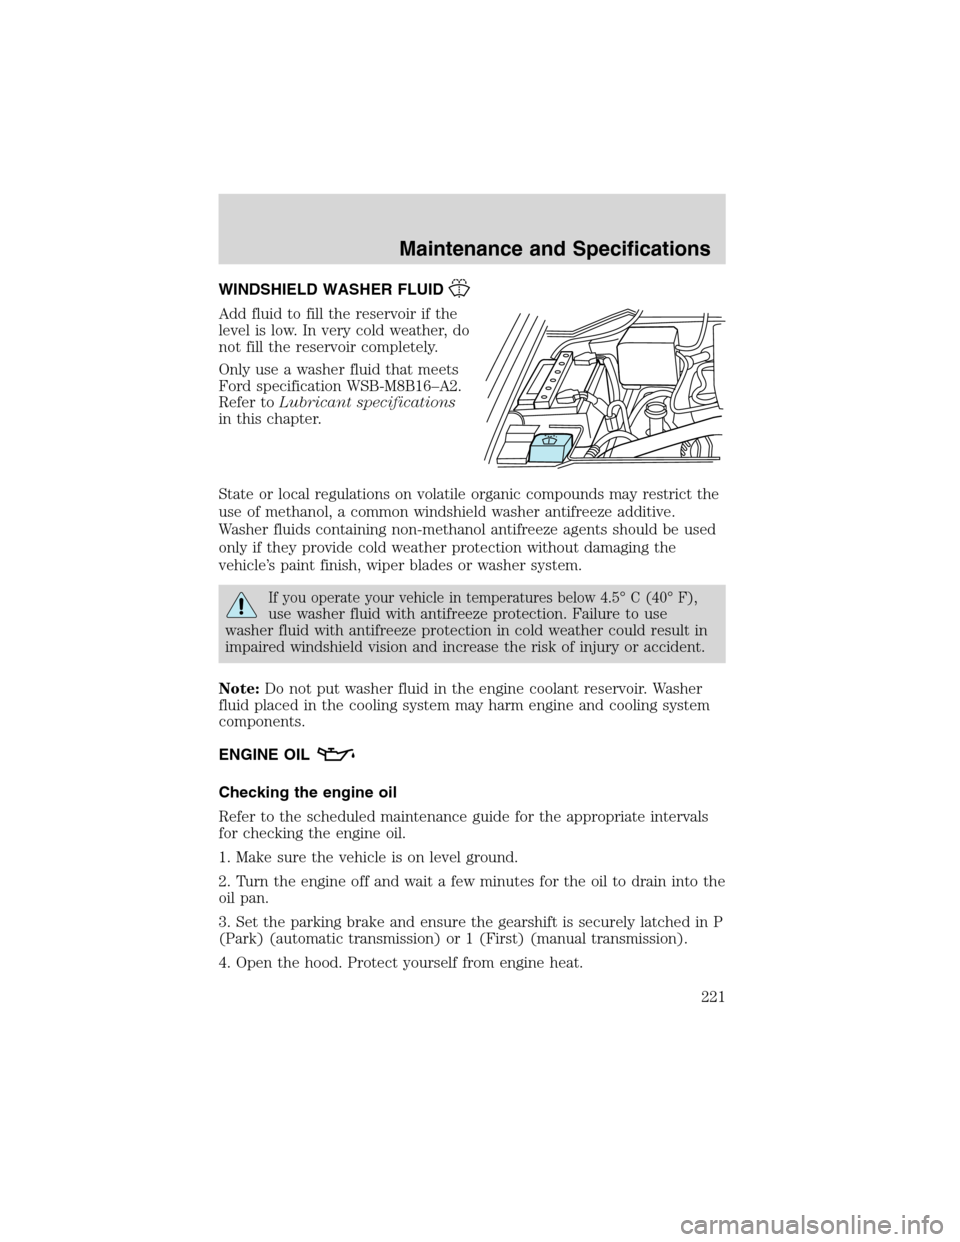
WINDSHIELD WASHER FLUID
Add fluid to fill the reservoir if the
level is low. In very cold weather, do
not fill the reservoir completely.
Only use a washer fluid that meets
Ford specification WSB-M8B16–A2.
Refer toLubricant specifications
in this chapter.
State or local regulations on volatile organic compounds may restrict the
use of methanol, a common windshield washer antifreeze additive.
Washer fluids containing non-methanol antifreeze agents should be used
only if they provide cold weather protection without damaging the
vehicle’s paint finish, wiper blades or washer system.
If you operate your vehicle in temperatures below 4.5°C (40°F),
use washer fluid with antifreeze protection. Failure to use
washer fluid with antifreeze protection in cold weather could result in
impaired windshield vision and increase the risk of injury or accident.
Note:Do not put washer fluid in the engine coolant reservoir. Washer
fluid placed in the cooling system may harm engine and cooling system
components.
ENGINE OIL
Checking the engine oil
Refer to the scheduled maintenance guide for the appropriate intervals
for checking the engine oil.
1. Make sure the vehicle is on level ground.
2. Turn the engine off and wait a few minutes for the oil to drain into the
oil pan.
3. Set the parking brake and ensure the gearshift is securely latched in P
(Park) (automatic transmission) or 1 (First) (manual transmission).
4. Open the hood. Protect yourself from engine heat.
Maintenance and Specifications
221
Page 245 of 280
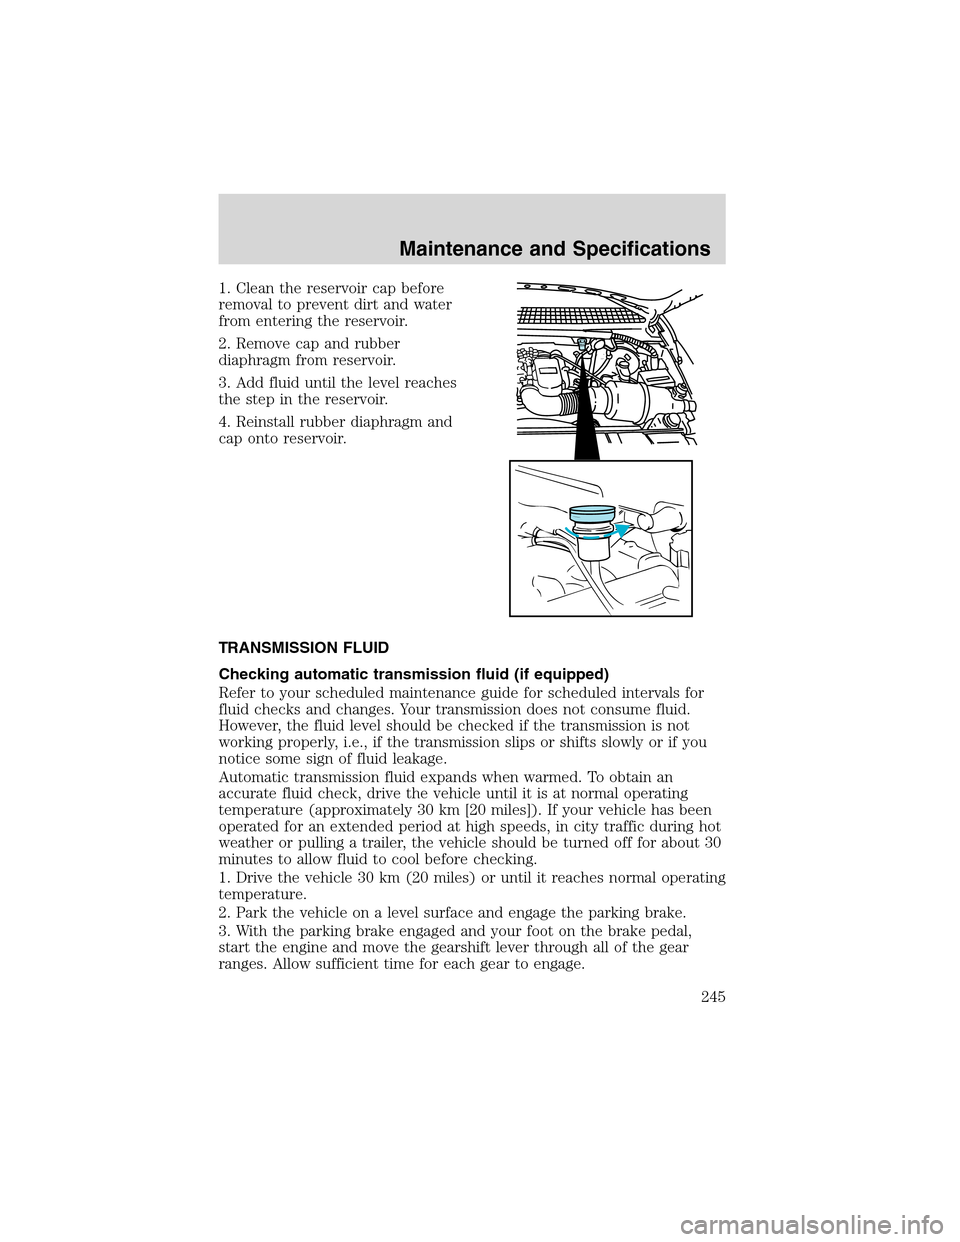
1. Clean the reservoir cap before
removal to prevent dirt and water
from entering the reservoir.
2. Remove cap and rubber
diaphragm from reservoir.
3. Add fluid until the level reaches
the step in the reservoir.
4. Reinstall rubber diaphragm and
cap onto reservoir.
TRANSMISSION FLUID
Checking automatic transmission fluid (if equipped)
Refer to your scheduled maintenance guide for scheduled intervals for
fluid checks and changes. Your transmission does not consume fluid.
However, the fluid level should be checked if the transmission is not
working properly, i.e., if the transmission slips or shifts slowly or if you
notice some sign of fluid leakage.
Automatic transmission fluid expands when warmed. To obtain an
accurate fluid check, drive the vehicle until it is at normal operating
temperature (approximately 30 km [20 miles]). If your vehicle has been
operated for an extended period at high speeds, in city traffic during hot
weather or pulling a trailer, the vehicle should be turned off for about 30
minutes to allow fluid to cool before checking.
1. Drive the vehicle 30 km (20 miles) or until it reaches normal operating
temperature.
2. Park the vehicle on a level surface and engage the parking brake.
3. With the parking brake engaged and your foot on the brake pedal,
start the engine and move the gearshift lever through all of the gear
ranges. Allow sufficient time for each gear to engage.
Maintenance and Specifications
245