Page 819 of 4500
Clean both sealing surfaces with a non-residue solvent.
Parts must be reassembled within 10 minutes of application. Otherwise, the packing (FIPG) material must
be removed and reapplied.
ADJUSTMENT
1.BEFORE TRANSMISSION FILL
This transmission requires Toyota Genuine ATF WS transmission fluid.
After servicing the transmission, you must refill the transmission with the correct amount of fluid.
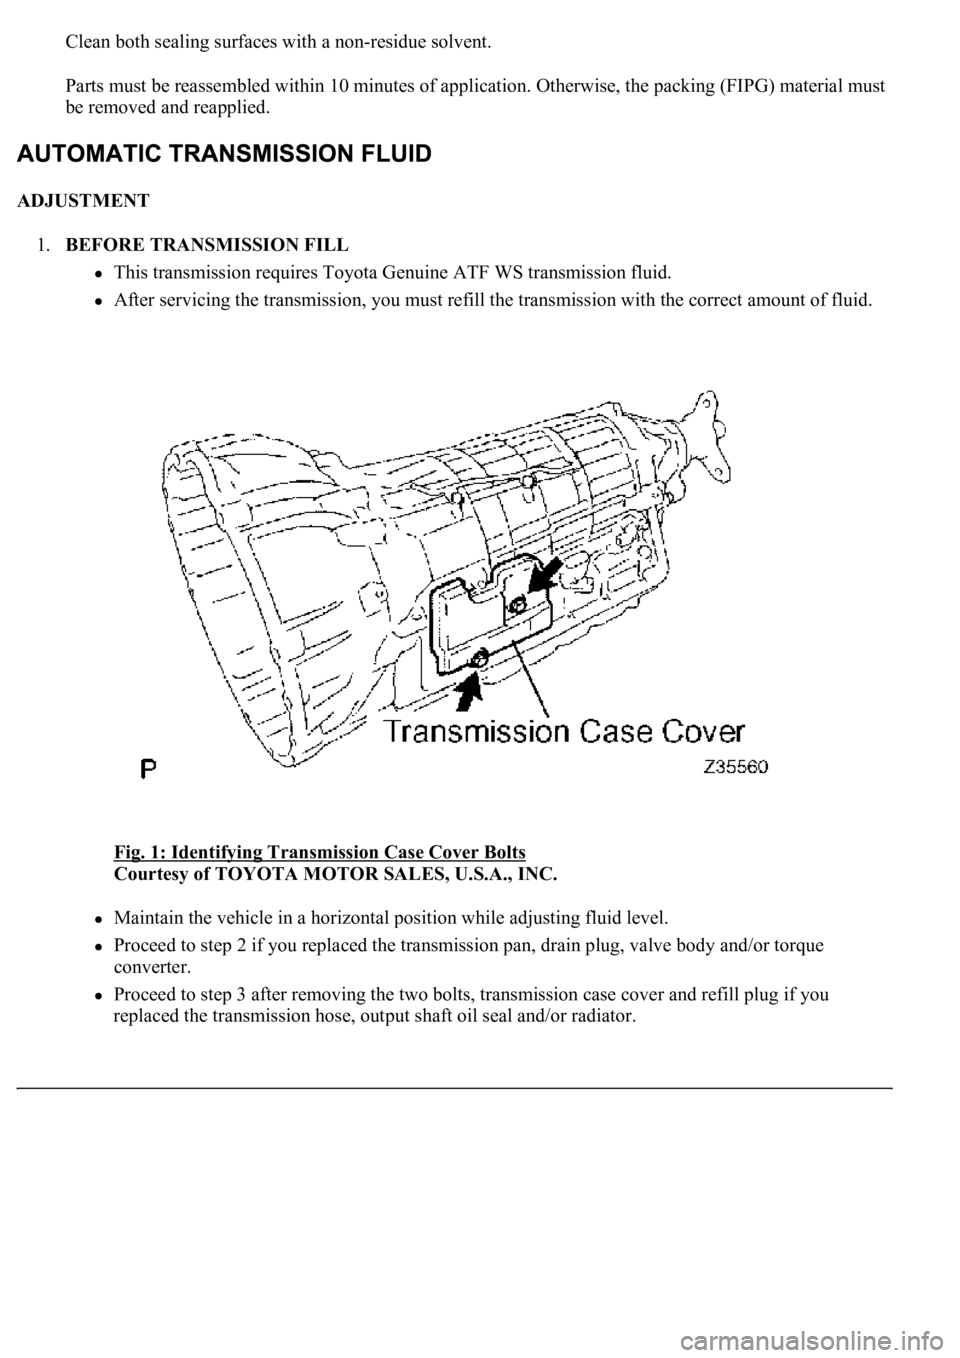
Fig. 1: Identifying Transmission Case Cover Bolts
Courtesy of TOYOTA MOTOR SALES, U.S.A., INC.
Maintain the vehicle in a horizontal position while adjusting fluid level.
Proceed to step 2 if you replaced the transmission pan, drain plug, valve body and/or torque
converter.
Proceed to step 3 after removing the two bolts, transmission case cover and refill plug if you
replaced the transmission hose, output shaft oil seal and/or radiator.
Page 822 of 4500
HINT:
If you cannot add the listed amount of fluid, do the following:
1. Install the refill plug.
2. Allow the engine to idle with air conditioning OFF.
3. Move the shift lever through entire gear range to circulate fluid.
4. Wait for 30 seconds with the engine idling.
5. Stop the engine.
6. Remove the refill plug and add fluid.
7. Reinstall the refill plug.
4.FLUID CIRCULATION
a. Allow the engine to idle with the air conditioning OFF.
b. Move the shift lever through entire gear range to circulate fluid.
5.FLUID TEMPERATURE CHECK
a. With hand-held tester
1. Connect the han
d-held tester to the DLC3.
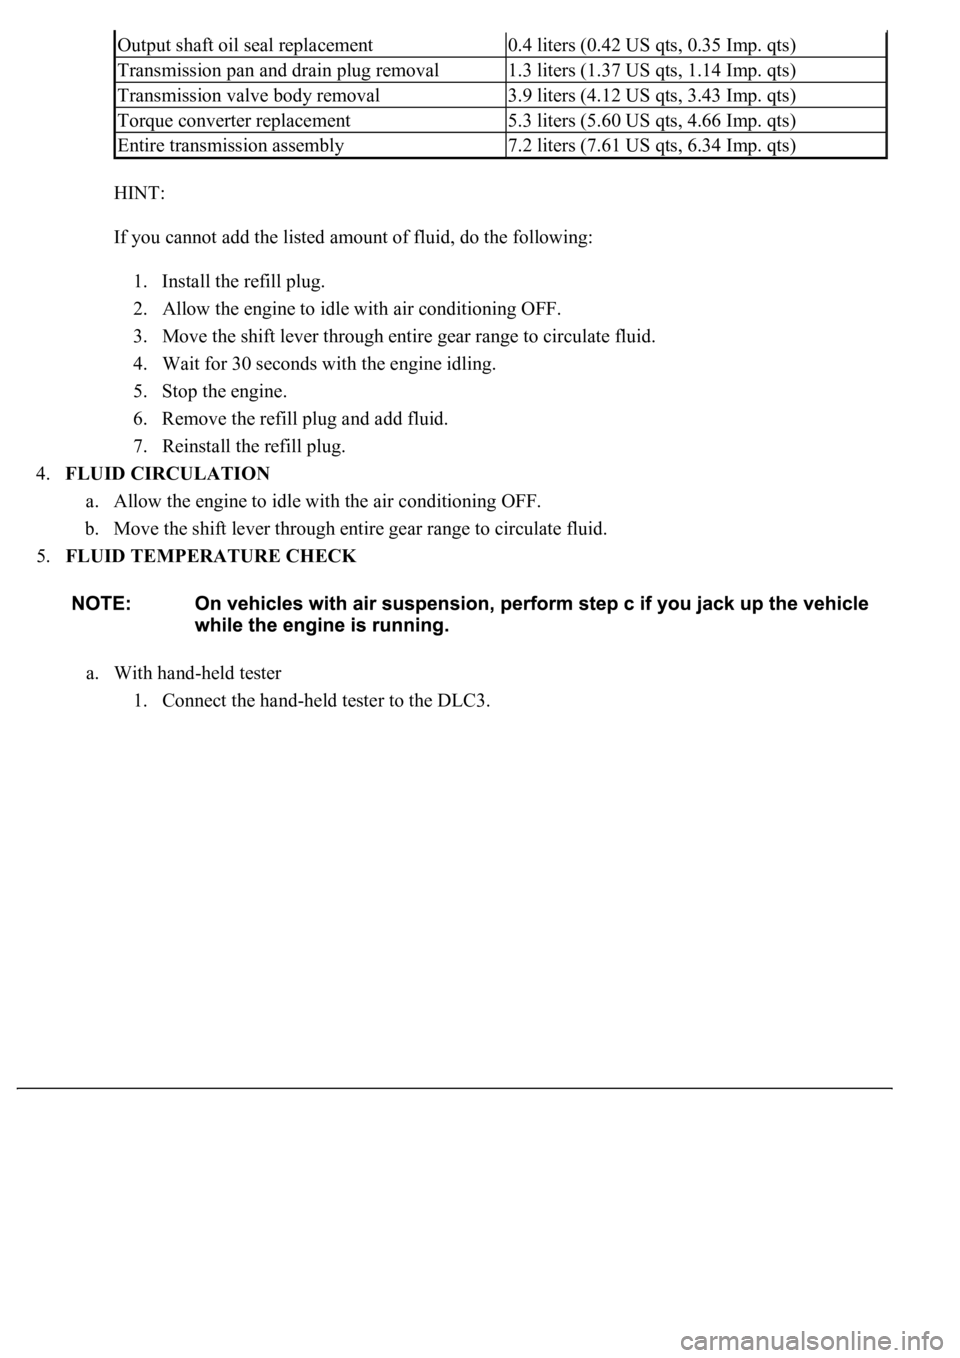
Output shaft oil seal replacement0.4 liters (0.42 US qts, 0.35 Imp. qts)
Transmission pan and drain plug removal1.3 liters (1.37 US qts, 1.14 Imp. qts)
Transmission valve body removal3.9 liters (4.12 US qts, 3.43 Imp. qts)
Torque converter replacement5.3 liters (5.60 US qts, 4.66 Imp. qts)
Entire transmission assembly7.2 liters (7.61 US qts, 6.34 Imp. qts)
Page 880 of 4500
Courtesy of TOYOTA MOTOR SALES, U.S.A., INC.
REPLACEMENT
<00380056004c0051004a00030044000300550044005d0052005500030045004f00440047004800030044005100470003004a00440056004e0048005700030056004600550044005300480055000f000300550048005000520059004800030044004f004f00
030057004b004800030052004f004700030029002c0033002a[ material from the gasket surfaces.
Thoroughly clean all components to remove any loose material.
Clean both sealing surfaces with a non-residue solvent.
Apply FIPG in a continuous line width approximately 1 mm (0.04 in.) along the sealing surface.
Parts must be assembled within 10 minutes of application. Otherwise, the FIPG material must be
removed and reapplied.
1.DISCONNECT BATTERY NEGATIVE TERMINAL
2.DRAIN AUTOMATIC TRANSMISSION FLUID
a. Remove the drain plug, gasket and drain the ATF.
b. Install a new gasket and the drain plug.
Torque: 20 N.m (205 kgf.cm, 15 ft.lbf)
3.REMOVE AUTOMATIC TRANSMISSION OIL PAN SUB-ASSY
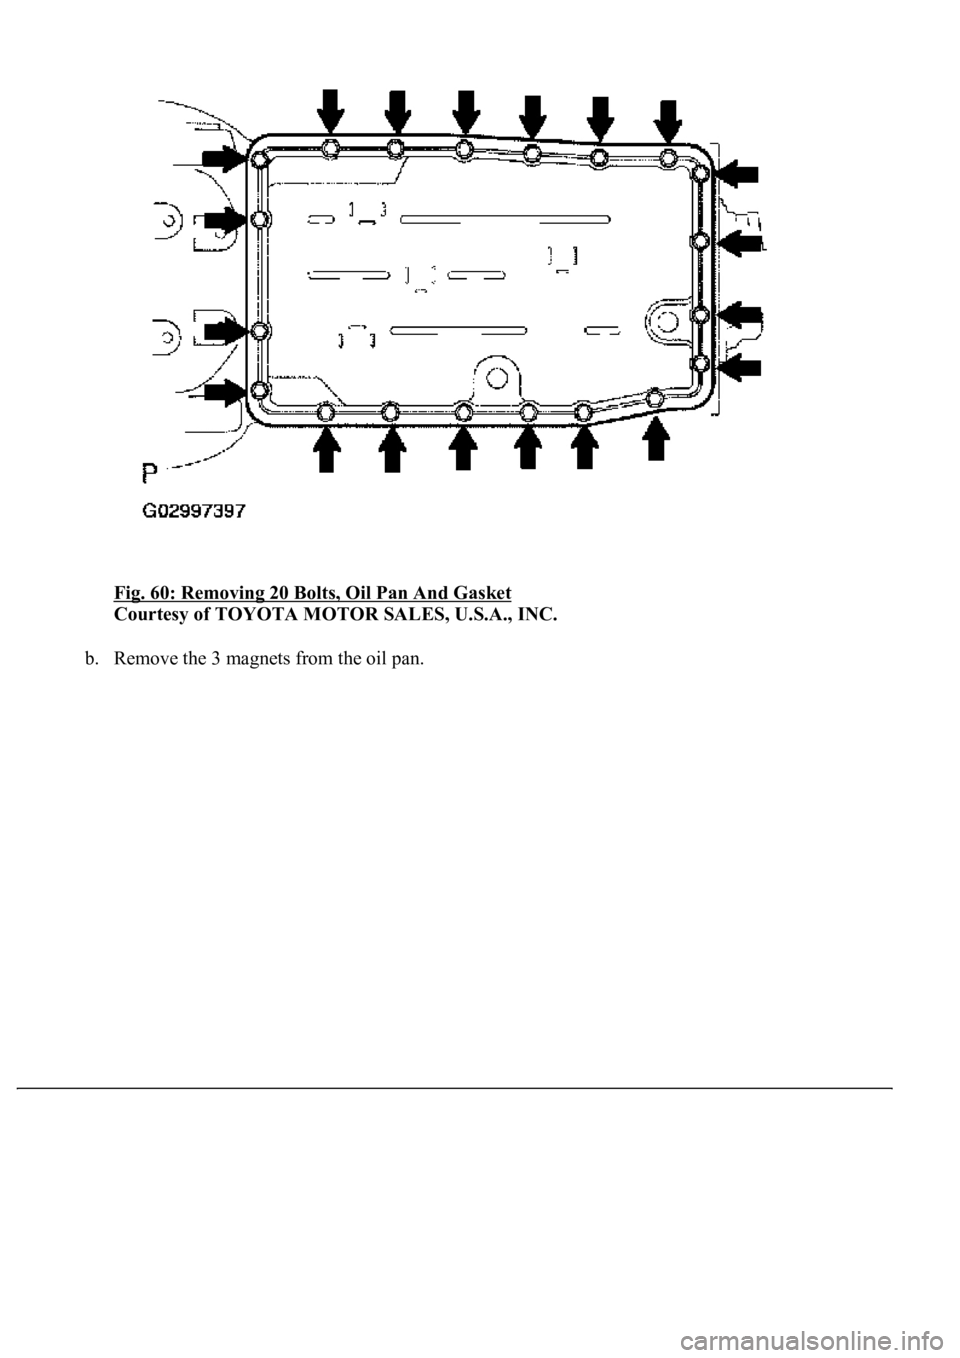
a. Remove the 20 bolts, oil pan and
gasket.
Page 881 of 4500
Fig. 60: Removing 20 Bolts, Oil Pan And Gasket
Courtesy of TOYOTA MOTOR SALES, U.S.A., INC.
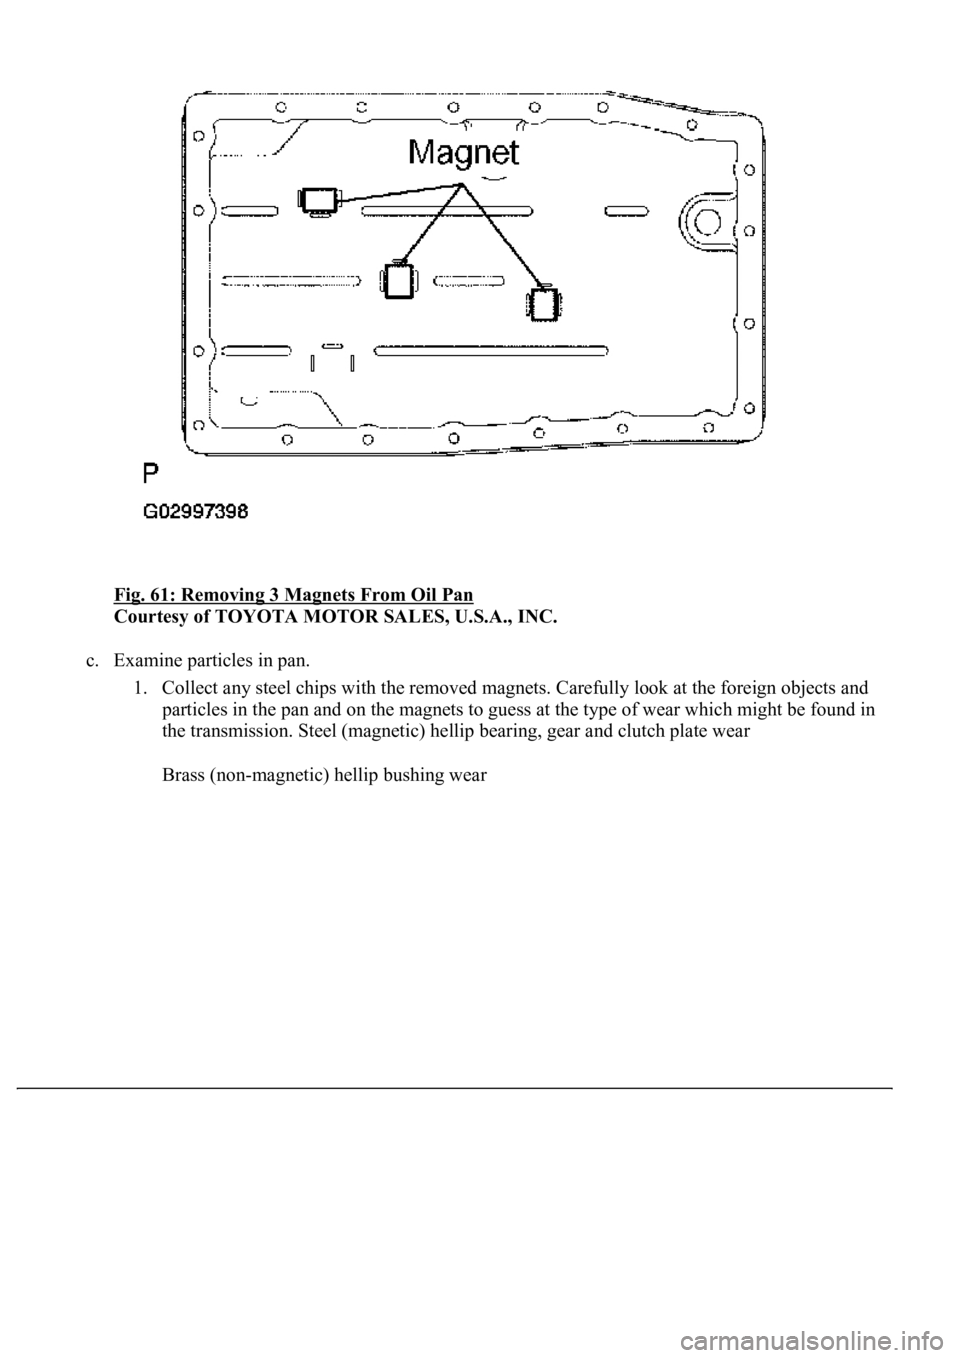
b. Remove the 3 magnets from the oil pan.
Page 882 of 4500
Fig. 61: Removing 3 Magnets From Oil Pan
Courtesy of TOYOTA MOTOR SALES, U.S.A., INC.
c. Examine particles in pan.
1. Collect any steel chips with the removed magnets. Carefully look at the foreign objects and
particles in the pan and on the magnets to guess at the type of wear which might be found in
the transmission. Steel (magnetic) hellip bearing, gear and clutch plate wear
Brass (non-ma
gnetic) hellip bushing wear
Page 891 of 4500
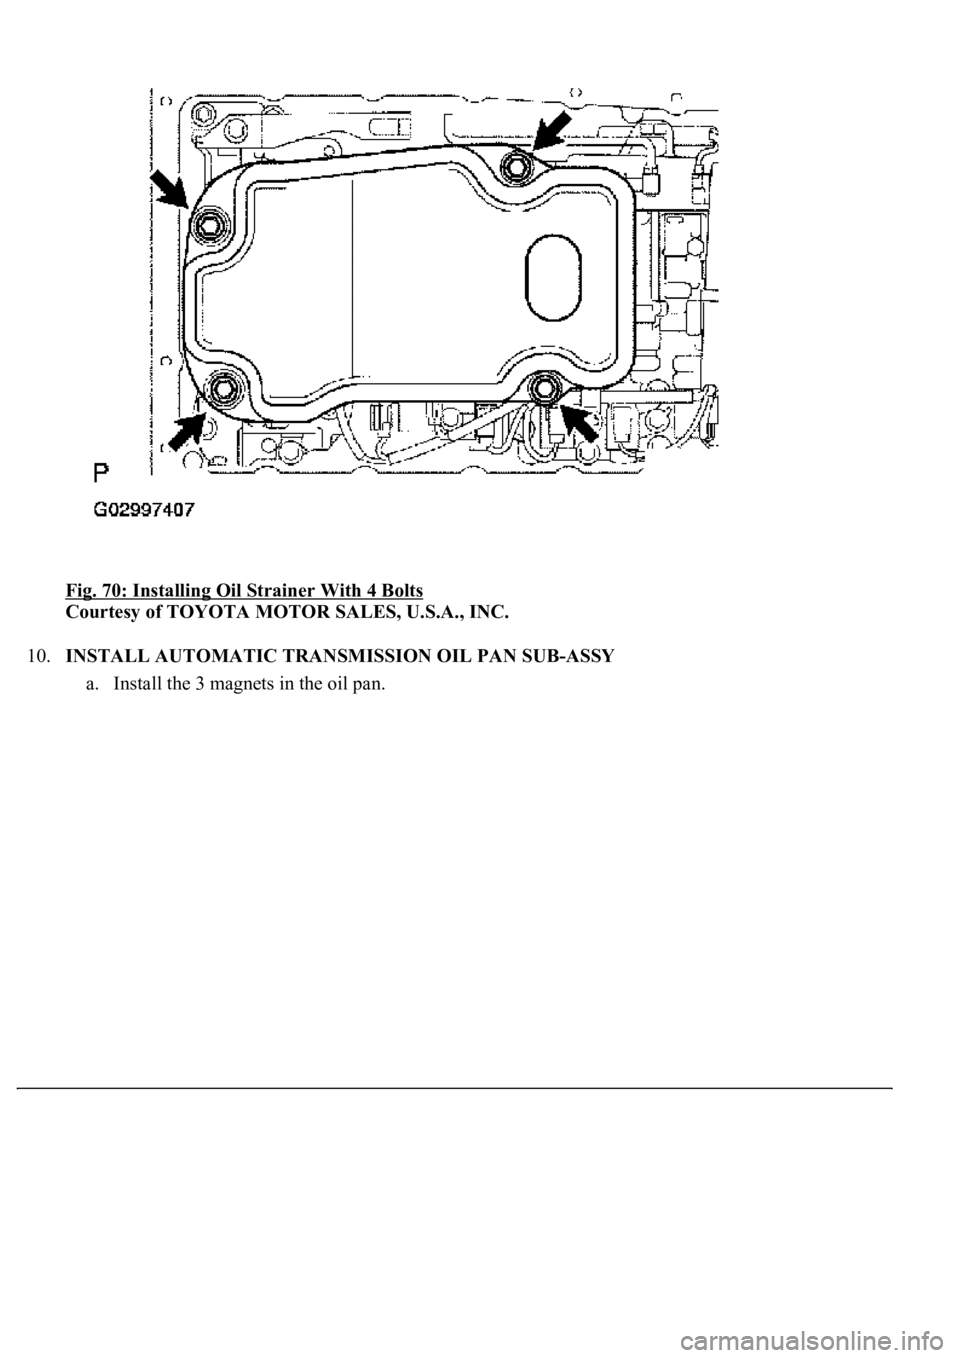
Fig. 70: Installing Oil Strainer With 4 Bolts
Courtesy of TOYOTA MOTOR SALES, U.S.A., INC.
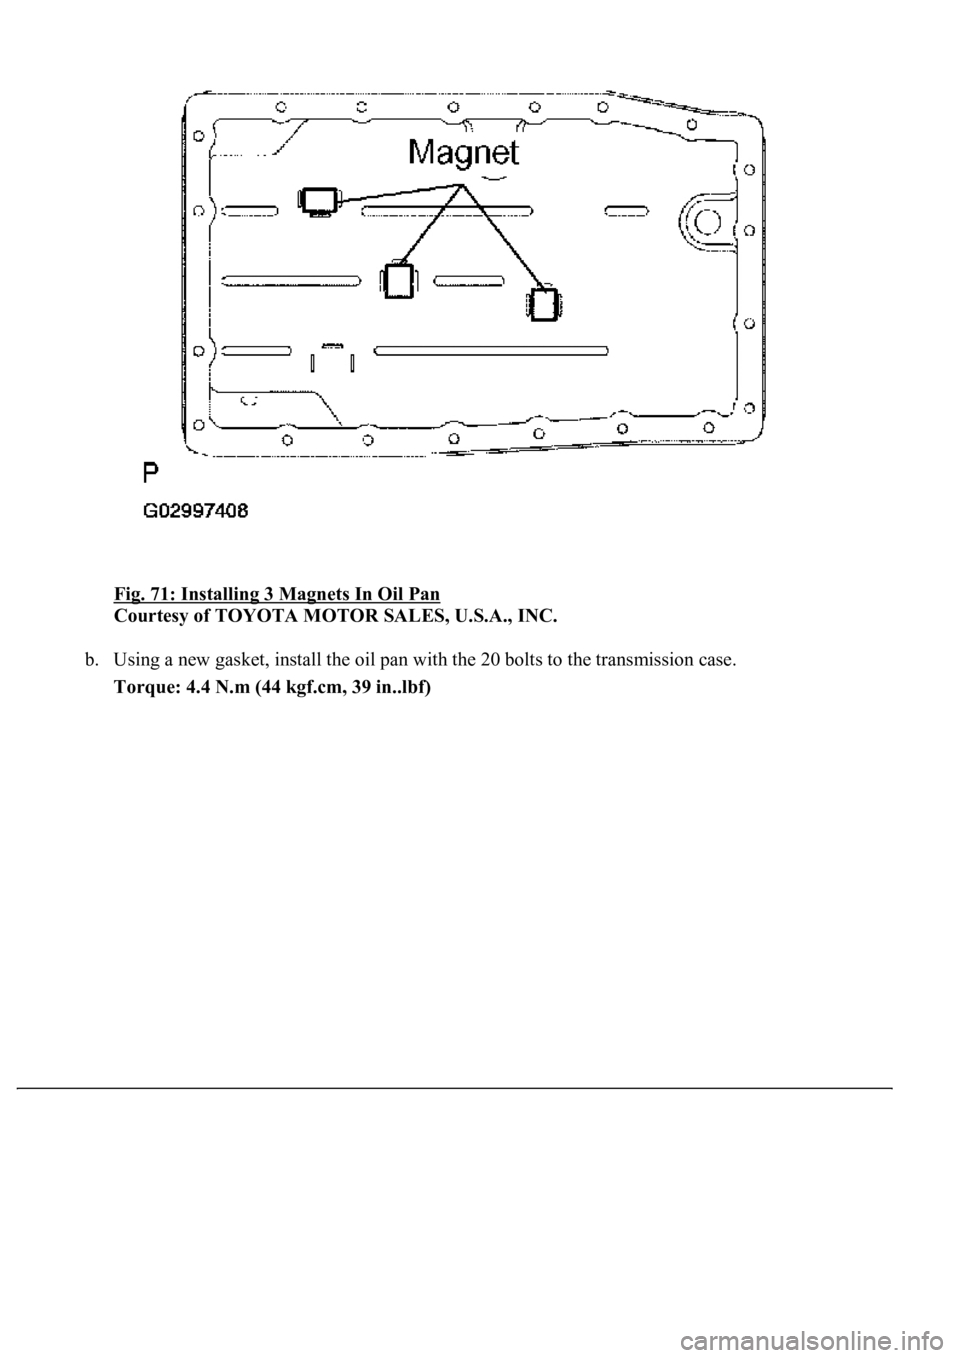
10.INSTALL AUTOMATIC TRANSMISSION OIL PAN SUB-ASSY
a. Install the 3 ma
gnets in the oil pan.
Page 892 of 4500
Fig. 71: Installing 3 Magnets In Oil Pan
Courtesy of TOYOTA MOTOR SALES, U.S.A., INC.
b. Using a new gasket, install the oil pan with the 20 bolts to the transmission case.
Torque: 4.4 N.m (44 kgf.cm, 39 in..lbf)
Page 893 of 4500
Fig. 72: Installing Oil Pan With 20 Bolts To Transmission Case
Courtesy of TOYOTA MOTOR SALES, U.S.A., INC.
11.CONNECT BATTERY NEGATIVE TERMINAL
12.ADD AUTOMATIC TRANSMISSION FLUID (SEE ADJUSTMENT
)
Fluid type: ATF WS
Capacity: 4.3 liters (4.5 US qts, 3.8 Imp.qts)
13.RESET MEMORY (SEE INITIALIZATION
)
14.PERFORM INITIALIZATION (SEE INITIALIZATION
)
REPLACEMENT
<00380056004c0051004a00030044000300550044005d0052005500030045004f00440047004800030044005100470003004a00440056004e0048005700030056004600550044005300480055000f000300550048005000520059004800030044004f004f00
030057004b004800030052004f004700030029002c0033002a[ material from the gasket surfaces.
Thoroughly clean all components to remove any loose material.