Page 20 of 415
CONT INUED
Insert the latch plate into the buckle,
then tug on the belt to make sure the
belt is securely latched. Also check
that the belt is not twisted, because a
twisted belt can cause serious
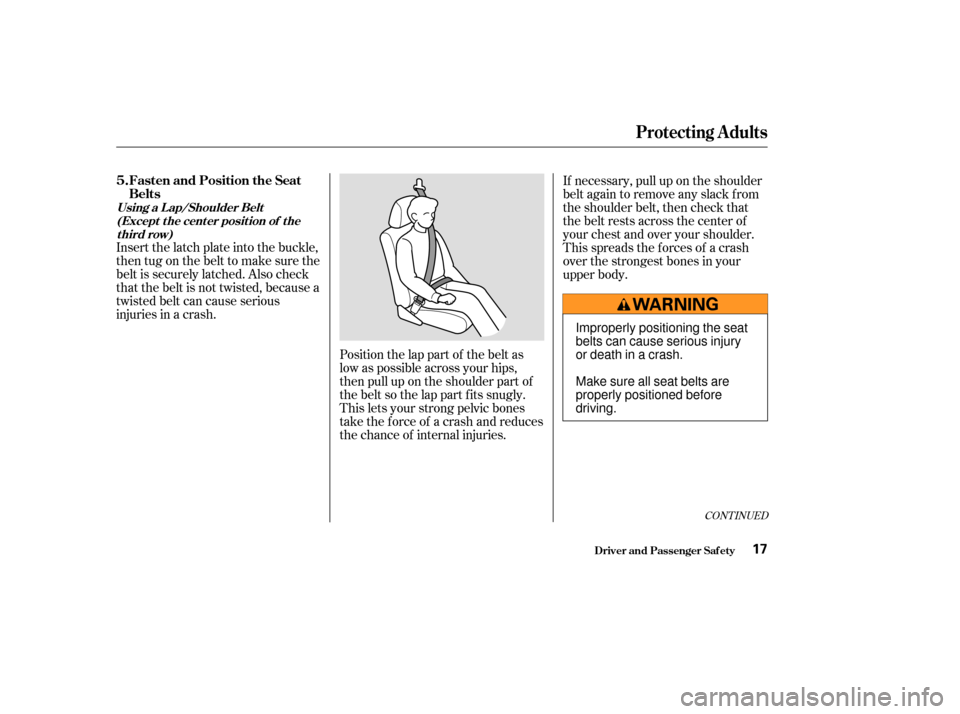
injuries in a crash.Position the lap part of the belt as
low as possible across your hips,
then pull up on the shoulder part of
the belt so the lap part f its snugly.
This lets your strong pelvic bones
take the force of a crash and reduces
the chance of internal injuries.If necessary, pull up on the shoulder
belt again to remove any slack from
the shoulder belt, then check that
the belt rests across the center of
your chest and over your shoulder.
This spreads the f orces of a crash
over the strongest bones in your
upper body.
Driver and Passenger Saf ety
Protecting Adults
Fasten and Position the Seat
Belts
5.
Using a L ap/Shoulder Belt
(Except t he cent er posit ion of t hethird row)
17
Improperly positioning the seat
belts can cause serious injury
or death in a crash.
Make sure all seat belts are
properly positioned before
driving.
Page 23 of 415
If necessary, pull up on the shoulder
belt again to remove any slack from
the shoulder belt, then check that
the belt rests across the center of
your chest and over your shoulder.
This spreads the f orces of a crash
over the strongest bones in your
upper body.This could cause
very serious injuries in a crash. If a seat belt does not seem to work
as it should, it may not protect the
occupant in a crash.
Anyone using a seat belt that is
not working properly can be
seriously injured or killed. Have your
Honda dealer check the belt as soon
as possible.
See page f or additional
inf ormation about your seat belt
system and how to take care of your
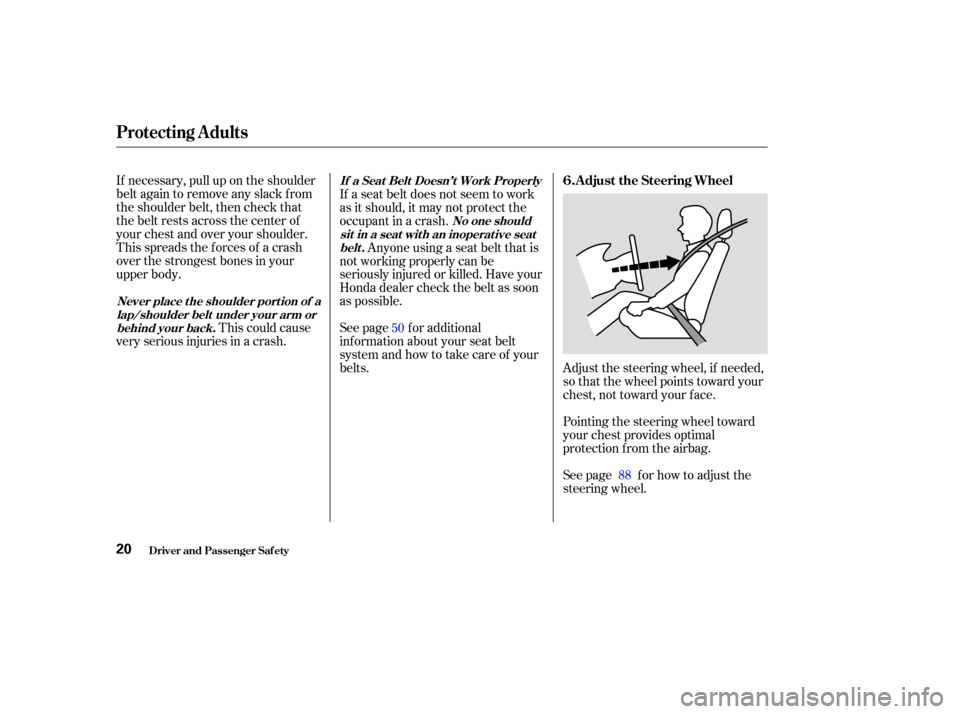
belts. Adjust the steering wheel, if needed,
so that the wheel points toward your
chest, not toward your f ace.
Pointing the steering wheel toward
your chest provides optimal
protection f rom the airbag.
See page f or how to adjust the
steering wheel.
50
88
Protecting Adults
Driver and Passenger Saf ety
Never place t he shoulder port ion of alap/shoulder belt under your arm orbehind your back. If a Seat Belt Doesn’t Work Properly
No one should
sit in a seat wit h an inoperat ive seat belt.
A djust the Steering Wheel
6.
20
Page 36 of 415
Af ter selecting a proper child seat,
and a good position to install the seat,
there are three main steps in
installing the seat:Make sure the child is properly
strappedinthechildseat
according to the child seat maker’s
instructions. A child who is not
properly secured in a child seat
canbethrownoutof theseatina
crash and be seriously injured.
However, a child seat does not need
to be ‘‘rock solid.’’ In some vehicles
or seating positions, it may be
dif f icult to install a child seat so that
it does not move at all. Some side-to-
side or back-and-f orth movement can
be expected and should not reduce
the child seat’s ef f ectiveness. When you are not using a child seat,
either remove it and store it in a saf e
place, or make sure it is properly
secured. An unsecured child seat can
be thrown around the vehicle during
a crash or sudden stop and injure
someone.
If the child seat is not secure, try
installing it in a dif f erent seating
position, or use a dif f erent style of
child seat that can be f irmly secured
in the desired seating position. To provide security during normal
driving maneuvers as well as during
a collision, we recommend that
parents secure a child seat as f irmly
as possible.
Af ter installing a child
seat, push and pull the seat
f orward and f rom side to side to
verif y that it is secure. All child seats are
designed to be secured to the
vehicle with the lap part of a lap/
shoulder belt. Some child seats
can be secured to the vehicle’s
LATCH anchorage system instead.
A child whose seat is not properly
secured to the vehicle can be
endangered in a crash. See pages , and f or instructions on
howtoproperlysecurechildseats
in this vehicle. 39 48
35
Inst alling a Child Seat Secure t he child in t he child seat .
Storing a Child Seat
Make sure t he child seat is f irmly secured.
Properly secure t he child seat t o
the vehicle.
1.
2. 3.
Protecting Children
Driver and Passenger Saf ety33
Page 39 of 415
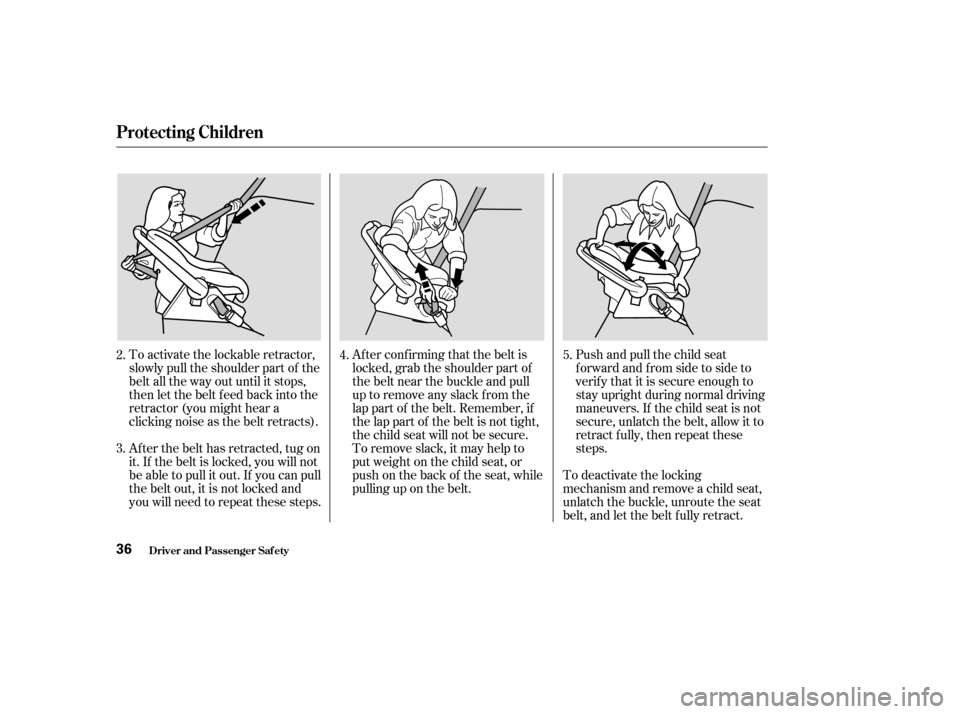
To activate the lockable retractor,
slowly pull the shoulder part of the
belt all the way out until it stops,
then let the belt f eed back into the
retractor (you might hear a
clicking noise as the belt retracts).
Af ter the belt has retracted, tug on
it. If the belt is locked, you will not
be able to pull it out. If you can pull
the belt out, it is not locked and
you will need to repeat these steps.Af ter conf irming that the belt is
locked, grab the shoulder part of
the belt near the buckle and pull
up to remove any slack from the
lap part of the belt. Remember, if
the lap part of the belt is not tight,
the child seat will not be secure.
To remove slack, it may help to
putweightonthechildseat,or
push on the back of the seat, while
pulling up on the belt.
Push and pull the child seat
f orward and f rom side to side to
verif y that it is secure enough to
stay upright during normal driving
maneuvers. If the child seat is not
secure, unlatch the belt, allow it to
retract f ully, then repeat these
steps.
To deactivate the locking
mechanism and remove a child seat,
unlatch the buckle, unroute the seat
belt, and let the belt f ully retract.
4.
3. 2. 5.
Protecting Children
Driver and Passenger Saf ety36
Page 40 of 415
Forproperprotection,aninfantmust
ride in a reclined, or semi-reclined
position. To determine the proper
reclining angle, check with the baby’s
doctor or f ollow the seat maker’s
recommendations.
To achieve the desired reclining
angle, it may help to put a rolled up
towel under the toe of the child seat,
as shown.
Then pull hard on the loose end of
thebelttoremovetheanyslack(it
may help to put weight on the child
seat while pulling on the belt).
Finally, f ollow instruction number 5
on page to verify that the child
seat is secured.
To install a rear-f acing child seat in
the center position of the third seat,
use the lap part of the lap/shoulder
belt. Follow instruction number 1 on
page f or routing and latching the
seat belt. 35 36
Protecting Children
Driver and Passenger Saf ety
Rear-Facing Child Seat Inst allat ion
Tips
Inst alling a Rear-Facing Child Seat in
t he Cent er Posit ion of t he T hird Seat
37
Page 43 of 415
Af ter conf irming that the belt is
locked, grab the shoulder part of
the belt near the buckle and pull
up to remove any slack from the
lap part of the belt. Remember, if
the lap part of the belt is not tight,
the child seat will not be secure. It
mayhelptoputweightonthe
child seat, or push on the back of
the seat, while pulling up on the
belt.
To activate the lockable retractor,
slowly pull the shoulder part of the
belt all the way out until it stops,
then let the belt f eed back into the
retractor (you might hear a
clicking noise as the belt retracts). Af ter the belt has retracted, tug on
it. If the belt is locked, you will not
be able to pull it out. If you can pull
the belt out, it is not locked and
you will need to repeat these steps.
4.
2. 3.
Protecting Children
Driver and Passenger Saf ety40
Page 44 of 415
To deactivate the locking
mechanism in order to remove a
child restraint system, unlatch the
buckle, unroute the seat belt, and let
the belt fully retract.
Push and pull the child seat
f orward and f rom side to side to
verif y that it is secure enough to
stay upright during normal driving
maneuvers. If the child seat is not
secure, unlatch the belt, allow it to
retract f ully, then repeat these
steps. To install a forward-facing child seat
in the center position of the third
seat, use the lap part of the lap/
shoulder belt. Follow instruction
number 1 on page f or routing and
latching the seat belt.
5.
39
CONT INUED
Inst alling a Child Seat in t he Cent erPosition of the T hird Seat
Protecting Children
Driver and Passenger Saf ety41
Page 45 of 415
Then pull hard on the loose end of
thebelttoremovetheanyslack(it
may help to put weight on the child
seat while pulling on the belt).
Finally, f ollow instruction number 5
on page to verify that the child
seat is secured.When a child reaches the
recommended weight or height limit
for a forward-facing child seat, the
child should sit in the back seat on a
booster and wear a lap/shoulder belt.
We recommend that the child use a
booster seat until the child is tall
enough to use the seat belt without a
booster.
The f ollowing pages give
instructions on how to check proper
seat belt f it, what kind of booster
seat to use if one is needed, and
important precautions f or a child
who must sit in the f ront seat.
41
Protecting L arger Children
Protecting Children
Driver and Passenger Saf ety42
Allowing a larger child to sit
improperly in the front seat can
result in injury or death if the
passenger’s front airbag inflates.
If a larger child must sit in front,
make sure the child moves the
seat as far back as possible,
uses a booster seat if needed,
and wears the seat belt properly.