Page 261 of 415

Youshoulddothefollowingchecks
and adjustments every day bef ore
you drive your vehicle.Make sure all windows, mirrors,
and outside lights are clean and
unobstructed. Remove f rost, snow,
or ice. Check the adjustment of the seat
(see page ).
Check the adjustment of the
inside and outside mirrors (see
page ).
Check the adjustment of the
steering wheel (see page ).
Fasten your seat belt. Check that
your passengers have f astened
their seat belts (see page ).Turn the ignition switch ON (II).
Check the indicator lights in the
instrument panel.
Start the engine (see page ).
Check the gauges and indicator
lights in the instrument panel (see
page ).
Check that any items you may be
carrying with you inside are stored
properly or f astened down
securely. Visually check the tires. If a tire
looks low, use a gauge to check its
pressure. Check that the hood and tailgate
arefullyclosed. Makesurethedoorsandtailgate
are securely closed and locked.
3. 2.
1.
4. 5.
6.
7.
8.
9. 11.
12. 10.
128 88
17 259
71
110
Preparing to Drive
Driving258
Page 263 of 415
This indicator on the instrument
panel shows which position the shif t
lever is in.
Your Honda’s transmission has f ive
f orward speeds, and is electronically
controlled f or smoother shif ting. It
also has a ‘‘lock-up’’ torque converter
forbetterfueleconomy.Youmay
f eel what seems like another shif t
when the converter locks.
The ‘‘D’’ indicator comes on f or a
f ew seconds when you turn the
ignition switch to ON (II). If it
f lashes while driving (in any shif t
position), it indicates a possible
problem in the transmission. Avoid
rapid acceleration and have the trans-
missioncheckedbyanauthorized
Honda dealer as soon as possible.
The malf unction indicator lamp may
come on along with the ‘‘D’’ indicator
if there is a problem in the automatic
transmission control system.
Automatic Transmission
Driving
Shif t L ever Position Indicator
260
Page 264 of 415

�µ
CONT INUED
This position mechani-
cally locks the transmission. Use
Park whenever you are turning of f or
starting the engine. To shif t out of
Park, you must press on the brake
pedal and have your f oot of f the
accelerator pedal. Pull the shif t lever
towards you, then move it out of
Park.
If you have done all of the above and
still cannot move the lever out of
Park, see Shif t Lock Release on page .
You must also pull the shif t lever
towards you to shift into Park. To
avoid transmission damage, come to
a complete stop bef ore shif ting into
Park. The shif t lever must be in Park
bef ore you can remove the key f rom
the ignition switch.
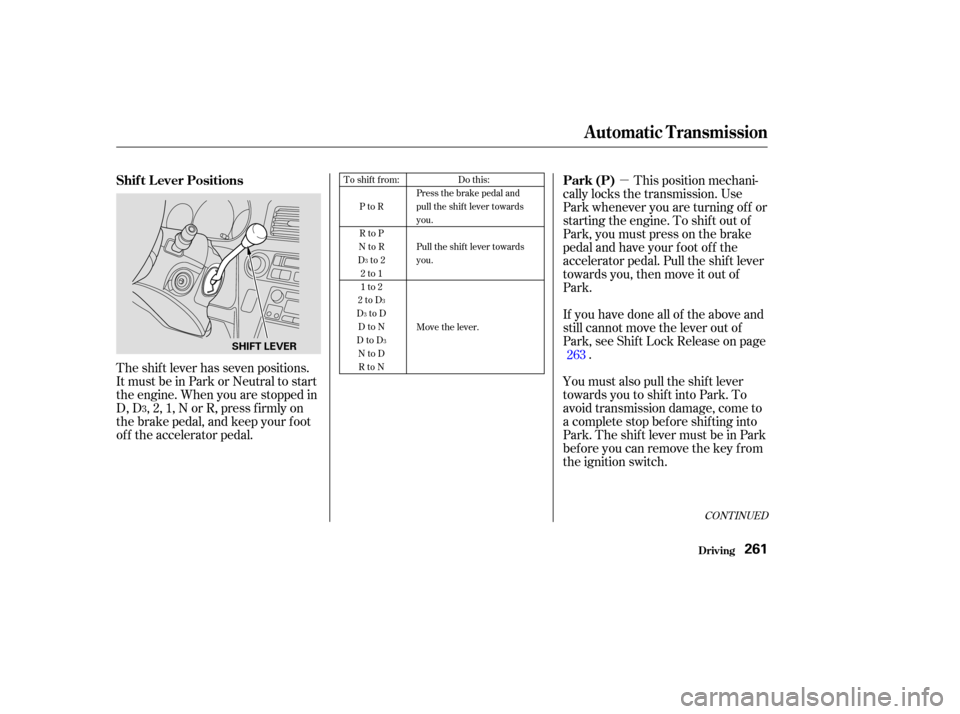
The shift lever has seven positions.
It must be in Park or Neutral to start
the engine. When you are stopped in
D, D , 2, 1, N or R, press f irmly on
the brake pedal, and keep your f oot
of f the accelerator pedal.
263Do this:
Press the brake pedal and
pull the shift lever towards
you.
Pull the shift lever towards
you.
Move the lever.
To shift from:
PtoR
RtoP
NtoR
Dto2 2to1
1to2
2toD
DtoD DtoN
DtoD NtoDRtoN
3
3
3
3
3
Automatic Transmission
Driving
Park (P)
Shif t L ever Positions
261
SHIFT LEVER
Page 266 of 415

�µ
�µ To shif t to Second,
pull the shif t lever towards you, then
shif t to the lower gear. This position
locks the transmission in second
gear. It does not downshif t to f irst
gear when you come to a stop.
Second gives you more power when
climbing, and increased engine
braking when going down steep hills.
Usesecondgearwhenstartingout
on a slippery surf ace or in deep snow.
It will help reduce wheelspin.
When driving down hill with a trailer,
use the Second position. If you exceed the maximum speed
f or the gear you are in, the engine
speed will enter into the tachometer’s
red zone. If this occurs, you may f eel
the engine cut in and out. This is
caused by a limiter in the engine’s
computer controls. The engine will
run normally when you reduce the
RPM below the red zone.
This allows you to move the shif t
lever out of Park if the normal
method of pushing on the brake
pedal and pulling the shif t lever does
not work.
Set the Parking brake.
Remove the key from the ignition
switch.
Place a cloth on the edge of the
Shif t Lock Release slot cover on
the steering column. Remove the
cover by caref ully prying on the
edge with a small f lat-tipped
screwdriver (not included in the
tool kit).
To shif t f rom Second to
First, pull the shift lever towards you,
then shift to the lower gear. With the
lever in this position, the transmis-
sion locks in First gear. By upshif t-
ing and downshif ting through 1, 2,
D , and D, you can operate this
transmission much like a manual
transmission without a clutch pedal. 1.
2.
3.
CONT INUED
3
Automatic Transmission
Driving
Second (2)
Engine Speed L imiter Shif t L ock Release
First (1)
263
Page 267 of 415
Insert the key in the Shift Lock
Release slot.
Push down on the key while you
pull the shif t lever towards you
and move it out of Park to Neutral.Remove the key from the Shift
Lock Release slot, then install a
new cover. Depress the brake
pedal and restart the engine.
If you need to use the Shif t Lock
Release, it means your vehicle is
developing a problem. Have the
vehicle checked by your Honda
dealer.
4.
5.
6.
Automatic Transmission
Driving264
SHIFT LOCK RELEASE SLOT COVER
Page 268 of 415

�µ
Always use the parking brake when
you park your vehicle. The indicator
on the instrument panel shows that
the parking brake is not f ully
released; it does not indicate that the
parking brake is f irmly set. Make
sure the parking brake is set f irmly
or your vehicle may roll if it is
parked on an incline.
Set the parking brake bef ore you put
the transmission in Park. This keeps
the vehicle from moving and putting
pressure on the parking mechanism
in the transmission making it
easier to move the shif t lever out of
Park when you want to drive away. If the vehicle is f acing uphill, turn
the f ront wheels away f rom the curb.
If the vehicle is f acing downhill, turn
the f ront wheels toward the curb.
Make sure the parking brake is f ully
released bef ore driving away.
Driving with the parking brake
partially set can overheat or damage
the rear brakes.
Make sure the windows are closed.
Turn of f the lights.
Place any packages, valuables, etc.,
in the cargo area or take them
with you.
Lock the doors and the tailgate
with the key or the remote
transmitter.
Never park over dry leaves, tall
grass, or other f lammable
materials. The three way catalytic
converter gets very hot, and could
cause these materials to catch on
fire.
Parking T ips
Parking
Driving265
Page 270 of 415

You will f eel a pulsation in the brake
pedal when the ABS activates, and
you may hear some noise. This is
normal; it is the ABS rapidly
pumping the brakes.this defeats the
purpose of the ABS. Let the ABS
work f or you by always keeping f irm,
steady pressure on the brake pedal
as you steer away from the hazard.
This is sometimes ref erred to as
Activation varies with the amount of
traction your tires have. On dry
pavement, you will need to press on
thebrakepedalveryhardbeforeyou
activate the ABS. However, you may
feel the ABS activate immediately if
you are trying to stop on snow or ice.
Your vehicle has an Anti-lock Brake
System (ABS) as standard
equipment. ABS helps to prevent the
wheels f rom locking up and skidding
during hard braking, allowing you to
retain steering control.
When the f ront tires skid, you lose
steering control; the vehicle
continues straight ahead even
though you turn the steering wheel.
The ABS helps to prevent lock-up
and helps you retain steering control
by pumping the brakes rapidly; much
f aster than a person can do it.
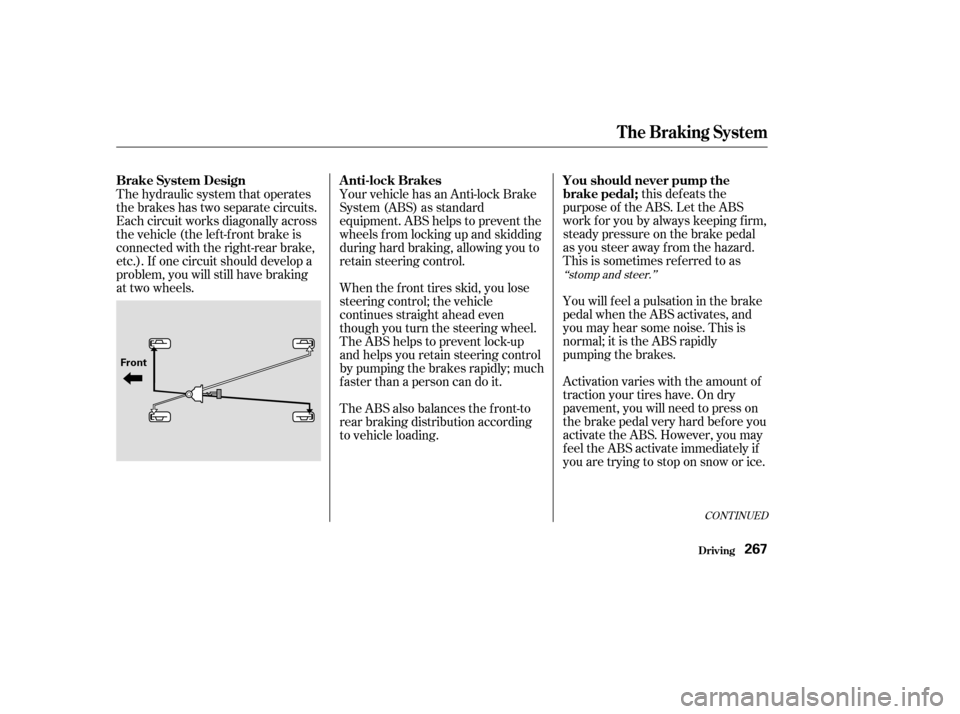
The hydraulic system that operates
the brakes has two separate circuits.
Each circuit works diagonally across
the vehicle (the lef t-f ront brake is
connected with the right-rear brake,
etc.). If one circuit should develop a
problem, you will still have braking
at two wheels.
The ABS also balances the f ront-to
rear braking distribution according
to vehicle loading.
‘‘stomp and steer.’’
CONT INUED
The Braking System
Driving
You should never pump the
brake pedal;
Anti-lock Brakes
Brake System Design
267
Front
Page 271 of 415

�Î
�Îon loose or
uneven surf aces, such as gravel or
snow, than a vehicle without anti-
lock. Slow down and allow a greater
distance between vehicles under
those conditions.
Always steer moderately
when you are braking hard. Severe
or sharp steering wheel movement
can still cause your vehicle to veer
into oncoming traffic or off the road. such as trying to take a
corner too f ast or making a sudden
lane change. Always drive at a safe,
prudent speed f or the road and
weather conditions. it only helps with steering
control during braking. You should
always maintain a saf e f ollowing
distance f rom other vehicles.
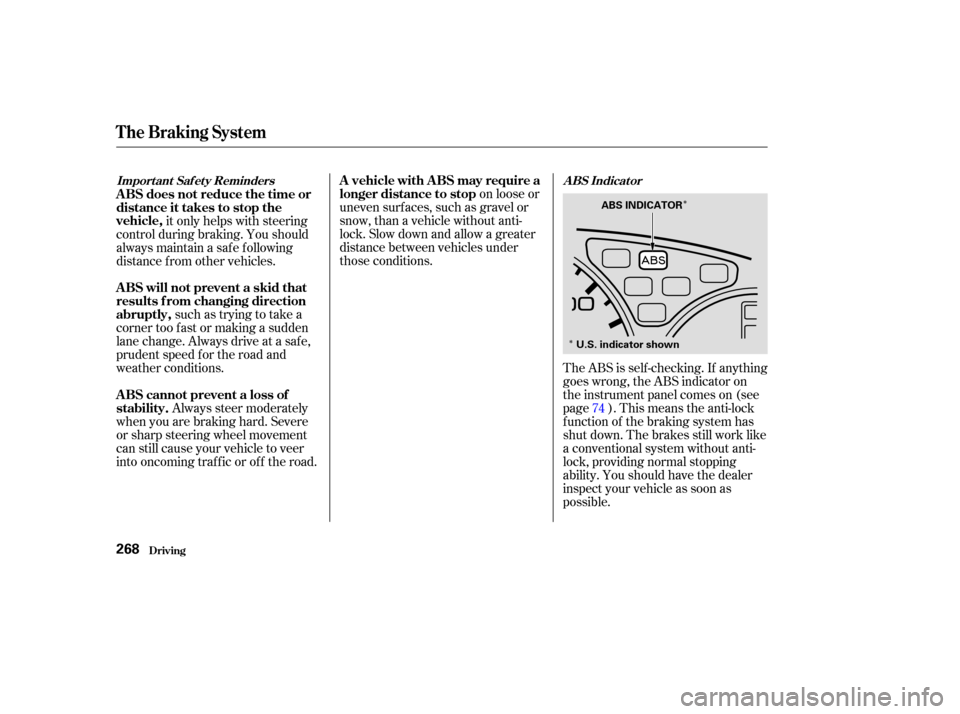
The ABS is self -checking. If anything
goes wrong, the ABS indicator on
the instrument panel comes on (see
page ). This means the anti-lock
f unction of the braking system has
shut down. The brakes still work like
a conventional system without anti-
lock, providing normal stopping
ability. You should have the dealer
inspect your vehicle as soon as
possible.74
A BS Indicat or
Import ant Saf et y RemindersA vehicle with A BS may require a
longer distance to stop
A BS cannot prevent a loss of
stability. A BS will not prevent a skid that
results f rom changing direction
abruptly, A BS does not reduce the time or
distance it takes to stop the
vehicle,
The Braking System
Driving268
ABS INDICATOR
U.S. indicator shown