Page 313 of 415

Always use Honda Power Steering
Fluid. If it is not available, you may
use another power steering f luid as
an emergency replacement.
However, continued use can cause
increased wear and poor steering in
cold weather. Have the power
steering system f lushed and ref illed
with Honda PSF as soon as possible.
A low power steering f luid level can
indicate a leak in the system. Check
the f luid level f requently and have
the system inspected as soon as
possible.
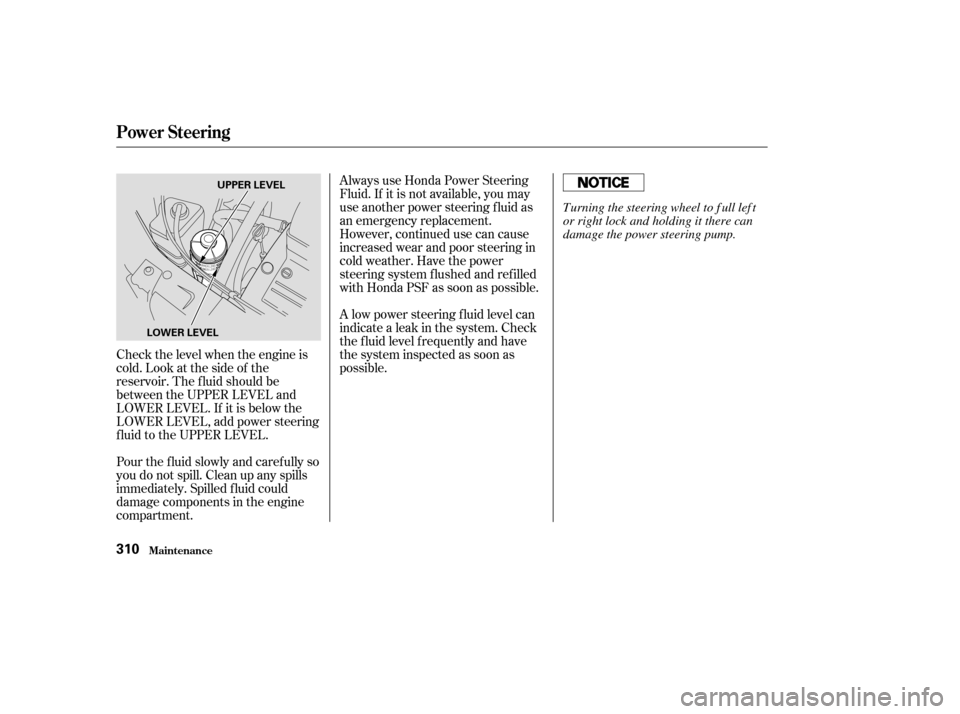
Check the level when the engine is
cold. Look at the side of the
reservoir. The f luid should be
between the UPPER LEVEL and
LOWER LEVEL. If it is below the
LOWER LEVEL, add power steering
f luid to the UPPER LEVEL.
Pour the f luid slowly and caref ully so
you do not spill. Clean up any spills
immediately. Spilled f luid could
damage components in the engine
compartment.
Power Steering
Maint enance310
UPPER LEVEL
LOWER LEVEL
T urning the steering wheel to f ull lef t
or right lock and holding it there can
damage the power steering pump.
Page 315 of 415
Remove the air cleaner housing
cover.
Remove the old air cleaner
element.
Caref ully clean the inside of the
air cleaner housing with a damp
rag.
The coolant lines inside the air
cleaner housing may be warm. Place the new air cleaner element
in the air cleaner housing.
Reinstall the air cleaner housing
cover, and tighten the four bolts.
Reinstall the air intake cover.
Reinstall the two pins and secure
thembypushingontheheads
until they lock.
3.
4.
6.
7.
5. 8.
Maint enance
A ir Cleaner Element
312
AIR CLEANER ELEMENT
Page 317 of 415
Loosen the two holding clips by
turning the heads one-quarter turn
counterclockwise with a f lat-tipped
screwdriver. Remove the cover on
the f ront cylinder bank by pulling
it straight up.
Clean off any dirt and oil that have
collected around the ignition coils.Disconnect the wire connector
f rom the ignition coil by pushing
on the lock tab and pulling on the
connector. Pull on the plastic
connector, not the wires.
Use a wrench to remove the
hexagonsocketheadcapbolt
holding the ignition coil. Remove
the ignition coil by pulling it
straight out.
Remove the spark plug with
a f ive-eighths inch (16 mm) spark
plug socket.
5.
6.
4.
2.
3.
Maint enance
Spark Plugs
314
HEXAGON SOCKET HEAD CAP BOLT
HOLDING CLIP
Page 319 of 415
�´
�µ
Install the ignition coil. Reinstall
the hexagon socket head cap bolt.
Push the wire connector onto the
ignition coil. Make sure it locks in
place.
Repeat this procedure f or the
other f ive spark plugs.
Reinstall the cover on the front
cylinder bank while putting its
mounting clip in the hole on the
passenger’s side. Secure the cover
by turning the heads of the two
holding clips one-quarter turn
clockwise with a f lat-tipped
screwdriver.Spark Plug Gap:
Reinstall the engine cover and
tighten the f our bolts securely. NGK:
DENSO:
9.
11.
10.
12.
13.
Spark Plugs
Maint enance
Specif ications:
316
PZFR5F-11
PKJ16CR-L11
0.04 in (1.1 mm)
0
0.1 mm
Page 322 of 415
CONT INUED
Check the condition of the wiper
blades at least every six months.
Look f or signs of cracking in the
rubber, or areas that are getting
hard. Replace the blades if you f ind
these signs, or if they leave streaks
and unwiped areas when used.Disconnect the blade assembly
fromthewiperarmbypushingin
the lock tab. Hold the lock tab in
while you push the blade assembly
toward the base of the arm.
Raise the wiper arm of f the
windshield.
To replace a wiper blade:
Front windshield: Raise the driver’s
side first, then the passenger’s
side. 2.
1.
Wiper Blades
Maint enance319
WIPER ARMS
LOCK TAB
Do not open the hood when the wiper
arms are raised, or you will damage the
hood and the arms.
Page 323 of 415
Slide the new wiper blade into the
holder until the tabs lock.
Slide the wiper blade assembly
onto the wiper arm. Make sure it
locks in place.
Lower the wiper arm down against
the windshield.
Examine the new wiper blades. If
they have no plastic or metal rein-
f orcement along the back edge,
remove the metal reinf orcement
strips f rom the old wiper blade and
install them in the slots along the
edge of the new blade.
Remove the blade f rom its holder
by grasping the tabbed end of the
blade. Pull f irmly until the tabs
come out of the holder. Front windshield: Lower the
passenger’s side f irst, then the
driver’s side.
6.
7.
4. 5.
3.
Wiper Blades
Maint enance320
BLADE BLADE
REINFORCEMENT
Page 324 of 415

Run the air conditioning at least once
a week during the cold weather
months. Run it f or at least ten
minutes while you are driving at a
steady speed with the engine at
normal operating temperature. This
circulates the lubricating oil con-
tained in the ref rigerant.If the air conditioning does not get as
cold as before, have your dealer
check the system. Recharge the
system with Ref rigerant HFC-134a
(R-134a). (See Specif ications on page
.)
Your vehicle’s air conditioning is a
sealed system. Any major mainte-
nance, such as recharging, should be
done by a qualif ied mechanic. You
can do a couple of things to make
sure the air conditioning works
ef f iciently.
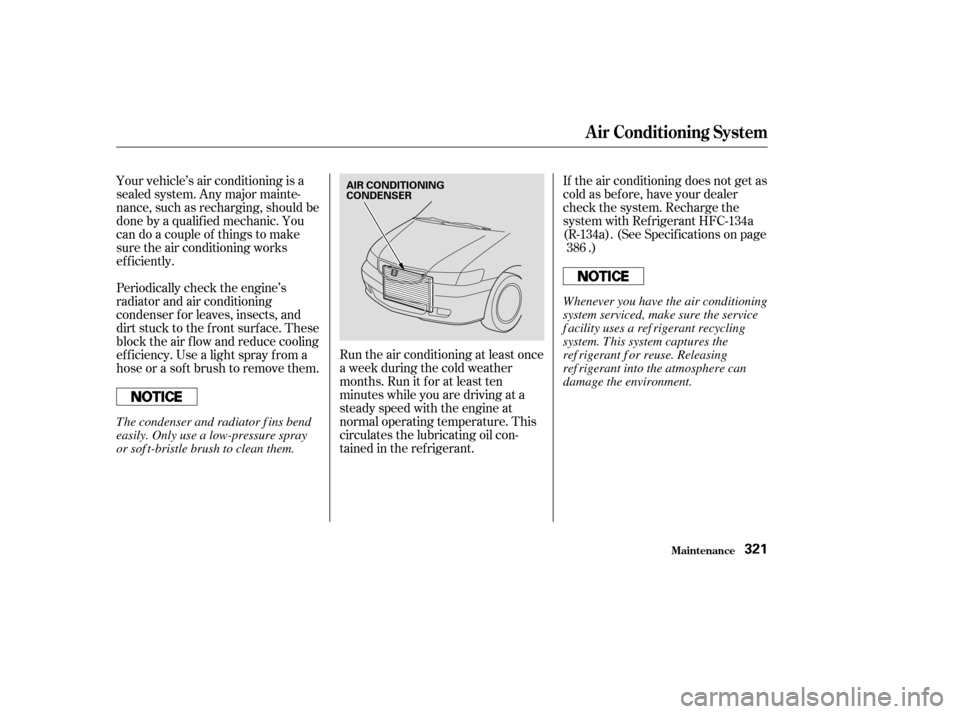
Periodically check the engine’s
radiator and air conditioning
condenser f or leaves, insects, and
dirt stuck to the f ront surf ace. These
block the air f low and reduce cooling
ef f iciency. Use a light spray f rom a
hose or a sof t brush to remove them. 386
Maint enance
A ir Condit ioning Syst em
321
AIR CONDITIONING
CONDENSER
Whenever you have the air conditioning
system serviced, make sure the service
f acility uses a ref rigerant recycling
system. This system captures the
ref rigerant f or reuse. Releasing
ref rigerant into the atmosphere can
damage the environment.
The condenser and radiator f ins bend
easily. Only use a low-pressure spray
or sof t-bristle brush to clean them.
Page 337 of 415

Remove the socket from the
headlight assembly by turning it
one-quarter turn counterclockwise.
Remove the burned out bulb f rom
thesocketbypushingitinand
turning the bulb counterclockwise
until it unlocks.
Install the new bulb in the socket.
Turn it clockwise to lock it in place.
Insert the socket back into the
headlight assembly. Turn it
clockwise to lock it in place.
Put the inner f ender in place.
Install the two holding clips. Lock
each clip in place by pushing on
the center.Determine which of the two bulbs
is burned out: stop/taillight/side
marker light or turn signal light. Pull the taillight assembly out of
thebodybyslidingitbackward.
Use a Phillips-head screwdriver to
remove the taillight assembly
mounting screw under each cover. Open the tailgate. Release the
covers by inserting a f lat-tip
screwdriver into the slot until the
cover bows slightly. Then pivot
the screwdriver 90° and pull it
straight out of the slot.
Turn on the lights to make sure
the new bulb is working.
1.
2. 3.
4.
4.
5.
6.
7.
8.
9.
Lights
Maint enance
Replacing Rear Bulbs
(in Fenders)
334