Page 307 of 415
When the coolant stops draining,
tightenthedrainplugatthe
bottom of the radiator.
Tighten the drain bolt at the rear
of the engine cylinder block
securely.
Tightening torque:
Remove the reserve tank f rom its
holder by pulling it straight up.
Drain the coolant into an
appropriate container, then put the
tank back in its holder.
Install a rubber hose on the drain
bolt in the back of the engine
block. Loosen the drain bolt. Drain
the coolant into an appropriate
container. 6.
4. 5. 7.
Cooling Syst em
Maint enance304
RESERVE TANK RESERVE
TANK CAP
HOLDER
7 lbf·ft (10 N·m , 1.0 kgf·m)
Page 308 of 415
Fill the reserve tank to the MAX
mark. Install the reserve tank cap.
Install the radiator cap, and
tighten it to the first stop.
Start the engine and let it run until
the radiator cooling f an comes on
at least twice. Then stop the
engine.
Remove the radiator cap. Fill the
radiator with coolant up to the
base of the f iller neck.
Install the radiator cap, and
tighten it fully.
Pour Honda All Season
Antif reeze/Coolant Type 2 into
the radiator up to the base of the
f iller neck. This coolant is a
mixture of 50 percent antif reeze
and 50 percent water. Pre-mixing
is not required.
The cooling system capacity is:
8. 10.
11.
12.
13.9.
Cooling Syst em
Maint enance305
FILLER NECK
Fill up to here
1.98 US gal (7.5, 1.65 Imp gal)
Page 309 of 415

Fill the reservoir with a good-quality
windshield washer f luid. This
increases the cleaning capability and
prevents f reezing in cold weather.
When you ref ill the reservoir, clean
the edges of the windshield wiper
blades with windshield washer f luid
on a clean cloth. This will help to
condition the blade edges.
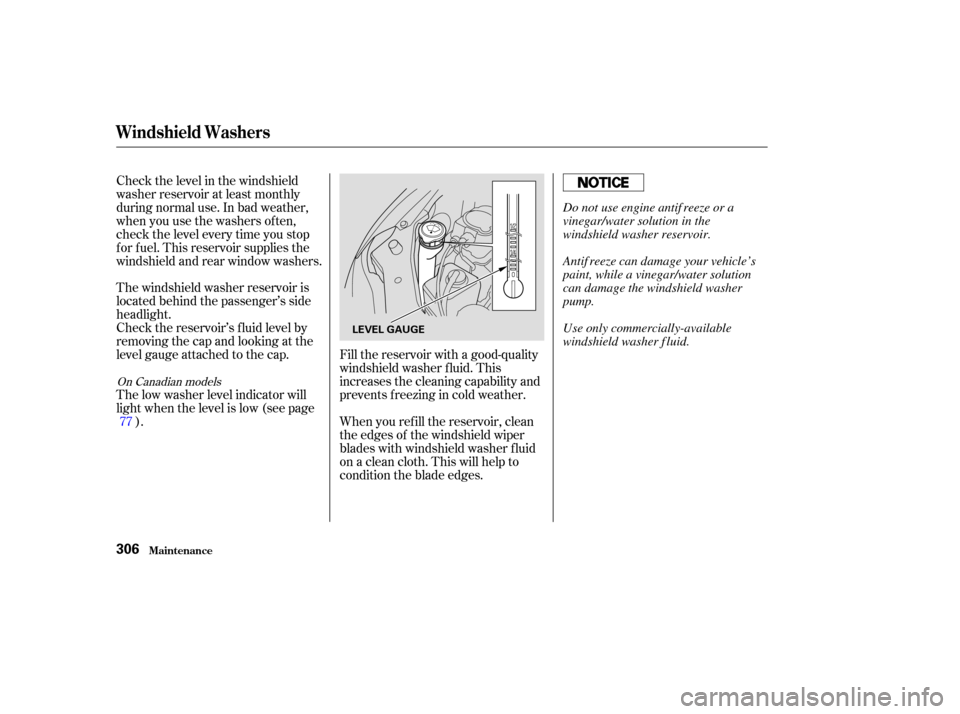
Check the level in the windshield
washer reservoir at least monthly
duringnormaluse.Inbadweather,
when you use the washers of ten,
check the level every time you stop
f or f uel. This reservoir supplies the
windshield and rear window washers.
The windshield washer reservoir is
located behind the passenger’s side
headlight.
Check the reservoir’s f luid level by
removing the cap and looking at the
level gauge attached to the cap.
The low washer level indicator will
light when the level is low (see page
).
77
On Canadian models
Windshield Washers
Maint enance306
LEVEL GAUGE
Do not use engine antif reeze or a
vinegar/water solution in the
windshield washer reservoir.
Antif reeze can damage your vehicle’s
paint, while a vinegar/water solution
can damage the windshield washer
pump.
Use only commercially-available
windshield washer f luid.
Page 310 of 415
Check the f luid level with the engine
at normal operating temperature.Park the vehicle on level ground.
Shut of f the engine.
Remove the dipstick and check
the f luid level. It should be
between the upper and lower
marks. Insert the dipstick all the way into
the transmission as shown.
Remove the dipstick (yellow loop)
f rom the transmission and wipe it
with a clean cloth.
1.
2.3.
4.
CONT INUED
Maint enance
Automatic Transmission Fluid
307
DIPSTICK DIPSTICK
UPPER MARKLOWER MARK
Page 311 of 415

To thoroughly f lush the transmission,
the technician should drain and ref ill
it with Honda ATF-Z1, then drive the
vehicle a short distance. Do this
three times. Then drain and ref ill the
transmission a f inal time.
If the level is below the lower
mark, remove the f ill plug and add
f luid to bring it to the upper mark.
Pour the f luid slowly and caref ully
so you do not spill. Clean up any
spills immediately. Spilled f luid
could damage components in the
engine compartment.
Insert the dipstick all the way back
into the transmission securely as
shown in the illustration.
The transmission should be drained
and ref illed with new f luid according
to the time and distance recommen-
dations in the maintenance schedule.
If you are not sure how to add f luid,
contact your Honda dealer.
Always use Honda ATF-Z1
(Automatic Transmission Fluid). If
it is not available, you may use a
DEXRON
III automatic
transmission f luid as a temporary
replacement. However, continued
use can affect shift quality. Have
the transmission f lushed and
ref illed with Honda ATF-Z1 as
soon as it is convenient.
5.
6.
Maint enance
Automatic Transmission Fluid
308
Page 312 of 415

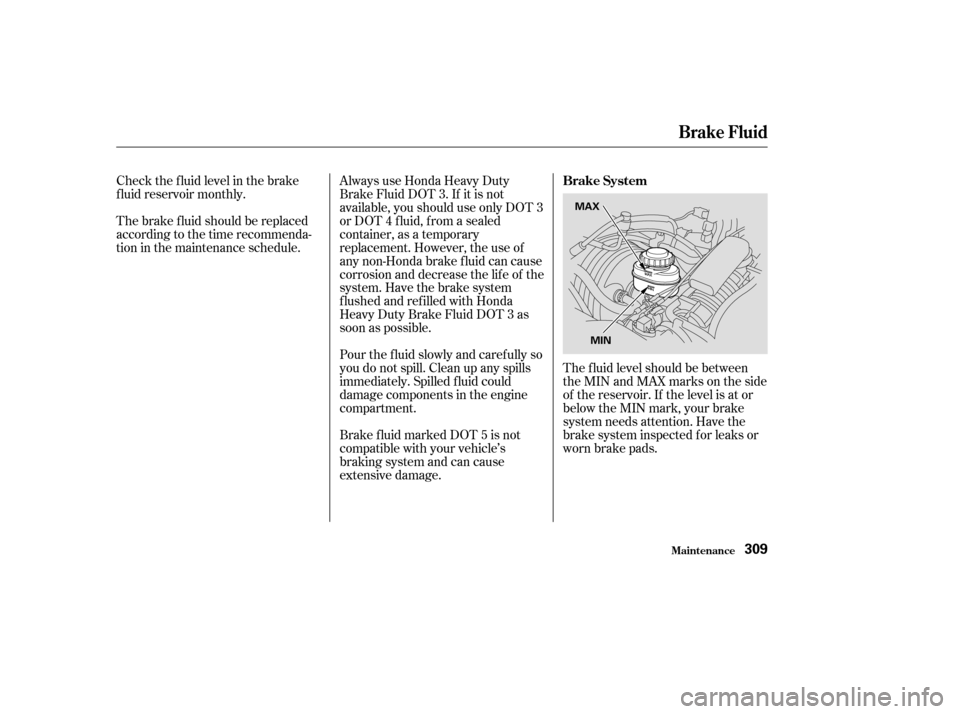
The f luid level should be between
theMINandMAXmarksontheside
of the reservoir. If the level is at or
below the MIN mark, your brake
system needs attention. Have the
brake system inspected f or leaks or
worn brake pads.
Always use Honda Heavy Duty
Brake Fluid DOT 3. If it is not
available, you should use only DOT 3
or DOT 4 f luid, f rom a sealed
container, as a temporary
replacement. However, the use of
any non-Honda brake fluid can cause
corrosion and decrease the lif e of the
system. Have the brake system
f lushed and ref illed with Honda
Heavy Duty Brake Fluid DOT 3 as
soon as possible.
Check the f luid level in the brake
f luid reservoir monthly.
The brake f luid should be replaced
according to the time recommenda-
tion in the maintenance schedule.
Pour the f luid slowly and caref ully so
you do not spill. Clean up any spills
immediately. Spilled f luid could
damage components in the engine
compartment.
Brake f luid marked DOT 5 is not
compatible with your vehicle’s
braking system and can cause
extensive damage.Brake System
Maint enance
Brake Fluid
309
MAX
MIN
Page 313 of 415

Always use Honda Power Steering
Fluid. If it is not available, you may
use another power steering f luid as
an emergency replacement.
However, continued use can cause
increased wear and poor steering in
cold weather. Have the power
steering system f lushed and ref illed
with Honda PSF as soon as possible.
A low power steering f luid level can
indicate a leak in the system. Check
the f luid level f requently and have
the system inspected as soon as
possible.
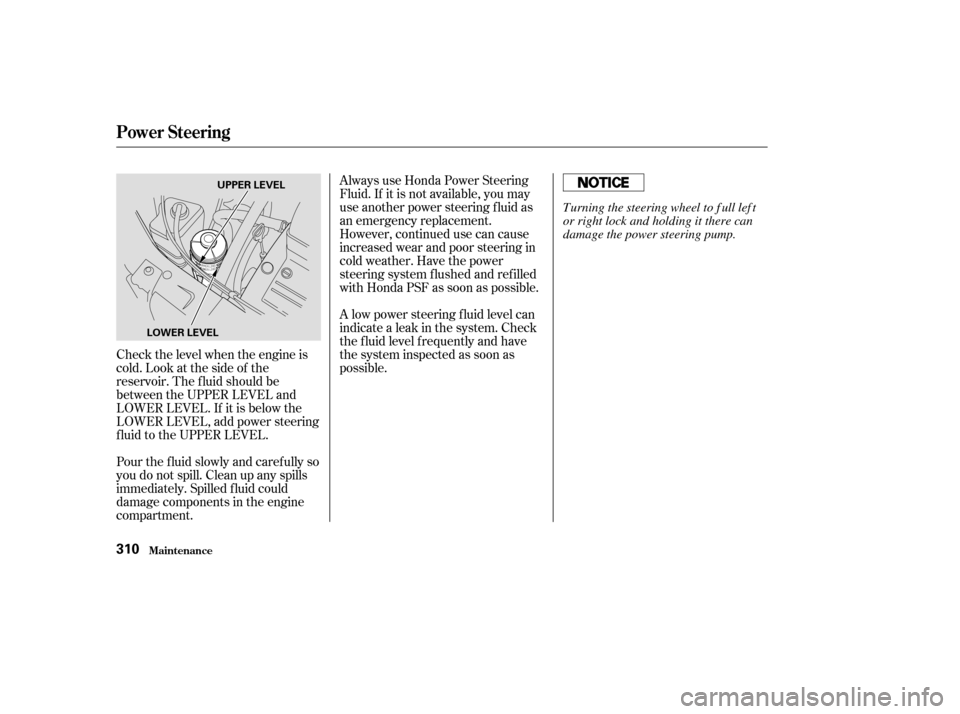
Check the level when the engine is
cold. Look at the side of the
reservoir. The f luid should be
between the UPPER LEVEL and
LOWER LEVEL. If it is below the
LOWER LEVEL, add power steering
f luid to the UPPER LEVEL.
Pour the f luid slowly and caref ully so
you do not spill. Clean up any spills
immediately. Spilled f luid could
damage components in the engine
compartment.
Power Steering
Maint enance310
UPPER LEVEL
LOWER LEVEL
T urning the steering wheel to f ull lef t
or right lock and holding it there can
damage the power steering pump.
Page 314 of 415
To replace it:Remove the two pins holding the
air intake cover by pulling the
head on each pin. Remove the air
intake cover.
The air cleaner element is inside the
air cleaner housing on the driver’s
side of the engine compartment.
Loosen the f our bolts by using a
Phillips-head screwdriver.
The air cleaner element should be
replaced according to the time and
distance recommendations in the
maintenance schedule.
1.2.
CONT INUED
Replacement
A ir Cleaner Element
Maint enance311
AIR
INTAKE
COVER
BOLTS