Page 374 of 415

If the indicator remains on past three
driving trips, or the f uel cap was not
loose or missing, have the vehicle
checked by the dealer as soon as
possible. Drive moderately until the
dealer has inspected the problem.
Avoid full-throttle acceleration and
driving at high speed.
Youshouldalsohavethedealer
inspect your vehicle if this indicator
comes on repeatedly, even though it
may turn of f as you continue driving.
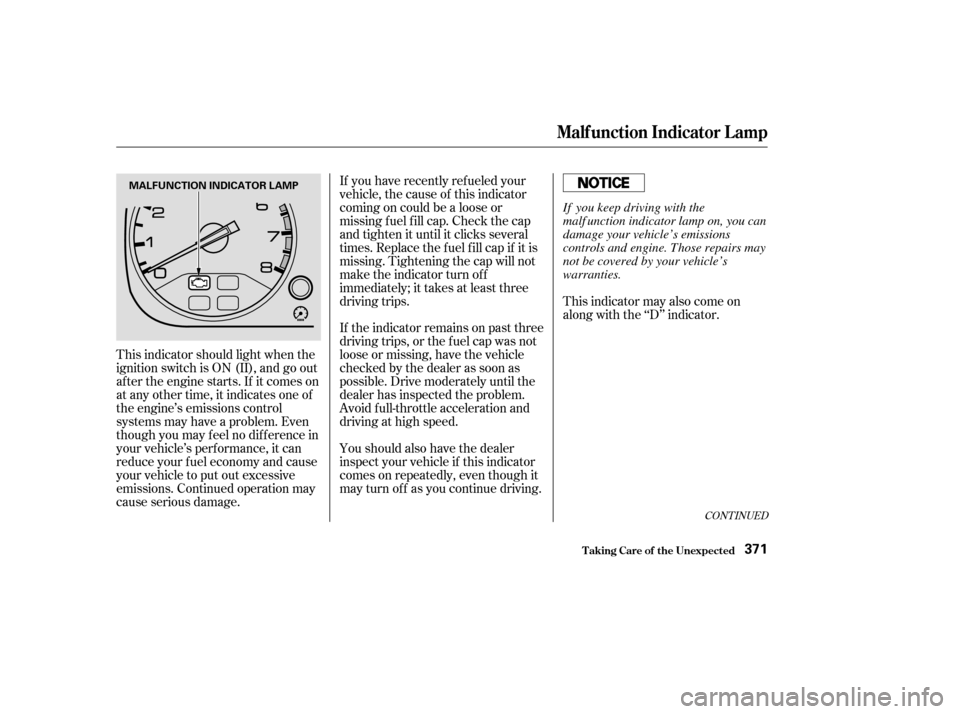
This indicator should light when the
ignition switch is ON (II), and go out
af ter the engine starts. If it comes on
at any other time, it indicates one of
the engine’s emissions control
systems may have a problem. Even
though you may f eel no dif f erence in
your vehicle’s perf ormance, it can
reduce your f uel economy and cause
your vehicle to put out excessive
emissions. Continued operation may
cause serious damage. If you have recently ref ueled your
vehicle, the cause of this indicator
coming on could be a loose or
missing f uel f ill cap. Check the cap
and tighten it until it clicks several
times. Replace the f uel f ill cap if it is
missing. Tightening the cap will not
make the indicator turn of f
immediately; it takes at least three
driving trips.
This indicator may also come on
along with the ‘‘D’’ indicator.
CONT INUED
Malf unction Indicator L amp
T aking Care of t he Unexpect ed371
MALFUNCTION INDICATOR LAMP
If you keep driving with the
malf unction indicator lamp on, you can
damage your vehicle’s emissions
controls and engine. Those repairs may
not be covered by your vehicle’s
warranties.
Page 375 of 415
Your vehicle has certain ‘‘readiness
codes’’ that are part of the on-board
diagnostics f or the emissions
systems. In some states, part of the
emissions testing is to make sure
these codes are set. If they are not
set, the test cannot be completed.
If your vehicle’s battery has been
disconnected or gone dead, these
codes are erased. It takes several
days of driving under various
conditions to set the codes again.If possible, do not take your vehicle
f or a state emissions test until the
readiness codes are set. Ref er to
State Emissions Testing f or more
inf ormation. (See page .)
To check if they are set, turn the
ignition ON (II), but do not start the
engine. The Malf unction Indicator
Lamp will come on f or 20 seconds. If
it then goes of f , the readiness codes
are set. If it blinks 5 times, the
readiness codes are not set.
395
Readiness Codes
Malf unction Indicator L amp
T aking Care of t he Unexpect ed372
Page 377 of 415
All the electrical circuits in your
vehicle have fuses to protect them
f rom a short circuit or overload.
These f uses are located in f our f use
boxes.
Theinteriorfuseboxesarelocated
underneath the dashboard on each
side.Toopenthefuseboxonthe
passenger’s side, pull the right edge
of the cover.
The primary under-hood f use box is
locatedinthebackof theengine
compartment on the passenger’s side.
To open it, push the tabs as shown.
Fuses
T aking Care of t he Unexpect ed374
DRIVER’S SIDE INTERIOR PASSENGER’S SIDE
INTERIOR
PRIMARY UNDER-HOOD FUSE BOX
Page 378 of 415

CONT INUED
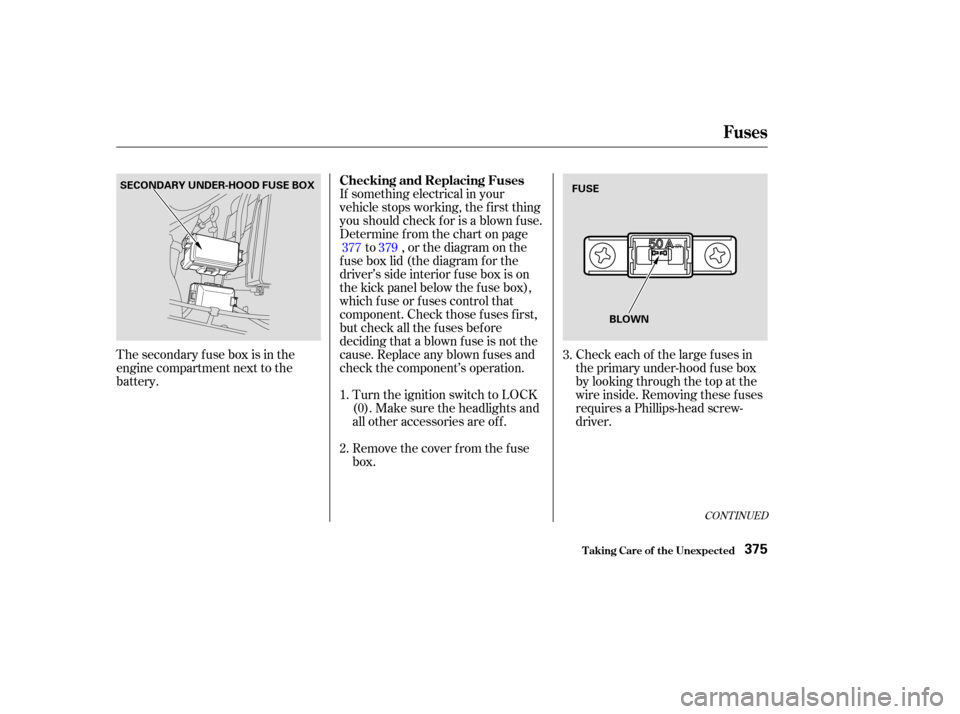
The secondary f use box is in the
engine compartment next to the
battery.If something electrical in your
vehicle stops working, the first thing
youshouldcheckforisablownfuse.
Determine f rom the chart on page
to , or the diagram on the
f use box lid (the diagram f or the
driver’s side interior f use box is on
the kick panel below the f use box),
which f use or f uses control that
component. Check those f uses f irst,
but check all the f uses bef ore
deciding that a blown f use is not the
cause. Replace any blown f uses and
check the component’s operation.
Turn the ignition switch to LOCK
(0). Make sure the headlights and
all other accessories are off.
Remove the cover f rom the f use
box. Check each of the large f uses in
the primary under-hood f use box
by looking through the top at the
wire inside. Removing these f uses
requires a Phillips-head screw-
driver.
1.
2. 379377
3.
Fuses
T aking Care of t he Unexpect ed
Checking and Replacing Fuses
375
FUSE
BLOWN
SECONDARY UNDER-HOOD FUSE BOX
Page 383 of 415

�µ
�µ �µ
If your vehicle needs to be towed,
call a prof essional towing service or,
if youbelongtoone,anorganization
that provides roadside assistance.
Never tow your vehicle behind
another vehicle with just a rope or
chain. It is very dangerous.
The tow
truck uses metal cables with hooks
on the ends. These hooks go around
parts of the f rame or suspension and
the cables lif t that end of the vehicle
of f the ground. Your vehicle’s sus-
pension and body can be seriously
damaged.
If your Honda cannot be transported
by f lat-bed, it should be towed by
wheel-lif t equipment with the f ront
wheels of f the ground. If , due to
damage, your vehicle must be towed
with the f ront wheels on the ground,
do the f ollowing. With the f ront wheels on the ground,
it is best to tow the vehicle no farther
than 50 miles (80 km), and keep the
speedbelow35mph(55km/h).
There are three popular types of
prof essional towing equipment.
The operator
loads your vehicle on the back of a
truck.
The tow
truck uses two pivoting arms that go
under the tires (f ront or rear) and lif t
them of f the ground. The other two
tires remain on the ground. Release the parking brake.
Start the engine.
ShifttoD,thentoN.
Turn of f the engine.Sling-t ype Equipment
Flat -bed Equipment Wheel-lif t Equipment
T his method of towing
is unacceptable.
This is the best way to trans-
port your Honda.
T his is
an acceptable way to tow your
Honda.
Emergency T owing
T aking Care of t he Unexpect ed380
Improper towing preparation will
damage the transmission. Follow the
above procedure exactly. If you cannot
shif t the transmission or start the
engine, your vehicle must be trans-
ported with the f ront wheels of f the
ground.
Page 387 of 415
Your vehicle has several identif ying
numbers located in various places.
The Vehicle Identif ication Number
(VIN) is the 17-digit number your
Honda dealer uses to register your
vehicle f or warranty purposes. It is
also necessary f or licensing and
insuring your vehicle. The easiest
placetofindtheVINisonaplate
fastened to the top of the dashboard.
Youcanseeitbylookingthrough
the windshield on the driver’s side. It
is also on the Certification label at-
tached to the driver’s doorjamb, and
is stamped on the engine com-
partment bulkhead. The VIN is also
provided in bar code on the
Certif ication label.
Identif ication Numbers
T echnical Inf ormation384
VEHICLE IDENTIFICATION NUMBERCERTIFICATION LABEL
Page 388 of 415
The Transmission Number is on a
label on top of the transmission. The Engine Number is stamped into
the engine block. It is on the f ront.
Identif ication Numbers
T echnical Inf ormation385
ENGINE NUMBERAUTOMATIC TRANSMISSION NUMBER
Page 389 of 415

�µ�µ�Î
�Î
�Î
�Î
�Î
�Î
�Î
�Î
Specif ications
T echnical Inf ormation386
Dimensions
Weights
Air Conditioning Capacities
201.2 in (5,110 mm)
75.6 in (1,920 mm)
5.3 US qt (5.0
, 4.4 Imp qt)
2.6 US qt (2.5
, 2.2 Imp qt)
Including the coolant in the reserve tank and that remaining in the
engine.
Reserve tank capacity:
0.16 US gal (0.6
, 0.13 Imp gal)
Excluding the oil remaining in the engine. 4.6 US qt (4.4
, 3.9 Imp qt)
4.2 US qt (4.0
, 3.5 Imp qt)
2.48 US gal (9.4
, 2.07 Imp gal)
3.5 US qt (3.3
, 2.9 Imp qt)
8.3 US qt (7.9, 7.0 Imp qt)
4.8 US qt (4.5
, 4.0 Imp qt)
HFC-134a (R-134a)
66.1 in (1,680 mm) 66.1 in (1,680 mm)
118.1 in (3,000 mm) 68.5 in (1,740 mm)
32 34 oz (850 900 g) ND-OIL8 20.00 US gal (75.7
, 16.65 Imp gal)
1.98 US gal (7.5, 1.65 Imp gal)
69.7 in (1,770 mm)
Length
Width
Height
Wheelbase
Track
Gross vehicle weight rating
Gross combined weight
rating (GCWR) See the tire information label atta-
ched to the driver’s doorjamb.
Refrigerant type
Charge quantity
Lubricant type Fuel tank
Engine
coolant
Engine oil
Automatic
transmission
fluid
Windshield
washer
reservoir
8,265 lbs (3,750 kg) Approx.
Front
Rear
1:
2:Change
Total
Change
Including
filter
Without
filter
Total
Change
Total
U.S. Vehicles
Canada Vehicles
1: LX
2: EX,EX-L1
2
1
2