Page 284 of 415

Follow all normal precautions when
parking, including putting the
transmission in Park and f irmly
setting the parking brake. Also, place
wheel chocks at each of the trailer’s
tires.
Crosswinds and air turbulence
caused by passing trucks can disrupt
your steering and cause trailer
swaying. When being passed by a
large vehicle, keep a constant speed
and steer straight ahead. Do not try
to make quick steering or braking
corrections.
Always drive slowly and have
someone guide you when backing up.
Grip the of the steering
wheel; then turn the wheel to the lef t
to get the trailer to move to the lef t,
andturnthewheelrighttomovethe
trailer to the right.
If you must stop when f acing uphill,
use the f oot brake or parking brake.
Do not try to hold the vehicle in
placebypressingontheaccelerator,
as this can cause the automatic
transmission to overheat.
When driving down hills, reduce
your speed and shif t down to 2nd
gear. Do not ‘‘ride’’ the brakes, and
remember it will take longer to slow
downandstopwhentowingatrailer.
bottom
Towing a Trailer
Driving
Parking
Handling Crosswinds and Buf f et ing
Backing Up
281
Page 286 of 415

This section explains the importance
of keeping your vehicle well
maintained and why you should
f ollow basic maintenance saf ety
precautions.
If you have the skills and tools to per-
f orm more complex maintenance
tasks on your Honda, you may want
to purchase the Service Manual. See
page f or inf ormation on how to
obtain a copy, or see your Honda
dealer. This section also includes
Maintenance Schedules f or normal
driving and severe driving conditions,
a Maintenance Record, and instruc-
tions f or simple maintenance tasks
you may want to take care of
yourself .......................
Maintenance Saf ety .284
.
Important Safety Precautions . 285
.................
Maintenance Schedule . 286
...
Required Maintenance Record . 293
.......
Owner Maintenance Checks . 295
..............................
Fluid Locations .296
......................................
Engine Oil .297
..................................
Adding Oil .297
....................
Recommended Oil .297
..............................
Synthetic Oil .298
....................................
Additives .299
.....
Changing the Oil and Filter . 299
.............................
Cooling System .301
............
Adding Engine Coolant . 301
.......
Replacing Engine Coolant . 303
....................
Windshield Washers .306
....
Automatic Transmission Fluid . 307
....................................
Brake Fluid .309
............................
Brake System .309
..............................
Power Steering .310
.....................
Air Cleaner Element .311
....................................
Hood Latch .313
....................................
Spark Plugs .313
..............................
Replacement .313
............................
Specif ications .316
...........................................
Battery .317 .................................
Wiper Blades .319
..............
Air Conditioning System . 321
..................
Dust and Pollen Filter . 322
.....................................
Drive Belts .322
....................................
Timing Belt .323
...............................................
Tires .323
......................................
Inf lation .323
..................................
Inspection .325
..............................
Maintenance .326
.............................
Tire Rotation .326
...
Replacing Tires and Wheels . 327
......................
Wheels and Tires .328
..........................
Winter Driving .328
.............................
Snow Tires .329
............................
Tire Chains .329
.............................................
Lights .330
.....................
Headlight Aiming .332
........................
Replacing Bulbs .332
....................
Storing Your Vehicle .341
401
Maintenance
Maint enance283
Page 313 of 415

Always use Honda Power Steering
Fluid. If it is not available, you may
use another power steering f luid as
an emergency replacement.
However, continued use can cause
increased wear and poor steering in
cold weather. Have the power
steering system f lushed and ref illed
with Honda PSF as soon as possible.
A low power steering f luid level can
indicate a leak in the system. Check
the f luid level f requently and have
the system inspected as soon as
possible.
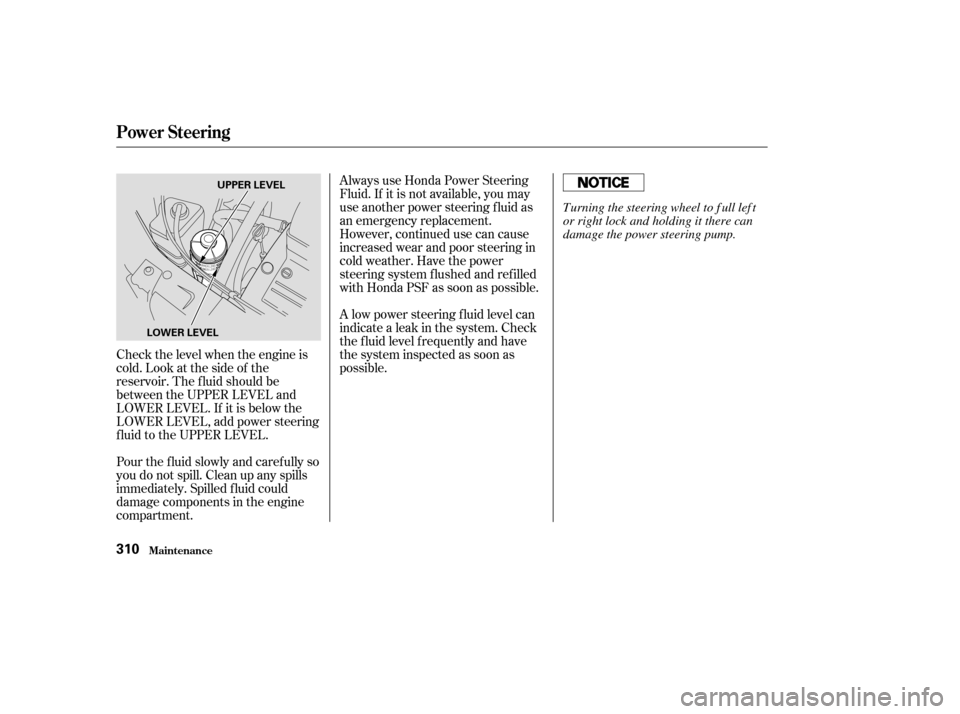
Check the level when the engine is
cold. Look at the side of the
reservoir. The f luid should be
between the UPPER LEVEL and
LOWER LEVEL. If it is below the
LOWER LEVEL, add power steering
f luid to the UPPER LEVEL.
Pour the f luid slowly and caref ully so
you do not spill. Clean up any spills
immediately. Spilled f luid could
damage components in the engine
compartment.
Power Steering
Maint enance310
UPPER LEVEL
LOWER LEVEL
T urning the steering wheel to f ull lef t
or right lock and holding it there can
damage the power steering pump.
Page 329 of 415

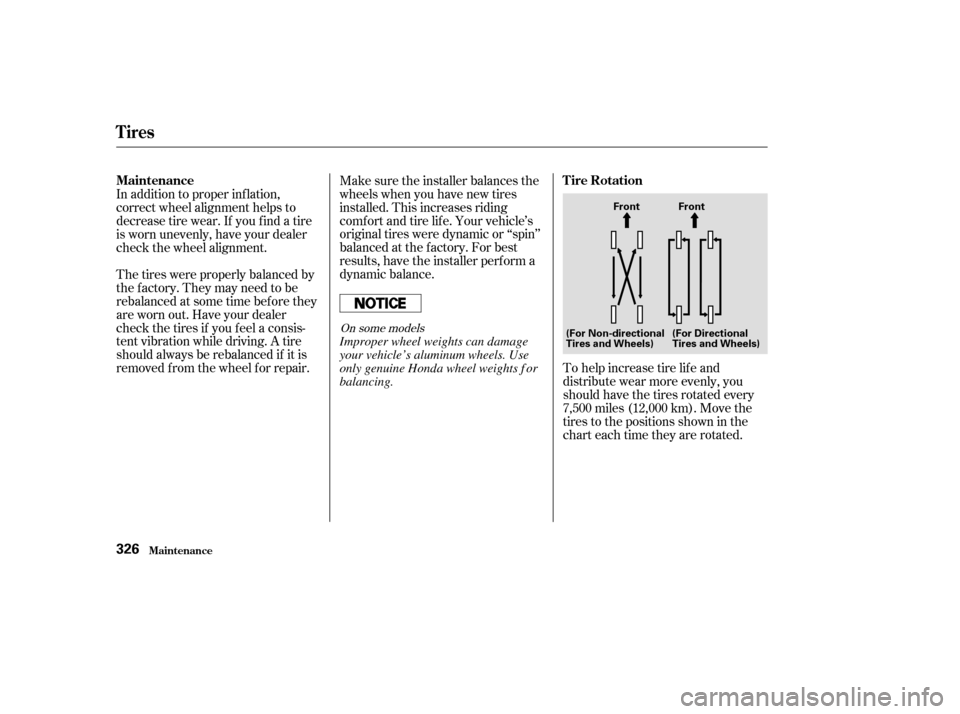
To help increase tire lif e and
distribute wear more evenly, you
should have the tires rotated every
7,500 miles (12,000 km). Move the
tires to the positions shown in the
chart each time they are rotated.
Make sure the installer balances the
wheels when you have new tires
installed. This increases riding
comf ort and tire lif e. Your vehicle’s
original tires were dynamic or ‘‘spin’’
balanced at the f actory. For best
results, have the installer perf orm a
dynamic balance.
In addition to proper inf lation,
correct wheel alignment helps to
decrease tire wear. If you f ind a tire
is worn unevenly, have your dealer
check the wheel alignment.
The tires were properly balanced by
the factory. They may need to be
rebalanced at some time bef ore they
are worn out. Have your dealer
check the tires if you f eel a consis-
tent vibration while driving. A tire
should always be rebalanced if it is
removed f rom the wheel f or repair.
On some models
Tires
Maint enance
Tire Rotation
Maintenance
326
Front Front
(For Non-directional
Tires and Wheels) (For Directional
Tires and Wheels)
Improper wheel weights can damage
your vehicle’s aluminum wheels. Use
only genuine Honda wheel weights f or
balancing.
Page 330 of 415

CONT INUED
It is best to replace all f our tires at
thesametime.If thatisnotpossible
or necessary, then replace the two
f ront tires or the two rear tires as a
pair. Replacing just one tire can
seriously af f ect your vehicle’s han-
dling.
When shopping f or replacement
tires, you may find that some tires
are ‘‘directional.’’ This means they
are designed to rotate only in one
direction. If you use directional tires,
they should be rotated only front-to-
back.
The tires that came with your
vehicle were selected to match the
perf ormance capabilities of the
vehicle while providing the best
combination of handling, ride
comfort,andlonglife.Youshould
replace them with radial tires of the
same size, load range, speed rating,
and maximum cold tire pressure
rating (as shown on the tire’s
sidewall). Mixing radial and bias-ply
tires on your vehicle can reduce its
braking ability, traction, and steering
accuracy.
Tires
Maint enance
Replacing T ires and Wheels
327
Installing improper tires on your
vehicle can affect handling and
stability. This can cause a crash
in which you can be seriously
hurt or killed.
Always use the size and type of
tires recommended in this
owner’s manual.
Page 331 of 415

�´
Tires that are marked ‘‘M S’’ or
‘‘All Season’’ on the sidewall have an
all-weather tread design. They
should be suitable f or most winter
driving conditions. Tires without
these markings are designed f or
optimum traction in dry conditions.
They may not provide adequate
perf ormance in winter driving.
For the best perf ormance in snowy
or icy conditions, you should install
snow tires or tire chains. They may
be required by local laws under
certain conditions.
TheABSworksbycomparingthe
speed of the wheels. When replacing
tires, use the same size originally
supplied with the vehicle. Tire size
and construction can affect wheel
speed and may cause the system to
work inconsistently.
If you ever need to replace a wheel,
make sure the wheel’s specif ications
match those of the original wheel
that came on your vehicle. Re-
placement wheels are available at
your Honda dealer.
Wheel:
Tire:
See page f or inf ormation about
DOT Tire Quality Grading.
388 Winter Driving
Wheels and T ires
Tires
Maint enance328
16x61/2JJ
225/60R16 98T
Page 332 of 415

If you mount snow tires on your
Honda, make sure they are radial
tires of the same size and load range
as the original tires. Mount snow
tiresonallfourwheelstobalance
your vehicle’s handling in all weather
conditions. Keep in mind the traction
provided by snow tires on dry roads
may not be as high as your vehicle’s
original equipment tires. You should
drive cautiously even when the roads
areclear.Checkwiththetiredealer
f or maximum speed recommenda-
tions.Metal link-type ‘‘chains’’ should not
be used. No matter how tight they
seem to be installed, they can come
into contact with the body and
suspension, causing serious damage.
When installing cables, f ollow the
manuf acturer’s instructions and
mount them as tightly as you can.
Drive slowly with them installed. If
youhearthemcomingincontact
with the body or chassis, stop and
investigate. Make sure the cables are
installed tightly, and that they are
not contacting the brake lines or
suspension. Remove them as soon as
you begin driving on cleared roads. Because your Honda has limited tire
clearance, mount only SAE Class ‘‘S’’
cable-type traction devices on the
front tires. Use traction devices only
when required by driving conditions
or local laws. Make sure they are the
correct size f or your tires.
Snow T ires
T ire Chains
Tires
Maint enance329
Traction devices that are the wrong
size or improperly installed can
damage your vehicle’s brake lines,
suspension, body, and wheels. Stop
driving if they are hitting any part of
the vehicle.
Page 336 of 415
Use a f lat-tipped screwdriver to
remove the two holding clips f rom
the inner f ender.
Pull the inner f ender cover away
f rom the f ender and bumper.
If you are changing the bulb on
the driver’s side, start the engine,
turn the steering wheel all the way
to the right, and turn off the
engine. If you are changing the
bulb on the passenger’s side, turn
the steering wheel to the left.
Insert the new bulb into the hole,
making sure the tabs are in their
slots. Pivot the hold-down wire
back in place and clip the end into
the slot.
Install the rubber seal over the
back of the headlight assembly.
Make sure it is right side up; it is
marked ‘‘TOP.’’
Push the electrical connector onto
the new bulb. Make sure it is
connected securely.
Reinstall the air intake cover. (Driver’s side) Turn on the headlights to test the
new bulb.
1. 2.
3.
5.
6.
7.
8.
CONT INUED
Lights
Maint enance
Replacing the Front Side Marker/
Turn Signal and Parking L ight
Bulb
333
HOLDING CLIP