Page 361 of 415
Tighten the wheel nuts securely in
the same crisscross pattern. Have
the wheel nut torque checked at
the nearest automotive service
f acility.
Tighten the wheel nuts to:
Lower the vehicle to the ground
and remove the jack.
Put the flat tire in the supplied
vinyl bag. This bag is stored in the
rear compartment on the driver’s
side panel in the third row. Knot
the top of the vinyl bag.
18.
19.
20.
Changing a Flat T ire
T aking Care of t he Unexpect ed358
80 lbf·ft (108 N·m , 11 kgf·m)
Page 363 of 415
Storing the Flat Tire on the Floor
When the third seat is f olded, the
f lat tire is secured to the f loor on
topof thefoldedseat.Pullupthe
carpet on the attachment point and
remove the plastic screw as
described in the previous
procedure.
Remove the wing bolt from the
bracket that is attached to the
spare tire lid.
Install the flat tire on the bracket
with the inside of the wheel facing
toward you. Put the tire mounting
wing bolt in the attachment point
through one of the f ive wheel nut
holes and the bracket as shown.
Poke holes in the vinyl bag. Secure
the f lat tire by tightening the wing
bolt.
Adjust the seat-back of the third
seat to the upright position (see
page ). Install the bracket and
the bracket mounting bolt to the
attachment point as shown, and
tighten the bolt. Make sure the
bracket is securely locked.
23.
111
Changing a Flat T ire
T aking Care of t he Unexpect ed360
BRACKET
TIRE MOUNTING WING BOLT
Page 364 of 415

Unclip the hook f rom the seat
back handle on the driver’s seat
and lower the f loor lid and the
carpet.
Make sure to adjust the f ront
seats properly bef ore you start
driving (see page ).
Store the jack in its holder. Turn
the jack’s end bracket clockwise to
lock it in place. Store the tools.
Replace the cover.
Close the tailgate.
Store the plastic screw in the spare
tire well.
Store the wheel cover in the spare
tire well. Make sure it will not get
scratched or damaged.
Storethesparetirebasketinthe
spare tire well.
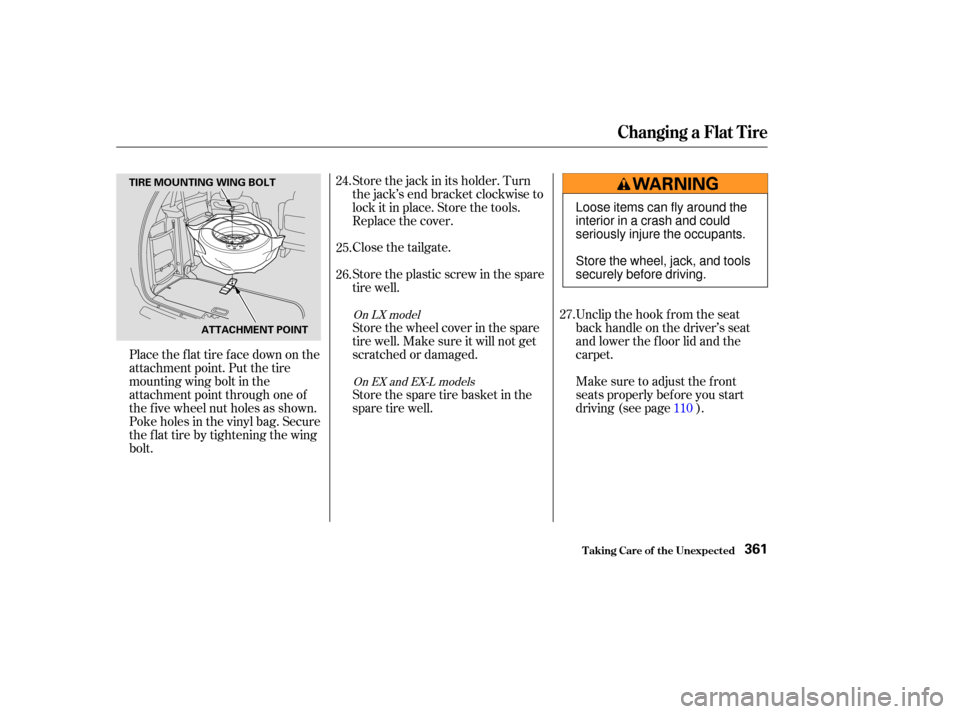
Place the flat tire face down on the
attachment point. Put the tire
mountingwingboltinthe
attachment point through one of
the f ive wheel nut holes as shown.
Poke holes in the vinyl bag. Secure
the f lat tire by tightening the wing
bolt. 24.
25.
26.
27.
110On LX modelOn EX and EX-L models
Changing a Flat T ire
T aking Care of t he Unexpect ed361
TIRE MOUNTING WING BOLT
ATTACHMENT POINT
Loose items can fly around the
interiorinacrashandcould
seriously injure the occupants.
Store the wheel, jack, and tools
securely before driving.
Page 376 of 415

�Î
�Î
However, if the brake pedal does not
f eel normal, you should take
immediate action. Because of the
brake system’s dual-circuit design, a
problem in one part of the system
will still give you braking at two
wheels. You will f eel the brake pedal
go down much f arther bef ore the
vehicle begins to slow down, and you
will have to press harder on the
pedal. The distance needed to stop
will be much longer. If it comes on at any other time, it
indicates a problem with the vehicle’s
brake system. In most cases, the
problem is a low f luid level in the
brake f luid reservoir. Press lightly on
the brake pedal to see if it f eels
normal. If it does, check the brake
f luid level the next time you stop at a
service station (see page ). If the
f luid level is low, take the vehicle to
your dealer and have the brake
system inspected f or leaks or worn
brake pads. Slow down by shif ting to a lower
gear, and pull to the side of the road
when it is saf e. Because of the
longer distance needed to stop, it is
hazardous to drive the vehicle. You
should have it towed, and repaired as
soon as possible. (See
on page .)
If you must drive the vehicle a short
distance in this condition, drive
slowly and cautiously.
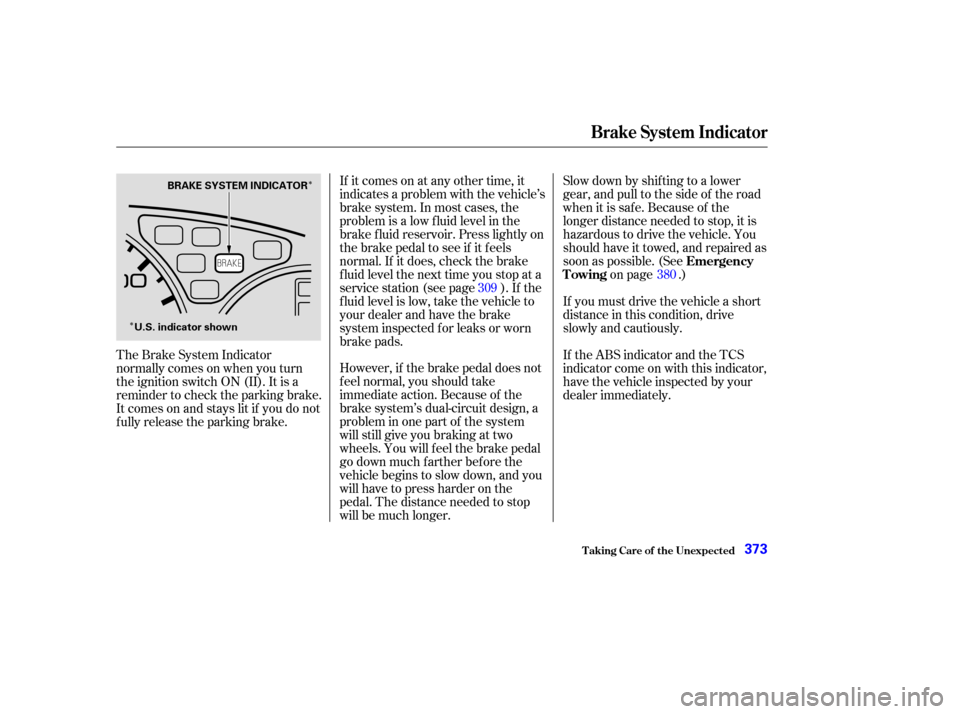
The Brake System Indicator
normallycomesonwhenyouturn
the ignition switch ON (II). It is a
reminder to check the parking brake.
It comes on and stays lit if you do not
f ully release the parking brake. If the ABS indicator and the TCS
indicator come on with this indicator,
have the vehicle inspected by your
dealer immediately.
309
380Emergency
Towing
Brake System Indicator
T aking Care of t he Unexpect ed373
BRAKE SYSTEM INDICATOR
U.S. indicator shown
Page 383 of 415

�µ
�µ �µ
If your vehicle needs to be towed,
call a prof essional towing service or,
if youbelongtoone,anorganization
that provides roadside assistance.
Never tow your vehicle behind
another vehicle with just a rope or
chain. It is very dangerous.
The tow
truck uses metal cables with hooks
on the ends. These hooks go around
parts of the f rame or suspension and
the cables lif t that end of the vehicle
of f the ground. Your vehicle’s sus-
pension and body can be seriously
damaged.
If your Honda cannot be transported
by f lat-bed, it should be towed by
wheel-lif t equipment with the f ront
wheels of f the ground. If , due to
damage, your vehicle must be towed
with the f ront wheels on the ground,
do the f ollowing. With the f ront wheels on the ground,
it is best to tow the vehicle no farther
than 50 miles (80 km), and keep the
speedbelow35mph(55km/h).
There are three popular types of
prof essional towing equipment.
The operator
loads your vehicle on the back of a
truck.
The tow
truck uses two pivoting arms that go
under the tires (f ront or rear) and lif t
them of f the ground. The other two
tires remain on the ground. Release the parking brake.
Start the engine.
ShifttoD,thentoN.
Turn of f the engine.Sling-t ype Equipment
Flat -bed Equipment Wheel-lif t Equipment
T his method of towing
is unacceptable.
This is the best way to trans-
port your Honda.
T his is
an acceptable way to tow your
Honda.
Emergency T owing
T aking Care of t he Unexpect ed380
Improper towing preparation will
damage the transmission. Follow the
above procedure exactly. If you cannot
shif t the transmission or start the
engine, your vehicle must be trans-
ported with the f ront wheels of f the
ground.
Page 384 of 415
If you decide to tow your vehicle
with all f our wheels on the ground,
make sure you use a properly-
designed and attached tow bar.
Prepare the vehicle for towing as
described above, and leave the
ignition switch in Accessory (I) so
the steering wheel does not lock.
Make sure the radio and any items
plugged into the accessory power
socket are turned of f so they do not
rundownthebattery.
Emergency T owing
T aking Care of t he Unexpect ed381
The steering system can be damaged if
the steering wheel is locked. Leave the
ignition switch in Accessory (I), and
make sure the steering wheel turns
f reely bef ore you begin towing.Trying to lif t or tow your vehicle by the
bumpers will cause serious damage.
The bumpers are not designed to
support the vehicle’s weight.
Page 389 of 415

�µ�µ�Î
�Î
�Î
�Î
�Î
�Î
�Î
�Î
Specif ications
T echnical Inf ormation386
Dimensions
Weights
Air Conditioning Capacities
201.2 in (5,110 mm)
75.6 in (1,920 mm)
5.3 US qt (5.0
, 4.4 Imp qt)
2.6 US qt (2.5
, 2.2 Imp qt)
Including the coolant in the reserve tank and that remaining in the
engine.
Reserve tank capacity:
0.16 US gal (0.6
, 0.13 Imp gal)
Excluding the oil remaining in the engine. 4.6 US qt (4.4
, 3.9 Imp qt)
4.2 US qt (4.0
, 3.5 Imp qt)
2.48 US gal (9.4
, 2.07 Imp gal)
3.5 US qt (3.3
, 2.9 Imp qt)
8.3 US qt (7.9, 7.0 Imp qt)
4.8 US qt (4.5
, 4.0 Imp qt)
HFC-134a (R-134a)
66.1 in (1,680 mm) 66.1 in (1,680 mm)
118.1 in (3,000 mm) 68.5 in (1,740 mm)
32 34 oz (850 900 g) ND-OIL8 20.00 US gal (75.7
, 16.65 Imp gal)
1.98 US gal (7.5, 1.65 Imp gal)
69.7 in (1,770 mm)
Length
Width
Height
Wheelbase
Track
Gross vehicle weight rating
Gross combined weight
rating (GCWR) See the tire information label atta-
ched to the driver’s doorjamb.
Refrigerant type
Charge quantity
Lubricant type Fuel tank
Engine
coolant
Engine oil
Automatic
transmission
fluid
Windshield
washer
reservoir
8,265 lbs (3,750 kg) Approx.
Front
Rear
1:
2:Change
Total
Change
Including
filter
Without
filter
Total
Change
Total
U.S. Vehicles
Canada Vehicles
1: LX
2: EX,EX-L1
2
1
2
Page 392 of 415

�µ
The temperature grades are A (the
highest), B, and C, representing the
tire’s resistance to the generation of
heat and its ability to dissipate heat
when tested under controlled
conditions on a specif ied indoor
laboratory test wheel. Sustained high
temperature can cause the material
of the tire to degenerate and reduce
tire life, and excessive temperature
can lead to sudden tire f ailure. The
grade C corresponds to a level of
perf ormance which all passenger car
tires must meet under the Federal
Motor Vehicle Saf ety Standard No.
109. Grades B and A represent
higher levels of perf ormance on the
laboratory test wheel than the
minimum required by law. Warning: The temperature grade f or
this tire is established f or a tire that
is properly inf lated and not over-
loaded. Excessive speed, underinf la-
tion, or excessive loading, either
separately or in combination, can
cause heat buildup and possible tire
f ailure.
DOT T ire Quality Grading (U.S. Vehicles)
T echnical Inf ormation
Temperature A,B,C
389