Page 193 of 415

�µ�µ
You can use the TUNE and SEEK/
SKIP bars while a disc is playing to
select passages and change tracks.
To move rapidly within a track, press
andholdtheTUNEbar.Pressthe
side to move forward. You will
seeCUEinthedisplay.Pressthe side to move backward. You
will see REW displayed. Release the
bar when the system reaches the
point you want.
Each time you press and release the side of the SEEK/SKIP bar,
the system skips forward to the
beginning of the next track. Press
the sidetoskipbackwardtothe
beginning of the current track. Press
it again to skip to the beginning of
the previous track. To activate the Repeat
f eature, press and release the RPT
button. You will see RPT in the
display. The system continuously
replays the current track. Press the
RPT button again to turn it off.
This feature,
when activated, plays the tracks on
the CD in random order, rather than
in the order they are recorded on the
CD. To activate Random Play, press
and release the A. SEL/RDM button.
You will see RDM in the display. The
system will then select and play
tracks randomly. This continues
until you deactivate Random Play by
pressing A. SEL/RDM again.
If the system is in Repeat mode, you
must turn it of f by pressing the RPT
button bef ore selecting Random Play.
When the system reaches the end of
the disc, it will return to the begin-
ning and play the disc again.
You can switch to the radio while a
CD is playing by pressing the AM/
FM button. Press the CD button to
return to playing the CD. The CD
will begin playing where it lef t of f .
If you turn the system of f while a CD
is playing, either with the PWR/VOL
knob or by turning off the ignition,
the disc will stay in the drive. When
youturnthesystembackon,theCD
will begin playing where it lef t of f .
Press the eject button to remove the
disc f rom the drive.
If you eject the disc, but do not
remove it from the slot, the system
will automatically reload the disc
af ter 15 seconds and put the CD
player in pause mode. To begin
playing the disc, press the CD button.
Audio System
Comf ort and Convenience Feat ures
REPEAT
RANDOM PLAY
190
Page 237 of 415

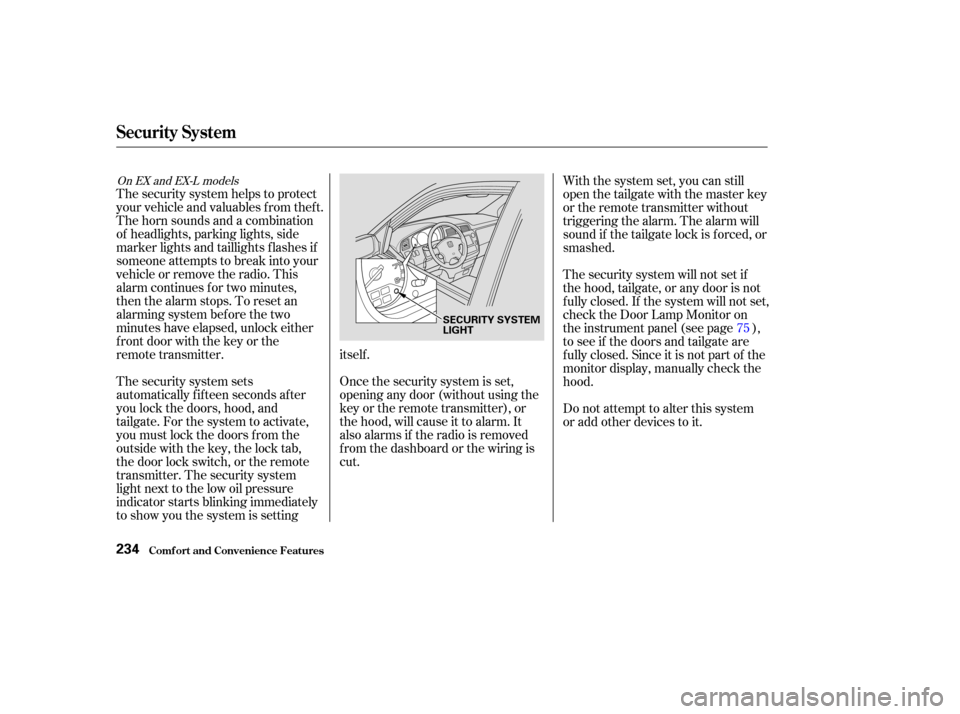
The security system helps to protect
your vehicle and valuables f rom thef t.
The horn sounds and a combination
of headlights, parking lights, side
marker lights and taillights f lashes if
someone attempts to break into your
vehicleorremovetheradio.This
alarm continues f or two minutes,
then the alarm stops. To reset an
alarming system before the two
minutes have elapsed, unlock either
f ront door with the key or the
remote transmitter.
The security system sets
automatically fifteen seconds after
you lock the doors, hood, and
tailgate. For the system to activate,
you must lock the doors f rom the
outside with the key, the lock tab,
the door lock switch, or the remote
transmitter. The security system
light next to the low oil pressure
indicator starts blinking immediately
to show you the system is settingitself .
Once the security system is set,
opening any door (without using the
key or the remote transmitter), or
the hood, will cause it to alarm. It
also alarms if the radio is removed
f rom the dashboard or the wiring is
cut.With the system set, you can still
open the tailgate with the master key
or the remote transmitter without
triggering the alarm. The alarm will
sound if the tailgate lock is f orced, or
smashed.
The security system will not set if
the hood, tailgate, or any door is not
f ully closed. If the system will not set,
check the Door Lamp Monitor on
the instrument panel (see page ),
to see if the doors and tailgate are
f ully closed. Since it is not part of the
monitor display, manually check the
hood.
Do not attempt to alter this system
or add other devices to it.
75
On EX and EX-L models
Security System
Comf ort and Convenience Feat ures234
SECURITY SYSTEM
LIGHT
Page 241 of 415

Always ref er to the operating
instructions and saf ety inf ormation
that came with your garage door
opener or other equipment you
intend to operate with the HomeLink
Universal Transceiver. If you do not
have this inf ormation, you should
contact the manuf acturer of the
equipment.
While training or using HomeLink,
make sure you have a clear view of
the garage door or gate, and that no
one will be injured by its movement.If your garage door opener was
manuf actured bef ore April 1982, you
may not be able to program
HomeLink to operate it. Garage door
openers manuf actured bef ore that
date do not have a safety feature that
causes them to stop and reverse if an
obstacle is detected during closing,
increasing the risk of injury. If you
have questions, call (800) 355-3515.
If you are training HomeLink to
operate a garage door or gate, it is
recommended that you unplug the
motor f or that device during training.
Repeatedly pressing the remote
control button could burn out the
motor.
If you have problems with training
the HomeLink Universal Transceiver,
or would like inf ormation on home
products that can be operated by the
transmitter, call (800) 355-3515. On
the Internet, go to www.homelink.
com. The HomeLink Universal
Transceiver built into your vehicle
canbeprogrammedtooperate
remotely-controlled devices around
your home, such as garage doors,
lighting, or home security systems. It
can replace up to three remote
transmitters.
The HomeLink transmitter stores
the code in a permanent memory.
There should be no need to retrain
the transmitter if your vehicle’s
battery goes dead or is disconnected.
On EX and EX-L modelsImportant Saf ety Precautions
General Inf ormation
Customer Assistance
HomeL ink Universal T ransceiver
Comf ort and Convenience Feat ures238
Page 243 of 415

Canadian Owners:
The remote control you are training
from may stop transmitting after two
seconds. This is not long enough f or
HomeLink to learn the code. Release
and press the button on the remote
control every two seconds until
HomeLink has learned the code.For security purposes, newer garage
door opening systems use a ‘‘rolling’’
or variable code. Inf ormation f rom
the remote control and the garage
door opener are needed bef ore
HomeLink can operate the garage
door opener.
The ‘‘Training HomeLink’’
procedure trains HomeLink to the
proper garage door opener code.
The f ollowing procedure
synchronizes HomeLink to the
garage door opener so they send and
receive the correct codes.
The red light in HomeLink should
begin f lashing. It will f lash slowly
at first, then rapidly.
When the red light f lashes rapidly,
release both buttons. HomeLink
should have learned the code from
the remote control.
Plug in the garage door opener
motor, then test the HomeLink
transceiver button by pushing it. It
should operate the garage door.
If the button does not work, repeat
this procedure to train it again. If it
still does not work, you may have a variable or rolling code garage
door opener. Test this by pressing
and holding the HomeLink
transceiver button you just trained.
If the red light blinks f or two
seconds,thenstayson,youhavea
rolling code garage door opener.
You may be able to verify this with
the manufacturer’s documentation.
Go to ‘‘Training With a Rolling
Code System.’’
Repeat these steps to train the
other two HomeLink buttons to
operate any other remotely-
controlled devices around your
home (lighting, automatic gate,
security system, etc.).
5.
6.
8.
7. T raining With a Rolling Code
System
HomeL ink Universal T ransceiver
Comf ort and Convenience Feat ures240
Page 251 of 415
Wipe the dipstick with a clean
cloth or paper towel.
Check the engine oil level every time
you f ill the vehicle with f uel. Wait a
f ew minutes af ter turning the engine
of f bef ore you check the oil.
Remove the dipstick (orange
handle).
To close the hood, lif t it up slightly to
remove the support rod f rom the
hole. Put the support rod back into
its holding clip. Lower the hood to
about a f oot (30 cm) above the
fender,thenletitdrop.
Afterclosingthehood,makesureit
is securely latched.
2.
1.
Service Station Procedures
Bef ore Driving
Oil Check
248
DIPSTICK
Page 257 of 415

Store or secure all items that could
be thrown around and hurt
someone during a crash.
Be sure items placed on the f loor
behind the f ront seats cannot roll
under the seats and interf ere with
the driver’s ability to operate the
pedals, or with the proper
operation of the seats.
Keep the glove box closed while
driving. If the lid is open, a
passenger could injure their knees
during a crash or sudden stop.
This f igure includes the total weight
of all occupants, cargo, accessories,
and the tongue weight if you are
towing a trailer.
The f inal number is the total weight
of cargo you can carry.
If you are towing a trailer, add the
tongue weight to the number
above. Add up the weight of all occupants.
To f igure out how much cargo you
can carry: When you load luggage, the total
weight of the vehicle, all passengers,
cargo, and trailer tongue load must
not exceed the Gross Vehicle
Weight Rating (GVWR). The load
for the front and rear axles also must
not exceed the Gross Axle Weight
Rating (GAWR). The GVWR and
GAWRareprintedonthetire
information label attached to the
driver’s doorjamb (see page ).
The maximum load f or your vehicle
is 1,158 lbs (525 kg).
Subtract the total f rom 1,158 lbs
(525 kg). 386Carrying Items in the Passenger
Compartment
Load Limit
Carrying Cargo
Bef ore Driving254
Overloading or improper
loading can affect handling and
stability and cause a crash in
which you can be hurt or killed.
Follow all load limits and other
loading guidelines in this
manual.
Page 258 of 415

Distribute cargo evenly on the
f loor of the cargo area, placing the
heaviest items on the bottom and
as far forward as possible. Tie
down items that could be thrown
about the vehicle during a crash or
sudden stop.
If you carry large items that
prevent you f rom closing the
tailgate, exhaust gas can enter the
passenger area. To avoid the
possibility of, f ollow the instructions
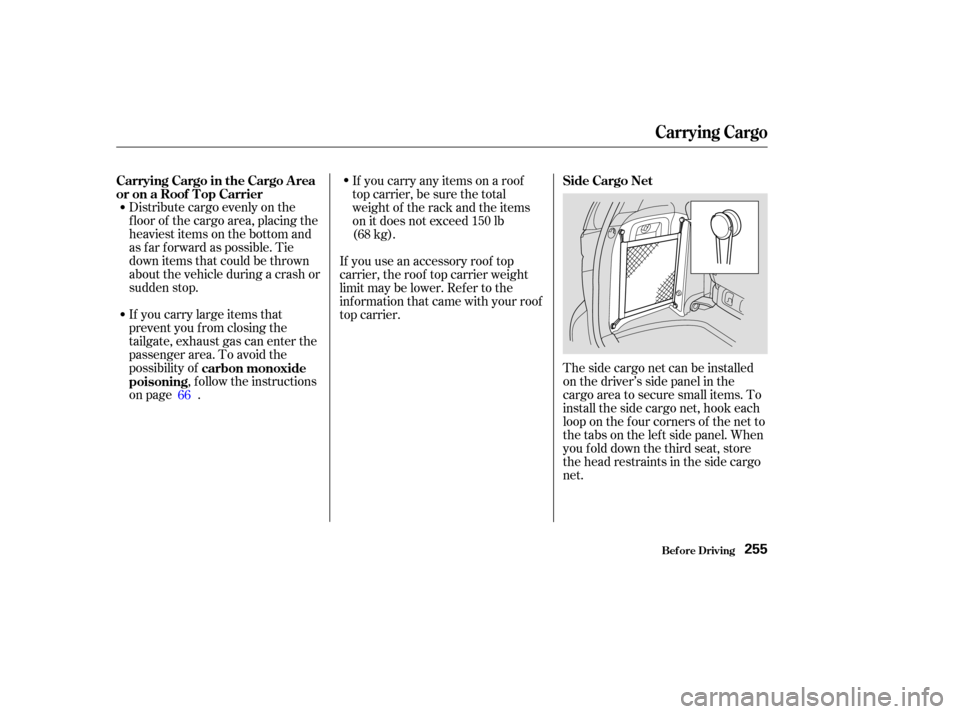
on page . The side cargo net can be installed
on the driver’s side panel in the
cargo area to secure small items. To
install the side cargo net, hook each
loop on the f our corners of the net to
the tabs on the lef t side panel. When
youfolddownthethirdseat,store
the head restraints in the side cargo
net.
If you carry any items on a roof
top carrier, be sure the total
weight of the rack and the items
on it does not exceed 150 lb
(68 kg).
If you use an accessory roof top
carrier, the roof top carrier weight
limit may be lower. Ref er to the
inf ormation that came with your roof
top carrier.
66 carbon monoxide
poisoning Side Cargo Net
Carrying Cargo in the Cargo A rea
or on a Roof T op Carrier
Carrying Cargo
Bef ore Driving255
Page 259 of 415
You can use the cargo net to secure
items in the cargo area, and store
small items between the two halves
of the net. To install the cargo net,
hook the loops on the f our corners of
the net to the tabs at both sides of
the tailgate sill.There are cargo hooks f or plastic
grocery bags on the back of the third
row seat. They are designed to hold
light items. Heavy objects may
damage the hooks.
On EX and EX-L models
Carrying Cargo
Cargo Net
Cargo Hooks
Bef ore Driving256
CARGO HOOKS