Page 26 of 415

If your
hands or arms are close to the
airbag covers in the center of the
steering wheel and on top of the
dashboard, they could be injured if
the airbags inf late.
Devices intended to improve
occupant comf ort or reposition the
shoulder part of a seat belt can
severely compromise the
protective capability of the seat
belt and increase the chance of
serious injury in a crash.
Carrying hard or sharp
objects on your lap, or driving with
a pipe or other sharp object in
your mouth, can result in injuries
if your f ront airbag inf lates. If a side airbag
inflates,acupholderorotherhard
object attached on or near the
door could be propelled inside the
vehicle and hurt someone.
Any object
attached to or placed on the covers
marked ‘‘SRS AIRBAG,’’ in the
center of the steering wheel and
on top of the dashboard, could
interf ere with the proper operation
of the airbags. Or, if the airbags
inf late, the objects could be
propelled inside the car and hurt
someone. This could make the driver’s
seat position sensor or the f ront
passenger’s seat weight sensors
inef f ective.
This could
cause problems with the driver’s
seat position sensor or the f ront
passenger’s seat weight sensors.
Protecting Adults
Driver and Passenger Saf ety
K eep your hands and arms away
f rom t he airbag covers.
Do not put any accessories on seat
belts.
Do not place hard or sharp object sbet ween yourself and a f rontairbag. Do not at t ach hard object s on or
near a f ront door.
Do not at t ach or place object s on the f ront airbag covers. Do not modif y t he f ront seat s.
Do not place any it ems undert he f ront seat s.
23
Page 29 of 415
Front airbags have been designed to
help protect adults in a moderate to
severe f rontal collision. To do this,
the passenger’s f ront airbag is quite
large, and it can inflate with enough
f orce to cause very serious injuries.With an advanced airbag system, the
f ront passenger’s airbag is turned of f
if sensors detect a total weight of
less than about 65 lbs (30 kg) in the
seat, and the ‘‘Passenger Airbag
Cutof f ’’ indicator is turned on. (See
page f or additional inf ormation on
how the passenger’s airbag works.)
Even if the passenger’s f ront airbag
is turned of f , we strongly
recommend that inf ants, small
children, and larger children ride
properly restrained in a back seat
wheretheywillbesafer.
To help prevent airbag-caused
deaths and injuries to children, this
vehicle has an advanced airbag
system. 57
Protecting Children
Driver and Passenger Saf ety
The Passenger’s Front Airbag
Can Pose Serious Risks
26
Page 35 of 415

This page brief ly summarizes
Honda’s recommendations on where
to place rear-facing and forward-
f acing child seats in your vehicle.Recommended positions.
Properlysecurearear-facingchild
seat (see page ).
Recommended
positions. Properly secure a f ront-
f acing child seat (see page ).
To help prevent airbag-caused
deaths and injuries to children,
this vehicle has an advanced
airbag system.
With this system, the front
passenger’s airbag is turned of f
if sensors detect a total weight
of less than about 65 lbs (30 kg)
in the seat.
Even if the f ront passenger’s
airbag is turned of f , we strongly
recommend that inf ants and
small children ride properly
restrained in a back seat where
they will be saf er. Not recommended. If
a small child must ride in f ront,
move the vehicle seat to the rear-
most position and secure a f ront-
f acing child seat with the seat belt
(see page ). Never in the f ront seat, due
to the f ront airbag hazard. Not
recommended.
39
35 39
Placing a Child Seat Front Passenger’s Seat
Back Seat sInf ant s:
Small children:
Small children:
Inf ant s:
Protecting Children
Driver and Passenger Saf ety
Airbags Pose Serious
Risks to Children
32
Page 37 of 415

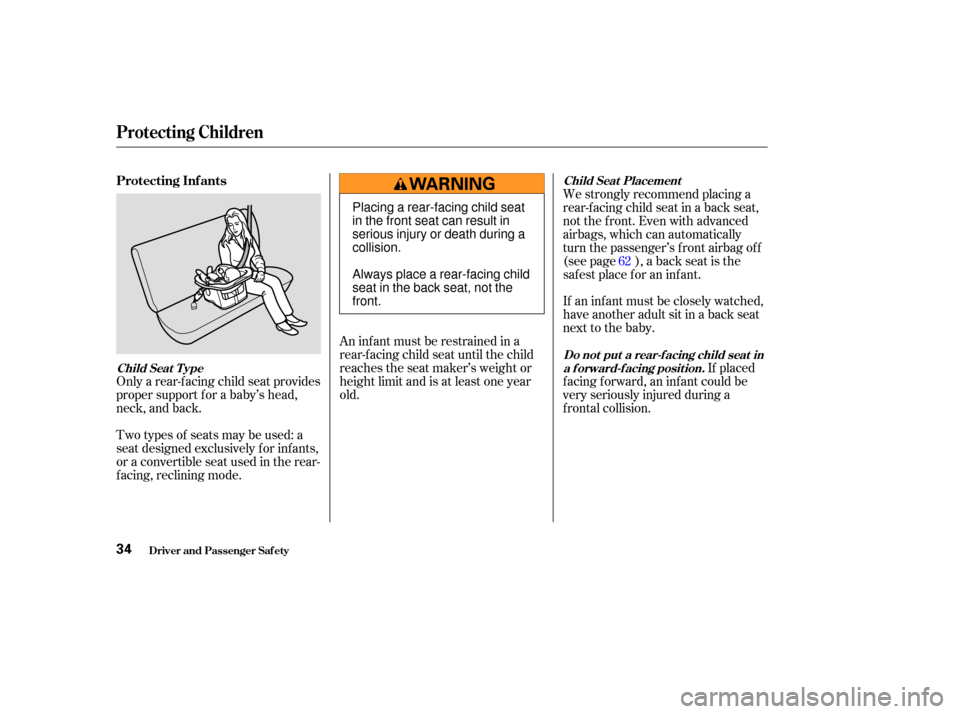
Only a rear-f acing child seat provides
proper support f or a baby’s head,
neck, and back.
Two types of seats may be used: a
seat designed exclusively f or inf ants,
or a convertible seat used in the rear-
f acing, reclining mode.An inf ant must be restrained in a
rear-f acing child seat until the child
reaches the seat maker’s weight or
height limit and is at least one year
old.We strongly recommend placing a
rear-facing child seat in a back seat,
not the front. Even with advanced
airbags, which can automatically
turn the passenger’s f ront airbag of f
(see page ), a back seat is the
saf est place f or an inf ant.
If an inf ant must be closely watched,
have another adult sit in a back seat
next to the baby.
If placed
f acing f orward, an inf ant could be
very seriously injured during a
f rontal collision. 62
Protecting Inf ants
Child Seat T ype Child Seat Placement
Do not put a rear-f acing child seat ina f orward-f acing position.
Protecting Children
Driver and Passenger Saf ety34
Placing a rear-facing child seat
in the front seat can result in
serious injury or death during a
collision.
Always place a rear-facing child
seat in the back seat, not the
front.
Page 39 of 415

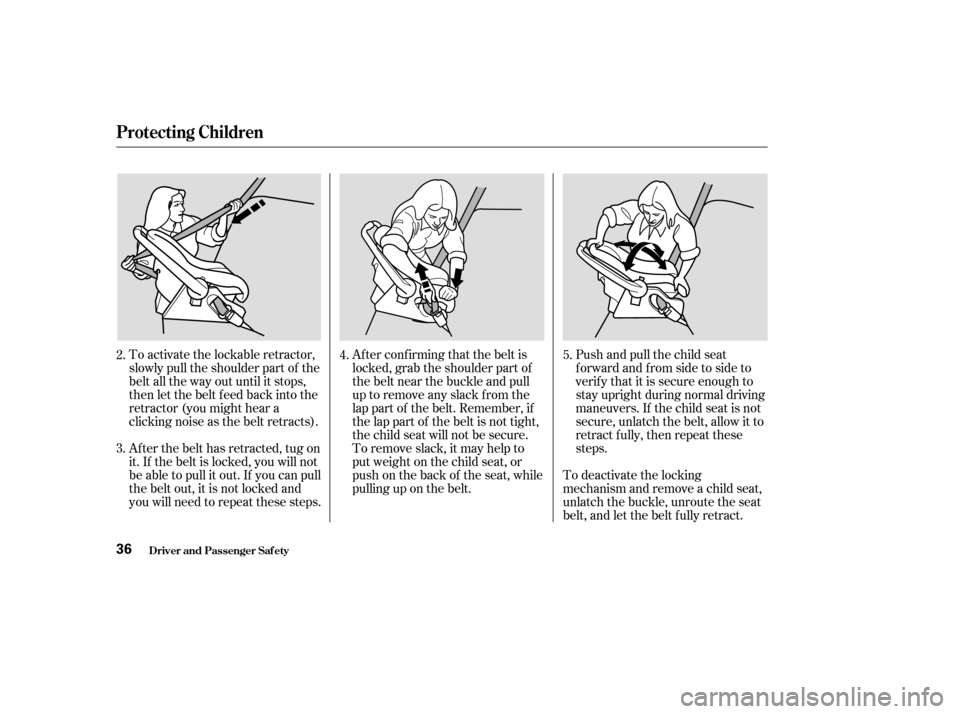
To activate the lockable retractor,
slowly pull the shoulder part of the
belt all the way out until it stops,
then let the belt f eed back into the
retractor (you might hear a
clicking noise as the belt retracts).
Af ter the belt has retracted, tug on
it. If the belt is locked, you will not
be able to pull it out. If you can pull
the belt out, it is not locked and
you will need to repeat these steps.Af ter conf irming that the belt is
locked, grab the shoulder part of
the belt near the buckle and pull
up to remove any slack from the
lap part of the belt. Remember, if
the lap part of the belt is not tight,
the child seat will not be secure.
To remove slack, it may help to
putweightonthechildseat,or
push on the back of the seat, while
pulling up on the belt.
Push and pull the child seat
f orward and f rom side to side to
verif y that it is secure enough to
stay upright during normal driving
maneuvers. If the child seat is not
secure, unlatch the belt, allow it to
retract f ully, then repeat these
steps.
To deactivate the locking
mechanism and remove a child seat,
unlatch the buckle, unroute the seat
belt, and let the belt f ully retract.
4.
3. 2. 5.
Protecting Children
Driver and Passenger Saf ety36
Page 40 of 415
Forproperprotection,aninfantmust
ride in a reclined, or semi-reclined
position. To determine the proper
reclining angle, check with the baby’s
doctor or f ollow the seat maker’s
recommendations.
To achieve the desired reclining
angle, it may help to put a rolled up
towel under the toe of the child seat,
as shown.
Then pull hard on the loose end of
thebelttoremovetheanyslack(it
may help to put weight on the child
seat while pulling on the belt).
Finally, f ollow instruction number 5
on page to verify that the child
seat is secured.
To install a rear-f acing child seat in
the center position of the third seat,
use the lap part of the lap/shoulder
belt. Follow instruction number 1 on
page f or routing and latching the
seat belt. 35 36
Protecting Children
Driver and Passenger Saf ety
Rear-Facing Child Seat Inst allat ion
Tips
Inst alling a Rear-Facing Child Seat in
t he Cent er Posit ion of t he T hird Seat
37
Page 41 of 415

We also recommend that a small
child stay in the child seat as long as
possible, until the child reaches the
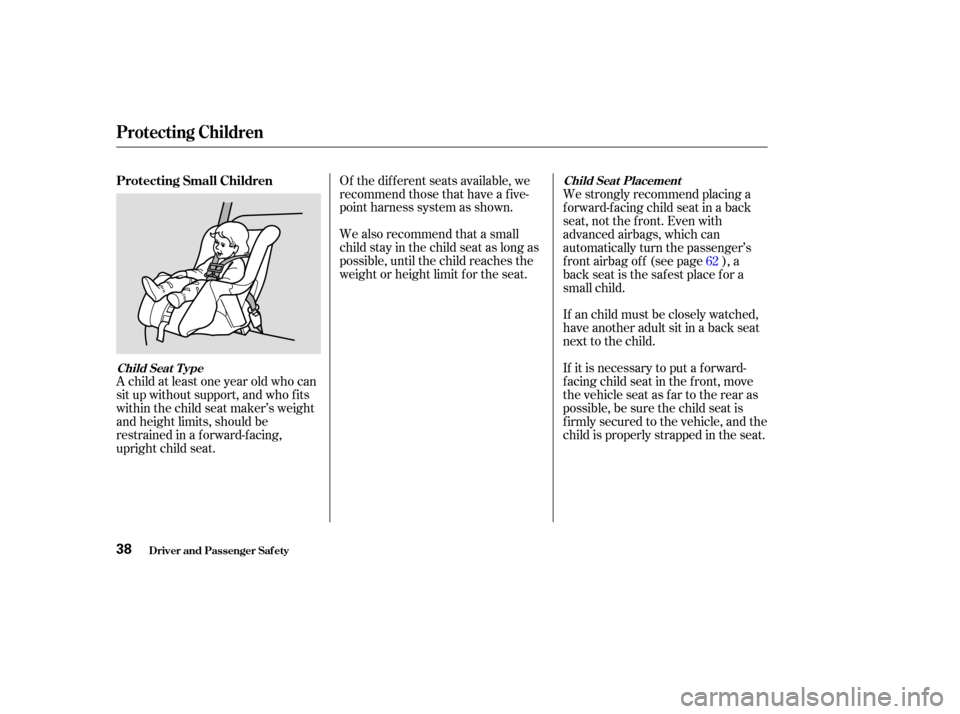
weight or height limit f or the seat. Of the different seats available, we
recommend those that have a f ive-
point harness system as shown.
A child at least one year old who can
sit up without support, and who f its
within the child seat maker’s weight
and height limits, should be
restrained in a f orward-f acing,
upright child seat. We strongly recommend placing a
forward-facing child seat in a back
seat,notthefront.Evenwith
advanced airbags, which can
automatically turn the passenger’s
front airbag off (see page ), a
back seat is the safest place for a
small child.
If an child must be closely watched,
have another adult sit in a back seat
next to the child.
If it is necessary to put a f orward-
f acing child seat in the f ront, move
the vehicle seat as far to the rear as
possible, be sure the child seat is
f irmly secured to the vehicle, and the
child is properly strapped in the seat.
62
Protecting Small Children
Child Seat T ype Child Seat Placement
Protecting Children
Driver and Passenger Saf ety38
Page 43 of 415
Af ter conf irming that the belt is
locked, grab the shoulder part of
the belt near the buckle and pull
up to remove any slack from the
lap part of the belt. Remember, if
the lap part of the belt is not tight,
the child seat will not be secure. It
mayhelptoputweightonthe
child seat, or push on the back of
the seat, while pulling up on the
belt.
To activate the lockable retractor,
slowly pull the shoulder part of the
belt all the way out until it stops,
then let the belt f eed back into the
retractor (you might hear a
clicking noise as the belt retracts). Af ter the belt has retracted, tug on
it. If the belt is locked, you will not
be able to pull it out. If you can pull
the belt out, it is not locked and
you will need to repeat these steps.
4.
2. 3.
Protecting Children
Driver and Passenger Saf ety40