2003 GMC SIERRA DENALI steering
[x] Cancel search: steeringPage 306 of 428
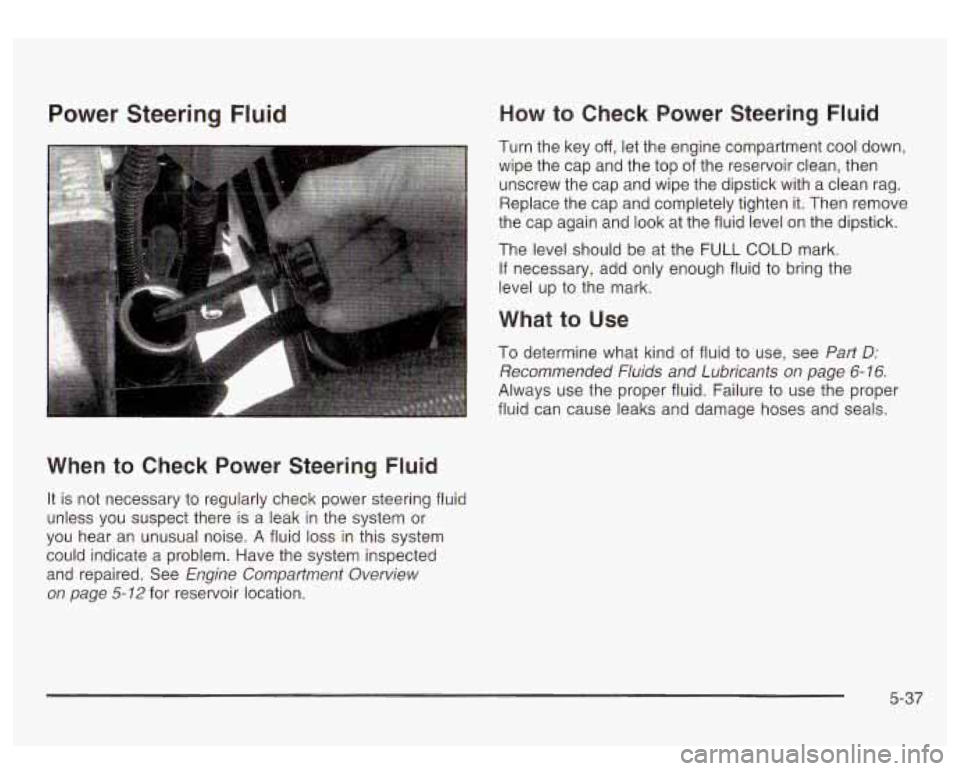
Power Steering Fluid
When to Check Power Steering Fluid
It is not necessary to regularly check power steering fluid
unless you suspect there is a leak in the system or
you hear an unusual noise. A fluid loss in this system
could indicate a problem. Have the system inspected
and repaired. See
Engine Compartment Overview
on page
5-12 for reservoir location.
How to Check Power Steering Fluid
Turn the key off, let the engine compartment cool down,
wipe the cap and the top of the reservoir clean, then
unscrew the cap and wipe the dipstick with a clean rag.
Replace the cap and completely tighten it. Then remove
the cap again and look at the fluid level on the dipstick.
The level should be at the
FULL COLD mark.
If necessary, add only enough fluid to bring the
level up to the mark.
What to Use
To determine what kind of fluid to use, see Part Dr
Recommended Fluids and Lubricants on page 6- 16.
Always use the proper fluid. Failure to use the proper
fluid can cause leaks and damage hoses and seals.
5-37
Page 337 of 428
Used Replacement Wheels
-
Putting a used wheel your vehicle is
dangerous. You can’t know how it’s been used
or how far
it’s been driven. It could fail
suddenly and cause a crash.
If you have to
replace a wheel, use a new
GM original
equipment wheel.
I I
Tire Chains
Don’t use lire chains. There’s not enough
clearance. Tire chains used on a vehicle
without the proper amount sf clearance can cause damage to the brakes, suspension or
other vehicle parts. The area damaged by the
CAUTION: (Continued) tire chains could cause
, -u to lose cc..-rol
of
your vehicle and you or others may be injured in
a crash. Use another type of traction device only
if its manufacturer recommends it for use on
your vehicle and tire size combination and road
conditions. Follow that manufacturer’s
instructions. To help avoid damage to your
vehicle, drive slowly, readjust or remove the
device
if it’s contacting your vehicle, and don’t
spin your wheels.
If you do find traction devices
that will
fit, install them on the rear tires.
If a Tire Goes Flat
It’s unusual for a tire to “blow out” while you’re driving,
especially
if you maintain your tires properly. If air
goes out of a tire, it’s much more likely to leak out
slowly. But
if you should ever have a “blowout”, here are
a few tips about what to expect and what
to do:
If a front tire fails, the flat tire will create a drag that
pulls the vehicle toward that side. Take your foot
off the
accelerator pedal and grip the steering wheel firmly.
Steer to maintain lane position, and then gently brake to
a stop well out of the traffic lane.
5-68
Page 338 of 428
A rear blowout, particularly on a curve, acts much like a Changing a Flat Tire
skid and may require the same correction you’d use
in a skid. In any rear blowout, remove your foot from the
If a tire goes flat, avoid further tire and wheel damage
accelerator pedal. Get the vehicle under control by by driving slowly
to a level place. Turn on your
steering
the way you want the vehicle to go. it may be hazard warning flashers.
very bumpy and noisy, but you can still steer. Gently
brake
to a stop - well off the road if possible.
If a tire goes flat, the next part shows how
to use your
jacking equipment to change a flat tire safely.
C..-nging a tire can cause
an injury. The
vehicle can slip
off the jack and roll over you
or other people. You and they could be badly
injured. Find a level place to change your tire.
To help prevent the vehicle from moving:
1. Set the parking brake firmly.
2. Put the shift lever in PARK (P).
3. Turn off the engine.
4. Put the wheel blocks at the front and rear
of the tire farthest away from the one
being changed. That
would be the tire on
the other side of the vehicle, at the
opposite end.
5-69
Page 367 of 428
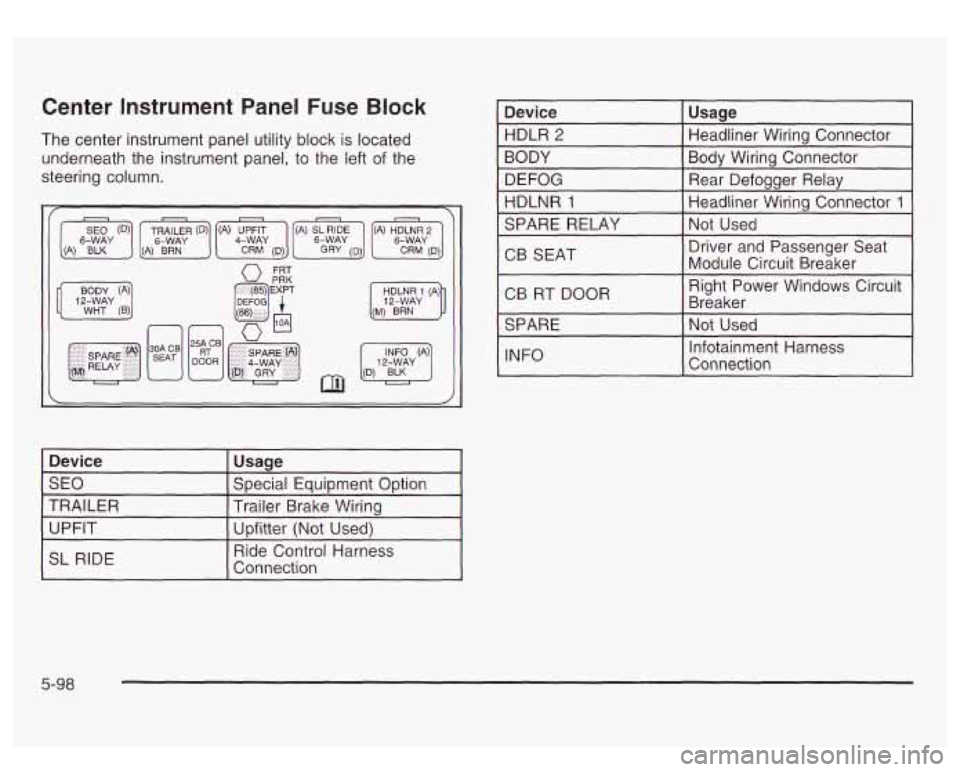
Center Instrument Panel Fuse Block
The center instrument panel utility block is located
underneath the instrument panel, to the left of the
steering column.
Device Special Equipment ODtion
SEO Usage
TRAILER Upfitter (Not Used)
UPFIT Trailer
Brake Wiring
1 SL RIDE I
Ride Control Harness
Connection
I Device I Usage I
HDLR 2
Bodv Wiring Connector
BODY Headliner Wiring
connector-
DEFOG Headliner Wiring Connector
1 HDLNR 1
Rear Defogger Relay
I SPARE RELAY I Not Used I
CB SEAT Driver
and Passenger Seat
Module Circuit Breaker
I CB RT DOOR I
Right Power Windows Circuit
Breaker
I
I SPARE I Not Used I
I INFO I
~-
Infotainment Harness
Connection
1
5-98
Page 376 of 428
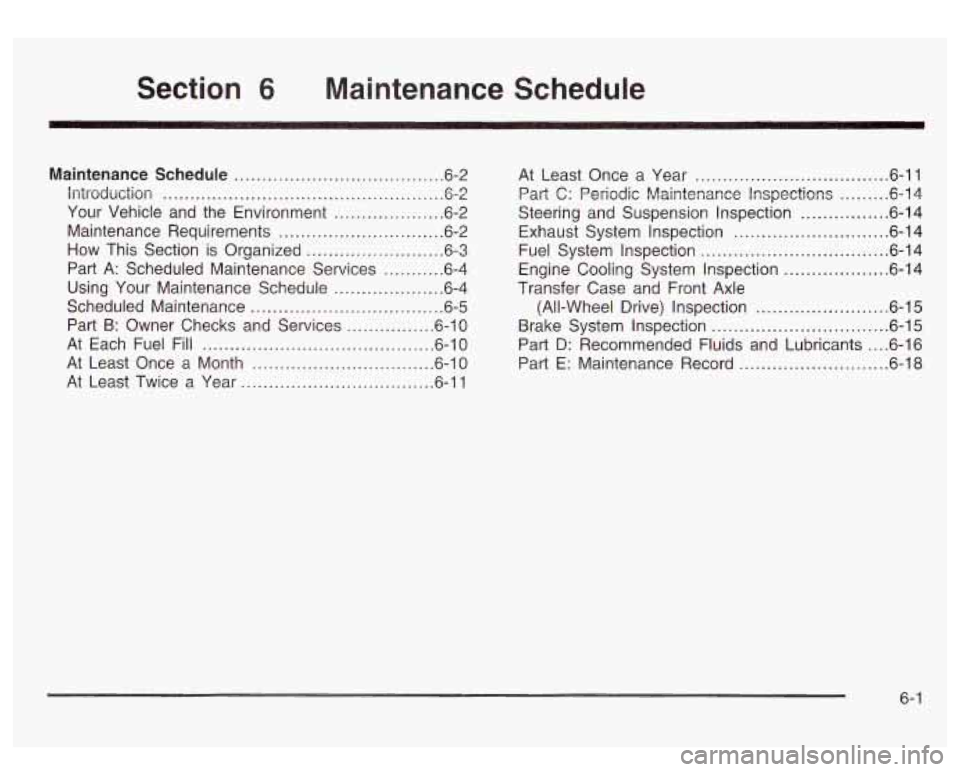
Section 6 Maintenance Schedule
Maintenance Schedule ...................................... 6.2
introduction
................................................... 6.2
Your Vehicle and the Environment
.................... 6-2
Maintenance Requirements
.............................. 6-2
How This Section is Organized
......................... 6-3
Part A: Scheduled Maintenance Services
........... 6-4
Using Your Maintenance Schedule
.................... 6-4
Scheduled Maintenance
................................... 6-5
Part
B: Owner Checks and Services ................ 6-10
At Each Fuel Fill
.......................................... 6-10
At Least Once a Month
................ ......... 6-10
At Least Twice a Year
............................... 6-11 At Least
Once a Year
................................... 6-11
Part
C: Periodic Maintenance Inspections ......... 6.14
Steering and Suspension Inspection
................ 6.14
Exhaust System inspection
............................ 6-14
Fuel System Inspection
.................................. 6.14
Engine Cooling System inspection
................... 6.14
(All-Wheel Drive) Inspection
........................ 6.15
Brake System Inspection
................................ 6.15
Part
D: Recommended Fluids and Lubricants .... 6-16
Part E: Maintenance Record
........................... 6.18
Transfer Case and
Front Axle
6- 1
Page 381 of 428
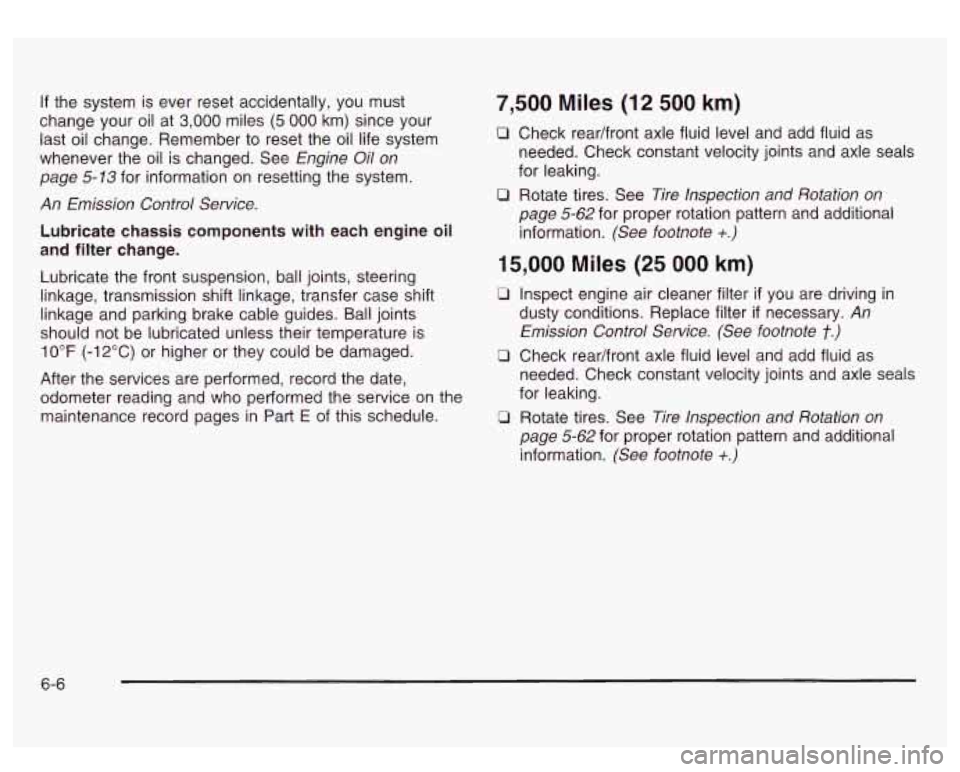
If the system is ever reset accidentally, you must
change your oil at
3,000 miles (5 000 km) since your
last oil change. Remember to reset the oil life system
whenever the oil is changed. See
Engine Oil on
page 5-73
for information on resetting the system.
An Emission Control Service.
Lubricate chassis components with each engine oil
and filter change.
Lubricate the front suspension, ball joints, steering
linkage, transmission shift linkage, transfer case shift
linkage and parking brake cable guides. Ball joints
should not be lubricated unless their temperature is
10°F (-12°C) or higher or they could be damaged.
After the services are performed, record the date,
odometer reading and who performed the service on the
maintenance record pages in Part
E of this schedule.
7,500 Miles (12 500 km)
0 Check readfront axle fluid level and add fluid as
needed. Check constant velocity joints and axle seals
for leaking.
page 5-62 for proper rotation pattern and additional
information.
(See footnote +.)
0 Rotate tires. See Tire Inspection and Rotation on
15,000 Miles (25 000 km)
0 Inspect engine air cleaner filter if you are driving in
dusty conditions. Replace filter
if necessary. An
Emission Control Service. (See footnote
t.)
0 Check readfront axle fluid level and add fluid as
needed. Check constant velocity joints and axle seals
for leaking.
0 Rotate tires. See Tire Inspection and Rotation on
page 5-62
for proper rotation pattern and additional
information.
(See footnote +.)
6-6
Page 389 of 428
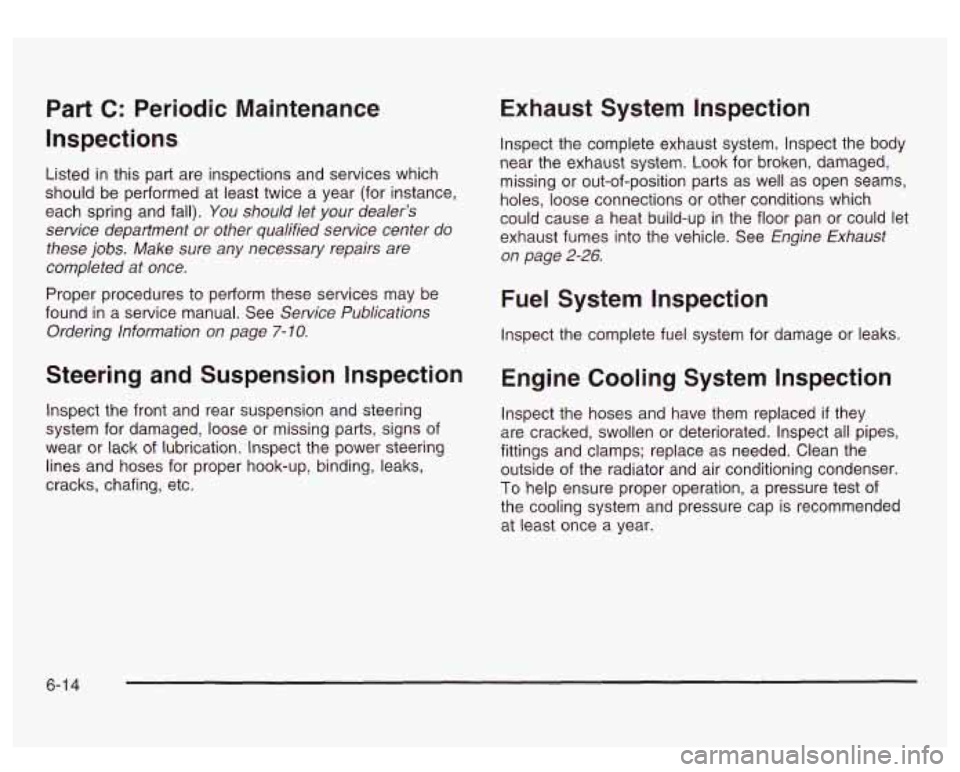
Part C: Periodic Maintenance
Inspections
Listed in this part are inspections and services which
should be performed at least twice a year (for instance,
each spring and fall).
You should let your dealer’s
service department or other qualified service center do
these jobs. Make sure any necessary repairs are
completed at once.
Proper procedures to perform these services may be
found in a service manual. See
Service Publications
Ordering lnformation on page
7- 10.
Steering and Suspension Inspection
Inspect the front and rear suspension and steering
system for damaged, loose or missing parts, signs of
wear or lack of lubrication. Inspect the power steering
lines and hoses for proper hook-up, binding, leaks,
cracks, chafing, etc.
Exhaust System Inspection
Inspect the complete exhaust system. Inspect the body
near the exhaust system. Look for broken, damaged,
missing or out-of-position parts as well as open seams,
holes, loose connections or other conditions which
could cause a heat build-up in the floor pan or could let
exhaust fumes into the vehicle. See
Engine Exhaust
on page
2-26.
Fuel System Inspection
Inspect the complete fuel system for damage or leaks.
Engine Cooling System Inspection
Inspect the hoses and have them replaced if they
are cracked, swollen or deteriorated. Inspect
all pipes,
fittings and clamps; replace as needed. Clean the
outside of the radiator and air conditioning condenser.
To help ensure proper operation, a pressure test of
the cooling system and pressure cap is recommended
at least once a year.
6-1 4
Page 391 of 428

Part D: Recommended Fluids and
Lubricants
Fluids and lubricants identified below by name, part
number or specification may be obtained from your
dealer.
Engine Oil
Engine Coolant
Hydraulic Brake
System
Windshield
Washer Solvent
Power Steering
System
~~
Automatic
Transmission Fluid/Lubricant
Engine oil with the American
Petroleum Institute Certified for
Gasoline Engines starburst symbol
of the proper viscosity. To determine
the preferred viscosity for your
vehicle's engine, see
Engine Oil on
Daae
5- 13.
50/50 mixture of clean, drinkable
water and use only DEX-COOL
Coolant. See
Engine Coolant on
page
5-24.
Delco Supreme 11 Brake Fluid or
equivalent DOT-3 brake fluid.
GM Optikleen Washer Solvent or
equivalent.
GM Power Steering Fluid (GM Part
No.
U.S. 1052884, in Canada
993294, or equivalent).
DEXRON-Ill Automatic Transmission
Fluid. Usage
FluWLubricant
Multi-Purpose Lubricant, Superlube
Key Lock
Canada 10953474. or eauivalent). Cylinders (GM Part No. U.S. 12346241, in
Floor Shift
Linkage
Chassis
Lubrication Lubriplate
Lubricant Aerosol (GM
Part No.
US. 12346293, in Canada
' 992723, or equivalent) or lubricant
meeting requirements of NLGl #2
Category LB or GC-LB.
Chassis Lubricant (GM Part
No.
U.S. 12377985, in Canada
88901242, or equivalent) or lubricant
meeting requirements of NLGl #2,
Cateaow LB or GC-LB.
SAE 75W-90 Synthetic Axle
Lubricant (GM Part No.
U.S.
Front Axle 12378261, in Canada 10953455) or
equivalent meeting GM Specification
99861 15.
Synthetic Axle Lubricant; use only
Rear Axle
88901362).
Do not add friction
(Steerable) GM Part
No. 12378557
(in Canada
modifier.
Transfer Case
I Fluid.
DEXRON-Ill Automatic Transmission
Chassis Lubricant (GM Part No.
U.S. 12377985,
in Canada Rear Driveline
meeting requirements of NLGI #2, Center Spline 88901242, or equivalent) or lubricant
CateqorV LB or GC-LB.
6-1 6