2003 FORD SUPER DUTY ignition
[x] Cancel search: ignitionPage 115 of 256
Note:Do not perform this operation if the rear wheels are slipping.
Shifting to/from 4L (4WD Low)
1. Bring the vehicle to a complete stop.
2. Depress the brake.
3. On vehicles equipped with an automatic transmission, place the
transmission in N (Neutral); on vehicles equipped with a manual
transmission, depress the clutch.
4. Move the transfer case lever through N (Neutral) directlyto the
desired position. The LOW RANGE indicator will illuminate once the
transfer case has engaged.
•If the transfer casedoes notengage, repeat steps 1 through 4.
Using the N (Neutral) position
The transfer case N (Neutral) position overrides the transmission
and puts the vehicle in neutral regardless of transmission
gearshift lever position. The vehicle can move forward or
backward.
This position should onlybe used when towing the vehicle.
Do not leave the vehicle unattended with the transfer case in the
N (Neutral) position. Always set the parking brake fully and turn
off the ignition when leaving the vehicle.
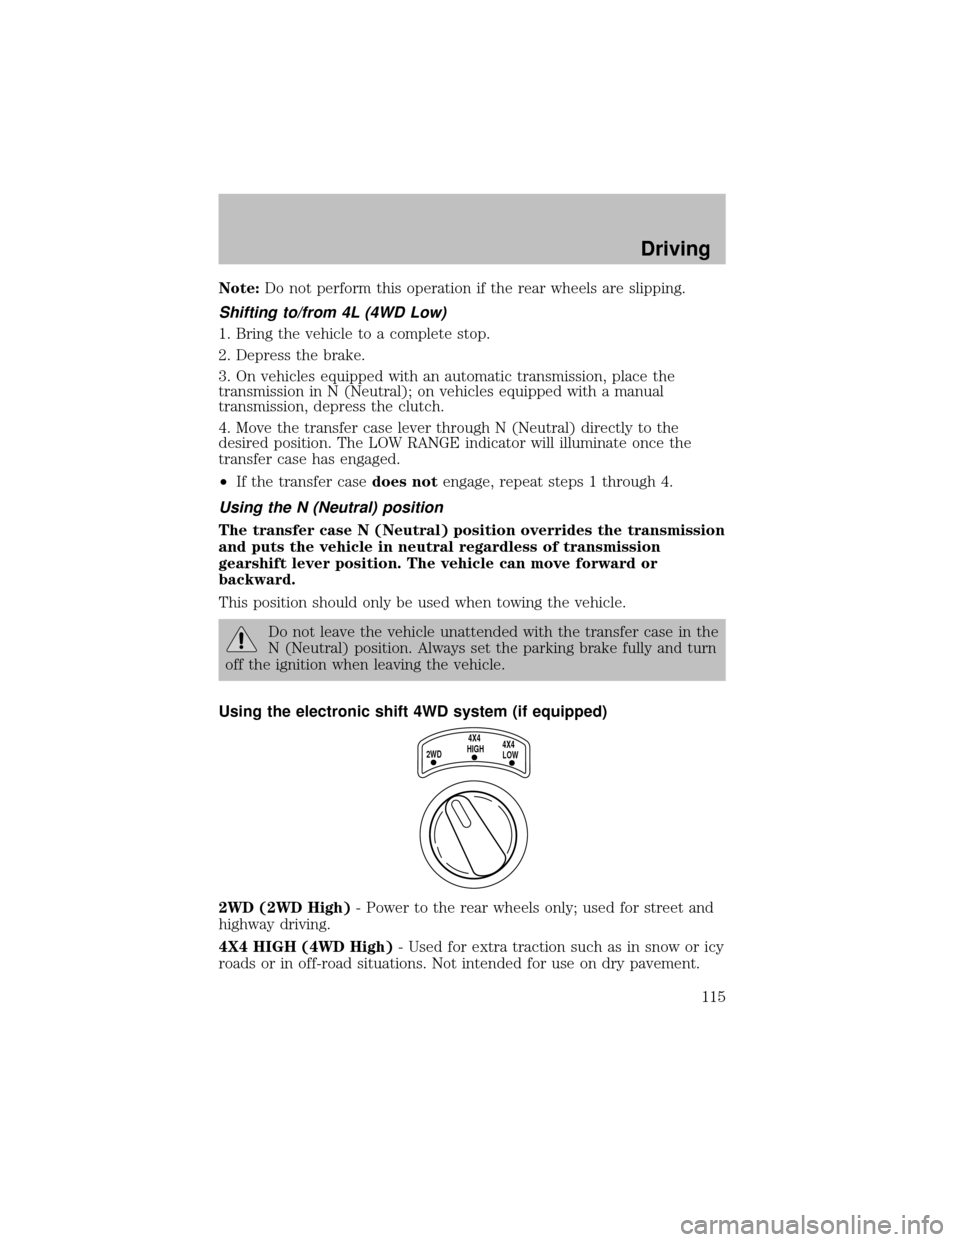
Using the electronic shift 4WD system (if equipped)
2WD (2WD High)- Power to the rear wheels only; used for street and
highwaydriving.
4X4 HIGH (4WD High)- Used for extra traction such as in snow or icy
roads or in off-road situations. Not intended for use on drypavement.
2WD4X4
HIGH4X4
LOW
Driving
115
Page 118 of 256
If your vehicle gets stuck
If your vehicle gets stuck in mud or snow it may be rocked out by
shifting between forward and reverse gears, stopping between shifts, in a
steadypattern. Press lightlyon the accelerator in each gear.
Do not rock the vehicle if the engine is not at normal operating
temperature or damage to the transmission may occur.
Do not rock the vehicle for more than a few minutes or damage
to the transmission and tires may occur or the engine may
overheat.
Always set the parking brake fully and make sure the gearshift is
latched in P (Park). Turn the ignition to the LOCK position and
remove the key whenever you leave your vehicle.
If the parking brake is fullyreleased, but the brake warning lamp
remains illuminated, the brakes maynot be working properly.
See your dealer or a qualified service technician.
Do not spin the wheels at over 56 km/h (35 mph). The tires may
fail and injure a passenger or bystander.
Refer toTransmission temperature gaugein theInstrument cluster
chapter for transmission fluid temperature information.
Emergency maneuvers
•In an unavoidable emergencysituation where a sudden sharp turn
must be made, remember to avoid “over-driving” your vehicle, i.e.,
turn the steering wheel onlyas rapidlyand as far as required to avoid
the emergency. Excessive steering will result in less vehicle control,
not more. Additionally, smooth variations of the accelerator and/or
brake pedal pressure should be utilized if changes in vehicle speed are
called for. Avoid abrupt steering, acceleration or braking which could
result in an increased risk of loss of vehicle control, vehicle rollover
and/or personal injury. Use all available road surface to return the
vehicle to a safe direction of travel.
•In the event of an emergencystop, avoid skidding the tires and do not
attempt anysharp steering wheel movements.
Driving
118
Page 119 of 256
Vehicles with a higher center of gravitysuch as utilityand
four-wheel drive vehicles handle differentlythan vehicles with a
lower center of gravity. Utility and four-wheel drive vehicles arenot
designed for cornering at speeds as high as passenger cars anymore
than low-slung sports cars are designed to perform satisfactorilyunder
off-road conditions. Avoid sharp turns, excessive speed and abrupt
maneuvers in these vehicles. Failure to drive cautiouslycould result in
an increased risk of loss of vehicle control, vehicle rollover, personal
injuryand death.
•If the vehicle goes from one type of surface to another (i.e., from
concrete to gravel) there will be a change in the waythe vehicle
responds to a maneuver (steering, acceleration or braking). Again,
avoid these abrupt inputs.
Parking
On some 4WD vehicles, when the transfer case is in the N (Neutral)
position, the engine and transmission are disconnected from the rest of
the driveline. Therefore, the vehicle is free to roll even if the automatic
transmission is in P (Park) or the manual transmission is in gear. Do not
leave the vehicle unattended with the transfer case in the N (Neutral)
position. Always set the parking brake fully and turn off the ignition
when leaving the vehicle.
4WD Systems
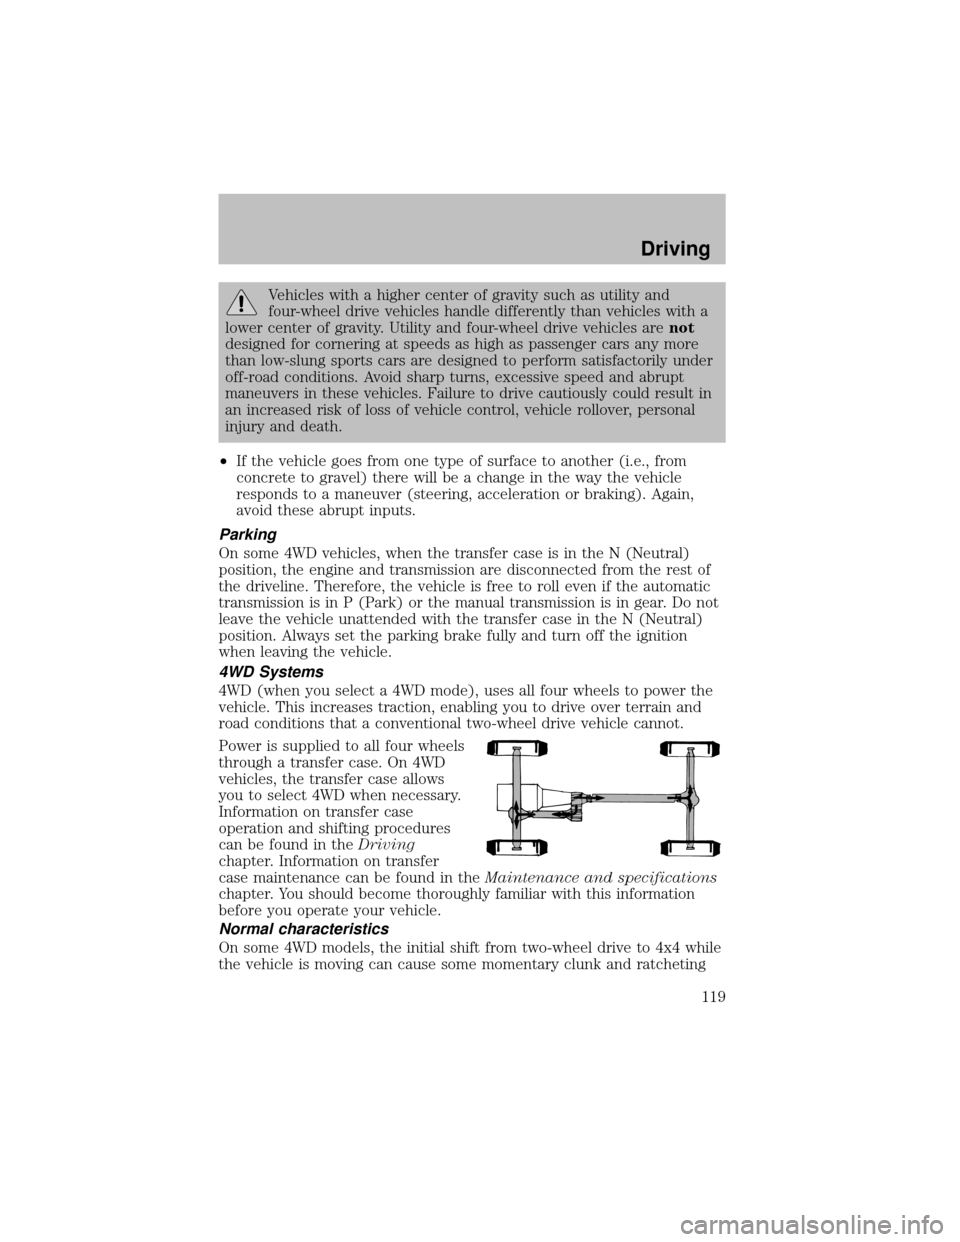
4WD (when you select a 4WD mode), uses all four wheels to power the
vehicle. This increases traction, enabling you to drive over terrain and
road conditions that a conventional two-wheel drive vehicle cannot.
Power is supplied to all four wheels
through a transfer case. On 4WD
vehicles, the transfer case allows
you to select 4WD when necessary.
Information on transfer case
operation and shifting procedures
can be found in theDriving
chapter. Information on transfer
case maintenance can be found in theMaintenance and specifications
chapter. You should become thoroughlyfamiliar with this information
before you operate your vehicle.
Normal characteristics
On some 4WD models, the initial shift from two-wheel drive to 4x4 while
the vehicle is moving can cause some momentaryclunk and ratcheting
Driving
119
Page 120 of 256
sounds. This is the front drivetrain coming up to speed and the
automatic locking hubs engaging and is not cause for concern.
Sand
When driving over sand, tryto keep all four wheels on the most solid
area of the trail. Avoid reducing the tire pressures but shift to a lower
gear and drive steadilythrough the terrain. Applythe accelerator slowly
and avoid spinning the wheels.
If you must reduce the tire pressure for whatever reason in sand, make
sure you re-inflate the tires as soon as possible.
Avoid excessive speed because vehicle momentum can work against you
and cause the vehicle to become stuck to the point that assistance may
be required from another vehicle. Remember, you may be able to back
out the way you came if you proceed with caution.
Mud and water
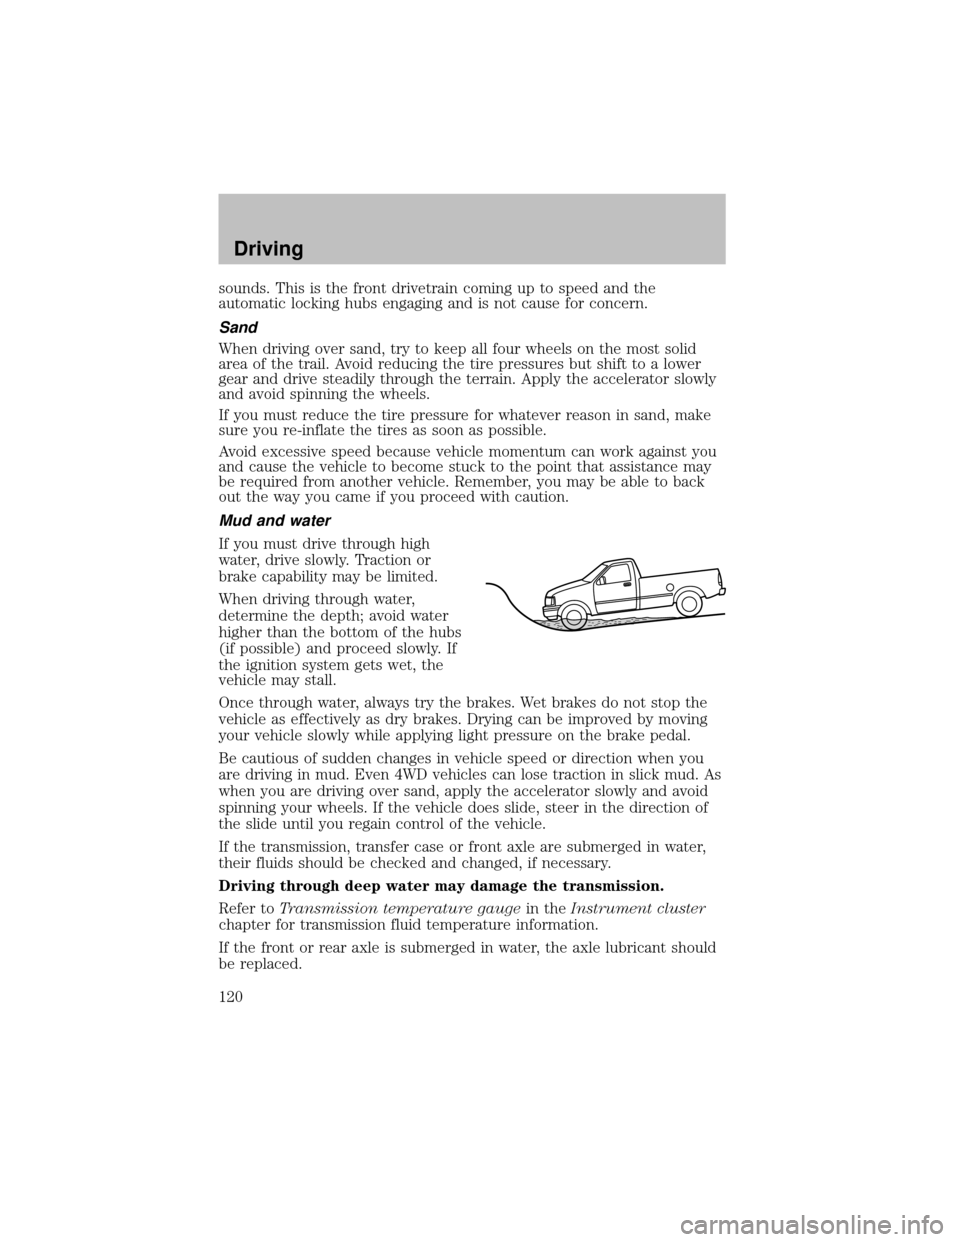
If you must drive through high
water, drive slowly. Traction or
brake capabilitymaybe limited.
When driving through water,
determine the depth; avoid water
higher than the bottom of the hubs
(if possible) and proceed slowly. If
the ignition system gets wet, the
vehicle maystall.
Once through water, always try the brakes. Wet brakes do not stop the
vehicle as effectivelyas drybrakes. Drying can be improved bymoving
your vehicle slowly while applying light pressure on the brake pedal.
Be cautious of sudden changes in vehicle speed or direction when you
are driving in mud. Even 4WD vehicles can lose traction in slick mud. As
when you are driving over sand, applythe accelerator slowlyand avoid
spinning your wheels. If the vehicle does slide, steer in the direction of
the slide until you regain control of the vehicle.
If the transmission, transfer case or front axle are submerged in water,
their fluids should be checked and changed, if necessary.
Driving through deep water may damage the transmission.
Refer toTransmission temperature gaugein theInstrument cluster
chapter for transmission fluid temperature information.
If the front or rear axle is submerged in water, the axle lubricant should
be replaced.
Driving
120
Page 145 of 256
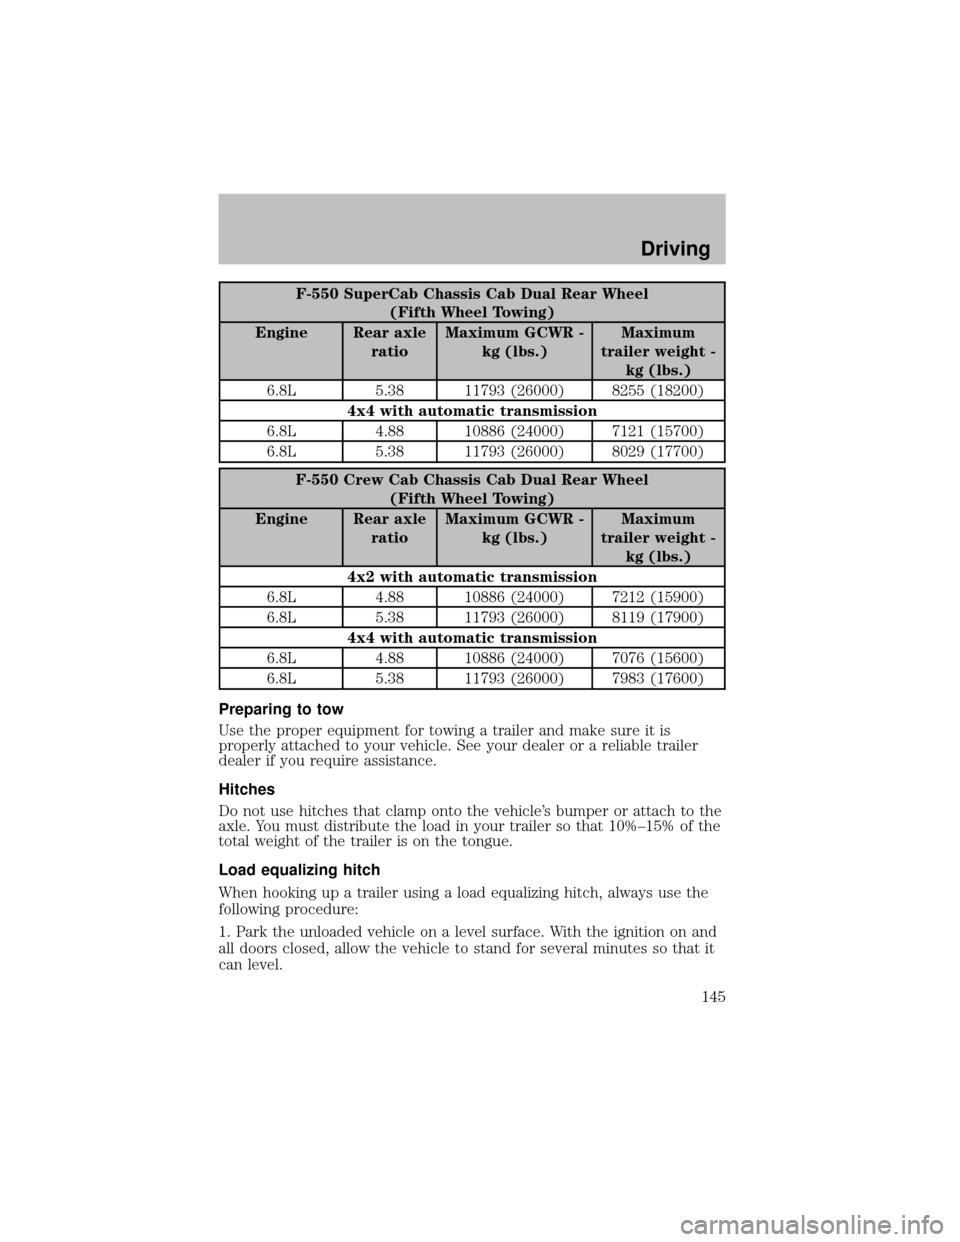
F-550 SuperCab Chassis Cab Dual Rear Wheel
(Fifth Wheel Towing)
Engine Rear axle
ratioMaximum GCWR -
kg (lbs.)Maximum
trailer weight -
kg (lbs.)
6.8L 5.38 11793 (26000) 8255 (18200)
4x4 with automatictransmission
6.8L 4.88 10886 (24000) 7121 (15700)
6.8L 5.38 11793 (26000) 8029 (17700)
F-550 Crew Cab Chassis Cab Dual Rear Wheel
(Fifth Wheel Towing)
Engine Rear axle
ratioMaximum GCWR -
kg (lbs.)Maximum
trailer weight -
kg (lbs.)
4x2 with automatictransmission
6.8L 4.88 10886 (24000) 7212 (15900)
6.8L 5.38 11793 (26000) 8119 (17900)
4x4 with automatictransmission
6.8L 4.88 10886 (24000) 7076 (15600)
6.8L 5.38 11793 (26000) 7983 (17600)
Preparing to tow
Use the proper equipment for towing a trailer and make sure it is
properly attached to your vehicle. See your dealer or a reliable trailer
dealer if you require assistance.
Hitches
Do not use hitches that clamp onto the vehicle’s bumper or attach to the
axle. You must distribute the load in your trailer so that 10%–15% of the
total weight of the trailer is on the tongue.
Load equalizing hitch
When hooking up a trailer using a load equalizing hitch, always use the
following procedure:
1. Park the unloaded vehicle on a level surface. With the ignition on and
all doors closed, allow the vehicle to stand for several minutes so that it
can level.
Driving
145
Page 153 of 256
Canadian customers who require roadside assistance, call
1–800–665–2006.
If you need to arrange roadside assistance for yourself, Ford Motor
Companywill reimburse a reasonable amount. To obtain reimbursement
information, U.S. Ford or Mercuryvehicles customers call
1-800-241-3673; Lincoln vehicle customers call 1–800–521–4140.
Canadian customers who need to obtain reimbursement information, call
1–800–665–2006.
ROADSIDE COVERAGE BEYOND BASIC WARRANTY
In the United States, you may purchase additional roadside assistance
coverage beyond this period through the Ford Auto Club by contacting
your Ford or Lincoln Mercury dealer.
Similarlyin Canada, for uninterrupted Roadside Assistance coverage, you
maypurchase extended coverage prior to your Basic Warranty’s Roadside
Assistance expiring. For more information and enrollment, contact
1–877–294–2582 or visit our website at www.ford.ca.
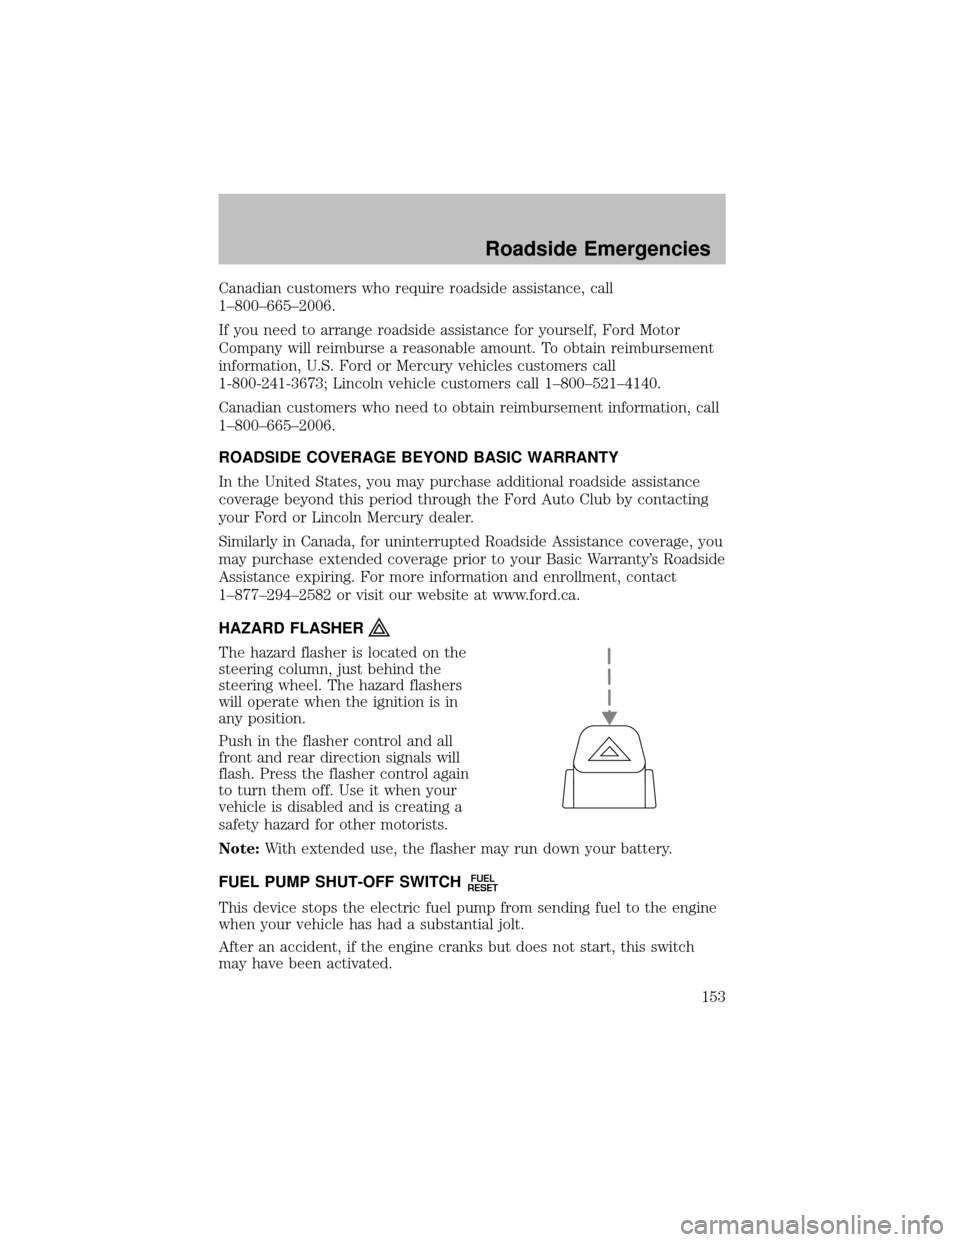
HAZARD FLASHER
The hazard flasher is located on the
steering column, just behind the
steering wheel. The hazard flashers
will operate when the ignition is in
anyposition.
Push in the flasher control and all
front and rear direction signals will
flash. Press the flasher control again
to turn them off. Use it when your
vehicle is disabled and is creating a
safetyhazard for other motorists.
Note:With extended use, the flasher mayrun down your battery.
FUEL PUMP SHUT-OFF SWITCH
FUEL
RESET
This device stops the electric fuel pump from sending fuel to the engine
when your vehicle has had a substantial jolt.
After an accident, if the engine cranks but does not start, this switch
mayhave been activated.
Roadside Emergencies
153
Page 154 of 256
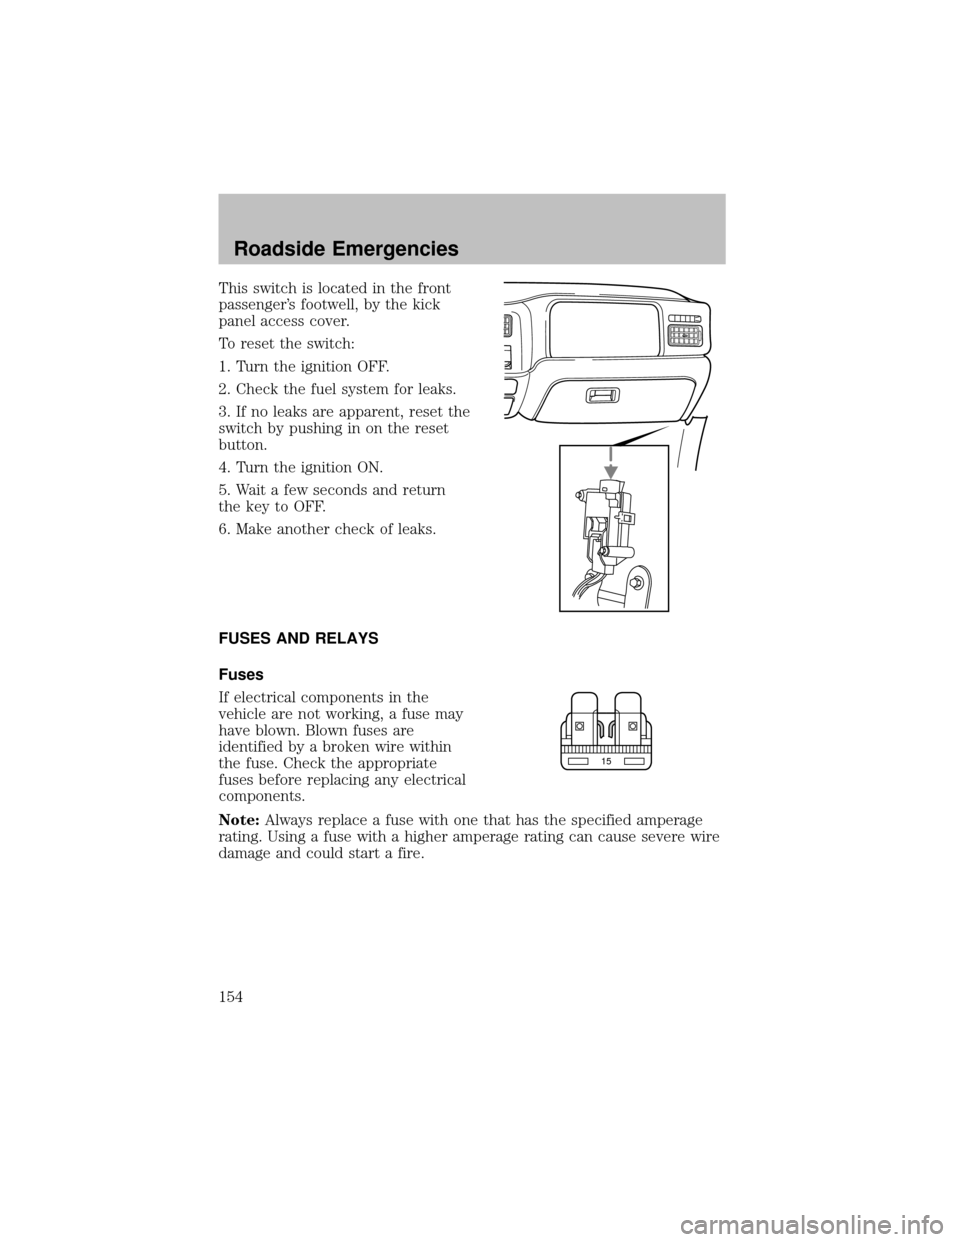
This switch is located in the front
passenger’s footwell, bythe kick
panel access cover.
To reset the switch:
1. Turn the ignition OFF.
2. Check the fuel system for leaks.
3. If no leaks are apparent, reset the
switch bypushing in on the reset
button.
4. Turn the ignition ON.
5. Wait a few seconds and return
the keyto OFF.
6. Make another check of leaks.
FUSES AND RELAYS
Fuses
If electrical components in the
vehicle are not working, a fuse may
have blown. Blown fuses are
identified bya broken wire within
the fuse. Check the appropriate
fuses before replacing anyelectrical
components.
Note:Always replace a fuse with one that has the specified amperage
rating. Using a fuse with a higher amperage rating can cause severe wire
damage and could start a fire.
15
Roadside Emergencies
154
Page 157 of 256
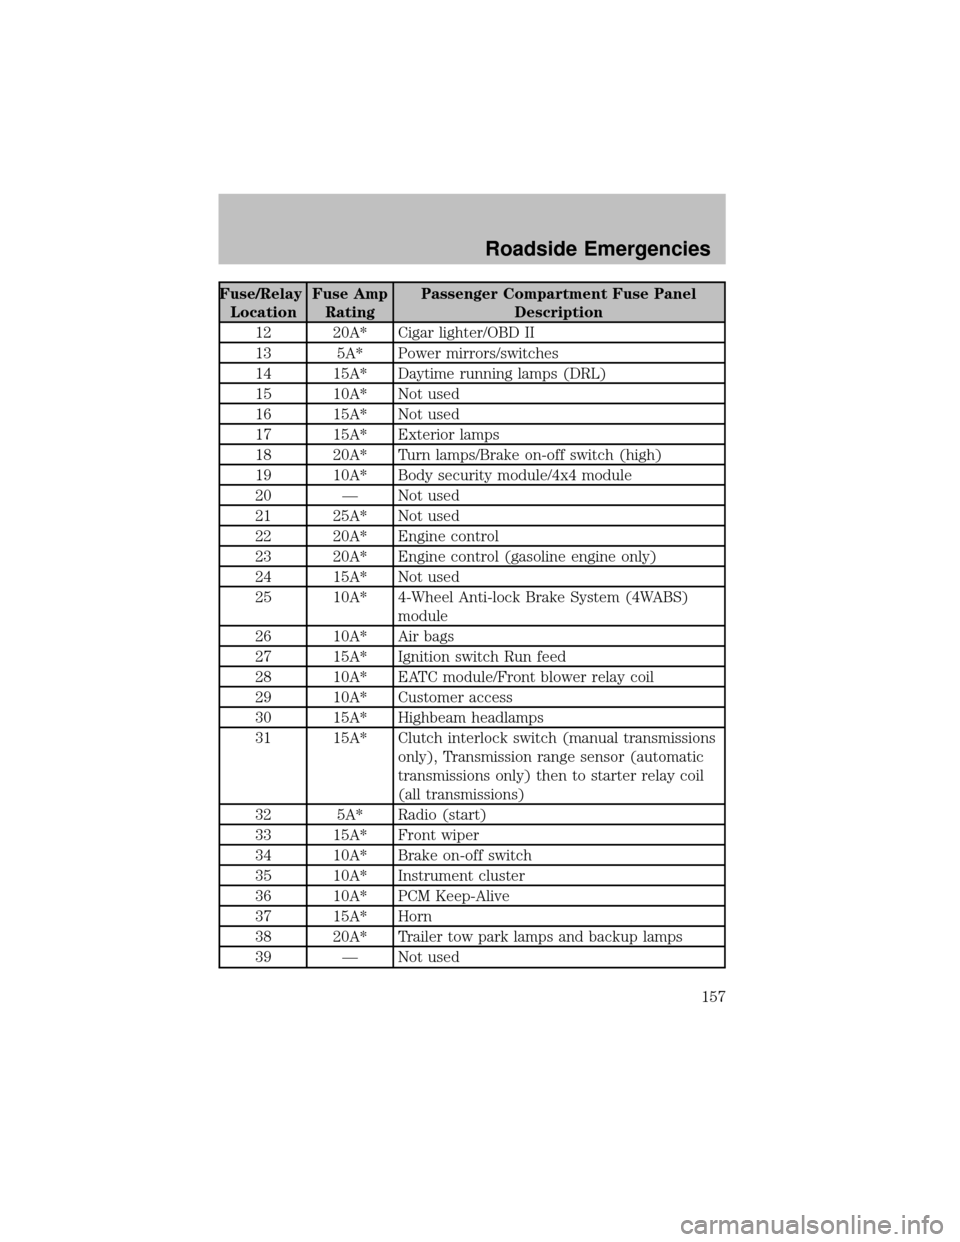
Fuse/Relay
LocationFuse Amp
RatingPassenger Compartment Fuse Panel
Description
12 20A* Cigar lighter/OBD II
13 5A* Power mirrors/switches
14 15A* Daytime running lamps (DRL)
15 10A* Not used
16 15A* Not used
17 15A* Exterior lamps
18 20A* Turn lamps/Brake on-off switch (high)
19 10A* Bodysecuritymodule/4x4 module
20 — Not used
21 25A* Not used
22 20A* Engine control
23 20A* Engine control (gasoline engine only)
24 15A* Not used
25 10A* 4-Wheel Anti-lock Brake System (4WABS)
module
26 10A* Air bags
27 15A* Ignition switch Run feed
28 10A* EATC module/Front blower relaycoil
29 10A* Customer access
30 15A* Highbeam headlamps
31 15A* Clutch interlock switch (manual transmissions
only), Transmission range sensor (automatic
transmissions only) then to starter relay coil
(all transmissions)
32 5A* Radio (start)
33 15A* Front wiper
34 10A* Brake on-off switch
35 10A* Instrument cluster
36 10A* PCM Keep-Alive
37 15A* Horn
38 20A* Trailer tow park lamps and backup lamps
39 — Not used
Roadside Emergencies
157