Page 2929 of 4378
14. Install the lower gearshift lever and the bolts.
15. Install the lower gearshift lever boot and the bolts.
16. Install the upper gearshift lever and the bolts.
17. Connect the cigar lighter electrical connector. Install the console panel gearshift plate. �K�l�j . 4 �b�a
52003 Mustang Workshop Manual
18. 11. 2011file:///C:/Ford/2000 - 2004/tsocache/SHEF_2308/S3B~us~en~ ...
Page 2956 of 4378
DESCRIPTION AND OPERATION
Fuel System
Component Location
WARNING: Do not smoke or carry lighted tobacco or open flame of any type when
working on or near any fuel- related components. Highly flammable mixtures are always present and may be ignited, resulting in possible personal injury. SECTION 310-
00: Fuel System — General Information 2003 Mustang Workshop Manual Item Part Number Description
1 9341 Inertia fuel shutoff switch
2 9F593 Fuel injector
3 9155 Fuel filter
4 9002 Fuel tank
5 9H307 Fuel pump module and flange assembly �K�l�j . 1 �b�a
22003 Mustang Workshop Manual
18. 11. 2011file:///C:/Ford/2000 - 2004/tsocache/SHEF_2308/S3B~us~en~ ...
Page 2959 of 4378

GENERAL PROCEDURES
Pressure Relief
WARNING: Do not smoke or carry lighted tobacco or open flame of any type when
working on or near any fuel- related components. Highly flammable mixtures are always present
and may be ignited, resulting in possible personal injury.
WARNING: Fuel in the fuel system remains under high pressure even when the engine is
not running. Before servicing or disconnecting any of the fuel lines or fuel system components,
the fuel system pressure must be relieved to prevent accidental spraying of fuel, causing
personal injury or a fire hazard.
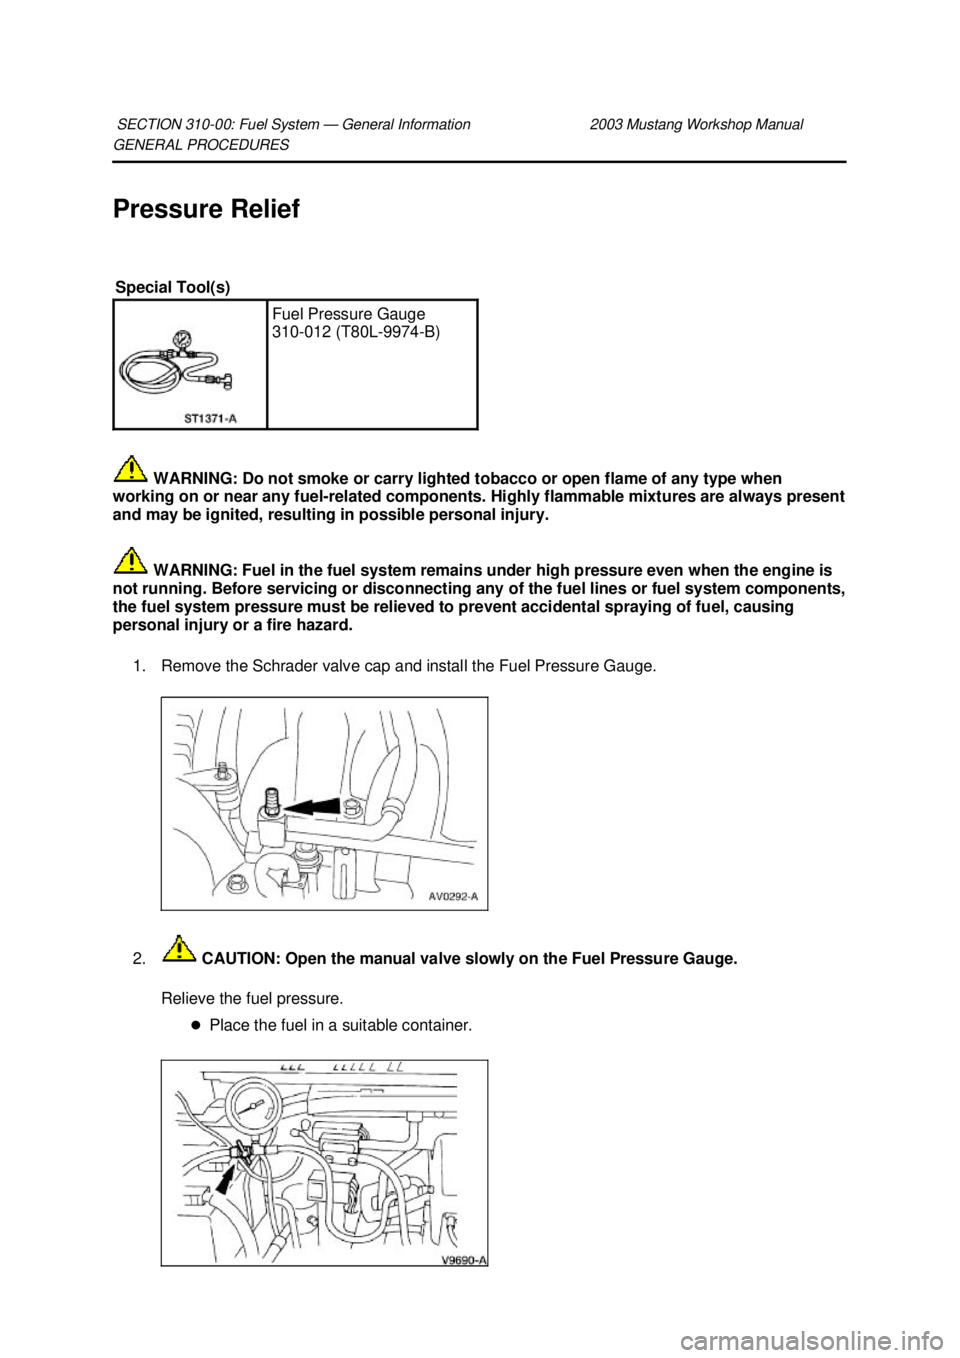
1. Remove the Schrader valve cap and install the Fuel Pressure Gauge.
2. CAUTION: Open the manual valve slowly on the Fuel Pressure Gauge.
Relieve the fuel pressure. �zPlace the fuel in a suitable container.
SECTION 310-
00: Fuel System — General Information 2003 Mustang Workshop Manual Special Tool(s)
Fuel Pressure Gauge
310-
012 (T80L-9974- B) �K�l�j . 1 �b�a
22003 Mustang Workshop Manual
18. 11. 2011file:///C:/Ford/2000 - 2004/tsocache/SHEF_2308/S3B~us~en~ ...
Page 2961 of 4378
GENERAL PROCEDURES
Fuel Tank Draining
WARNING: Do not smoke or carry lighted tobacco or an open flame of any type when
working on or near any fuel- related components. Highly flammable mixtures are always present
and may be ignited, resulting in possible personal injury.
1. Disconnect the battery ground cable. For additional information, refer to Section 414 - 01 .
2. Remove the fuel tank filler cap.
3. Insert the hose guide into the filler neck.
4. NOTE: Insert the hose until the stop contacts the guide tube. If the stop does not contact the
guide tube, remove the hose and repeat the procedure.
Insert the chamfered end of the hose into the filler neck through the guide tube.
SECTION 310-
00: Fuel System — General Information 2003 Mustang Workshop Manual Special Tool(s)
Fuel Storage Tanker
164-R3202 or equivalent
Fuel Tank Drain Hose
310-
F013 �K�l�j . 1 �b�a
22003 Mustang Workshop Manual
18. 11. 2011file:///C:/Ford/2000 - 2004/tsocache/SHEF_2308/S3B~us~en~ ...
Page 2963 of 4378

GENERAL PROCEDURES
Spring Lock Couplings
Disconnect
WARNING: Do not smoke or carry lighted tobacco or open flame of any type when
working on or near any fuel- related components. Highly flammable mixtures are always present
and may be ignited, resulting in possible personal injury.
WARNING: Fuel in the fuel system remains under high pressure even when the engine is
not running. Before servicing or disconnecting any of the fuel lines or fuel system components,
the fuel system pressure must be relieved to prevent accidental spraying of fuel, causing
personal injury or a fire hazard.
1. Relieve the fuel system pressure. For additional information, refer to Pressure Relief in this
section.
2. Remove the fuel tube clip.
SECTION 310-
00: Fuel System — General Information 2003 Mustang Workshop Manual Special Tool(s)
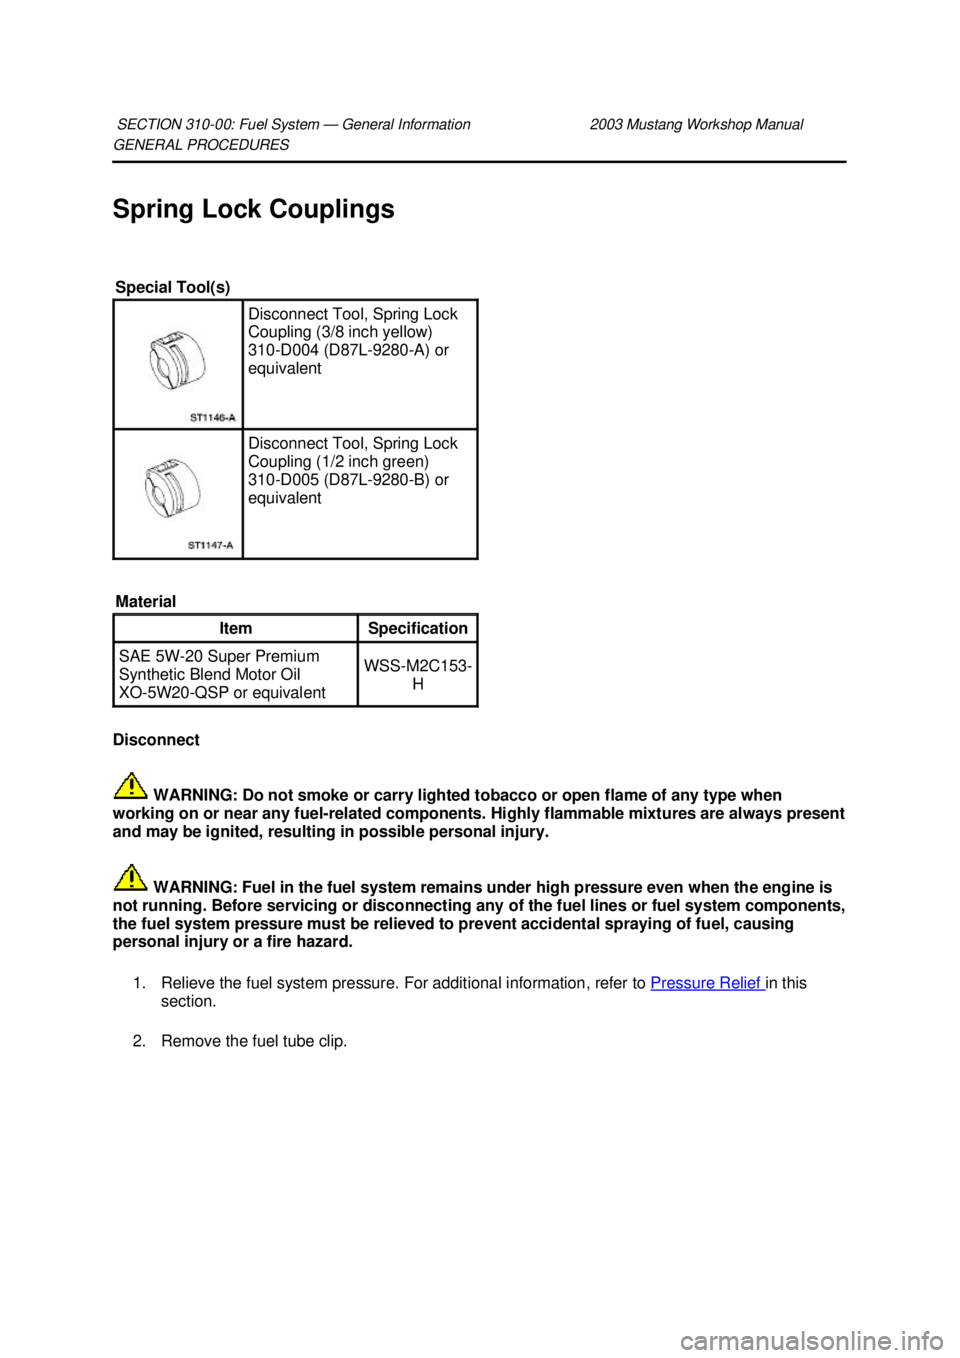
Disconnect Tool, Spring Lock
Coupling (3/8 inch yellow)
310-
D004 (D87L-9280- A) or
equivalent Disconnect Tool, Spring Lock
Coupling (1/2 inch green)
310-
D005 (D87L-9280- B) or
equivalent
Material Item Specification
SAE 5W-
20 Super Premium
Synthetic Blend Motor Oil
XO- 5W20- QSP or equivalent WSS-
M2C153-
H �K�l�j . 1 �b�a
32003 Mustang Workshop Manual
18. 11. 2011file:///C:/Ford/2000 - 2004/tsocache/SHEF_2308/S3B~us~en~ ...
Page 2966 of 4378

GENERAL PROCEDURES
Fuel Line Fittings —
Push Connect
Disconnect WARNING: Do not smoke or carry lighted tobacco or open flame of any type when
working on or near any fuel- related components. Highly flammable mixtures are always present
and may be ignited, resulting in possible personal injury.
WARNING: Fuel in the fuel system remains under high pressure even when the engine is
not running. Before servicing or disconnecting any of the fuel lines or fuel system components,
the fuel system pressure must be relieved to prevent accidental spraying of fuel, causing
personal injury or a fire hazard.
1. Relieve the fuel system pressure. For additional information, refer to Pressure Relief in this
section.
2. Disconnect the safety clip from the male hose.
3. Install the Fuel Line Disconnect Set and push into the fitting.
SECTION 310-
00: Fuel System — General Information 2003 Mustang Workshop Manual Special Tool(s)
Disconnect Tool, Spring Lock
Coupling
310-
S039 (T90T-9550- S)
Material Item Specification
SAE 5W-
20 Super Premium
Blend Motor Oil
XO- 5W20-QSP or equivalent WSS-
M2C153-
H �K�l�j . 1 �b�a
32003 Mustang Workshop Manual
18. 11. 2011file:///C:/Ford/2000 - 2004/tsocache/SHEF_2308/S3B~us~en~ ...
Page 2969 of 4378

GENERAL PROCEDURES
Fittings
—R-Clip
Disconnect WARNING: Do not smoke or carry lighted tobacco or open flame of any type when
working on or near any fuel- related components. Highly flammable mixtures are always present
and may be ignited, resulting in possible personal injury.
WARNING: Fuel in the fuel system remains under high pressure even when the engine is
not running. Before servicing or disconnecting any of the fuel lines or fuel system components,
the fuel system pressure must be relieved to prevent accidental spraying of fuel, causing
possible personal injury or a fire hazard.
CAUTION: Do not use any tools. The use of tools may cause a deformity in the clip
components which may cause fuel leaks.
1. Relieve the fuel system pressure. For additional information, refer to Pressure Relief in this
section.
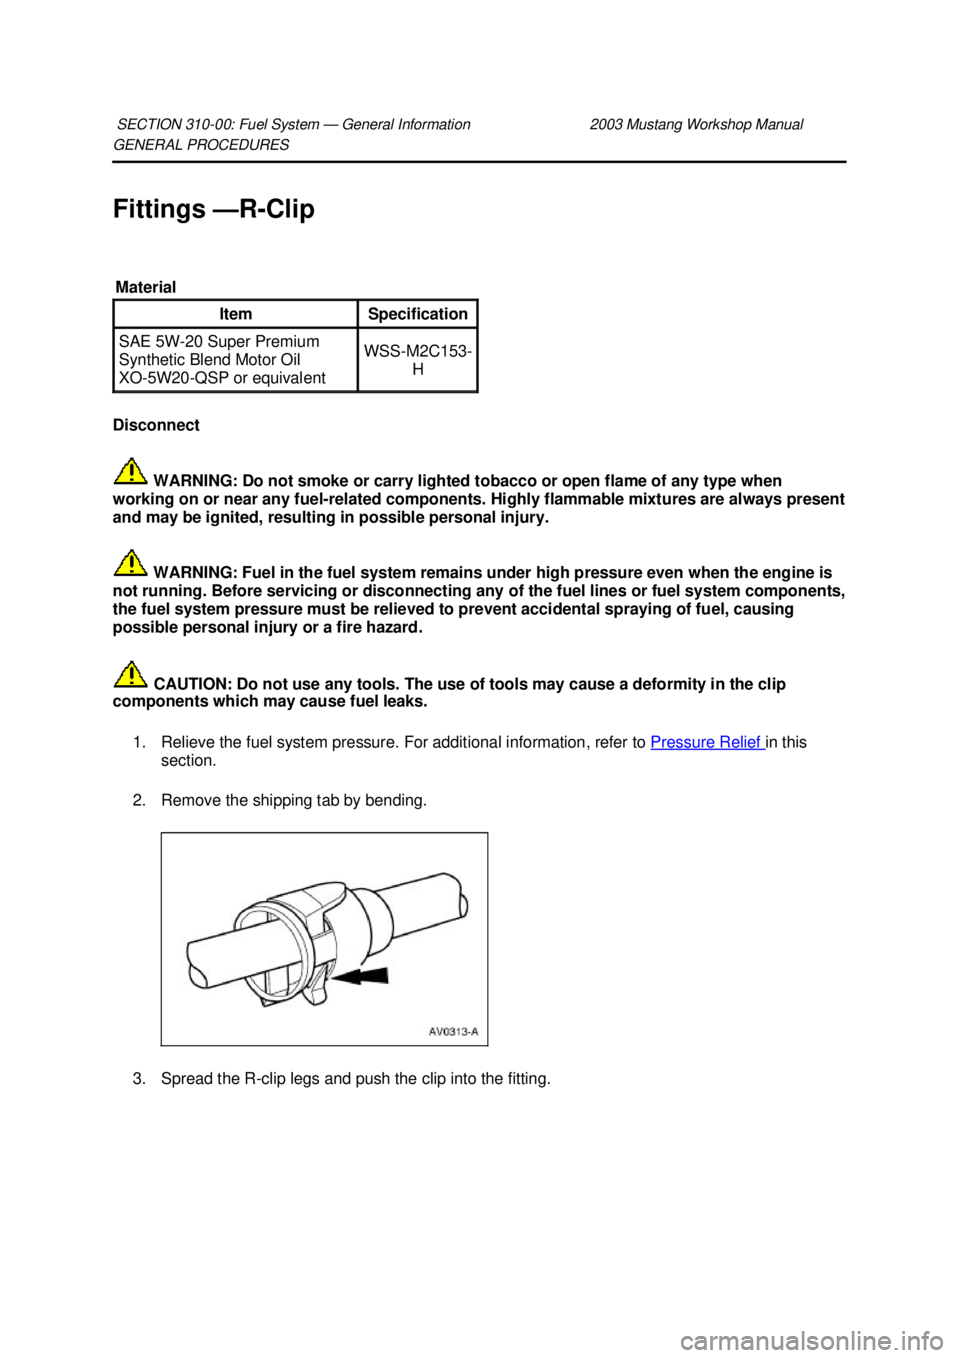
2. Remove the shipping tab by bending.
3. Spread the R- clip legs and push the clip into the fitting.
SECTION 310-
00: Fuel System — General Information 2003 Mustang Workshop Manual Material
Item Specification
SAE 5W-
20 Super Premium
Synthetic Blend Motor Oil
XO- 5W20- QSP or equivalent WSS-
M2C153-
H �K�l�j . 1 �b�a
32003 Mustang Workshop Manual
18. 11. 2011file:///C:/Ford/2000 - 2004/tsocache/SHEF_2308/S3B~us~en~ ...
Page 2970 of 4378
4. Separate the fitting from the tube.
Connect 1. NOTE: Apply a light coat of clean engine oil.
Clean and inspect the fitting and the tube for damage.
2. Insert the R- clip into the fitting.
3. Insert the tube in the fitting and push together until a click is heard. �K�l�j . 2 �b�a
32003 Mustang Workshop Manual
18. 11. 2011file:///C:/Ford/2000 - 2004/tsocache/SHEF_2308/S3B~us~en~ ...