Page 3137 of 4378
Item Part Number Description
1 19E630 LH demister nozzle duct
2 18490 Defroster duct
3 19B680 A/C evaporator register duct
—(RH) 4 19E630 RH demister nozzle duct
5 19893 A/C evaporator register
—(RH) 6 19893 A/C evaporator register
—(center) 7 18C433 Floor duct
8 18471 Heater air plenum chamber �K�l�j . 2 �b�a
32003 Mustang Workshop Manual
18. 11. 2011file:///C:/Ford/2000 - 2004/tsocache/SHEF_2308/S3B~us~en~ ...
Page 3146 of 4378
REMOVAL AND INSTALLATION
Duct —
Floor
Removal 1. Remove the evaporator core housing. For additional information, refer to Section 412 - 02 .
2. Remove the screws and remove the heater outlet floor duct.
Installation 1. To install, reverse the removal procedure.
SECTION 412-
01: Air Distribution and Filtering 2003 Mustang Workshop Manual �K�l�j . 1 �b�a
12003 Mustang Workshop Manual
18. 11. 2011file:///C:/Ford/2000 - 2004/tsocache/SHEF_2308/S3B~us~en~ ...
Page 3156 of 4378

DESCRIPTION AND OPERATION
Heating and Defrosting
The heating and defrosting system has the following features:
�zControls the temperature and, during A/C operation, reduces the relative humidity of the air
inside the vehicle.
�z Delivers heated or cooled air to maintain the vehicle interior temperature and comfort level.
�z Controls the A/C blower motor speed.
�z Cooling or heating can be adjusted to maintain the desired temperature.
�z System uses a reheat method to provide conditioned air to the passenger compartment.
�z The blower motor (19805) draws outside air through the air inlet duct from just below the
windshield during all system operations except for MAX A/C cooling (when recirculated air is
used).
�z All airflow from the blower motor passes through the A/C evaporator core (19860).
�z The temperature is then regulated by reheating a portion of the air and blending it with the
remaining cool air to the desired temperature.
�z The temperature blending is varied by the air temperature control door, which regulates the
amount of air that flows through and around the heater core (18476), where it is then mixed and
distributed.
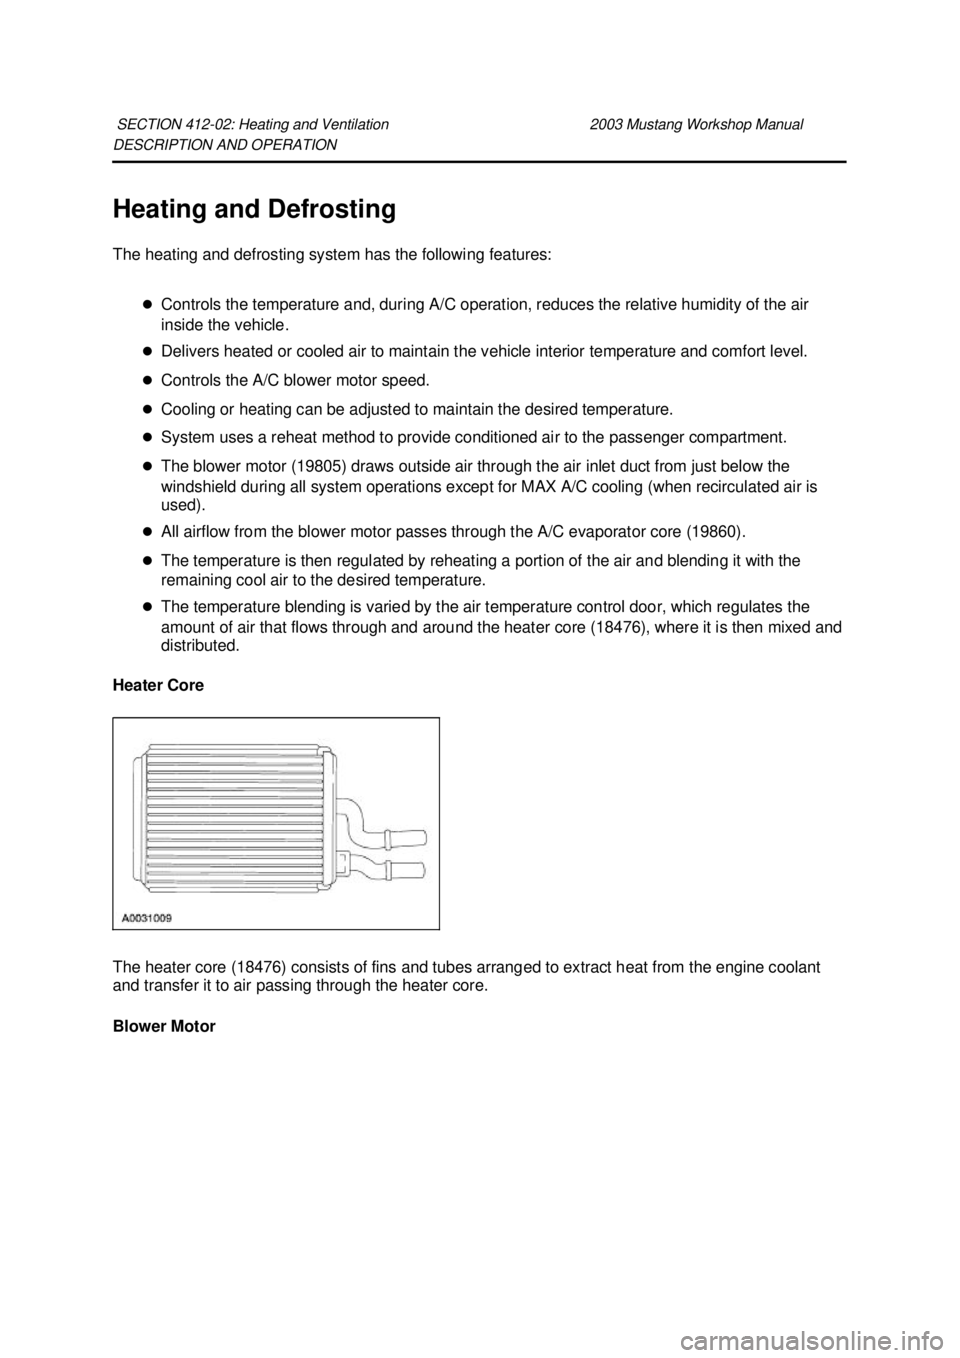
Heater Core
The heater core (18476) consists of fins and tubes arranged to extract heat from the engine coolant
and transfer it to air passing through the heater core. Blower Motor SECTION 412-
02: Heating and Ventilation 2003 Mustang Workshop Manual �K�l�j . 1 �b�a
22003 Mustang Workshop Manual
18. 11. 2011file:///C:/Ford/2000 - 2004/tsocache/SHEF_2308/S3B~us~en~ ...
Page 3157 of 4378
The A/C blower motor (19805 ) pulls air from the air inlet and forces it into the plenum assembly where
it is mixed and distributed.
Heater Hoses
NOTE:
The heater water hoses connect to the heater core using quick disconnect couplers. The
couplers are an integral part of the hose assemblies and cannot be separately serviced.
The heater water hoses (18472) provide a flexible connection between the engine and cooling system
allowing hot water to travel from the engine to the heater core. �K�l�j . 2 �b�a
22003 Mustang Workshop Manual
18. 11. 2011file:///C:/Ford/2000 - 2004/tsocache/SHEF_2308/S3B~us~en~ ...
Page 3162 of 4378
REMOVAL AND INSTALLATION
Evaporator Core Housing
Removal
NOTE:
The evaporator core is not separately serviceable, it is serviced only with the evaporator core
housing assembly.
1. Disconnect the battery ground cable.
2. Recover the refrigerant. For additional information, refer to Section 412 - 00 .
3. Drain the cooling system. For additional information, refer to Section 303 - 03A or
Section 303 -
03B .
4. Remove the instrument panel. For additional information, refer to Section 501 - 12 .
5. Disconnect the heater hose couplings from the heater core. For additional information, refer to Section 412 - 00 .
6. Disconnect the vacuum connector. SECTION 412-
02: Heating and Ventilation 2003 Mustang Workshop Manual Material
Item Specification
PAG Compressor Oil (R-134a
Systems)
F7AZ- 19589- DA (Motorcraft
YN- 12-C) WSH-
M1C231-
B MERPOL®
NA ESE-
M99B144-
B �K�l�j . 1 �b�a
42003 Mustang Workshop Manual
18. 11. 2011file:///C:/Ford/2000 - 2004/tsocache/SHEF_2308/S3B~us~en~ ...
Page 3166 of 4378
REMOVAL AND INSTALLATION
Heater Core
Removal
NOTE:
If a heater core leak is suspected, the heater core must be pressure leak tested before it is
removed from the vehicle. For additional information, refer to Section 412 - 00 .
1. Remove the evaporator core housing. For additional information, refer to Evaporator Core Housing in this section.
2. Remove the foam weather seal.
3. Remove the screws and remove the heater core cover.
4. Remove the heater core.
Installation 1. NOTE: Be sure to install a new oval foam weather seal around the heater core inlet and outlet
tubes.
To install, reverse the removal procedure.
SECTION 412-
02: Heating and Ventilation 2003 Mustang Workshop Manual �K�l�j . 1 �b�a
22003 Mustang Workshop Manual
18. 11. 2011file:///C:/Ford/2000 - 2004/tsocache/SHEF_5108/S3B~us~en~ ...
Page 3168 of 4378
DISASSEMBLY AND ASSEMBLY
Evaporator Core Housing
Disassembly
1. Remove the evaporator core housing. For additional information, refer to Evaporator Core Housing in this section.
2. Remove the foam weather seal.
3. Remove the screws and remove the heater core.
4. Remove the screws and remove the A/C recirculating air duct.
5. Remove the vacuum reservoir. 1. Disconnect the vacuum line.
2. Remove the screw.
SECTION 412-
02: Heating and Ventilation 2003 Mustang Workshop Manual �K�l�j . 1 �b�a
42003 Mustang Workshop Manual
18. 11. 2011file:///C:/Ford/2000 - 2004/tsocache/SHEF_5108/S3B~us~en~ ...
Page 3169 of 4378
6. Remove the heater air damper door motor.
1. Disconnect the vacuum lines.
2. Loosen the nuts and unclip the motor.
7. Release the vacuum harness from the housing.
8. Remove the screws and remove the resistor.
9. Disconnect the jumper wire. �K�l�j . 2 �b�a
42003 Mustang Workshop Manual
18. 11. 2011file:///C:/Ford/2000 - 2004/tsocache/SHEF_5108/S3B~us~en~ ...