Page 2 of 280
Locks and Security 65
Keys 65
Locks 65
Anti-theft system 67
Seating and Safety Restraints 72
Seating 72
Safety restraints 77
Air bags 90
Child restraints 99
Driving 110
Starting 110
Brakes 114
Transmission operation 118
Trailer towing 145
Roadside Emergencies 175
Getting roadside assistance 175
Hazard flasher switch 176
Fuel pump shut-off switch 176
Fuses and relays 177
Changing tires 182
Jump starting 193
Wrecker towing 198
Customer Assistance 200
Reporting safety defects (U.S. only) 208
Cleaning 209
Table of Contents
2
ProCarManuals.com
Page 5 of 280
Fuel pump shut-off switchIn the event of an accident the
safety switch will automatically cut off the fuel supply to the
engine. The switch can also be activated through sudden vibration
(e.g. collision when parking). To reset the switch, refer to theFuel
pump shut-off switchin theRoadside emergencieschapter.
SAFETY AND ENVIRONMENT PROTECTION
Warning symbols in this guide
How can you reduce the risk of personal injury and prevent possible
damage to others, your vehicle and its equipment? In this guide, answers
to such questions are contained in comments highlighted by the warning
triangle symbol. These comments should be read and observed.
Warning symbols on your vehicle
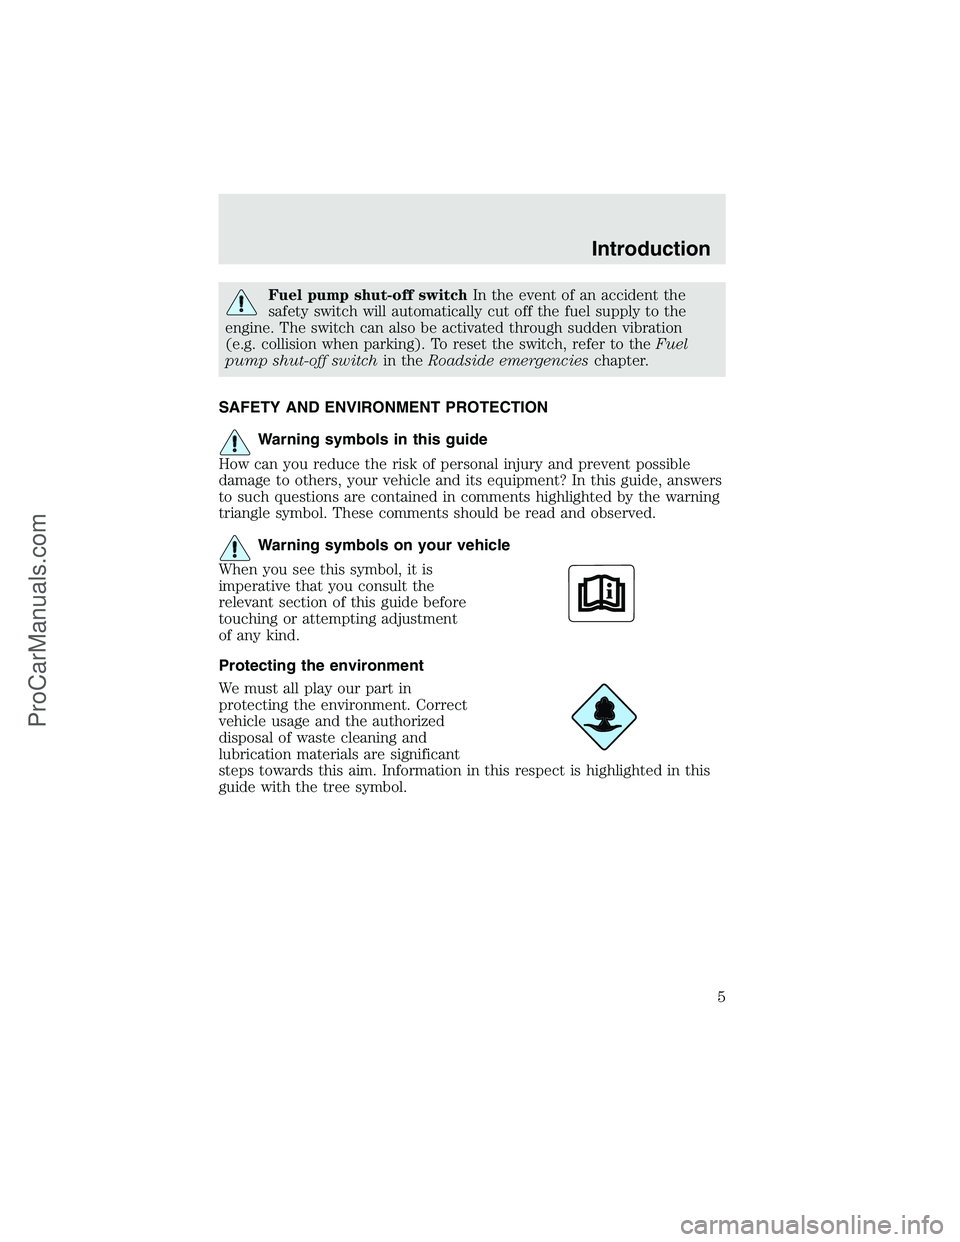
When you see this symbol, it is
imperative that you consult the
relevant section of this guide before
touching or attempting adjustment
of any kind.
Protecting the environment
We must all play our part in
protecting the environment. Correct
vehicle usage and the authorized
disposal of waste cleaning and
lubrication materials are significant
steps towards this aim. Information in this respect is highlighted in this
guide with the tree symbol.
Introduction
5
ProCarManuals.com
Page 6 of 280
BREAKING-IN YOUR VEHICLE
Your vehicle does not need an extensive break-in. Try not to drive
continuously at the same speed for the first 1,600 km (1,000 miles) of
new vehicle operation. Vary your speed to allow parts to adjust
themselves to other parts.
Drive your new vehicle for at least 800 km (500 miles) before towing a
trailer or snowplowing.
Do not add friction modifier compounds or special break-in oils during
the first few thousand kilometers (miles) of operation, since these
additives may prevent piston ring seating. SeeEngine oilin the
Maintenance and specificationschapter for more information on oil
usage.
SPECIAL NOTICES
Emission warranty
The New Vehicle Limited Warranty includes Bumper-to-Bumper
Coverage, Safety Restraint Coverage, Corrosion Coverage, and 6.0L
Power Stroke Diesel Engine Coverage. In addition, your vehicle is eligible
for Emissions Defect and Emissions Performance Warranties. For a
detailed description of what is covered and what is not covered, refer to
theWarranty Guidethat is provided to you along with your Owner’s
Guide.
Introduction
6
ProCarManuals.com
Page 14 of 280
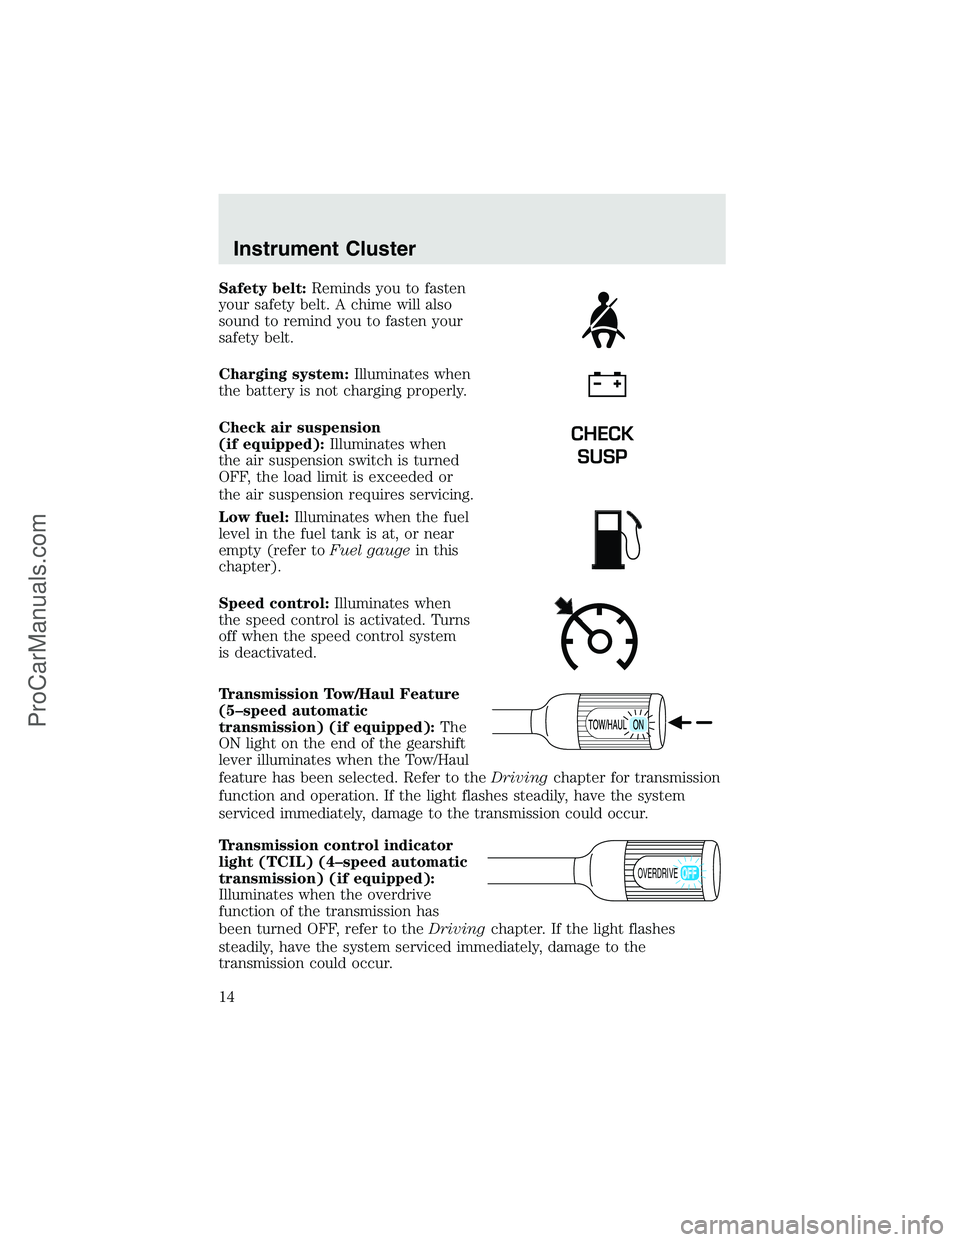
Safety belt:Reminds you to fasten
your safety belt. A chime will also
sound to remind you to fasten your
safety belt.
Charging system:Illuminates when
the battery is not charging properly.
Check air suspension
(if equipped):Illuminates when
the air suspension switch is turned
OFF, the load limit is exceeded or
the air suspension requires servicing.
Low fuel:Illuminates when the fuel
level in the fuel tank is at, or near
empty (refer toFuel gaugein this
chapter).
Speed control:Illuminates when
the speed control is activated. Turns
off when the speed control system
is deactivated.
Transmission Tow/Haul Feature
(5–speed automatic
transmission) (if equipped):The
ON light on the end of the gearshift
lever illuminates when the Tow/Haul
feature has been selected. Refer to theDrivingchapter for transmission
function and operation. If the light flashes steadily, have the system
serviced immediately, damage to the transmission could occur.
Transmission control indicator
light (TCIL) (4–speed automatic
transmission) (if equipped):
Illuminates when the overdrive
function of the transmission has
been turned OFF, refer to theDrivingchapter. If the light flashes
steadily, have the system serviced immediately, damage to the
transmission could occur.
CHECK
SUSP
OVERDRIVE
Instrument Cluster
14
ProCarManuals.com
Page 18 of 280
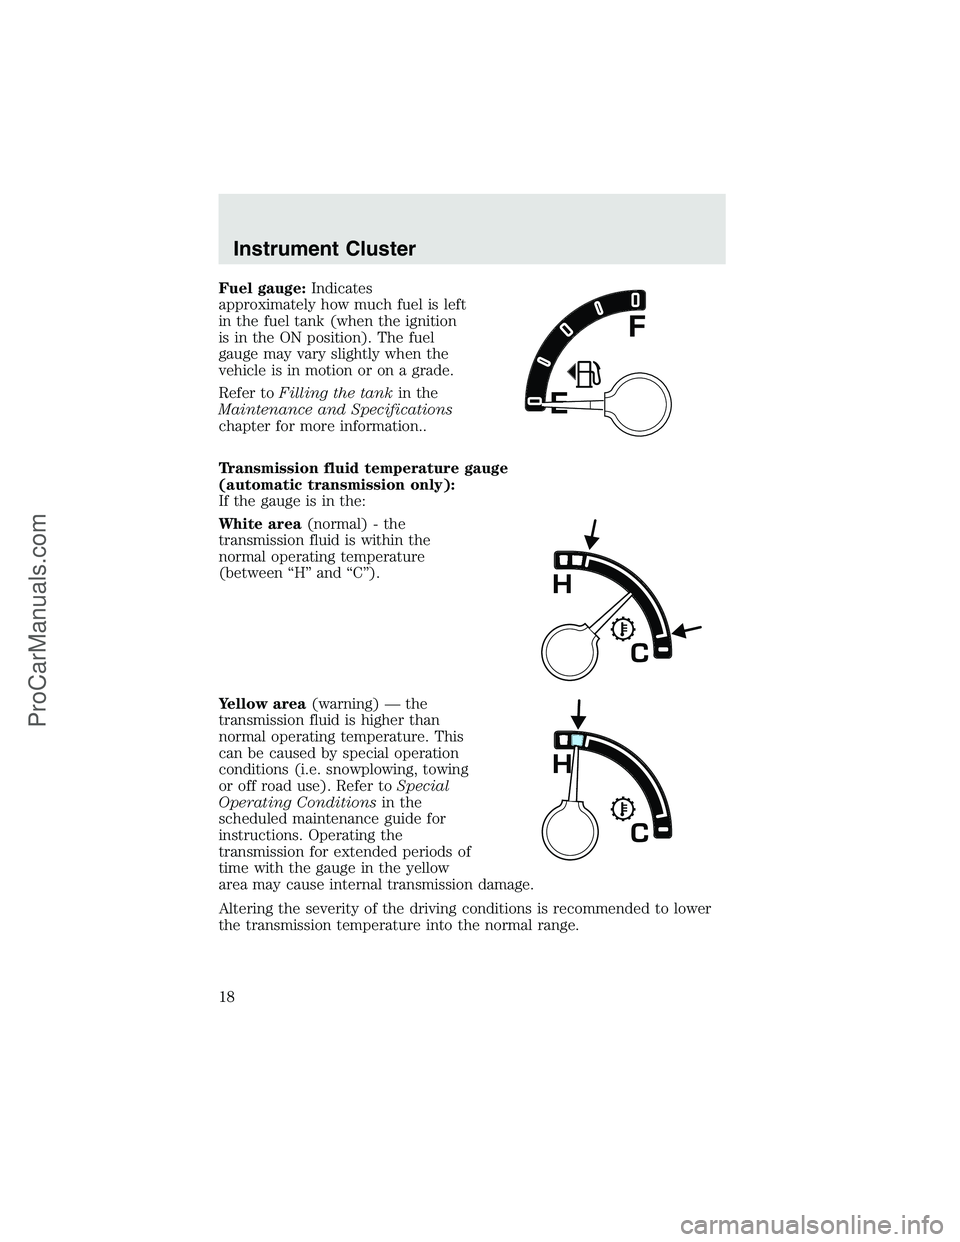
Fuel gauge:Indicates
approximately how much fuel is left
in the fuel tank (when the ignition
is in the ON position). The fuel
gauge may vary slightly when the
vehicle is in motion or on a grade.
Refer toFilling the tankin the
Maintenance and Specifications
chapter for more information..
Transmission fluid temperature gauge
(automatic transmission only):
If the gauge is in the:
White area(normal) - the
transmission fluid is within the
normal operating temperature
(between“H”and“C”).
Yellow area(warning)—the
transmission fluid is higher than
normal operating temperature. This
can be caused by special operation
conditions (i.e. snowplowing, towing
or off road use). Refer toSpecial
Operating Conditionsin the
scheduled maintenance guide for
instructions. Operating the
transmission for extended periods of
time with the gauge in the yellow
area may cause internal transmission damage.
Altering the severity of the driving conditions is recommended to lower
the transmission temperature into the normal range.
Instrument Cluster
18
ProCarManuals.com
Page 32 of 280
17.Disc/Tune:Radio: Press
orto manually tune down or up
the frequency band.
CD: Press
orto select the previous or next track on the CD.
18.CD door:Insert a CD label side
up.
CD CHANGER (IF EQUIPPED)
Your CD changer is in one of the following locations:
•Behind the passenger’s seat
•In the center console
•Under the rear bench on the driver’s side (see instructions below)
•In the stowage bin on the passenger’s side
1. Slide the door to access the CD
changer magazine.
2. Press
to eject the magazine.
3. Turn the magazine (A) over.
4. Using the disc holder release
knob (C), pull the disc holder (B)
out of the magazine.
Do not pull too hard on the disc holder as the disc holder may come
completely out of the magazine. If this happens, reinsert the disc holder
back into the magazine while pressing on the lever.
AB
C
Entertainment Systems
32
ProCarManuals.com
Page 33 of 280
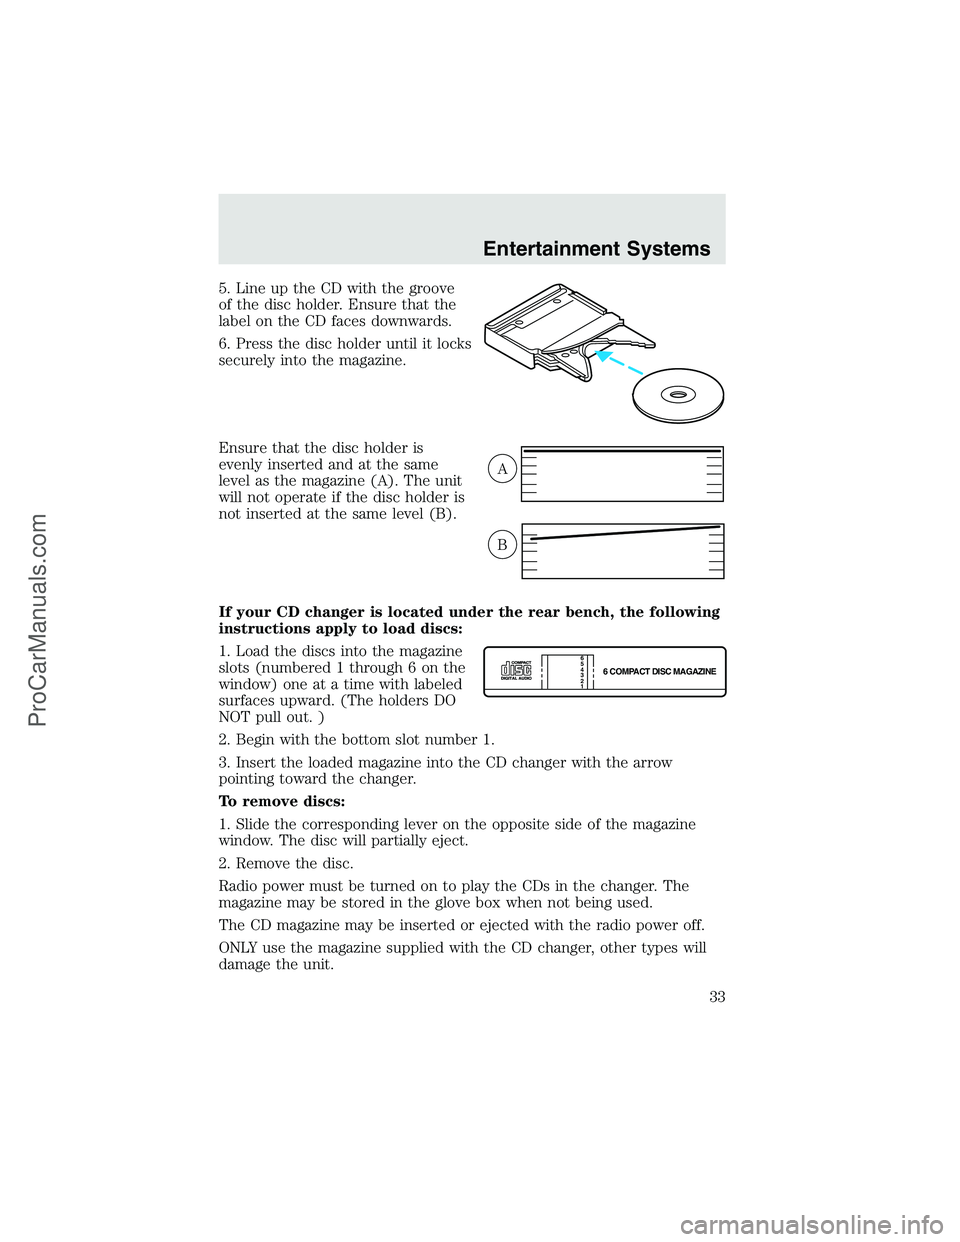
5. Line up the CD with the groove
of the disc holder. Ensure that the
label on the CD faces downwards.
6. Press the disc holder until it locks
securely into the magazine.
Ensure that the disc holder is
evenly inserted and at the same
level as the magazine (A). The unit
will not operate if the disc holder is
not inserted at the same level (B).
If your CD changer is located under the rear bench, the following
instructions apply to load discs:
1. Load the discs into the magazine
slots (numbered 1 through 6 on the
window) one at a time with labeled
surfaces upward. (The holders DO
NOT pull out. )
2. Begin with the bottom slot number 1.
3. Insert the loaded magazine into the CD changer with the arrow
pointing toward the changer.
To remove discs:
1. Slide the corresponding lever on the opposite side of the magazine
window. The disc will partially eject.
2. Remove the disc.
Radio power must be turned on to play the CDs in the changer. The
magazine may be stored in the glove box when not being used.
The CD magazine may be inserted or ejected with the radio power off.
ONLY use the magazine supplied with the CD changer, other types will
damage the unit.
A
B
6 COMPACT DISC MAGAZINE1 2 3 4 5
6
Entertainment Systems
33
ProCarManuals.com
Page 34 of 280
Keep the CD changer door closed. Coins and foreign objects will damage
the CD player and void your audio system warranty.
RADIO FREQUENCIES
AM and FM frequencies are established by the Federal Communications
Commission (FCC) and the Canadian Radio and Telecommunications
Commission (CRTC). Those frequencies are:
AM - 530, 540–1700, 1710 kHz
FM- 87.7, 87.9–107.7, 107.9 MHz
RADIO RECEPTION FACTORS
There are three factors that can effect radio reception:
•Distance/strength: The further you travel from an FM station, the
weaker the signal and the weaker the reception.
•Terrain: Hills, mountains, tall buildings, power lines, electric fences,
traffic lights and thunderstorms can interfere with your reception.
•Station overload: When you pass a broadcast tower, a stronger signal
may overtake a weaker one and play while the weak station frequency
is displayed.
CASSETTE/PLAYER CARE
Do:
•Use only cassettes that are 90 minutes long or less.
•Tighten very loose tapes by inserting a finger or pencil into the hole
and turning the hub.
•Remove loose labels before inserting tapes.
•Allow tapes which have been subjected to extreme heat, humidity or
cold to reach a moderate temperature before playing.
•Clean the cassette player head with a cassette cleaning cartridge after
10–12 hours of play to maintain good sound/operation.
Don’t:
•Expose tapes to direct sunlight, extreme humidity, heat or cold.
•Leave tapes in the cassette player for a long time when not being
played.
Entertainment Systems
34
ProCarManuals.com