Page 141 of 184
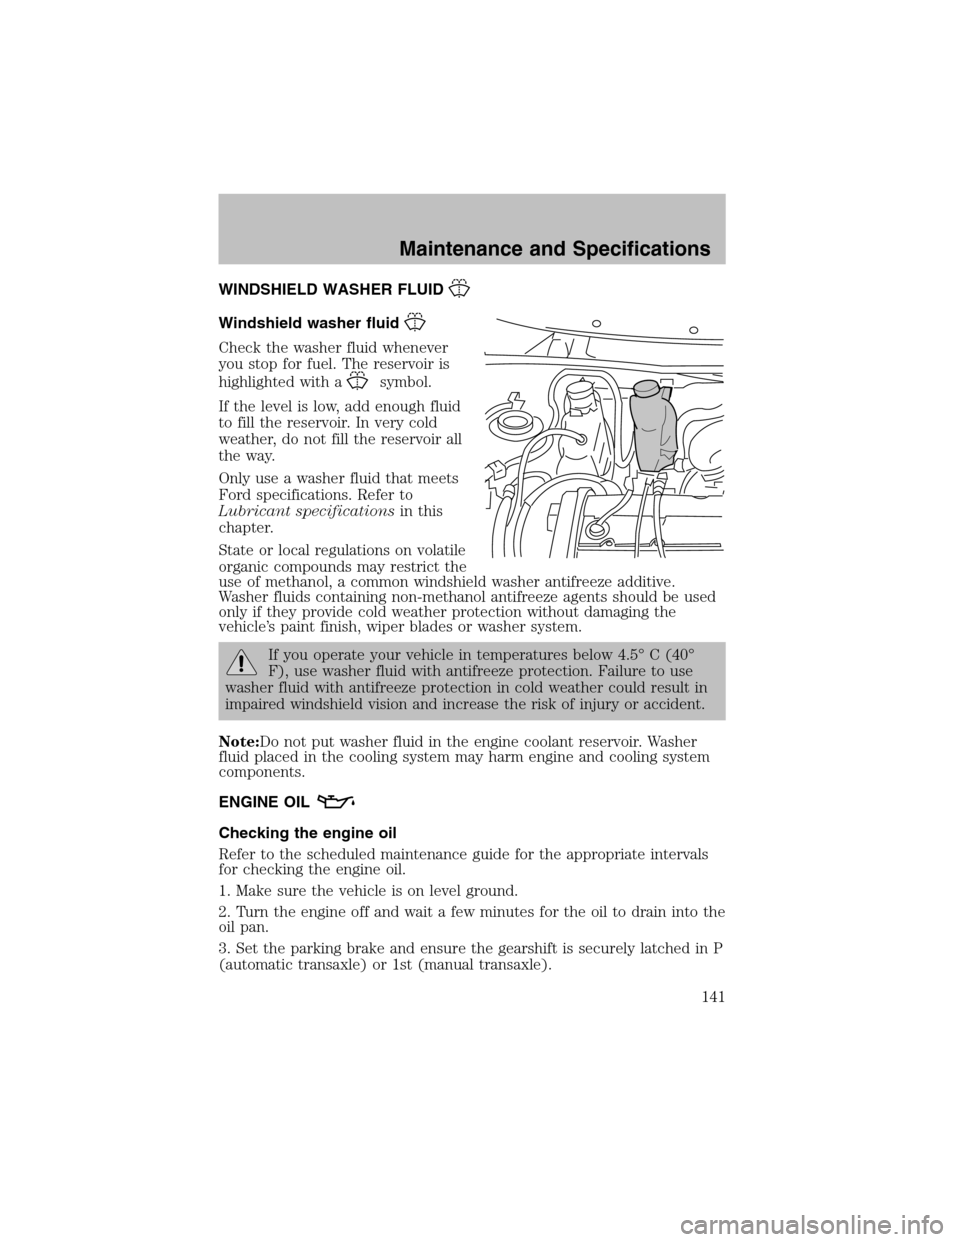
WINDSHIELD WASHER FLUID
Windshield washer fluid
Check the washer fluid whenever
you stop for fuel. The reservoir is
highlighted with a
symbol.
If the level is low, add enough fluid
to fill the reservoir. In very cold
weather, do not fill the reservoir all
the way.
Only use a washer fluid that meets
Ford specifications. Refer to
Lubricant specificationsin this
chapter.
State or local regulations on volatile
organic compounds may restrict the
use of methanol, a common windshield washer antifreeze additive.
Washer fluids containing non-methanol antifreeze agents should be used
only if they provide cold weather protection without damaging the
vehicle’s paint finish, wiper blades or washer system.
If you operate your vehicle in temperatures below 4.5° C (40°
F), use washer fluid with antifreeze protection. Failure to use
washer fluid with antifreeze protection in cold weather could result in
impaired windshield vision and increase the risk of injury or accident.
Note:Do not put washer fluid in the engine coolant reservoir. Washer
fluid placed in the cooling systemmay harmengine and cooling system
components.
ENGINE OIL
Checking the engine oil
Refer to the scheduled maintenance guide for the appropriate intervals
for checking the engine oil.
1. Make sure the vehicle is on level ground.
2. Turn the engine off and wait a few minutes for the oil to drain into the
oil pan.
3. Set the parking brake and ensure the gearshift is securely latched in P
(automatic transaxle) or 1st (manual transaxle).
Maintenance and Specifications
141
Page 153 of 184
Fuel Filler Cap
Your fuel tank filler cap has an indexed design with a 1/8 turn on/off
feature.
When fueling your vehicle:
1. Turn the engine off.
2. Carefully turn the filler cap counterclockwise 1/8 of a turn until it
stops.
3. Pull to remove the cap from the fuel filler pipe.
4. To install the cap, align the tabs on the cap with the notches on the
filler pipe.
5. Turn the filler cap clockwise 1/8 of a turn until it stops.
The “Check Fuel Cap” light illuminates when the ignition is turned to the
ON position. It will also illuminate when the fuel filler cap is not properly
installed. Proper fuel filler cap installation is checked automatically as
the vehicle is driven, but not until after some fuel is used (fuel gauge
drops below full). Once the fuel filler cap is properly secured, the “Check
Fuel Cap” light will turn off after a short period of driving.
If you must replace the fuel filler cap, replace it with a fuel filler
cap that is designed for your vehicle. The customer warranty may
be void for any damage to the fuel tank or fuel system if the
correct genuine Ford or Motorcraft fuel filler cap is not used.
The fuel systemmay be under pressure. If the fuel filler cap is
venting vapor or if you hear a hissing sound, wait until it stops
before completely removing the fuel filler cap. Otherwise, fuel may
spray out and injure you or others.
If you do not use the proper fuel filler cap, excessive pressure or
vacuum in the fuel tank may damage the fuel system or cause
the fuel cap to disengage in a collision, which may result in possible
personal injury.
Choosing the right fuel
Use only UNLEADED FUEL. The use of leaded fuel is prohibited by law
and could damage your vehicle.
Do not use fuel containing methanol. It can damage critical fuel system
components.
Maintenance and Specifications
153
Page 164 of 184
Checking and adding manual transmission fluid (if equipped)
1. Clean the filler plug.
2. Remove the filler plug and
inspect the fluid level.
3. Fluid level should be at the
bottomof the opening.
4. Add enough fluid through the
filler opening so that the fluid level
is at the bottomof the opening.
5. Install and tighten the fill plug
securely.
Use only fluid that meets Ford specifications. Refer toLubricant
Specificationsin this chapter.
AIR FILTER MAINTENANCE
Refer to the scheduled maintenance guide for the appropriate intervals
for changing the air filter element.
When changing the air filter element, use only the Motorcraft air filter
element listed. Refer toMotorcraft Part Numbers.
Maintenance and Specifications
164
Page 165 of 184
Note:Do not start your engine with the air cleaner removed and do not
remove it while the engine is running.
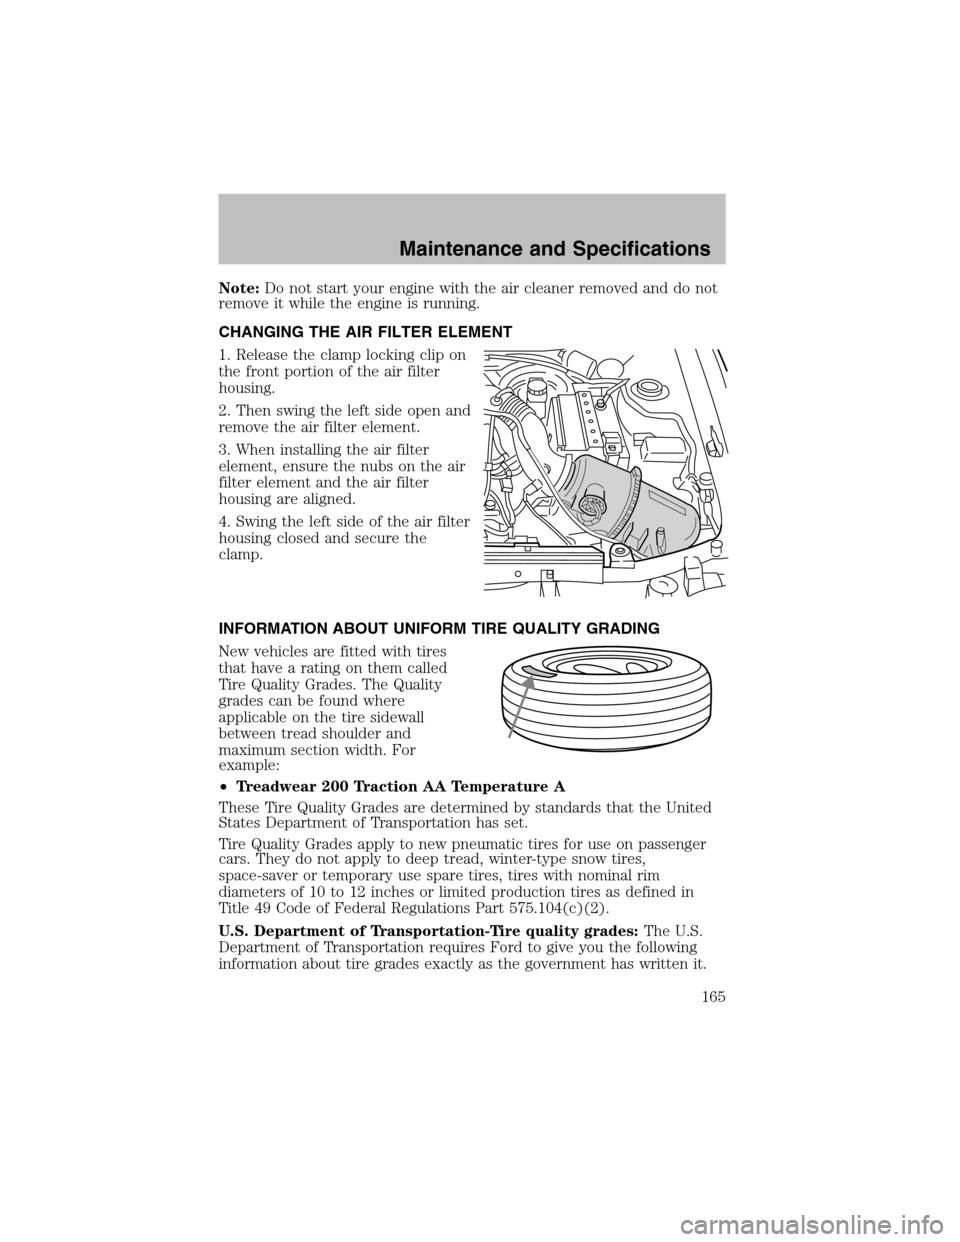
CHANGING THE AIR FILTER ELEMENT
1. Release the clamp locking clip on
the front portion of the air filter
housing.
2. Then swing the left side open and
remove the air filter element.
3. When installing the air filter
element, ensure the nubs on the air
filter element and the air filter
housing are aligned.
4. Swing the left side of the air filter
housing closed and secure the
clamp.
INFORMATION ABOUT UNIFORM TIRE QUALITY GRADING
New vehicles are fitted with tires
that have a rating on themcalled
Tire Quality Grades. The Quality
grades can be found where
applicable on the tire sidewall
between tread shoulder and
maximum section width. For
example:
•Treadwear 200 Traction AA Temperature A
These Tire Quality Grades are determined by standards that the United
States Department of Transportation has set.
Tire Quality Grades apply to new pneumatic tires for use on passenger
cars. They do not apply to deep tread, winter-type snow tires,
space-saver or temporary use spare tires, tires with nominal rim
diameters of 10 to 12 inches or limited production tires as defined in
Title 49 Code of Federal Regulations Part 575.104(c)(2).
U.S. Department of Transportation-Tire quality grades:The U.S.
Department of Transportation requires Ford to give you the following
information about tire grades exactly as the government has written it.
Maintenance and Specifications
165
Page 168 of 184
When replacing full size tires, never mix radial bias-belted, or
bias-type tires. Use only the tire sizes that are listed on the
Certification or Tire Label. Make sure that all tires are the same size,
speed rating, and load-carrying capacity. Use only the tire combinations
recommended on the label. If you do not follow these precautions,
your vehicle may not drive properly and safely.
Make sure that all replacement tires are of the same size, type,
load-carrying capacity and tread design (e.g., “All Terrain”,
“Touring”, etc.), as originally offered by Ford.
Failure to follow these precautions may adversely affect the
handling of the vehicle, and increase the risk of loss of vehicle
control, vehicle rollover and/or personal injury.
Tires that are larger or smaller than your vehicle’s original tires may also
affect the accuracy of your speedometer.
SNOW TIRES AND CHAINS
Snow tires must be the same size and grade as the tires you
currently have on your vehicle.
The tires on your vehicle have all weather treads to provide traction in
rain and snow. However, in some climates, you may need to use snow
tires and chains. If you need to use snow tires and chains, it is
recommended that steel wheels are used of the same size and
specifications as those originally installed.
Follow these guidelines when using snow tires and chains:
•Do not use tire chains on aluminum wheels. Chains may chip the
wheels.
•SAE Class S chains may be used on P185/65R14 tires.
•Do not use tire chains with 38 cm(15 inch) wheel/tire options. Using
chains on this size tire may cause damage to steering, suspension
and/or body components.
•Install chains securely, verifying that the chains do not touch any
wiring, brake lines or fuel lines.
•Drive cautiously. If you hear the chains rub or bang against your
vehicle, stop and re-tighten the chains. If this does not work, remove
the chains to prevent damage to your vehicle.
Maintenance and Specifications
168
Page 176 of 184
FORD ACCESSORIES FOR YOUR VEHICLE
A wide selection of genuine Ford accessories are available for your
vehicle through your local authorized Ford, Lincoln, Mercury or Ford of
Canada dealer. These quality accessories have been specifically
engineered to fulfill your automotive needs; they are custom designed to
complement the style and aerodynamic appearance of your vehicle. In
addition, each accessory is made from high quality materials and meets
or exceeds Ford’s rigorous engineering and safety specifications. Ford
Motor Company will repair or replace any properly dealer-installed Ford
accessory found to be defective in factory-supplied materials or
workmanship during the warranty period, as well as any component
damaged by the defective accessory. The accessory will be warranted for
whichever provides you the greatest benefit:
•12 months or 20,000 km (12,000 miles) (whichever occurs first), or
•the remainder of your new vehicle limited warranty.
This means that genuine Ford accessories purchased along with your
new vehicle and installed by the dealer are covered for the full length of
your New Vehicle’s Limited Warranty — 3 years or 60,000 km (36,000
miles) (whichever occurs first). Contact your dealer for details and a
copy of the warranty.
Not all accessories are available for all models.
Vehicle Security
Remote keyless entry
Wheel locks
Vehicle security systems
Comfort and convenience
Cargo net
Cargo organizer
Engine block heater
Remote start system
Smoker’s package
Accessories
176