Page 37 of 184

INTERIOR LAMPS
Dome lamp and map lamps (if equipped)
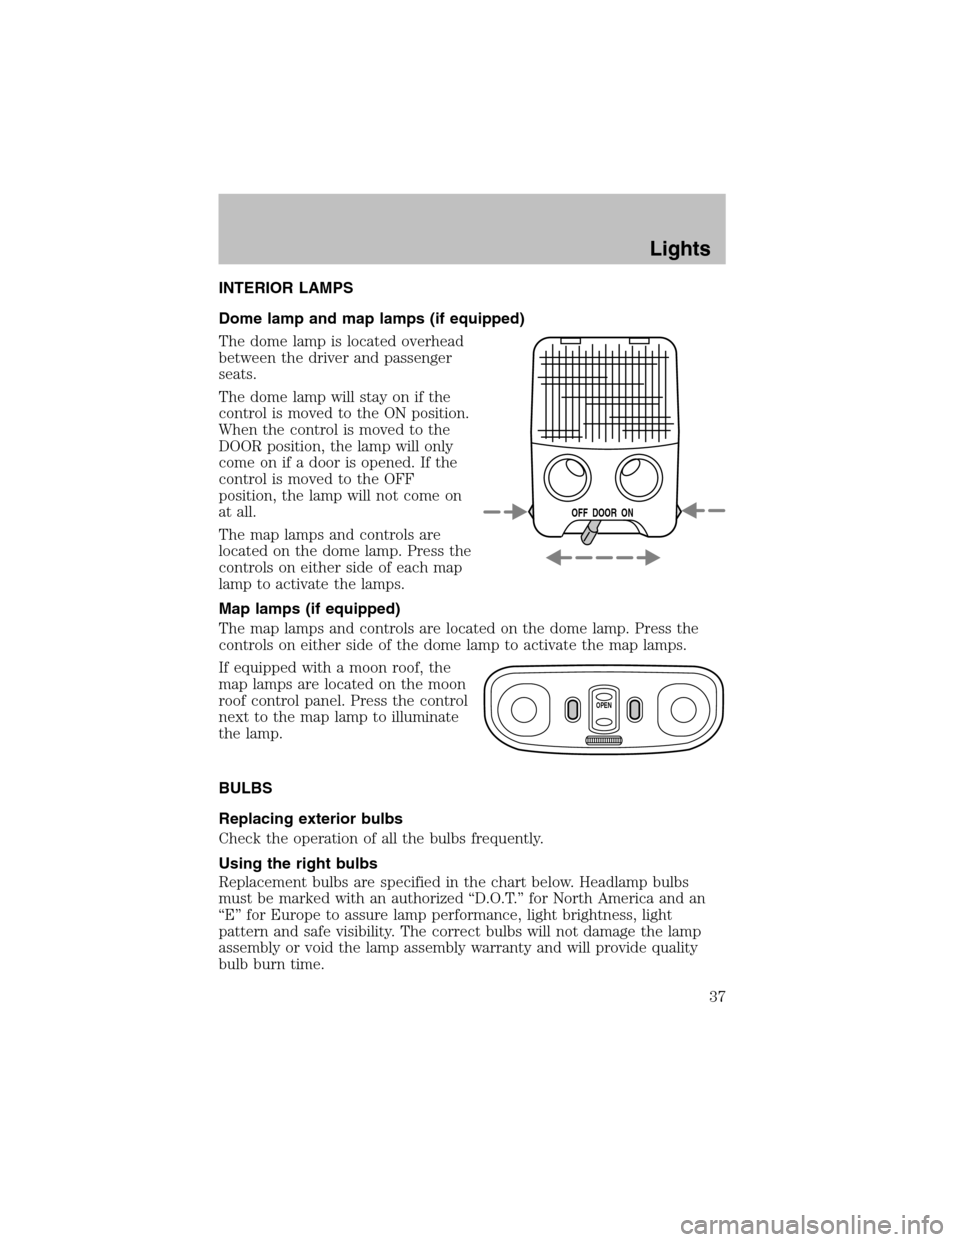
The dome lamp is located overhead
between the driver and passenger
seats.
The dome lamp will stay on if the
control is moved to the ON position.
When the control is moved to the
DOOR position, the lamp will only
come on if a door is opened. If the
control is moved to the OFF
position, the lamp will not come on
at all.
The map lamps and controls are
located on the dome lamp. Press the
controls on either side of each map
lamp to activate the lamps.
Map lamps (if equipped)
The map lamps and controls are located on the dome lamp. Press the
controls on either side of the dome lamp to activate the map lamps.
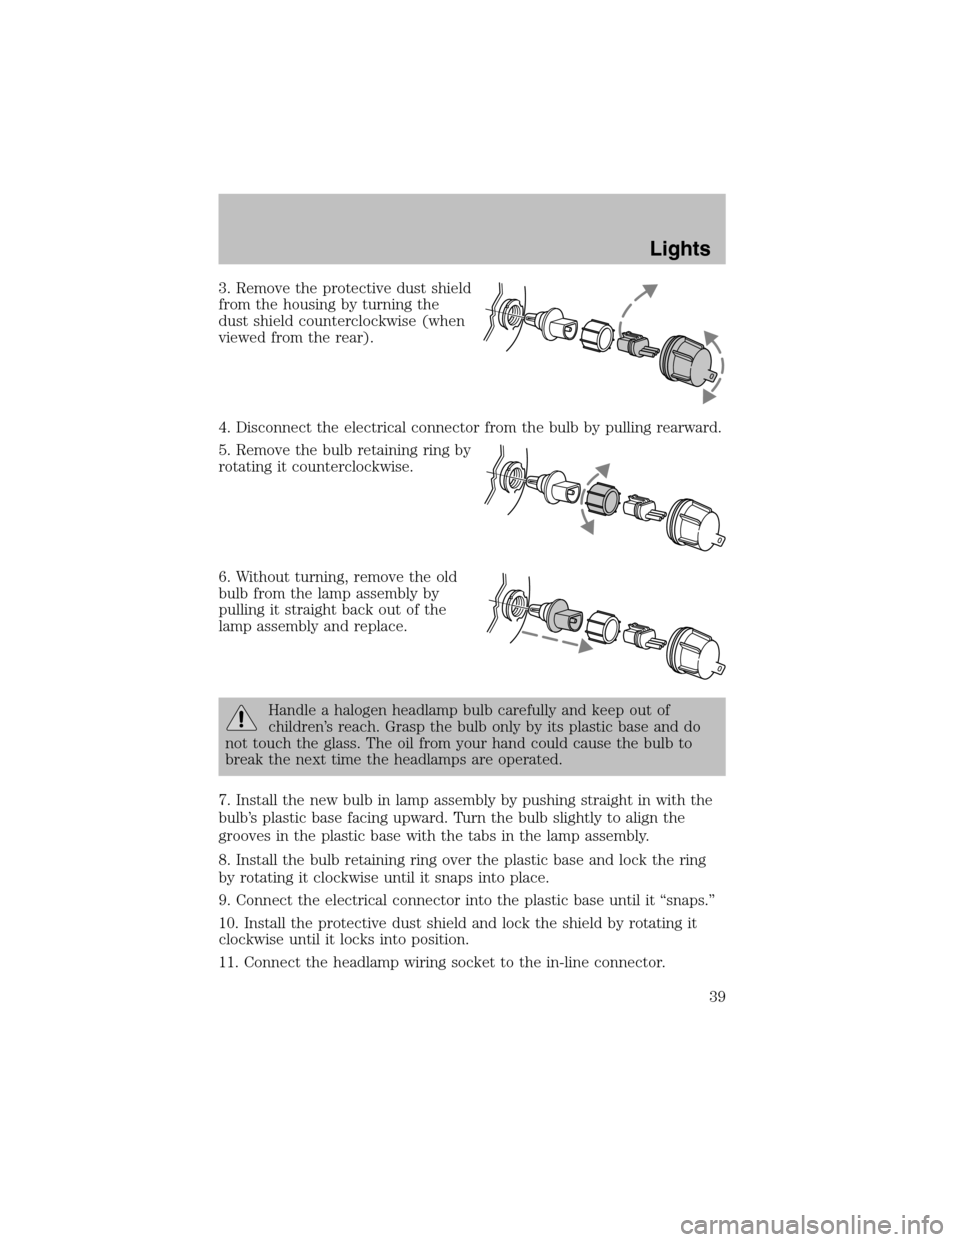
If equipped with a moon roof, the
map lamps are located on the moon
roof control panel. Press the control
next to the map lamp to illuminate
the lamp.
BULBS
Replacing exterior bulbs
Check the operation of all the bulbs frequently.
Using the right bulbs
Replacement bulbs are specified in the chart below. Headlamp bulbs
must be marked with an authorized “D.O.T.” for North America and an
“E” for Europe to assure lamp performance, light brightness, light
pattern and safe visibility. The correct bulbs will not damage the lamp
assembly or void the lamp assembly warranty and will provide quality
bulb burn time.
OFF DOOR ON
OPEN
Lights
37
Page 38 of 184
Function Trade Number
Front park/turn lamps 3157K
Foglamps (if equipped) 881
Headlamps-aero high and low beam 9007
Rear license plate lamps 168
High-mount brake lamp 921
Backup lamps 3156K
Brake lamps 3157K
Interior overhead lamp 12V/10W
All replacement bulbs are clear in color except where noted.
To replace all instrument panel lights - see your dealer
INTERIOR BULBS
Dome lamp
1. Remove the lamp lens by applying
pressure to both tabs at the top of
the lamp and pulling lens
downward.
2. Pull out the burned-out bulb and
install a new one.
3. Install the lamp lens by applying
pressure to both sides of the lamp
lens and popping the lamp lens up
on the assembly.
Map lamps
For bulb replacement, see a qualified service technician or your dealer.
Replacing headlamp bulbs
1. Make sure the headlamp switch is in the OFF position..
2. Open the hood and disconnect the headlamp wiring socket from the
in-line connector. This will make it easier to change the bulb.
OFF DOOR ON
Lights
38
Page 39 of 184

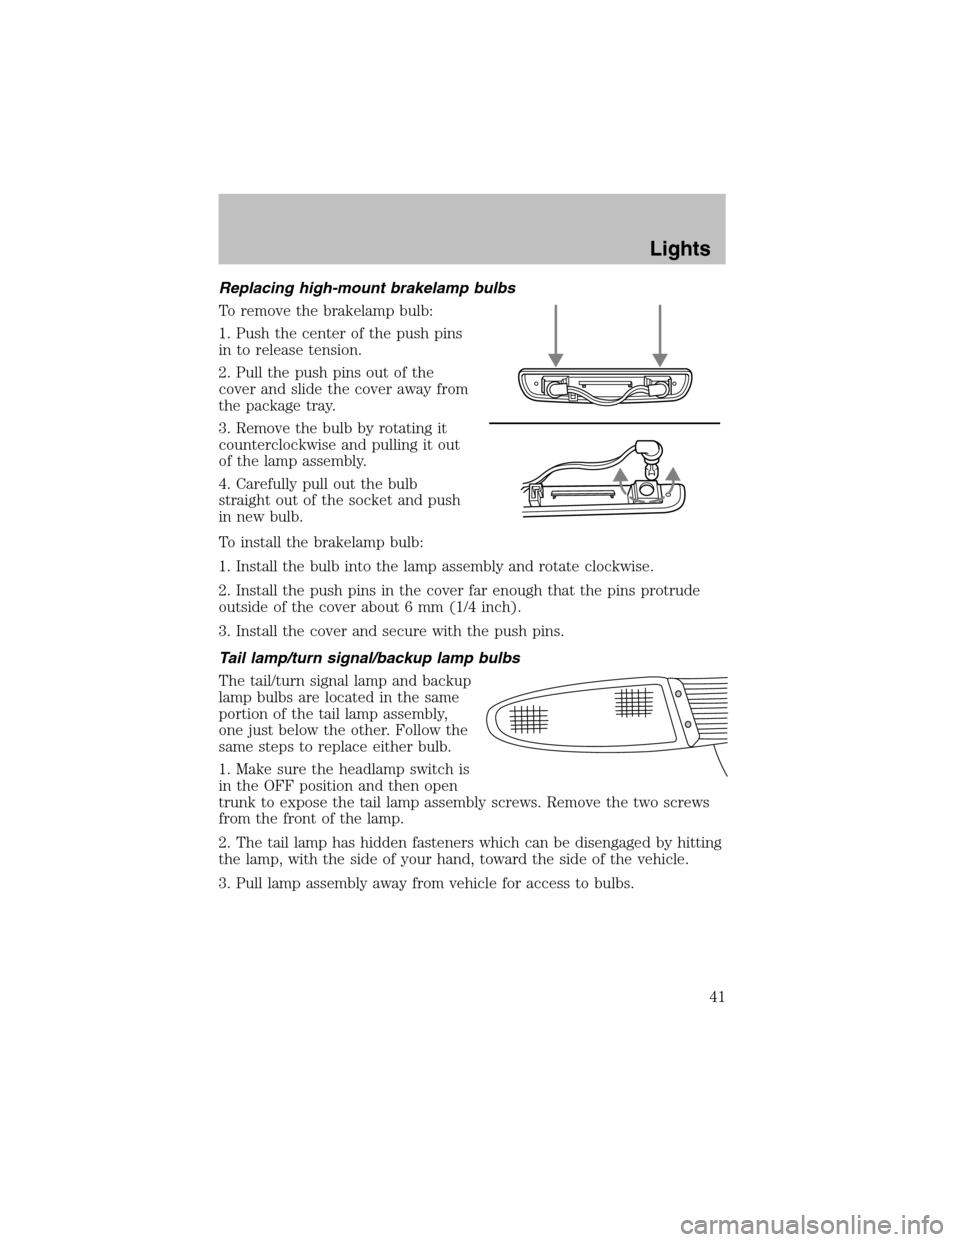
3. Remove the protective dust shield
fromthe housing by turning the
dust shield counterclockwise (when
viewed fromthe rear).
4. Disconnect the electrical connector fromthe bulb by pulling rearward.
5. Remove the bulb retaining ring by
rotating it counterclockwise.
6. Without turning, remove the old
bulb from the lamp assembly by
pulling it straight back out of the
lamp assembly and replace.
Handle a halogen headlamp bulb carefully and keep out of
children’s reach. Grasp the bulb only by its plastic base and do
not touch the glass. The oil fromyour hand could cause the bulb to
break the next time the headlamps are operated.
7. Install the new bulb in lamp assembly by pushing straight in with the
bulb’s plastic base facing upward. Turn the bulb slightly to align the
grooves in the plastic base with the tabs in the lamp assembly.
8. Install the bulb retaining ring over the plastic base and lock the ring
by rotating it clockwise until it snaps into place.
9. Connect the electrical connector into the plastic base until it “snaps.”
10. Install the protective dust shield and lock the shield by rotating it
clockwise until it locks into position.
11. Connect the headlamp wiring socket to the in-line connector.
Lights
39
Page 40 of 184
12. Turn the headlamps on and make sure they work properly. If the
headlamp was correctly aligned before you changed the bulb, you should
not need to align it again.
Replacing front parking lamp/turn signal bulbs
1. Make sure the headlamp switch is in the OFF position.
2. Open the hood and disconnect the headlamp wiring socket from the
in-line connector. This will make it easier to change the bulb.
3. Remove the protective dust shield from the housing by turning the
dust shield counterclockwise (when viewed fromthe rear).
4. Disconnect the electrical
connector fromthe bulb by pulling
rearward.
Replacing foglamp bulbs
1. Make sure the headlamp switch is
in the OFF position and then
remove the bulb socket from the
foglamp by turning
counterclockwise.
2. Disconnect the electrical
connector fromthe foglamp bulb.
3. Connect the electrical connector
to the new foglamp bulb.
4. Install the bulb socket in the
foglamp turning clockwise.
Lights
40
Page 41 of 184

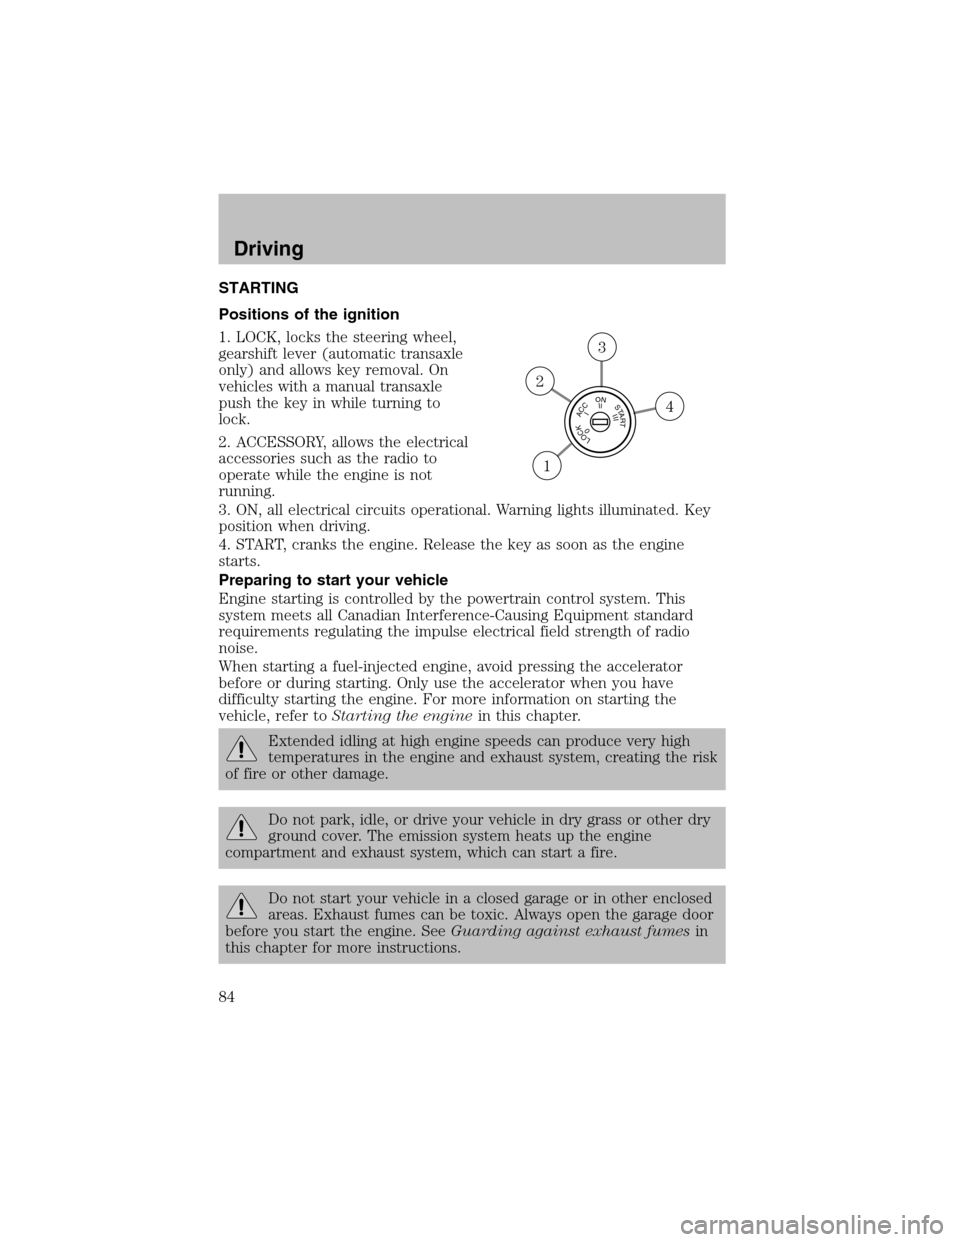
Replacing high-mount brakelamp bulbs
To remove the brakelamp bulb:
1. Push the center of the push pins
in to release tension.
2. Pull the push pins out of the
cover and slide the cover away from
the package tray.
3. Remove the bulb by rotating it
counterclockwise and pulling it out
of the lamp assembly.
4. Carefully pull out the bulb
straight out of the socket and push
in new bulb.
To install the brakelamp bulb:
1. Install the bulb into the lamp assembly and rotate clockwise.
2. Install the push pins in the cover far enough that the pins protrude
outside of the cover about 6 mm (1/4 inch).
3. Install the cover and secure with the push pins.
Tail lamp/turn signal/backup lamp bulbs
The tail/turn signal lamp and backup
lamp bulbs are located in the same
portion of the tail lamp assembly,
one just below the other. Follow the
same steps to replace either bulb.
1. Make sure the headlamp switch is
in the OFF position and then open
trunk to expose the tail lamp assembly screws. Remove the two screws
fromthe front of the lamp.
2. The tail lamp has hidden fasteners which can be disengaged by hitting
the lamp, with the side of your hand, toward the side of the vehicle.
3. Pull lamp assembly away from vehicle for access to bulbs.
Lights
41
Page 42 of 184
4. Remove the bulb socket by
rotating it counterclockwise, then
pulling it out of the lamp assembly.
5. Pull the bulb fromthe socket and
push in the new bulb.
6. Install the bulb socket into the
lamp by rotating it clockwise.
7. Position the tail lamp on the
vehicle and gently tap the lens to
engage the clips. Install the screws.
License plate lamps
To change the license plate bulbs:
1. Remove two screws and the
license plate lamp assembly from
the rear bumper.
2. Carefully pull the bulb out from
the lamp assembly and push in the
new bulb.
3. Install the lamp assembly on rear
bumper with two screws.
Lights
42
Page 84 of 184

STARTING
Positions of the ignition
1. LOCK, locks the steering wheel,
gearshift lever (automatic transaxle
only) and allows key removal. On
vehicles with a manual transaxle
push the key in while turning to
lock.
2. ACCESSORY, allows the electrical
accessories such as the radio to
operate while the engine is not
running.
3. ON, all electrical circuits operational. Warning lights illuminated. Key
position when driving.
4. START, cranks the engine. Release the key as soon as the engine
starts.
Preparing to start your vehicle
Engine starting is controlled by the powertrain control system. This
system meets all Canadian Interference-Causing Equipment standard
requirements regulating the impulse electrical field strength of radio
noise.
When starting a fuel-injected engine, avoid pressing the accelerator
before or during starting. Only use the accelerator when you have
difficulty starting the engine. For more information on starting the
vehicle, refer toStarting the enginein this chapter.
Extended idling at high engine speeds can produce very high
temperatures in the engine and exhaust system, creating the risk
of fire or other damage.
Do not park, idle, or drive your vehicle in dry grass or other dry
ground cover. The emission system heats up the engine
compartment and exhaust system, which can start a fire.
Do not start your vehicle in a closed garage or in other enclosed
areas. Exhaust fumes can be toxic. Always open the garage door
before you start the engine. SeeGuarding against exhaust fumesin
this chapter for more instructions.
LOCKACCONSTART0IIIIII4
3
2
1
Driving
84
Page 85 of 184
If you smell exhaust fumes inside your vehicle, have your dealer
inspect your vehicle immediately. Do not drive if you smell
exhaust fumes.
Make sure the corresponding lights illuminate or illuminate briefly. If a
light fails to illuminate, have the vehicle serviced.
•If the driver’s safety belt is fastened, the
light may not illuminate.
Important safety precautions
When the engine starts, the idle RPM runs faster to warmthe engine. If
the engine idle speed does not slow down automatically, have the vehicle
checked.
Before starting the vehicle:
1. Make sure all occupants buckle their safety belts. For more
information on safety belts and their proper usage, refer to theSeating
and safety restraintschapter.
2. Make sure the headlamps and electrical accessories are off.
If starting a vehicle with an automatic transaxle:
•Make sure the parking brake is
set.
Driving
85