2003 FIAT PALIO boot
[x] Cancel search: bootPage 9 of 156

READY TO GO
Sit comfortably in your car and get ready to...
read.
The following pages tell you everything you need to
know to start off in the best way: that is to say, in
total safety, right from the start.
In a few minutes you will be confident with warning
lights, instruments and main devices.
All adjustments must be made when the car is sta-
tionary.DASHBOARD INSTRUMENT HOLDER ......... PAGE 9
INSTRUMENT PANEL .......................................... PAGE 10
KEYS ............................................................................ PAGE 11
SEATS ........................................................................ PAGE 11
HEAD RESTS ........................................................... PAGE 11
SAFETY BELTS ........................................................ PAGE 12
STEERING COLUMN STALKS ........................... PAGE 13
REARVIEW MIRRORS ........................................... PAGE 14
MANUAL CLIMATE CONTROL ........................ PAGE 14
HAZARD LIGHTS .................................................. PAGE 14
COMMAND SWITCHES .......................................PAGE 15
ELECTRIC WINDOW WINDER ....................... PAGE 15
BOOT ........................................................................ PAGE 16
ENGINE BONNET ............................................... PAGE 16
DOORS ..................................................................... PAGE 17
AT THE FILLING STATION .................................. PAGE 18
8
1-19 03/03/2003 05:44 PM Page 8
Page 12 of 156

11
KEYS
A set of 2 keys are provided with
the car for
fig. 5:
– ignition;
– locking/unlocking the front doors;
– locking/unlocking the boot.
STEERING COLUMN LOCK
It is automatically locked when the
ignition key is removed. It is
unlocked when the key is turned to
MAR; lightly move the steering
wheel in either direction if the rota-
tion of the key is difficult.
fig. 5
P4E02062
HEAD RESTS
Adjust the headrest fig. 7such that
the nape, and not the neck, rests on
them, making sure that they are
locked in the desired position. Refer
to the “Getting to know the car”
chapter.
SEATS
All adjustments must
be made when the car is
stationary.
Seat adjustment fig. 6.
A- To move the seat forwards or
backwards.
B- Seat back inclination adjust-
ment.
fig. 7
P4E01603
fig. 6
P4E01989
1-19 03/03/2003 05:44 PM Page 11
Page 17 of 156

16
ENGINE BONNET
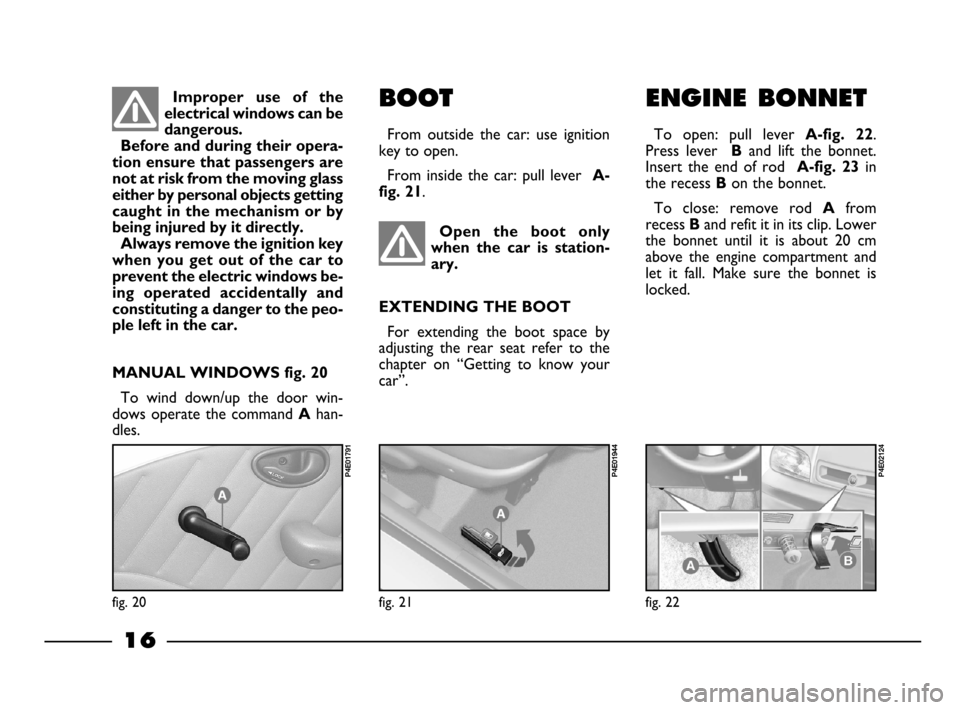
To open: pull lever A-fig. 22.
Press lever
Band lift the bonnet.
Insert the end of rod
A-fig. 23in
the recess
Bon the bonnet.
To close: remove rod
Afrom
recess
Band refit it in its clip. Lower
the bonnet until it is about 20 cm
above the engine compartment and
let it fall. Make sure the bonnet is
locked.
fig. 22
P4E02124
Open the boot only
when the car is station-
ary.
EXTENDING THE BOOT
For extending the boot space by
adjusting the rear seat refer to the
chapter on “Getting to know your
car”.
fig. 21
P4E01944
BOOT
From outside the car: use ignition
key to open.
From inside the car: pull lever
A-
fig. 21
.
Improper use of the
electrical windows can be
dangerous.
Before and during their opera-
tion ensure that passengers are
not at risk from the moving glass
either by personal objects getting
caught in the mechanism or by
being injured by it directly.
Always remove the ignition key
when you get out of the car to
prevent the electric windows be-
ing operated accidentally and
constituting a danger to the peo-
ple left in the car.
fig. 20
P4E01791
MANUAL WINDOWS fig. 20
To wind down/up the door win-
dows operate the command
Ahan-
dles.
1-19 03/03/2003 05:44 PM Page 16
Page 21 of 156

GETTING TO KNOW YOUR CAR
You should read this chapter sitting comfortably in
your new Fiat Palio. This way you can see the parts
described in the handbook at a glance and immediate-
ly check out what you have just read for yourself.
You will quickly become familiar with your Fiat Palio,
and its control and other features. Later, when you start
the engine and join the traffic, you will make a host of
other pleasant discoveries.INSTRUMENTS ......................................................... PAGE 33
WARNING LIGHTS ................................................ PAGE 35
HEATING/
CLIMATE CONTROL SYSTEM ............................ PAGE 37
MANUAL CLIMATE CONTROL SYSTEM ....... PAGE 38
STEERING COLUMN STALKS ............................. PAGE 41
CONTROLS ............................................................... PAGE 43
INTERIOR EQUIPMENT ........................................ PAGE 45
DOORS ........................................................................ PAGE 48
BOOT .......................................................................... PAGE 51
BONNET .................................................................... PAGE 54
HEADLIGHTS ............................................................ PAGE 56
ABS ............................................................................... PAGE 56
AIR BAG ...................................................................... PAGE 58
SOUND SYSTEM ....................................................... PAGE 60
AT THE FILLING STATION ................................. PAGE 62
PROTECTING THE ENVIRONMENT ............... PAGE 63
20
KEYS ............................................................................. PAGE 21
IGNITION SWITCH ............................................... PAGE 21
INDIVIDUAL SETTINGS ........................................ PAGE 22
SEAT BELTS ............................................................... PAGE 24
TRANSPORTING CHILDREN IN SAFETY ...... PAGE 29
PRETENSIONER ....................................................... PAGE 32
20-63 03/03/2003 06:02 PM Page 20
Page 22 of 156

21
IGNITION
SWITCH
The key can turn to 4 different po-
sitions
fig. 2:
–
STOP: engine switched off, ex-
tractable key, steering column lock.
Some electrical devices (e.g. door cen-
tralized lock etc.) remain operational.
–
MAR: ride position. All electrical
devices are operational.
–
AVV: engine starting.
–
PARK: engine switched-off, park-
ing lights switched on, extractable key,
steering column lock. To turn the key
in
PARK position, press the button
A.
In the event of a break-
in (e.g. attempted theft),
have the car checked at a
Fiat Dealership prior to driving
again.
fig. 1
P4E02062
KEYS
Two keys are provided with the car
& (
fig. 1) they are used for:
– the ignition;
– the front doors;
– the boot door.
Together with the keys, a self-stick
label is supplied. On this label is re-
ported the number to be quoted to
Fiat Dealershipwhen ordering du-
plicate keys.
fig. 2
P4E02017
When getting out of the
car, always remove the
key, to avoid someone ac-
cidentally activating the controls.
Remember to engage the hand
brake, ensuring complete lockup
of the car, engage gear and leave
the wheels steered. If the car is
parked on a very sloping road, we
recommend you lock the wheels
also with a wedge or a stone.
Never leave children alone in an
unattended car.
20-63 03/03/2003 06:02 PM Page 21
Page 52 of 156

51
When using the boot,
make sure the load you
are carrying does not ex-
ceed the permitted weight (see
the chapter “Technical Specifi-
cations”). Also make sure the
items in the boot are arranged
properly to prevent them being
thrown forwards and injuring pas-
sengers should you brake sharply.BOOT
OPENING/CLOSING
THE BOOT
TAILGATE
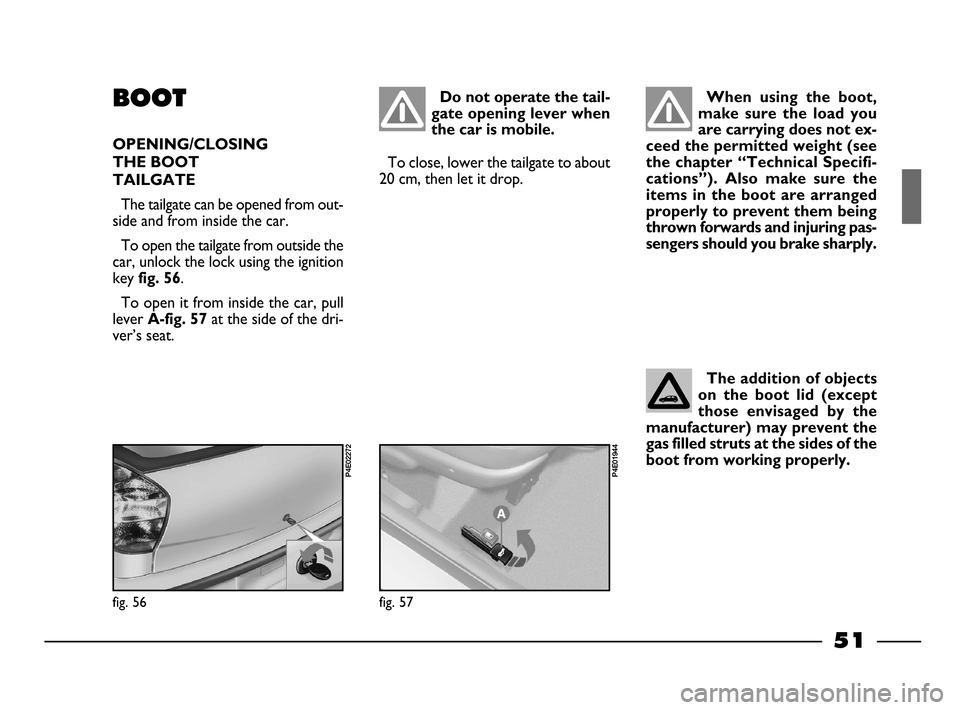
The tailgate can be opened from out-
side and from inside the car.
To open the tailgate from outside the
car, unlock the lock using the ignition
key
fig. 56.
To open it from inside the car, pull
lever
A-fig. 57at the side of the dri-
ver’s seat.
Do not operate the tail-
gate opening lever when
the car is mobile.
To close, lower the tailgate to about
20 cm, then let it drop.
fig. 56
P4E02272
fig. 57
P4E01944
The addition of objects
on the boot lid (except
those envisaged by the
manufacturer) may prevent the
gas filled struts at the sides of the
boot from working properly.
20-63 03/03/2003 06:03 PM Page 51
Page 53 of 156

52
To return the seat to normal
position
1)
Tip the entire seat backwards.
2) Tip the seat back backwards. Pass
the belts to the side and fasten the seat
back to the retainers. Make sure it is
fastened.
INCREASING THE LUGGAGE
SPACE AREA
1)
Release the seat back by means of
the side levers
A-fig. 58in the direc-
tion of the arrow.
2) Tip forward the seat back, by lat-
erally passing the seat belts, up to rest
it on the rear cushion
fig. 59.
3) Then tip forward the complete
rear seat back
fig. 60, in order to ob-
tain an only loading surface with the
boot floor.
fig. 58
P4E01746
fig. 59
P4E01993
fig. 60
P4E01994
fig. 61
P4E01749
20-63 03/03/2003 06:03 PM Page 52
Page 54 of 156

53
If you want to carry a
can of petrol as a reserve,
adhere to the laws in
force. Not following precautions
increases the risk of fire in the
event of an accident. To remove the
parcel shelf
1)
Free the upper extremities A-fig.
61
of the two tie rods, withdrawing
the eyelets from the pins.
2)Free the cover pins A-fig. 62
from their seats Band remove it.
After removing, the cover can be
transversally positioned between the
front seat backs and the tipped chush-
ion of the rear seat.
IMPORTANT If the load in the
boot is fairly heavy and you are trav-
elling at night, check and adjust the
height of the dipped beam headlights
(see“ Headlights” paragraph in this
chapter).
Heavy loads which are
not securely anchored
could seriously injure pas-
sengers in the event of an acci-
dent.
We suggest you do not
drive with the tailgate
open, as the exhaust gas-
es can come inside the car via the
boot.
fig. 62
P4E01750
20-63 03/03/2003 06:03 PM Page 53