2003 CHEVROLET EXPRESS CARGO VAN height
[x] Cancel search: heightPage 24 of 386
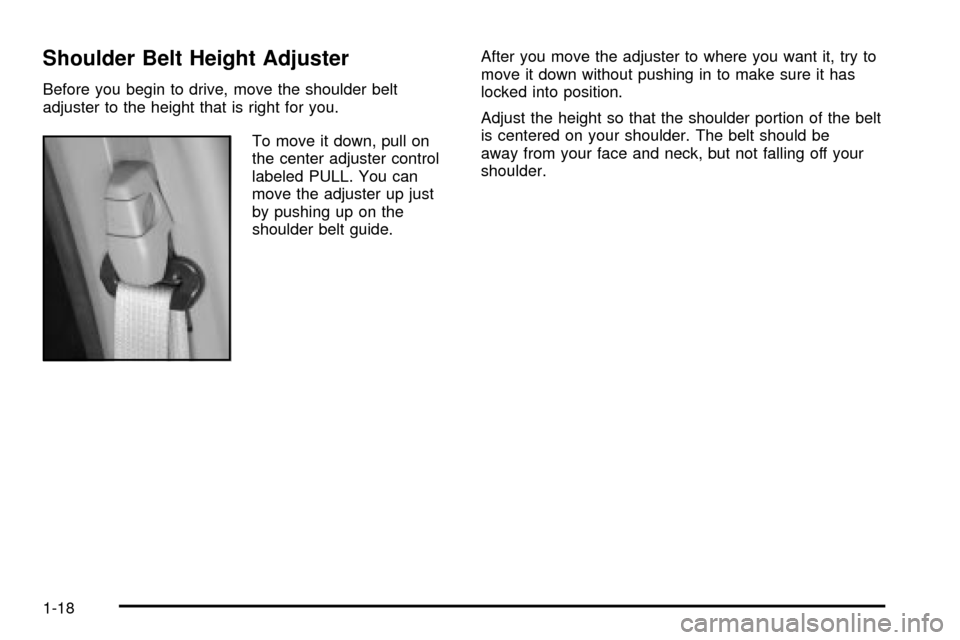
Shoulder Belt Height Adjuster
Before you begin to drive, move the shoulder belt
adjuster to the height that is right for you.
To move it down, pull on
the center adjuster control
labeled PULL. You can
move the adjuster up just
by pushing up on the
shoulder belt guide.After you move the adjuster to where you want it, try to
move it down without pushing in to make sure it has
locked into position.
Adjust the height so that the shoulder portion of the belt
is centered on your shoulder. The belt should be
away from your face and neck, but not falling off your
shoulder.
1-18
Page 44 of 386
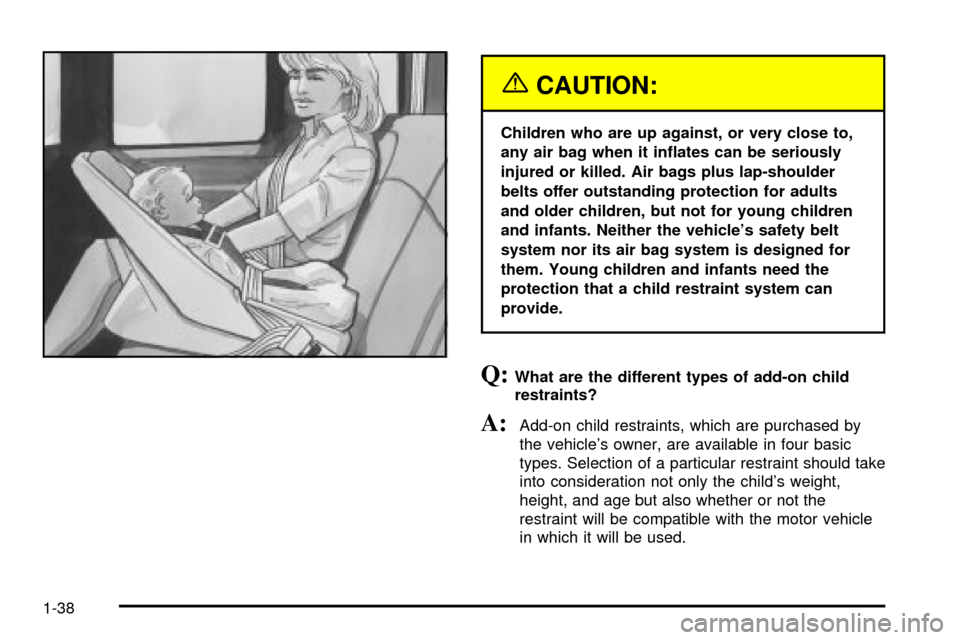
{CAUTION:
Children who are up against, or very close to,
any air bag when it in¯ates can be seriously
injured or killed. Air bags plus lap-shoulder
belts offer outstanding protection for adults
and older children, but not for young children
and infants. Neither the vehicle's safety belt
system nor its air bag system is designed for
them. Young children and infants need the
protection that a child restraint system can
provide.
Q:What are the different types of add-on child
restraints?
A:Add-on child restraints, which are purchased by
the vehicle's owner, are available in four basic
types. Selection of a particular restraint should take
into consideration not only the child's weight,
height, and age but also whether or not the
restraint will be compatible with the motor vehicle
in which it will be used.
1-38
Page 45 of 386
For most basic types of child restraints, there are
many different models available. When purchasing a
child restraint, be sure it is designed to be used
in a motor vehicle. If it is, the restraint will have a
label saying that it meets federal motor vehicle
safety standards.
The restraint manufacturer's instructions that come
with the restraint state the weight and height
limitations for a particular child restraint. In addition,
there are many kinds of restraints available for
children with special needs.
{CAUTION:
Newborn infants need complete support,
including support for the head and neck. This
is necessary because a newborn infant's neck
is weak and its head weighs so much
compared with the rest of its body. In a crash,
an infant in a rear-facing seat settles into the
restraint, so the crash forces can be
distributed across the strongest part of an
infant's body, the back and shoulders. Infants
always should be secured in appropriate infant
restraints.
{CAUTION:
The body structure of a young child is quite
unlike that of an adult or older child, for whom
the safety belts are designed. A young child's
hip bones are still so small that the vehicle's
regular safety belt may not remain low on the
hip bones, as it should. Instead, it may settle
up around the child's abdomen. In a crash, the
belt would apply force on a body area that's
unprotected by any bony structure. This alone
could cause serious or fatal injuries. Young
children always should be secured in
appropriate child restraints.
1-39
Page 80 of 386

Adding Equipment to Your Air
Bag-Equipped Vehicle
Q:If I add a push bumper or a bicycle rack to the
front of my vehicle, will it keep the air bags
from working properly?
A:As long as the push bumper or bicycle rack is
attached to your vehicle so that the vehicle's
basic structure isn't changed, it's not likely to keep
the air bags from working properly in a crash.
Q:Is there anything I might add to the front of the
vehicle that could keep the air bags from
working properly?
A:Yes. If you add things that change your vehicle's
frame, bumper system, front end sheet metal or
height, they may keep the air bag system
from working properly. Also, the air bag system
may not work properly if you relocate any of the air
bag sensors. If you have any questions about
this, you should contact Customer Assistance
before you modify your vehicle. The phone
numbers and addresses for Customer Assistance
are in Step Two of the
Customer Satisfaction
Procedure on page 7-2
.
Restraint System Check
Checking Your Restraint Systems
Now and then, make sure the safety belt reminder light
and all your belts, buckles, latch plates, retractors
and anchorages are working properly. Look for any other
loose or damaged safety belt system parts. If you see
anything that might keep a safety belt system from doing
its job, have it repaired.
Torn or frayed safety belts may not protect you in a
crash. They can rip apart under impact forces. If a belt
is torn or frayed, get a new one right away.
Also look for any opened or broken air bag covers, and
have them repaired or replaced. (The air bag system
does not need regular maintenance.)
1-74
Page 309 of 386
Brake Wear
Your vehicle has four-wheel disc brakes.
Disc brake pads have built-in wear indicators that make
a high-pitched warning sound when the brake pads
are worn and new pads are needed. The sound
may come and go or be heard all the time your vehicle
is moving (except when you are pushing on the
brake pedal ®rmly).
{CAUTION:
The brake wear warning sound means that
soon your brakes won't work well. That could
lead to an accident. When you hear the brake
wear warning sound, have your vehicle
serviced.
Notice:Continuing to drive with worn-out brake
pads could result in costly brake repair.
Some driving conditions or climates may cause a brake
squeal when the brakes are ®rst applied or lightly
applied. This does not mean something is wrong with
your brakes.
Properly torqued wheel nuts are necessary to help
prevent brake pulsation. When tires are rotated, inspect
brake pads for wear and evenly tighten wheel nuts in
the proper sequence to GM torque speci®cations.
Brake linings should always be replaced as complete
axle sets.
See
Brake System Inspection on page 6-17.
Brake Pedal Travel
See your dealer if the brake pedal does not return to
normal height, or if there is a rapid increase in
pedal travel. This could be a sign of brake trouble.
Brake Adjustment
Every time you make a brake stop, your disc brakes
adjust for wear.
5-39
Page 333 of 386
{CAUTION:
Using the wrong replacement wheels, wheel
bolts or wheel nuts on your vehicle can be
dangerous. It could affect the braking and
handling of your vehicle, make your tires lose
air and make you lose control. You could have
a collision in which you or others could be
injured. Always use the correct wheel, wheel
bolts and wheel nuts for replacement.
Notice:The wrong wheel can also cause problems
with bearing life, brake cooling, speedometer or
odometer calibration, headlamp aim, bumper height,
vehicle ground clearance and tire or tire chain
clearance to the body and chassis.
Whenever a wheel, wheel bolt or wheel nut is replaced
on a dual wheel setup, check the wheel nut torque
after 100, 1,000 and 6,000 miles (160, 1 600 and
10 000 km) of driving. For proper torque, see ªWheel Nut
Torqueº under
Capacities and Speci®cations on
page 5-97.
See
Changing a Flat Tire on page 5-65for more
information.
Used Replacement Wheels
{CAUTION:
Putting a used wheel on your vehicle is
dangerous. You can't know how it's been used
or how far it's been driven. It could fail
suddenly and cause a crash. If you have to
replace a wheel, use a new GM original
equipment wheel.
Tire Chains
Notice:Use tire chains only where legal and only
when you must. Use chains that are the proper size
for your tires. Install them on the tires of the rear
axle. Tighten them as tightly as possible with
the ends securely fastened. Drive slowly and follow
the chain manufacturer's instructions. If you can
hear the chains contacting your vehicle, stop
and retighten them. If the contact continues, slow
down until it stops. Driving too fast or spinning the
wheels with chains on will damage your vehicle.
5-63
Page 383 of 386

Safety Belts (cont.)
Safety Belt Extender....................................1-33
Safety Belt Use During Pregnancy.................1-24
Safety Belts Are for Everyone.......................1-10
Safety Chains.................................................4-40
Safety Warnings and Symbols.............................. iii
Scheduled Maintenance..................................... 6-5
Seats.............................................................. 1-3
Manual........................................................ 1-3
Power Seat.................................................. 1-4
Rear Seat Operation...................................... 1-6
Reclining Seatbacks...................................... 1-4
Secondary Latch System.................................5-69
Securing a Child Restraint................................1-56
Center Seat Position....................................1-56
Designed for the LATCH System...................1-53
Rear Outside Seat Position...........................1-53
Right Front Seat Position..............................1-58
Security Light.................................................3-37
Service Bulletins.............................................7-10
Service Manuals............................................... 7-9
Service........................................................... 5-3
Adding Equipment to the Outside of Your
Vehicle..................................................... 5-4
Doing Your Own Work................................... 5-3
Engine Soon Light.......................................3-33
Publications Ordering Information..................... 7-9
Servicing Your Air Bag-Equipped Vehicle............1-73
Setting Preset PTYs................................3-52, 3-64
Setting Preset Stations............3-42, 3-45, 3-50, 3-61Setting the Time.............................................3-41
Radios with Radio Data Systems (RDS).........3-41
Radios without Radio Data Systems (RDS).....3-40
Setting the Tone (Bass/Treble).................3-42, 3-45,
3-50, 3-61
Sheet Metal Damage.......................................5-86
Shifting Into Park (P).......................................2-26
Shifting Out of Park (P)...................................2-29
Shoulder Belt Height Adjuster...........................1-18
Single Stage Air Bags.....................................1-67
Skidding........................................................4-12
Sliding Side Door............................................2-11
Some Other Rainy Weather Tips.......................4-17
Spare Tire Check............................................6-12
Special Fabric Cleaning Problems.....................5-81
Speci®cations, Capacities.................................5-97
Speedometer..................................................3-25
Starter Switch Check.......................................6-13
Starting Your Engine.......................................2-22
Steering and Suspension Inspection..................6-16
Steering in Emergencies.................................... 4-9
Steering Tips................................................... 4-8
Steering.......................................................... 4-8
Storage Areas................................................2-36
Storing a Flat or Spare Tire and Tools...............5-78
Stuck in Sand, Mud, Ice or Snow......................4-28
Sun Visors.....................................................2-19
Swing-Out Side Door, 60/40.............................2-13
Swing-Out Windows........................................2-18
13