2003 CHEVROLET EXPRESS CARGO VAN bulb
[x] Cancel search: bulbPage 1 of 386

Seats and Restraint Systems........................... 1-1
Front Seats
............................................... 1-3
Rear Seats
............................................... 1-6
Safety Belts
.............................................1-10
Child Restraints
.......................................1-34
Air Bag System
.......................................1-63
Restraint System Check
............................1-74
Features and Controls..................................... 2-1
Keys
........................................................ 2-2
Doors and Locks
....................................... 2-7
Windows
.................................................2-16
Theft-Deterrent Systems
............................2-19
Starting and Operating Your Vehicle
...........2-20
Mirrors
....................................................2-31
OnStar
žSystem
......................................2-35
Storage Areas
.........................................2-36
Instrument Panel............................................. 3-1
Instrument Panel Overview
.......................... 3-4
Climate Controls
......................................3-19
Warning Lights, Gages and Indicators
.........3-23
Audio System(s)
.......................................3-40
Driving Your Vehicle....................................... 4-1
Your Driving, the Road, and Your Vehicle
..... 4-2
Towing
...................................................4-29Service and Appearance Care.......................... 5-1
Service
..................................................... 5-3
Fuel
......................................................... 5-4
Checking Things Under the Hood
................. 5-9
All-Wheel Drive
........................................5-46
Rear Axle
...............................................5-47
Front Axle
...............................................5-48
Noise Control System
...............................5-49
Bulb Replacement
....................................5-50
Windshield Wiper Blade Replacement
.........5-55
Tires
......................................................5-56
Appearance Care
.....................................5-80
Vehicle Identi®cation
.................................5-90
Electrical System
......................................5-91
Capacities and Speci®cations
.....................5-97
Normal Maintenance
Replacement Parts
..............................5-100
Maintenance Schedule..................................... 6-1
Maintenance Schedule
................................ 6-2
Customer Assistance Information.................... 7-1
Customer Assistance Information
.................. 7-2
Reporting Safety Defects
............................ 7-8
Index................................................................ 1
2003 Chevrolet Express Owner ManualM
Page 126 of 386
Turn and Lane Change Signals
The turn signal has two upward (for right) and
two downward (for left) positions. These positions
allow you to signal a turn or a lane change.
To signal a turn, move the lever all the way up or down.
When the turn is ®nished, the lever will return
automatically.
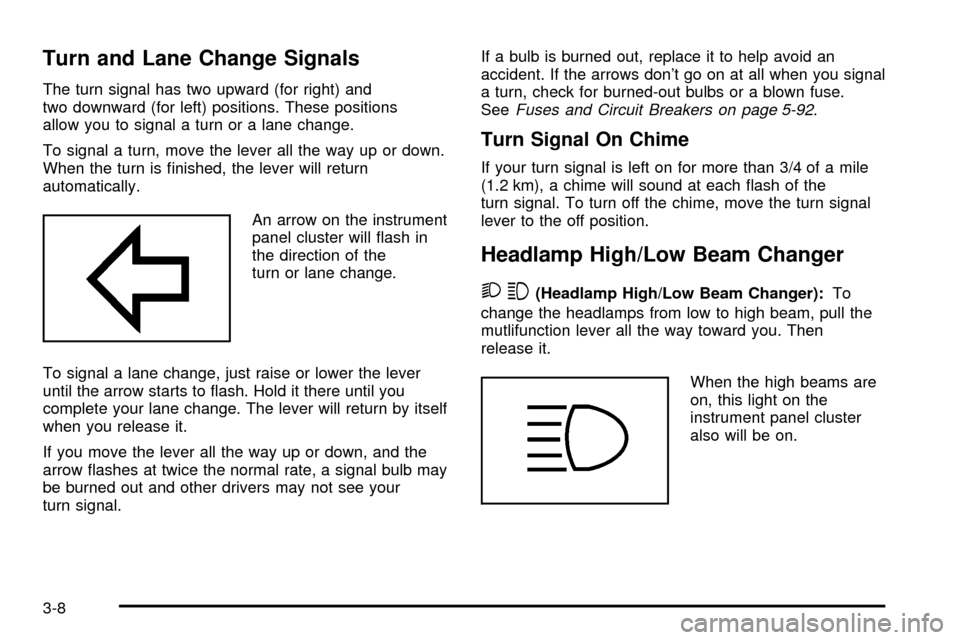
An arrow on the instrument
panel cluster will ¯ash in
the direction of the
turn or lane change.
To signal a lane change, just raise or lower the lever
until the arrow starts to ¯ash. Hold it there until you
complete your lane change. The lever will return by itself
when you release it.
If you move the lever all the way up or down, and the
arrow ¯ashes at twice the normal rate, a signal bulb may
be burned out and other drivers may not see your
turn signal.If a bulb is burned out, replace it to help avoid an
accident. If the arrows don't go on at all when you signal
a turn, check for burned-out bulbs or a blown fuse.
See
Fuses and Circuit Breakers on page 5-92.
Turn Signal On Chime
If your turn signal is left on for more than 3/4 of a mile
(1.2 km), a chime will sound at each ¯ash of the
turn signal. To turn off the chime, move the turn signal
lever to the off position.
Headlamp High/Low Beam Changer
23
(Headlamp High/Low Beam Changer):To
change the headlamps from low to high beam, pull the
mutlifunction lever all the way toward you. Then
release it.
When the high beams are
on, this light on the
instrument panel cluster
also will be on.
3-8
Page 236 of 386

Passing
You'll need more passing distance up ahead when
you're towing a trailer. And, because you're a good deal
longer, you'll need to go much farther beyond the
passed vehicle before you can return to your lane.
Backing Up
Hold the bottom of the steering wheel with one hand.
Then, to move the trailer to the left, just move that hand
to the left. To move the trailer to the right, move your
hand to the right. Always back up slowly and, if possible,
have someone guide you.
Making Turns
Notice:Making very sharp turns while trailering
could cause the trailer to come in contact with the
vehicle. Your vehicle could be damaged. Avoid
making very sharp turns while trailering.
When you're turning with a trailer, make wider turns than
normal. Do this so your trailer won't strike soft shoulders,
curbs, road signs, trees or other objects. Avoid jerky or
sudden maneuvers. Signal well in advance.
Turn Signals When Towing a Trailer
When you tow a trailer, your vehicle has to have extra
wiring and a heavy-duty turn signal ¯asher (included
in the optional trailering package).The arrows on your instrument panel will ¯ash whenever
you signal a turn or lane change. Properly hooked up,
the trailer lamps will also ¯ash, telling other drivers
you're about to turn, change lanes or stop.
When towing a trailer, the arrows on your instrument
panel will ¯ash for turns even if the bulbs on the trailer
are burned out. Thus, you may think drivers behind
you are seeing your signal when they are not. It's
important to check occasionally to be sure the trailer
bulbs are still working.
Driving On Grades
Reduce speed and shift to a lower gearbeforeyou start
down a long or steep downgrade. If you don't shift
down, you might have to use your brakes so much that
they would get hot and no longer work well.
When towing at high altitude on steep uphill grades,
consider the following: Engine coolant will boil at a lower
temperature than at normal altitudes. If you turn your
engine off immediately after towing at high altitude
on steep uphill grades, your vehicle may show signs
similar to engine overheating. To avoid this, let the
engine run while parked (preferably on level ground)
with the automatic transmission in PARK (P) for a
few minutes before turning the engine off. If you do get
the overheat warning, see
Engine Overheating on
page 5-24.
4-42
Page 271 of 386

Service............................................................5-3
Doing Your Own Service Work.........................5-3
Adding Equipment to the Outside of Your
Vehicle......................................................5-4
Fuel................................................................5-4
Gasoline Octane............................................5-4
Gasoline Speci®cations....................................5-5
California Fuel...............................................5-5
Additives.......................................................5-6
Fuels in Foreign Countries...............................5-6
Filling Your Tank............................................5-7
Filling a Portable Fuel Container.......................5-9
Checking Things Under
the Hood......................................................5-9
Hood Release..............................................5-10
Engine Compartment Overview.......................5-12
Engine Oil...................................................5-13
Engine Air Cleaner/Filter................................5-17
Automatic Transmission Fluid.........................5-19
Engine Coolant.............................................5-21
Radiator Pressure Cap..................................5-24
Engine Overheating.......................................5-24Cooling System............................................5-26
Engine Fan Noise.........................................5-34
Power Steering Fluid.....................................5-34
Windshield Washer Fluid................................5-35
Brakes........................................................5-37
Battery........................................................5-40
Jump Starting...............................................5-41
All-Wheel Drive..............................................5-46
Rear Axle.......................................................5-47
Front Axle......................................................5-48
Noise Control System.....................................5-49
Tampering with Noise Control System
Prohibited.................................................5-49
Bulb Replacement..........................................5-50
Halogen Bulbs..............................................5-50
Headlamps..................................................5-50
Front Turn Signal, Sidemarker and Parking
Lamps.....................................................5-52
Taillamps.....................................................5-52
Replacement Bulbs.......................................5-54
Section 5 Service and Appearance Care
5-1
Page 320 of 386
Bulb Replacement
For any bulb changing procedure not listed in this
section, contact your dealer.
For the type of bulbs, see
Replacement Bulbs on
page 5-54.
Halogen Bulbs
{CAUTION:
Halogen bulbs have pressurized gas inside
and can burst if you drop or scratch the bulb.
You or others could be injured. Be sure to read
and follow the instructions on the bulb
package.
Headlamps
1. Remove the two bolts from the headlamp assembly.
2. Remove the two pins on the top of the headlamp
assembly. To remove the pins, turn the outer pin
clockwise and pull it straight up. To remove
the inner pin, turn it counterclockwise and pull it
straight up.
3. Lift the inboard side of the headlamp to release the
inboard tab from the radiator support.
4. Lift the outboard side of the headlamp to release
the outboard tab from the radiator support.
5. Lower the headlamp to allow the vertical adjustor to
clear tie bar.
6. Turn the headlamp forward and upward to remove
it from the grille.
7. Turn the bulb connector counterclockwise and pull it
out of the housing.
5-50
Page 321 of 386
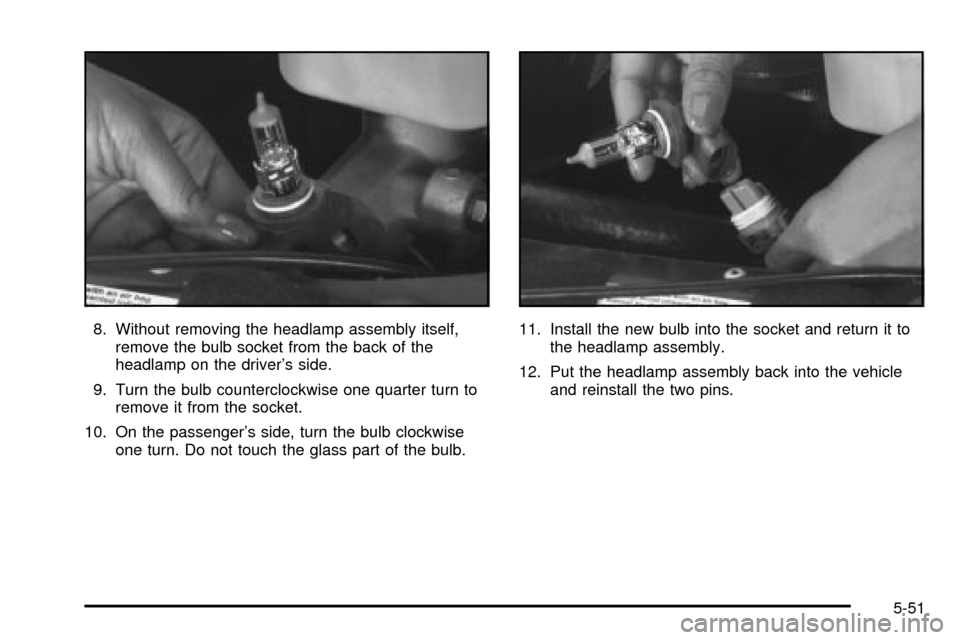
8. Without removing the headlamp assembly itself,
remove the bulb socket from the back of the
headlamp on the driver's side.
9. Turn the bulb counterclockwise one quarter turn to
remove it from the socket.
10. On the passenger's side, turn the bulb clockwise
one turn. Do not touch the glass part of the bulb.11. Install the new bulb into the socket and return it to
the headlamp assembly.
12. Put the headlamp assembly back into the vehicle
and reinstall the two pins.
5-51
Page 322 of 386
Front Turn Signal, Sidemarker and
Parking Lamps
1. Use a small tool to unlatch the outboard clip on
this lamp.
2. Pull the lamp forward to completely unlatch the clip.
Move the lamp outboard to loosen the tabs.
3. Remove the lamp from the grille.
4. Squeeze the tab on the side of the bulb assembly
while turning it counterclockwise.
5. Remove the bulb assembly from the back of the
lens and replace the bulb.
6. Turn the socket clockwise to reinstall it in the lens
assembly.
Taillamps
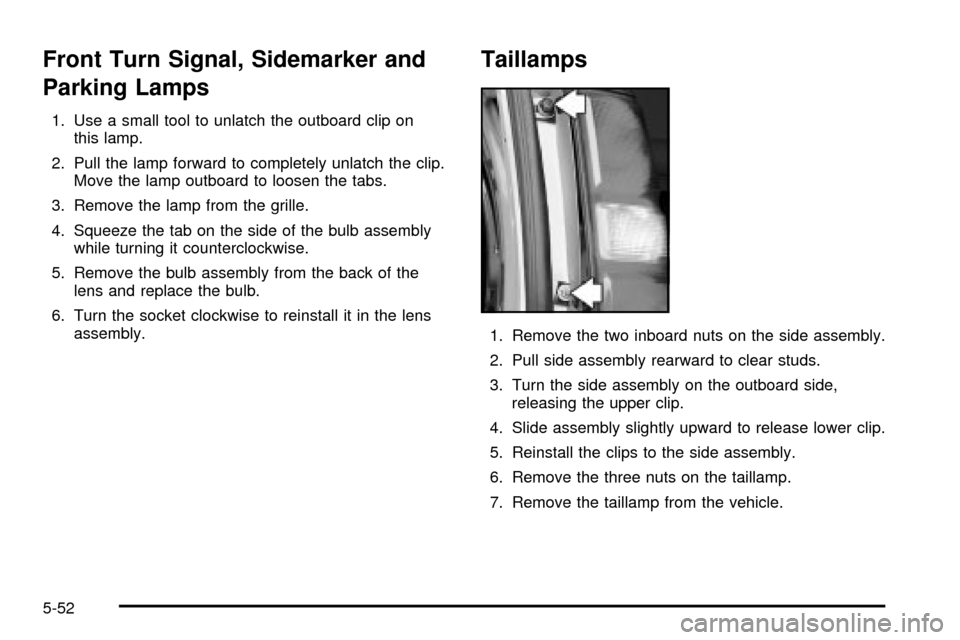
1. Remove the two inboard nuts on the side assembly.
2. Pull side assembly rearward to clear studs.
3. Turn the side assembly on the outboard side,
releasing the upper clip.
4. Slide assembly slightly upward to release lower clip.
5. Reinstall the clips to the side assembly.
6. Remove the three nuts on the taillamp.
7. Remove the taillamp from the vehicle.
5-52
Page 323 of 386
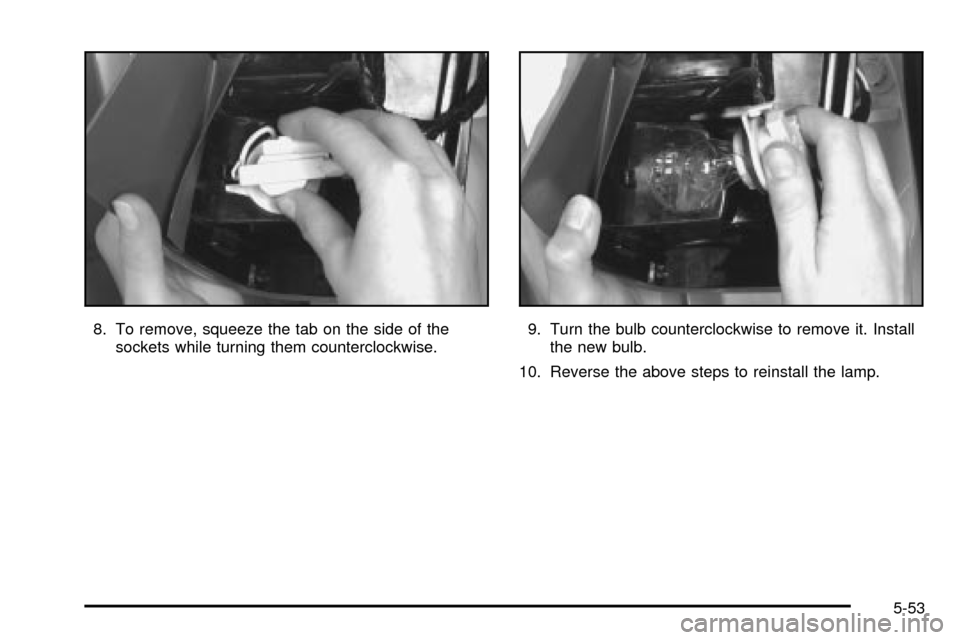
8. To remove, squeeze the tab on the side of the
sockets while turning them counterclockwise.9. Turn the bulb counterclockwise to remove it. Install
the new bulb.
10. Reverse the above steps to reinstall the lamp.
5-53