2003 CHEVROLET EXPRESS CARGO VAN lock
[x] Cancel search: lockPage 221 of 386
{CAUTION:
Snow can trap exhaust gases under your
vehicle. This can cause deadly CO (carbon
monoxide) gas to get inside. CO could
overcome you and kill you. You can't see it or
smell it, so you might not know it is in your
vehicle. Clear away snow from around the
base of your vehicle, especially any that is
blocking your exhaust pipe. And check around
again from time to time to be sure snow
doesn't collect there.
Open a window just a little on the side of the
vehicle that's away from the wind. This will
help keep CO out.Run your engine only as long as you must. This saves
fuel. When you run the engine, make it go a little
faster than just idle. That is, push the accelerator
slightly. This uses less fuel for the heat that you get and
it keeps the battery (or batteries) charged. You will
need a well-charged battery (or batteries) to restart the
vehicle, and possibly for signaling later on with your
headlamps. Let the heater run for a while.
Then, shut the engine off and close the window almost
all the way to preserve the heat. Start the engine
again and repeat this only when you feel really
uncomfortable from the cold. But do it as little as
possible. Preserve the fuel as long as you can. To help
keep warm, you can get out of the vehicle and do
some fairly vigorous exercises every half hour or so until
help comes.
4-27
Page 251 of 386
At Least Once a Year
Key Lock Cylinders Service
Lubricate the key lock cylinders with the lubricant
speci®ed in Part D.
Body Lubrication Service
Lubricate all hood hinges, hood prop rod pivot, fuel ®ller
door, rear compartment hinges, latches, locks, hood
latch assembly, secondary latch, pivots, spring anchor,
release pawl and any moving seat hardware. Part D
tells you what to use. More frequent lubrication may be
required when exposed to a corrosive environment.
Starter Switch Check
{CAUTION:
When you are doing this check, the vehicle
could move suddenly. If it does, you or others
could be injured. Follow the steps below.
1. Before you start, be sure you have enough room
around the vehicle.
2. Firmly apply both the parking brake and the regular
brake. See
Parking Brake on page 2-26if
necessary.
Do not use the accelerator pedal, and be ready to
turn off the engine immediately if it starts.
3. Try to start the engine in each gear. The starter
should work only in PARK (P) or NEUTRAL (N).
If the starter works in any other position, your
vehicle needs service.
6-13
Page 252 of 386
Automatic Transmission Shift Lock
Control System Check
{CAUTION:
When you are doing this check, the vehicle
could move suddenly. If it does, you or others
could be injured. Follow the steps below.
1. Before you start, be sure you have enough room
around the vehicle. It should be parked on a level
surface.
2. Firmly apply the parking brake. See
Parking Brake
on page 2-26if necessary.
Be ready to apply the regular brake immediately if
the vehicle begins to move.3. With the engine off, turn the key to the RUN
position, but don't start the engine. Without applying
the regular brake, try to move the shift lever out
of PARK (P) with normal effort. If the shift lever
moves out of PARK (P), your vehicle needs service.
Ignition Transmission Lock Check
While parked, and with the parking brake set, try to turn
the ignition key to LOCK in each shift lever position.
·The key should turn to LOCK only when the
shift lever is in PARK (P).
·The key should come out only in LOCK.
6-14
Page 256 of 386
Part D: Recommended Fluids and
Lubricants
Fluids and lubricants identi®ed below by name, part
number or speci®cation may be obtained from your
dealer.
Usage Fluid/Lubricant
Engine OilEngine oil with the American
Petroleum Institute Certi®ed for
Gasoline Engines starburst symbol
of the proper viscosity. To determine
the preferred viscosity for your
vehicle's engine, see
Engine Oil on
page 5-13.
Engine Coolant50/50 mixture of clean, drinkable
water and use only
DEX-COOL
žCoolant. SeeEngine
Coolant on page 5-21.
Hydraulic Brake
SystemDelco Supreme 11 Brake Fluid or
equivalent DOT-3 brake ¯uid.
Windshield
Washer SolventGM Optikleen
žWasher Solvent or
equivalent.
Usage Fluid/Lubricant
Parking Brake
Cable GuidesChassis Lubricant
(GM Part No. U.S. 12377985, in
Canada 88901242, or equivalent) or
lubricant meeting requirements of
NLGI #2, Category LB or GC-LB.
Power Steering
SystemGM Power Steering Fluid
(GM Part No. U.S. 1052884, in
Canada 993294, or equivalent).
Automatic
TransmissionDEXRON
ž-III Automatic
Transmission Fluid.
Key Lock
CylindersMulti-Purpose Lubricant, Superlube
(GM Part No. U.S. 12346241, in
Canada 10953474, or equivalent).
Chassis
LubricationChassis Lubricant
(GM Part No. U.S. 12377985, in
Canada 88901242, or equivalent) or
lubricant meeting requirements of
NLGI #2, Category LB or GC-LB.
Front Wheel
BearingsWheel bearing lubricant meeting
requirements of NLGI #2,
Category GC or GC-LB
(GM Part No. U.S. 1051344, in
Canada 993037, or equivalent).
6-18
Page 265 of 386

GM Mobility Program for Persons
with Disabilities
This program, available to
quali®ed applicants, can
reimburse you up to
$1,000 toward aftermarket
driver or passenger
adaptive equipment you
may require for your
vehicle (hand controls,
wheelchair/scooter
lifts, etc.).
This program can also provide you with free resource
information, such as area driver assessment centers and
mobility equipment installers. The program is available
for a limited period of time from the date of vehicle
purchase/lease. See your dealer for more details or call
the GM Mobility Assistance Center at 1-800-323-9935.
Text telephone (TTY) users, call 1-800-833-9935.
GM of Canada also has a Mobility Program. Call
1-800-GM-DRIVE (463-7483) for details. All TTY users
call 1-800-263-3830.
Roadside Assistance Program
To enhance Chevrolet's strong commitment to customer
satisfaction, Chevrolet is excited to announce the
establishment of the Chevrolet Roadside Assistance
Center. As the owner of a 2003 Chevrolet, membership
in Roadside Assistance is free.
Roadside Assistance is available 24 hours a day,
365 days a year, by calling 1-800-CHEV-USA
(243-8872). This toll-free number will provide you
over-the-phone roadside assistance with minor
mechanical problems. If your problem cannot be
resolved over the phone, our advisors have access to a
nationwide network of dealer recommended service
providers. Roadside membership is free; however some
services may incur costs.
Roadside offers two levels of service to the customer,
Basic CareandCourtesy Care:
RoadsideBasic Careprovides:
·Toll-free number, 1-800-CHEV-USA (243-8872),
text telephone (TTY) users, call 1-888-889-2438
·Free towing for warranty repairs
·Basic over-the-phone technical advice
·Available dealer services at reasonable costs
(i.e., wrecker services, locksmith/key service,
glass repair, etc.)
7-5
Page 266 of 386

RoadsideCourtesy Careprovides:
·RoadsideBasic Careservices
(as outlined previously)
Plus:
·FREE Non-Warranty Towing (to the closest dealer
from a legal roadway)
·FREE Locksmith/Key Service (when keys are lost
on the road or locked inside)
·FREE Flat Tire Service (spare installed on the road)
·FREE Jump Start (at home or on the road)
·FREE Fuel Delivery ($5 of fuel delivered
on the road)
Chevrolet offers Courtesy Transportation for customers
needing warranty service. Courtesy Transportation
will be offered in conjunction with the coverage provided
by the Bumper-to-Bumper New Vehicle Limited
Warranty to eligible purchasers of 2003 Chevrolet
passenger cars and light duty trucks. (See your selling
dealer for details.)
Courtesy Careis available to retail and retail lease
customers operating 2003 and newer Chevrolet vehicles
for a period of 3 years/36,000 miles (60 000 km),
whichever occurs ®rst. All
Courtesy Careservices must
be pre-arranged by Chevrolet Roadside or dealer
service management.
Basic CareandCourtesy Careare not part of or
included in the coverage provided by the New Vehicle
Limited Warranty. Chevrolet reserves the right to
modify or discontinue
Basic CareandCourtesy Careat
any time.
The Roadside Assistance Center uses companies that
will provide you with quality and priority service.
When roadside services are required, our advisors will
explain any payment obligations that may be incurred
for utilizing outside services.
For prompt assistance when calling, please have the
following available to give to the advisor;
·Vehicle Identi®cation Number (VIN)
·License plate number
·Vehicle color
·Vehicle location
·Telephone number where you can be reached
·Vehicle mileage
·Description of problem
Canadian Roadside Assistance
Vehicles purchased in Canada have an extensive
Roadside Assistance program accessible from anywhere
in Canada or the United States. Please refer to the
Warranty and Owner Assistance Information book.
7-6
Page 278 of 386
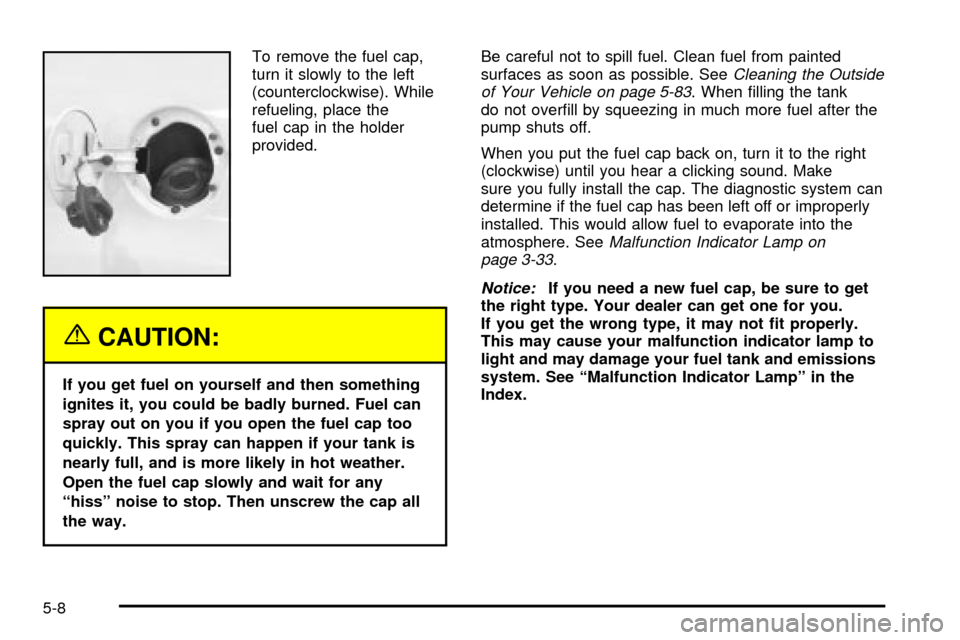
To remove the fuel cap,
turn it slowly to the left
(counterclockwise). While
refueling, place the
fuel cap in the holder
provided.
{CAUTION:
If you get fuel on yourself and then something
ignites it, you could be badly burned. Fuel can
spray out on you if you open the fuel cap too
quickly. This spray can happen if your tank is
nearly full, and is more likely in hot weather.
Open the fuel cap slowly and wait for any
ªhissº noise to stop. Then unscrew the cap all
the way.Be careful not to spill fuel. Clean fuel from painted
surfaces as soon as possible. See
Cleaning the Outside
of Your Vehicle on page 5-83. When ®lling the tank
do not over®ll by squeezing in much more fuel after the
pump shuts off.
When you put the fuel cap back on, turn it to the right
(clockwise) until you hear a clicking sound. Make
sure you fully install the cap. The diagnostic system can
determine if the fuel cap has been left off or improperly
installed. This would allow fuel to evaporate into the
atmosphere. See
Malfunction Indicator Lamp on
page 3-33.
Notice:If you need a new fuel cap, be sure to get
the right type. Your dealer can get one for you.
If you get the wrong type, it may not ®t properly.
This may cause your malfunction indicator lamp to
light and may damage your fuel tank and emissions
system. See ªMalfunction Indicator Lampº in the
Index.
5-8
Page 291 of 386
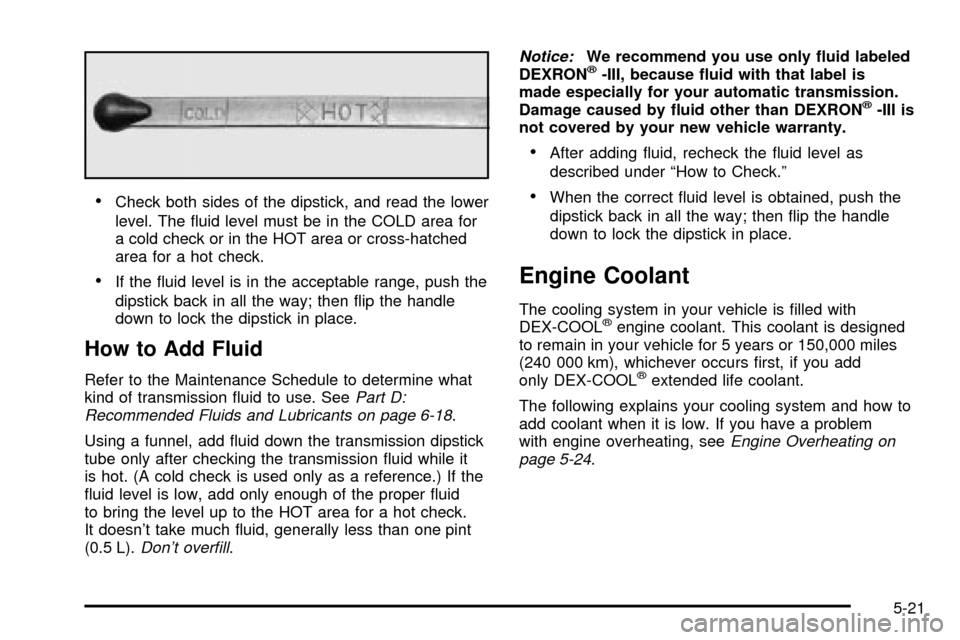
·Check both sides of the dipstick, and read the lower
level. The ¯uid level must be in the COLD area for
a cold check or in the HOT area or cross-hatched
area for a hot check.
·If the ¯uid level is in the acceptable range, push the
dipstick back in all the way; then ¯ip the handle
down to lock the dipstick in place.
How to Add Fluid
Refer to the Maintenance Schedule to determine what
kind of transmission ¯uid to use. SeePart D:
Recommended Fluids and Lubricants on page 6-18.
Using a funnel, add ¯uid down the transmission dipstick
tube only after checking the transmission ¯uid while it
is hot. (A cold check is used only as a reference.) If the
¯uid level is low, add only enough of the proper ¯uid
to bring the level up to the HOT area for a hot check.
It doesn't take much ¯uid, generally less than one pint
(0.5 L).
Don't over®ll.
Notice:We recommend you use only ¯uid labeled
DEXRONž-III, because ¯uid with that label is
made especially for your automatic transmission.
Damage caused by ¯uid other than DEXRON
ž-III is
not covered by your new vehicle warranty.
·After adding ¯uid, recheck the ¯uid level as
described under ªHow to Check.º
·When the correct ¯uid level is obtained, push the
dipstick back in all the way; then ¯ip the handle
down to lock the dipstick in place.
Engine Coolant
The cooling system in your vehicle is ®lled with
DEX-COOLžengine coolant. This coolant is designed
to remain in your vehicle for 5 years or 150,000 miles
(240 000 km), whichever occurs ®rst, if you add
only DEX-COOL
žextended life coolant.
The following explains your cooling system and how to
add coolant when it is low. If you have a problem
with engine overheating, see
Engine Overheating on
page 5-24.
5-21