2003 CHEVROLET CORVETTE display
[x] Cancel search: displayPage 62 of 368

The driver's door will unlock when the unlock button on
the remote keyless entry transmitter is pressed, or
press the unlock button again within ®ve seconds to
unlock both doors. Also, by pressing the unlock button,
it may automatically disarm your theft-deterrent
system, depending on how the theft-deterrent system is
programmed. If it's dark enough outside, your interior
lamps will come on.
Your memory settings will also be recalled when you
press the unlock button on the remote keyless entry
transmitter. See
Memory on page 2-55for more
information.
The hatch/trunk lid will release when the button with the
trunk symbol is pressed, as long as the ignition is
turned to OFF.
The system has a feature that makes it difficult for you
to lock your key in your vehicle. If you leave your
key in the ignitionand attempt to lock the doors, the
vehicle will not lock and a chime will sound to remind
you that the key is in the ignition. If the door lock
is pressed again, within ®ve seconds, the doors will lock
and the keys can be locked in the vehicle. This
system can't guarantee that you will never be locked out
of your vehicle. Always remember to take your key
with you.
Remote Alarm
When you press the horn button on the remote keyless
entry transmitter, the horn will sound. This panic
alarm button will allow you to attract attention, if needed.
If the horn alarm sounds, there are three ways to turn
it off:
·Press the panic alarm button again on the remote
keyless entry transmitter.
·Wait 90 seconds, and the horn will turn off by itself.
·Turn the key to any position in the ignition,
except OFF.
Remote Keyless Entry Settings
You can adjust the settings on the system through the
Driver Information Center (DIC). You can change
the type of alarm used by the theft-deterrent system.
See
DIC Controls and Displays on page 3-45for more
information.
2-6
Page 63 of 368

Matching Transmitter(s) to Your
Vehicle
Each remote keyless entry transmitter is coded to
prevent another transmitter from unlocking your vehicle.
If a transmitter is lost or stolen, a replacement can
be purchased through your dealer. Remember to bring
any remaining transmitters with you when you go to
your dealer. When the dealer matches the replacement
transmitter to your vehicle, any remaining transmitters
must also be matched. Once your dealer has coded the
new transmitter, the lost transmitter will not unlock
your vehicle. Each vehicle can have a maximum of three
transmitters matched to it.
To match transmitters to your vehicle, do the following:
1. Turn the ignition key to ON.
2. Clear any warning messages on the Driver
Information Center (DIC) by pressing the RESET
button.
3. Press the OPTIONS button on the DIC several
times until the blank page is displayed, then
press and hold the RESET button for two seconds.4. When the message FOB TRAINING is displayed,
press the RESET button once. The message
HOLD LK + UNLK 1ST FOB will be displayed in
the DIC.
5. Press and hold the lock and unlock buttons on the
®rst transmitter simultaneously for ®ve seconds.
6. When a transmitter is learned (matched), the DIC
will display FOB LEARNED and then prompt you to
learn the second transmitter.
7. Repeat Steps 5 and 6 for the third transmitter.
8. Remove the key from the ignition.
The programming mode will shut off if any of following
has occurred:
·You don't program any transmitters for two minutes.
·You take the key out of the ignition.
·You have programmed three transmitters.
2-7
Page 76 of 368

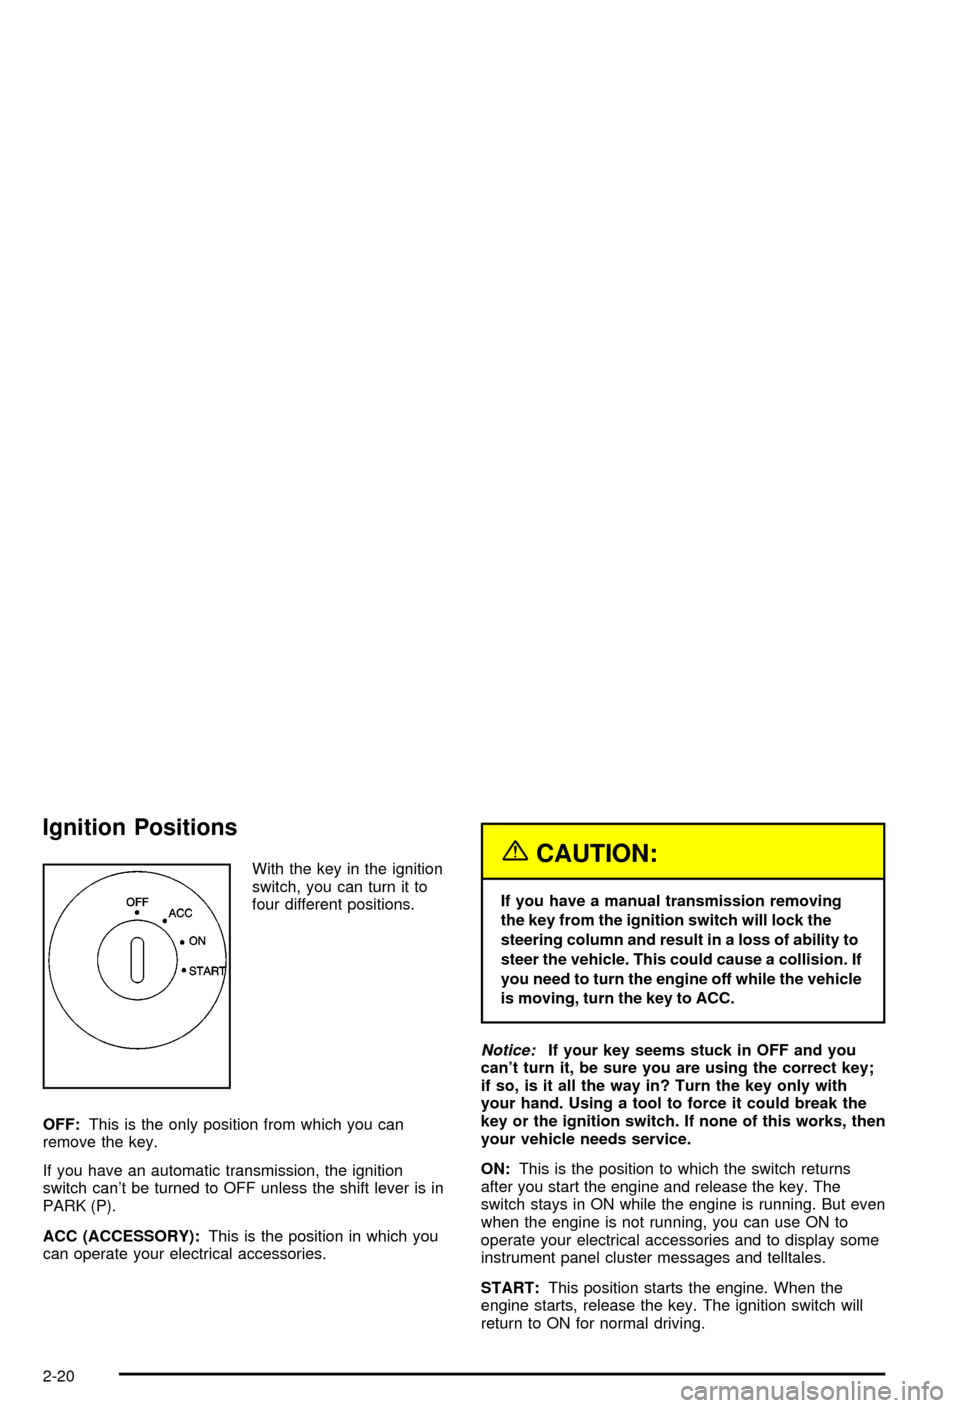
Ignition Positions
With the key in the ignition
switch, you can turn it to
four different positions.
OFF:This is the only position from which you can
remove the key.
If you have an automatic transmission, the ignition
switch can't be turned to OFF unless the shift lever is in
PARK (P).
ACC (ACCESSORY):This is the position in which you
can operate your electrical accessories.{CAUTION:
If you have a manual transmission removing
the key from the ignition switch will lock the
steering column and result in a loss of ability to
steer the vehicle. This could cause a collision. If
you need to turn the engine off while the vehicle
is moving, turn the key to ACC.
Notice:If your key seems stuck in OFF and you
can't turn it, be sure you are using the correct key;
if so, is it all the way in? Turn the key only with
your hand. Using a tool to force it could break the
key or the ignition switch. If none of this works, then
your vehicle needs service.
ON:This is the position to which the switch returns
after you start the engine and release the key. The
switch stays in ON while the engine is running. But even
when the engine is not running, you can use ON to
operate your electrical accessories and to display some
instrument panel cluster messages and telltales.
START:This position starts the engine. When the
engine starts, release the key. The ignition switch will
return to ON for normal driving.
2-20
Page 111 of 368

Vehicle Personalization
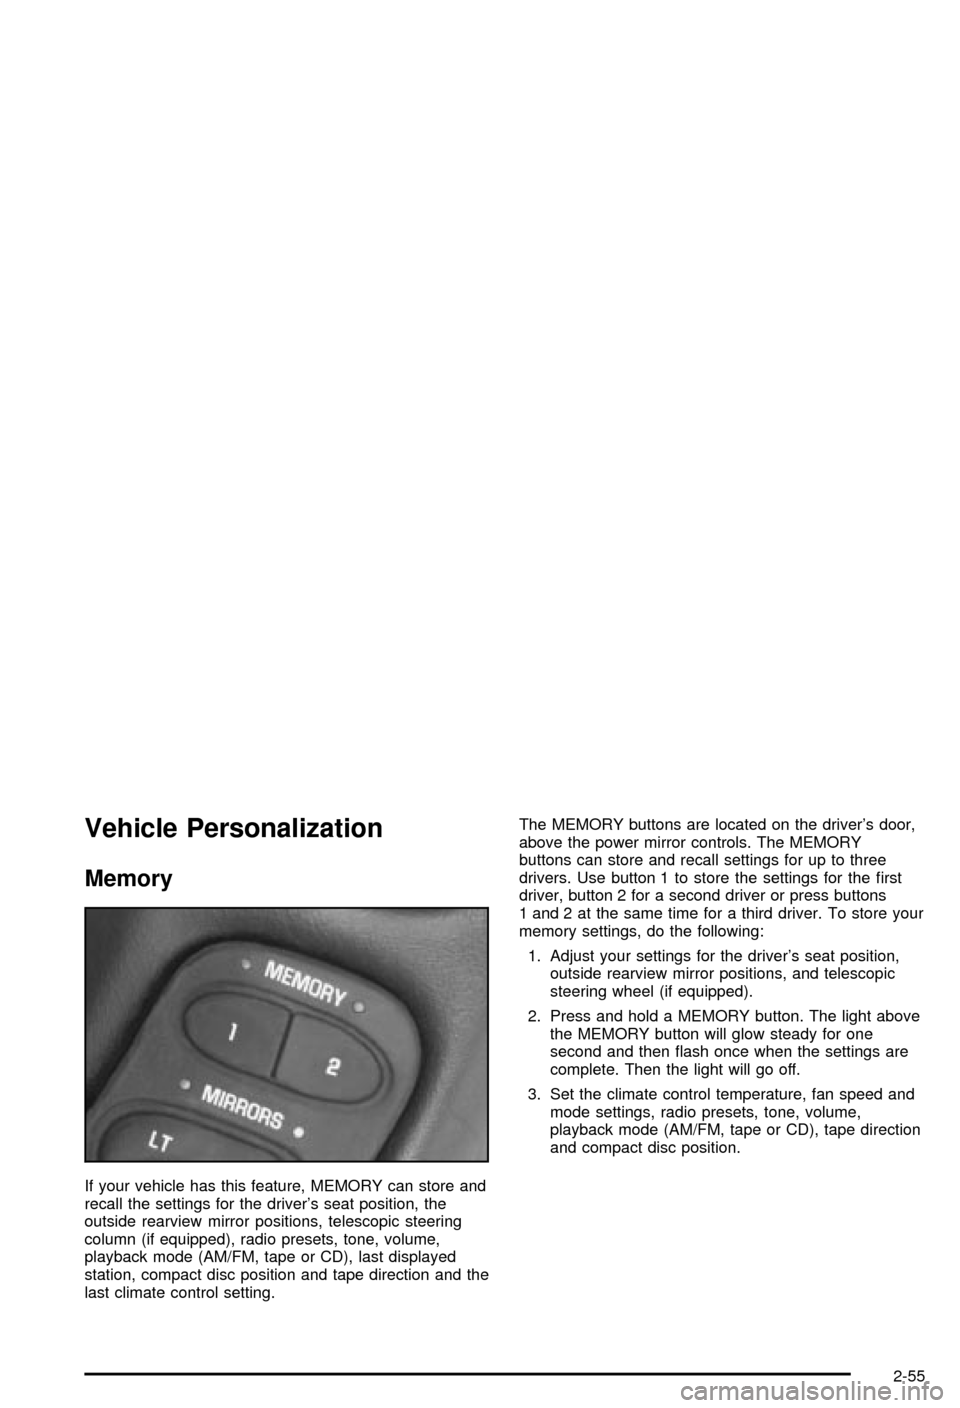
Memory
If your vehicle has this feature, MEMORY can store and
recall the settings for the driver's seat position, the
outside rearview mirror positions, telescopic steering
column (if equipped), radio presets, tone, volume,
playback mode (AM/FM, tape or CD), last displayed
station, compact disc position and tape direction and the
last climate control setting.The MEMORY buttons are located on the driver's door,
above the power mirror controls. The MEMORY
buttons can store and recall settings for up to three
drivers. Use button 1 to store the settings for the ®rst
driver, button 2 for a second driver or press buttons
1 and 2 at the same time for a third driver. To store your
memory settings, do the following:
1. Adjust your settings for the driver's seat position,
outside rearview mirror positions, and telescopic
steering wheel (if equipped).
2. Press and hold a MEMORY button. The light above
the MEMORY button will glow steady for one
second and then ¯ash once when the settings are
complete. Then the light will go off.
3. Set the climate control temperature, fan speed and
mode settings, radio presets, tone, volume,
playback mode (AM/FM, tape or CD), tape direction
and compact disc position.
2-55
Page 113 of 368

Instrument Panel Overview...............................3-2
Hazard Warning Flashers................................3-4
Other Warning Devices...................................3-4
Horn.............................................................3-5
Tilt Wheel.....................................................3-5
Turn Signal/Multifunction Lever.........................3-6
Exterior Lamps.............................................3-12
Interior Lamps..............................................3-15
Head-Up Display (HUD).................................3-17
Accessory Power Outlets...............................3-20
Ashtrays and Cigarette Lighter........................3-21
Climate Controls............................................3-22
Dual Automatic Climate Control System...........3-22
Outlet Adjustment.........................................3-28
Warning Lights, Gages and Indicators.............3-29
Instrument Panel Cluster................................3-30
Speedometer and Odometer...........................3-31
Tachometer.................................................3-31
Safety Belt Reminder Light.............................3-31
Air Bag Readiness Light................................3-32
Air Bag Off Light..........................................3-33
Voltmeter Gage............................................3-34
Brake System Warning Light..........................3-35
Anti-Lock Brake System Warning Light.............3-36
Traction Control System (TCS) Warning Light . . .3-36Active Handling System Light.........................3-37
Engine Coolant Temperature Gage..................3-38
Malfunction Indicator Lamp.............................3-38
Engine Oil Pressure Gage.............................3-41
Security Light...............................................3-42
Check Gages Warning Light...........................3-42
Fuel Gage...................................................3-42
Driver Information Center (DIC).......................3-44
DIC Controls and Displays.............................3-45
DIC Warnings and Messages.........................3-53
Other Messages...........................................3-61
Audio System(s).............................................3-62
Setting the Time...........................................3-62
Radio with Cassette......................................3-63
Radio with CD..............................................3-67
Trunk-Mounted CD Changer...........................3-71
Theft-Deterrent Feature..................................3-75
Understanding Radio Reception......................3-77
Care of Your Cassette Tape Player.................3-78
Care of Your CDs.........................................3-79
Care of Your CD Player................................3-79
Fixed Mast Antenna (Z06)..............................3-79
Power Antenna Mast Care (Convertible)...........3-79
Integrated Windshield and Rear Window
Antennas (Coupe).....................................3-80
Section 3 Instrument Panel
3-1
Page 115 of 368

The main components of your instrument panel are the
following:
A. Instrument Panel Brightness Control
B. Head-Up Display Controls
C. Turn Signal/Multifunction Lever
D. Driver Information Center (DIC) (Located in the
Instrument Cluster)
E. Instrument Panel Cluster
F. Windshield Wiper/Washer Lever
G. Driver Information Center (DIC) Buttons
H. Hazard Warning Flasher Button
I. Center Air Outlets
J. Audio System
K. Climate Controls
L. Fog Lamp Button
M. Remote Hatch Release Button (Coupe) or Remote
Trunk Release Button (Convertible/Z06)N. Ignition Switch
O. Shift Lever (Automatic Shown)
P. Active Handling Button
Q. Accessory Power Outlet (Located in the Center
Console)
R. Selective Ride Control Switch
S. Air Bag Off Light
T. Instrument Panel Cupholder
U. Remote Fuel Door Release Button (Located in the
Center Console)
V. Ashtray and Cigarette Lighter
W. Parking Brake
X. Glove Box
Y. Instrument Panel Fuse Block (Located Behind the
Toe-Board)
Z. Air Bag Off Switch (Located in Glove Box)
3-3
Page 120 of 368

INT (Intermittent):Move the lever to INT to choose a
delayed wiping cycle. Turn the INT ADJ band down
for a longer delay or up for a shorter delay. The further
the INT ADJ band is turned upward, the shorter the
delay will be and the further the INT ADJ band is turned
downward, the longer the delay will be. The wiper
speed can only be adjusted when the lever is in the INT
position. Use this position for light rain or snow.
LO (Low Speed):Move the lever up to the ®rst setting
past INT, for steady wiping at low speed.
HI (High Speed):Move the lever up to the second
setting past INT, for steady wiping at high speed.
MIST:Move the lever all the way down to MIST for a
single wiping cycle. Hold it there until the windshield
wipers start; then let go. The windshield wipers will stop
after one wipe. If you want more wipes, hold the
band on MIST longer.
Heavy snow or ice can overload the wipers. If this
occurs, a circuit breaker will stop the wipers until the
motor cools. So, be sure to clear any ice and snow from
the windshield wiper blades before using them. If the
wiper blades are frozen to the windshield, carefully
loosen them or warm the windshield before turning the
wipers on. If your blades do become worn or
damaged, get new blades or blade inserts.Windshield Washer
The lever on the right side of the steering column also
controls the windshield washer. There is a button at
the end of the lever. To spray washer ¯uid on the
windshield, press the button and hold it. The washer will
spray until you release the button. The wipers will
continue to clear the window for about six seconds after
the button is released and then stop or return to your
preset speed.
{CAUTION:
In freezing weather, don't use your washer
until the windshield is warmed. Otherwise the
washer ¯uid can form ice on the windshield,
blocking your vision.
If the ¯uid in the windshield washer ¯uid reservoir is
low, the message LOW WASHER FLUID will appear on
the Driver Information Center (DIC) display. It will
take 60 seconds after the bottle is re®lled for this
message to turn off. For information on the correct
washer ¯uid mixture to use, see
Windshield Washer
Fluid on page 5-36andPart D: Recommended Fluids
and Lubricants on page 6-14.
3-8
Page 121 of 368

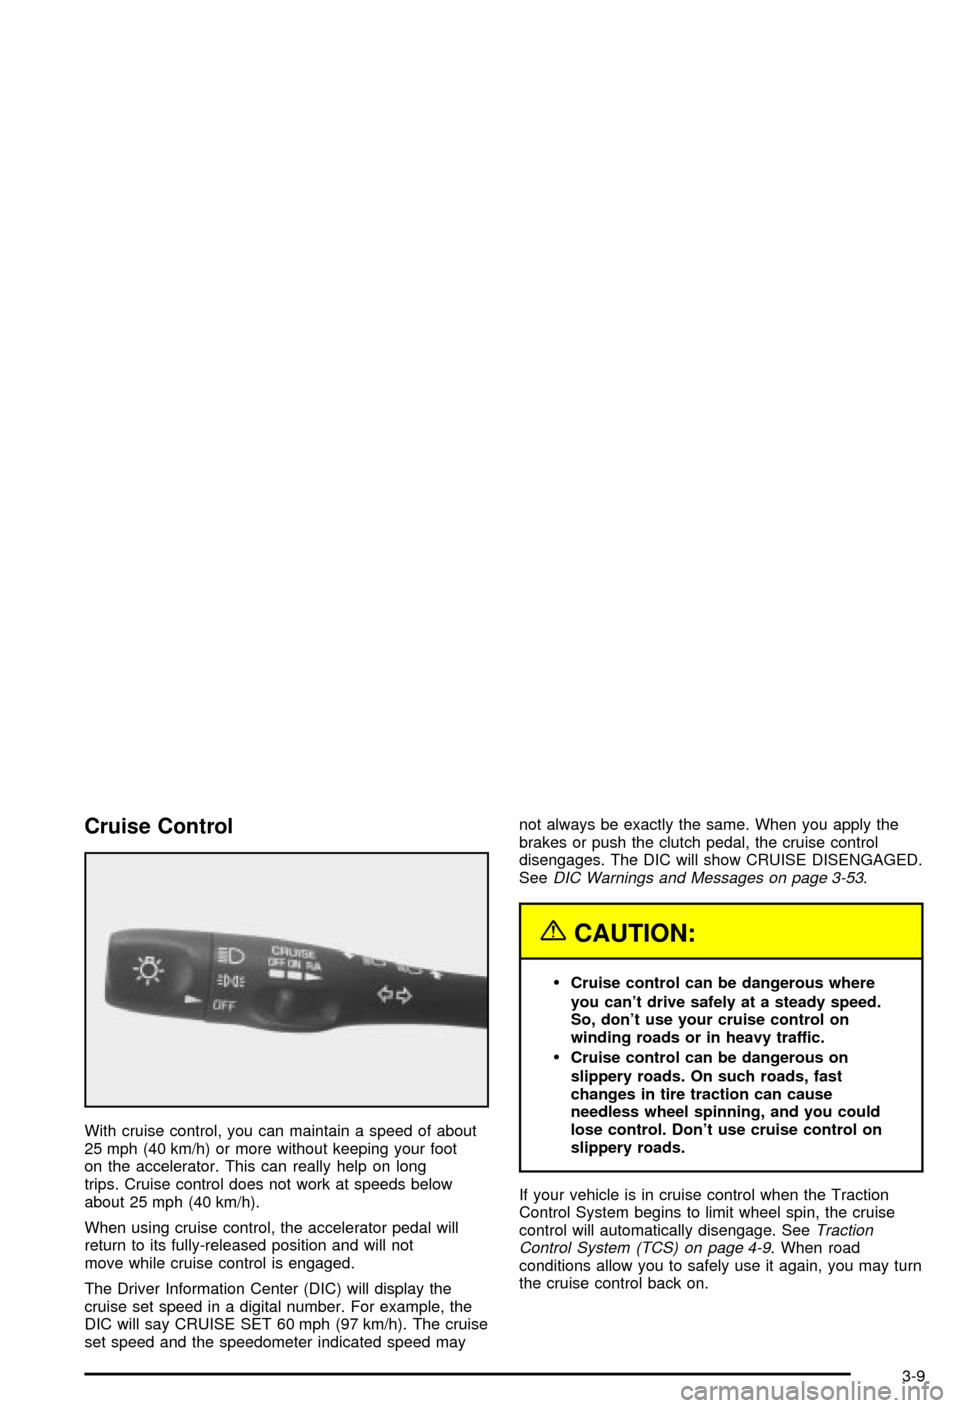
Cruise Control
With cruise control, you can maintain a speed of about
25 mph (40 km/h) or more without keeping your foot
on the accelerator. This can really help on long
trips. Cruise control does not work at speeds below
about 25 mph (40 km/h).
When using cruise control, the accelerator pedal will
return to its fully-released position and will not
move while cruise control is engaged.
The Driver Information Center (DIC) will display the
cruise set speed in a digital number. For example, the
DIC will say CRUISE SET 60 mph (97 km/h). The cruise
set speed and the speedometer indicated speed maynot always be exactly the same. When you apply the
brakes or push the clutch pedal, the cruise control
disengages. The DIC will show CRUISE DISENGAGED.
See
DIC Warnings and Messages on page 3-53.
{CAUTION:
·Cruise control can be dangerous where
you can't drive safely at a steady speed.
So, don't use your cruise control on
winding roads or in heavy traffic.
·Cruise control can be dangerous on
slippery roads. On such roads, fast
changes in tire traction can cause
needless wheel spinning, and you could
lose control. Don't use cruise control on
slippery roads.
If your vehicle is in cruise control when the Traction
Control System begins to limit wheel spin, the cruise
control will automatically disengage. See
Traction
Control System (TCS) on page 4-9. When road
conditions allow you to safely use it again, you may turn
the cruise control back on.
3-9