2003 CHEVROLET CORVETTE change
[x] Cancel search: changePage 98 of 368

Notice:If your vehicle is equipped with the optional
trunk±mounted CD changer, it is stored in the
center rear storage compartment. To help avoid
damage to the compact disc player, do not store
items such as liquids or sharp objects that could
damage, puncture or cut the trunk±mounted
CD changer or wiring.
Notice:Do not store heavy or sharp objects in the
rear storage compartments located in the
hatch/trunk area. If you do, the objects could
damage the underbody.
Convenience Net
If your vehicle has this feature you will see it on the
back wall of the rear area of the vehicle.
Put small loads, like grocery bags, in the net. It can help
keep them from falling over during sharp turns or
quick starts and stops. The convenience net is not for
larger, heavier loads.
You can unhook the net and place it in one of the rear
storage compartments when you are not using it.
On coupe models only, a vinyl storage bag has also
been provided.
Cargo Cover
If your vehicle has this feature, the security shade can
provide hidden storage in the rear area of the vehicle.
The shade is also helpful in blocking the glare from the
removable roof when it is stored in the rear
compartment.
Using the Cargo Cover
1. Hook the elastic loops
on the front corners (A)
of the shade to the
T-nuts located on the
front corners of the rear
hatch frame.
2. Hook the elastic loops on the rear corners (B) of the
shade to the hooks recessed inside the rear hatch
frame, near the rear corners.
2-42
Page 112 of 368

Your memory settings are now programmed. Any
changes that are made to the audio system and climate
controls while driving will be automatically stored
when the ignition key is turned off.
When ®rst entering your vehicle, after pressing the
unlock button on your remote keyless entry transmitter
or a MEMORY button, a recall of your settings will
occur when the door is closed and the ignition key is in
the ignition switch. As the memory settings are
recalled, the light above the button will ¯ash until the
correct settings are achieved, then glow for ®ve seconds
when complete.A memory recall can be stopped by pressing any
memory seat, mirror or steering column position button.
Drivers 1, 2 and 3 correspond to the order in which
your remote keyless entry transmitters were
programmed. See
Remote Keyless Entry System on
page 2-4for more information.
Memory recall will not work if the vehicle is moving.
Memory recall will be temporarily interrupted during
engine crank.
If easy entry is on, you must press the MEMORY button
to reset the seat.
2-56
Page 113 of 368

Instrument Panel Overview...............................3-2
Hazard Warning Flashers................................3-4
Other Warning Devices...................................3-4
Horn.............................................................3-5
Tilt Wheel.....................................................3-5
Turn Signal/Multifunction Lever.........................3-6
Exterior Lamps.............................................3-12
Interior Lamps..............................................3-15
Head-Up Display (HUD).................................3-17
Accessory Power Outlets...............................3-20
Ashtrays and Cigarette Lighter........................3-21
Climate Controls............................................3-22
Dual Automatic Climate Control System...........3-22
Outlet Adjustment.........................................3-28
Warning Lights, Gages and Indicators.............3-29
Instrument Panel Cluster................................3-30
Speedometer and Odometer...........................3-31
Tachometer.................................................3-31
Safety Belt Reminder Light.............................3-31
Air Bag Readiness Light................................3-32
Air Bag Off Light..........................................3-33
Voltmeter Gage............................................3-34
Brake System Warning Light..........................3-35
Anti-Lock Brake System Warning Light.............3-36
Traction Control System (TCS) Warning Light . . .3-36Active Handling System Light.........................3-37
Engine Coolant Temperature Gage..................3-38
Malfunction Indicator Lamp.............................3-38
Engine Oil Pressure Gage.............................3-41
Security Light...............................................3-42
Check Gages Warning Light...........................3-42
Fuel Gage...................................................3-42
Driver Information Center (DIC).......................3-44
DIC Controls and Displays.............................3-45
DIC Warnings and Messages.........................3-53
Other Messages...........................................3-61
Audio System(s).............................................3-62
Setting the Time...........................................3-62
Radio with Cassette......................................3-63
Radio with CD..............................................3-67
Trunk-Mounted CD Changer...........................3-71
Theft-Deterrent Feature..................................3-75
Understanding Radio Reception......................3-77
Care of Your Cassette Tape Player.................3-78
Care of Your CDs.........................................3-79
Care of Your CD Player................................3-79
Fixed Mast Antenna (Z06)..............................3-79
Power Antenna Mast Care (Convertible)...........3-79
Integrated Windshield and Rear Window
Antennas (Coupe).....................................3-80
Section 3 Instrument Panel
3-1
Page 118 of 368
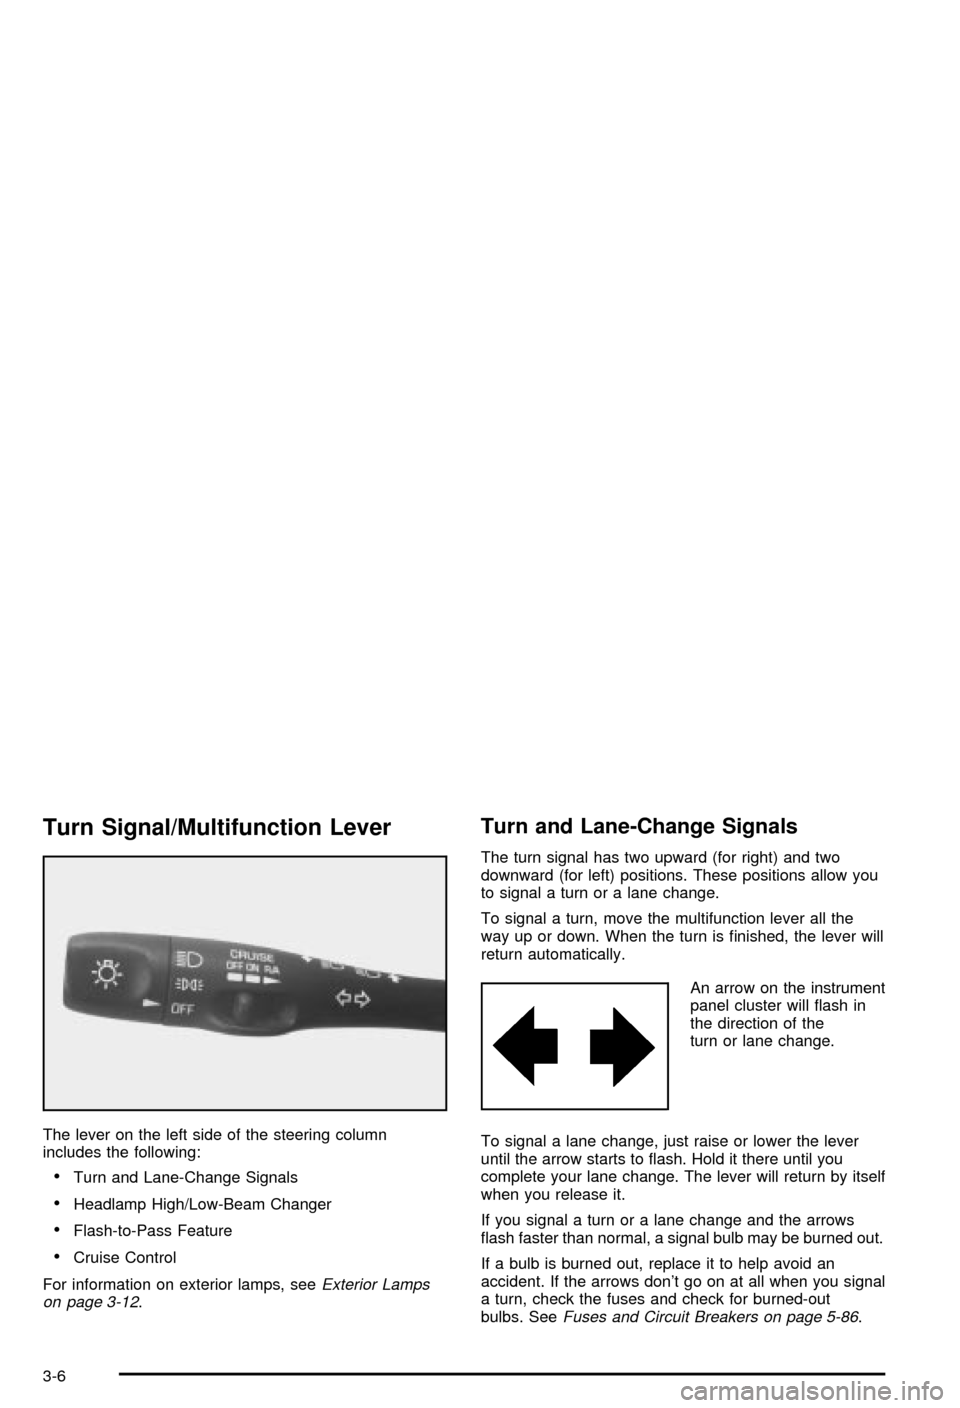
Turn Signal/Multifunction Lever
The lever on the left side of the steering column
includes the following:
·Turn and Lane-Change Signals
·Headlamp High/Low-Beam Changer
·Flash-to-Pass Feature
·Cruise Control
For information on exterior lamps, see
Exterior Lamps
on page 3-12.
Turn and Lane-Change Signals
The turn signal has two upward (for right) and two
downward (for left) positions. These positions allow you
to signal a turn or a lane change.
To signal a turn, move the multifunction lever all the
way up or down. When the turn is ®nished, the lever will
return automatically.
An arrow on the instrument
panel cluster will ¯ash in
the direction of the
turn or lane change.
To signal a lane change, just raise or lower the lever
until the arrow starts to ¯ash. Hold it there until you
complete your lane change. The lever will return by itself
when you release it.
If you signal a turn or a lane change and the arrows
¯ash faster than normal, a signal bulb may be burned out.
If a bulb is burned out, replace it to help avoid an
accident. If the arrows don't go on at all when you signal
a turn, check the fuses and check for burned-out
bulbs. See
Fuses and Circuit Breakers on page 5-86.
3-6
Page 119 of 368
Turn Signal on Chime
A chime will remind you if you leave the turn signal on
for more than 3/4 mile (1.2 km) of driving.
If you need to leave the turn signal on for more than
3/4 mile (1.2 km), turn off the signal and then turn it
back on.
Headlamp High/Low-Beam Changer
To change the headlamps from low beam to high or high
to low, push the turn signal lever all the way forward.
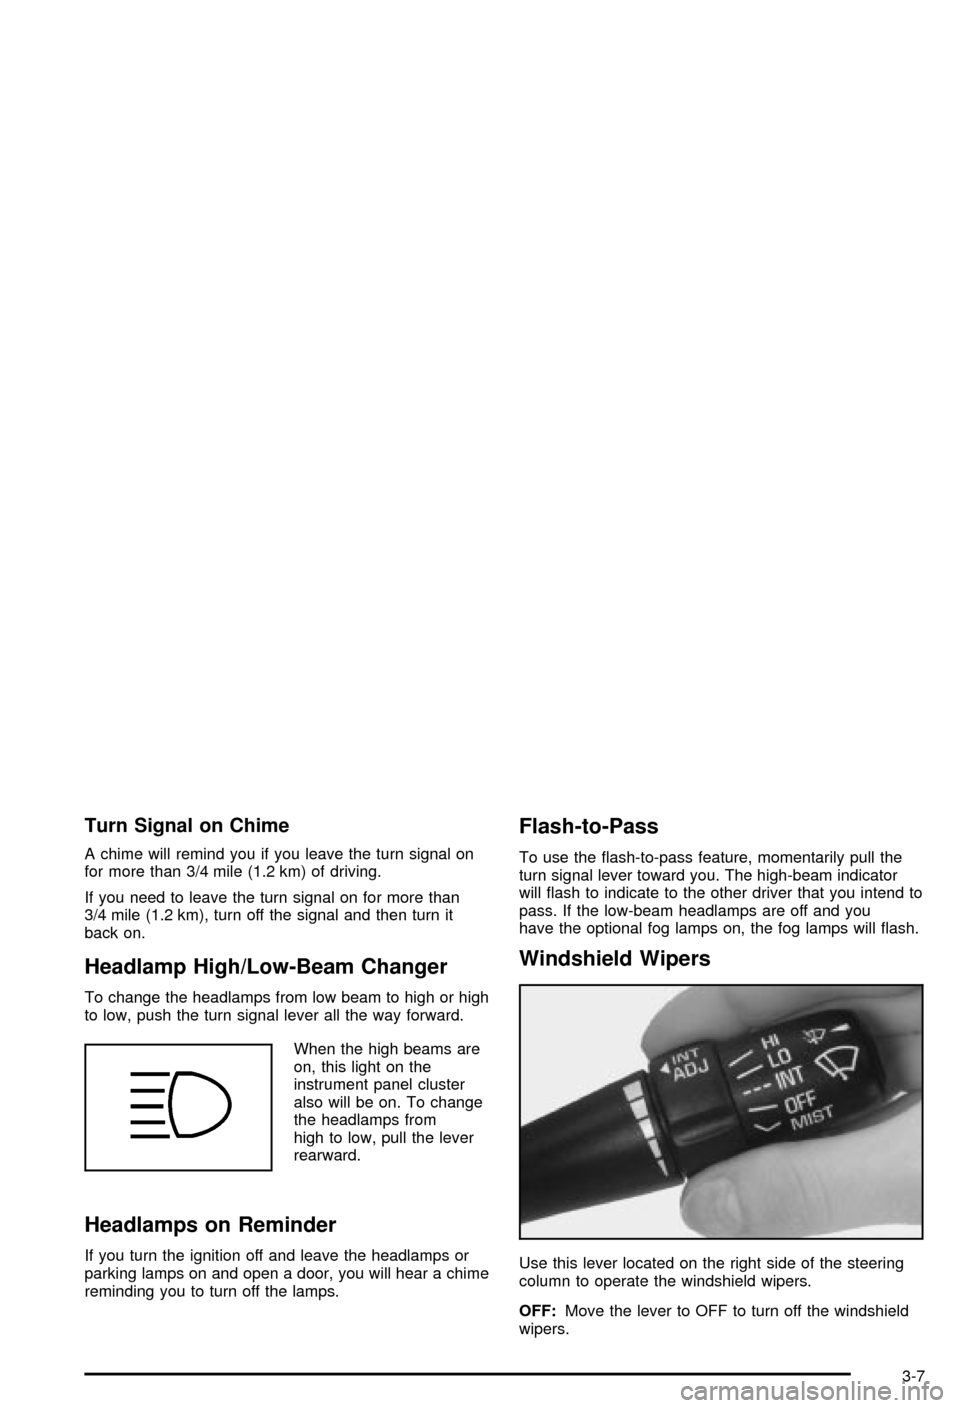
When the high beams are
on, this light on the
instrument panel cluster
also will be on. To change
the headlamps from
high to low, pull the lever
rearward.
Headlamps on Reminder
If you turn the ignition off and leave the headlamps or
parking lamps on and open a door, you will hear a chime
reminding you to turn off the lamps.
Flash-to-Pass
To use the ¯ash-to-pass feature, momentarily pull the
turn signal lever toward you. The high-beam indicator
will ¯ash to indicate to the other driver that you intend to
pass. If the low-beam headlamps are off and you
have the optional fog lamps on, the fog lamps will ¯ash.
Windshield Wipers
Use this lever located on the right side of the steering
column to operate the windshield wipers.
OFF:Move the lever to OFF to turn off the windshield
wipers.
3-7
Page 121 of 368
Cruise Control
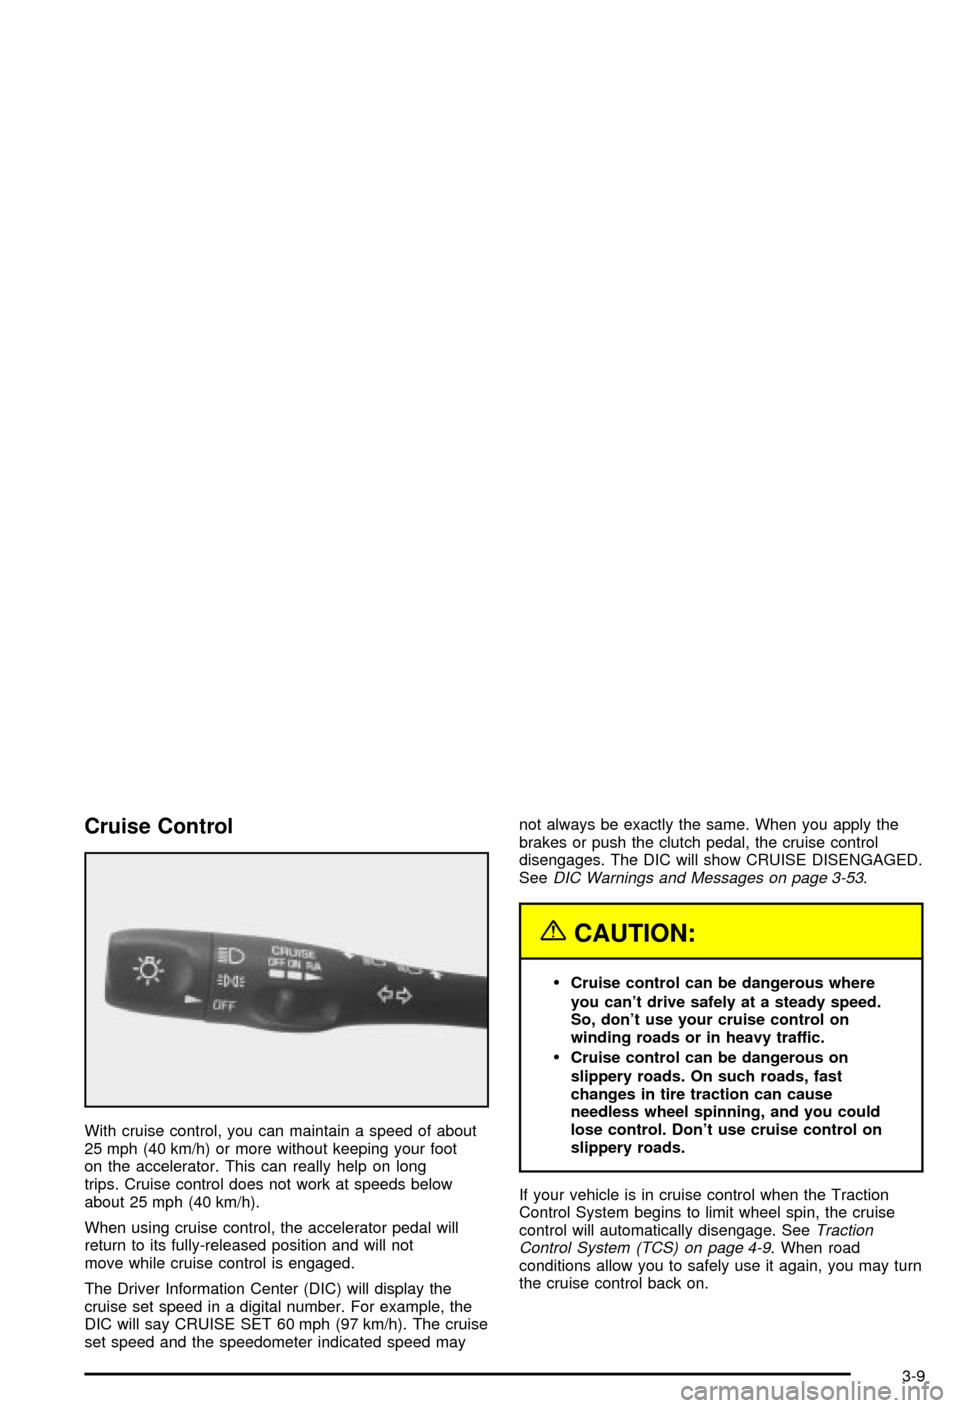
With cruise control, you can maintain a speed of about
25 mph (40 km/h) or more without keeping your foot
on the accelerator. This can really help on long
trips. Cruise control does not work at speeds below
about 25 mph (40 km/h).
When using cruise control, the accelerator pedal will
return to its fully-released position and will not
move while cruise control is engaged.
The Driver Information Center (DIC) will display the
cruise set speed in a digital number. For example, the
DIC will say CRUISE SET 60 mph (97 km/h). The cruise
set speed and the speedometer indicated speed maynot always be exactly the same. When you apply the
brakes or push the clutch pedal, the cruise control
disengages. The DIC will show CRUISE DISENGAGED.
See
DIC Warnings and Messages on page 3-53.
{CAUTION:
·Cruise control can be dangerous where
you can't drive safely at a steady speed.
So, don't use your cruise control on
winding roads or in heavy traffic.
·Cruise control can be dangerous on
slippery roads. On such roads, fast
changes in tire traction can cause
needless wheel spinning, and you could
lose control. Don't use cruise control on
slippery roads.
If your vehicle is in cruise control when the Traction
Control System begins to limit wheel spin, the cruise
control will automatically disengage. See
Traction
Control System (TCS) on page 4-9. When road
conditions allow you to safely use it again, you may turn
the cruise control back on.
3-9
Page 126 of 368

Fog Lamps
Your vehicle may have this feature. Use the fog lamps
for better vision in foggy or misty conditions. Your
parking lamps or low-beam headlamps must be on or
the fog lamps won't work.
To turn the fog lamps on, press the button located on
the instrument panel, to the left of the steering column. A
light in the button will come on when the fog lamps
are on. Press the button again to turn the fog lamps off.
Twilight Sentinelž(Optional in United
States, Standard in Canada)
Twilight Sentinelžcan turn your lamps on and off for
you. A light sensor on top of the instrument panel makes
the Twilight Sentinel
žwork, so be sure it isn't covered.
You can customize your vehicle to turn Twilight
Sentinel
žon or off (except for vehicles ®rst sold in
Canada). SeeDriver Information Center (DIC) on
page 3-44to turn this feature on or off.
When Twilight Sentinel
žis turned on, you will see the
following happen:
·When it's dark enough outside, the front turn signal
lamps (DRL) will go off, and the headlamps and
parking lamps will come on. The other lamps
that come on with headlamps will also come on.
·When it's bright enough outside, the headlamps will
go off, and the front turn signal lamps (DRL) will
come on, as long as the exterior lamp switch is in
the OFF position.
If you start your vehicle in a dark garage, the automatic
headlamp system will come on immediately. Once you
leave the garage, it will take approximately one minute for
the automatic headlamp system to change to DRL if it is
light outside. During that delay, your instrument panel
cluster may not be as bright as usual.
3-14
Page 130 of 368

There are ®ve HUD selections that you can choose to
view in the HUD display. By pressing and holding
the PAGE button, you can scroll through these pages in
the following order:
·Speed Only
·Speed and Gage
·Speed, Tachometer and Gage
·Speed and Tachometer
·Tachometer Only
When you have chosen the desired HUD display,
release the PAGE button.
Gages can be scrolled through by tapping the PAGE
button (only when a gage is displayed). The gages
shown are the following:
·Oil Pressure
·Coolant Temperature
·Fuel LevelThe selections that you choose will remain in the HUD
display until they are changed.
Be sure to continue scanning your displays, controls
and driving environment just as you would in a vehicle
without HUD. If you never look at your instrument
panel cluster, you may not see something important,
such as a warning light. Under important warning
conditions, the CHECK GAGES icon will illuminate in
the HUD. View your Driver Information Center (DIC) for
more information.
3-18