2003 BMW Z4 2.5I ignition
[x] Cancel search: ignitionPage 44 of 106
Driving
44
Windshield washer nozzles
The windshield washer nozzles are heated
automatically
* when the ignition key is in
position 2.
Cruise control*
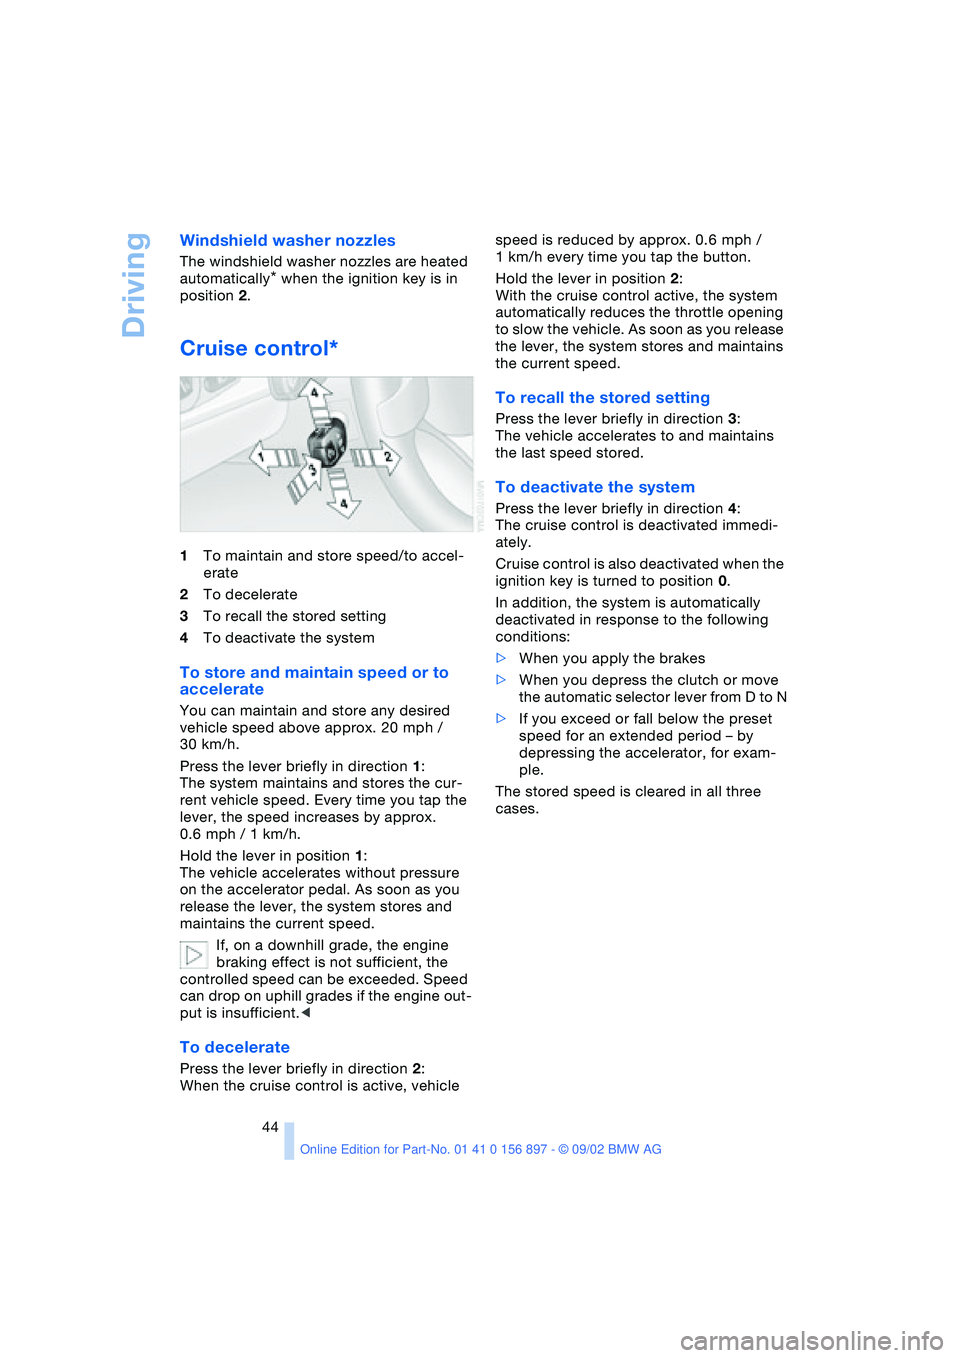
1To maintain and store speed/to accel-
erate
2To decelerate
3To recall the stored setting
4To deactivate the system
To store and maintain speed or to
accelerate
You can maintain and store any desired
vehicle speed above approx. 20 mph /
30 km/h.
Press the lever briefly in direction 1:
The system maintains and stores the cur-
rent vehicle speed. Every time you tap the
lever, the speed increases by approx.
0.6 mph / 1 km/h.
Hold the lever in position 1:
The vehicle accelerates without pressure
on the accelerator pedal. As soon as you
release the lever, the system stores and
maintains the current speed.
If, on a downhill grade, the engine
braking effect is not sufficient, the
controlled speed can be exceeded. Speed
can drop on uphill grades if the engine out-
put is insufficient.<
To decelerate
Press the lever briefly in direction 2:
When the cruise control is active, vehicle speed is reduced by approx. 0.6 mph /
1 km/h every time you tap the button.
Hold the lever in position 2:
With the cruise control active, the system
automatically reduces the throttle opening
to slow the vehicle. As soon as you release
the lever, the system stores and maintains
the current speed.
To recall the stored setting
Press the lever briefly in direction 3:
The vehicle accelerates to and maintains
the last speed stored.
To deactivate the system
Press the lever briefly in direction 4:
The cruise control is deactivated immedi-
ately.
Cruise control is also deactivated when the
ignition key is turned to position 0.
In addition, the system is automatically
deactivated in response to the following
conditions:
>When you apply the brakes
>When you depress the clutch or move
the automatic selector lever from D to N
>If you exceed or fall below the preset
speed for an extended period – by
depressing the accelerator, for exam-
ple.
The stored speed is cleared in all three
cases.
Page 45 of 106

At a glance
Controls
Driving tips
Mobility
Reference
45
Lamps
Parking lamps/Low beams
Parking lamps
The front, rear and side vehicle
lighting is switched on. You can use
the parking lamps to signal the
position of the vehicle when it is parked.
For information on lighting on one side of
the vehicle for parking, which is available
as an additional feature, refer to page 46.
Low beams
When you switch off the ignition
with the low beam headlamps on,
only the parking lamps will remain
on.
Follow me home lamps:
When you activate the headlamp flasher
after parking the vehicle and switching off
the lights, the low beams will come on for a
brief period.
You can also have this function acti-
vated/deactivated if you wish.<
Defective bulbs
The defective bulb indicator lamp
lights up:
At least one bulb of the vehicle's
exterior lighting has failed.
For replacing bulbs: refer to page 84.
LIGHTS ON warning
Whenever you open the driver's door after
having turned the ignition key to position 0,
you will hear an acoustic signal for a few seconds to remind you that the lamps have
not been switched off
.
Daytime driving lamps*
If you wish, the light switch can be left in
the second position. When the ignition is
switched off, the external lighting is also
switched off.
You can have the activation settings
for the daytime driving lamps pro-
grammed on your vehicle.<
Automatic headlamp control*
When the switch is set to this posi-
tion, the system automatically
switches the low beams on and off
in response to changes in ambient light – in
tunnels, at dusk, etc. – as well as to rain and
snow.
The vehicle's external lights remain
on constantly when you switch on the
front fog lamps after the headlights have
come on automatically.<
Automatic headlamp control cannot
serve as a substitute for the driver's
judgement in determining when the vehicle
lights should be switched on. For example,
the sensors are not able to detect fog. To
avoid safety risks, you should respond to
these kinds of low-visibility situations by
switching the headlights on manually.<
You can have the sensitivity of your
vehicle's automatic headlamp control
adjusted.<
Page 46 of 106
Lamps
46
High beams/Standing
lamps
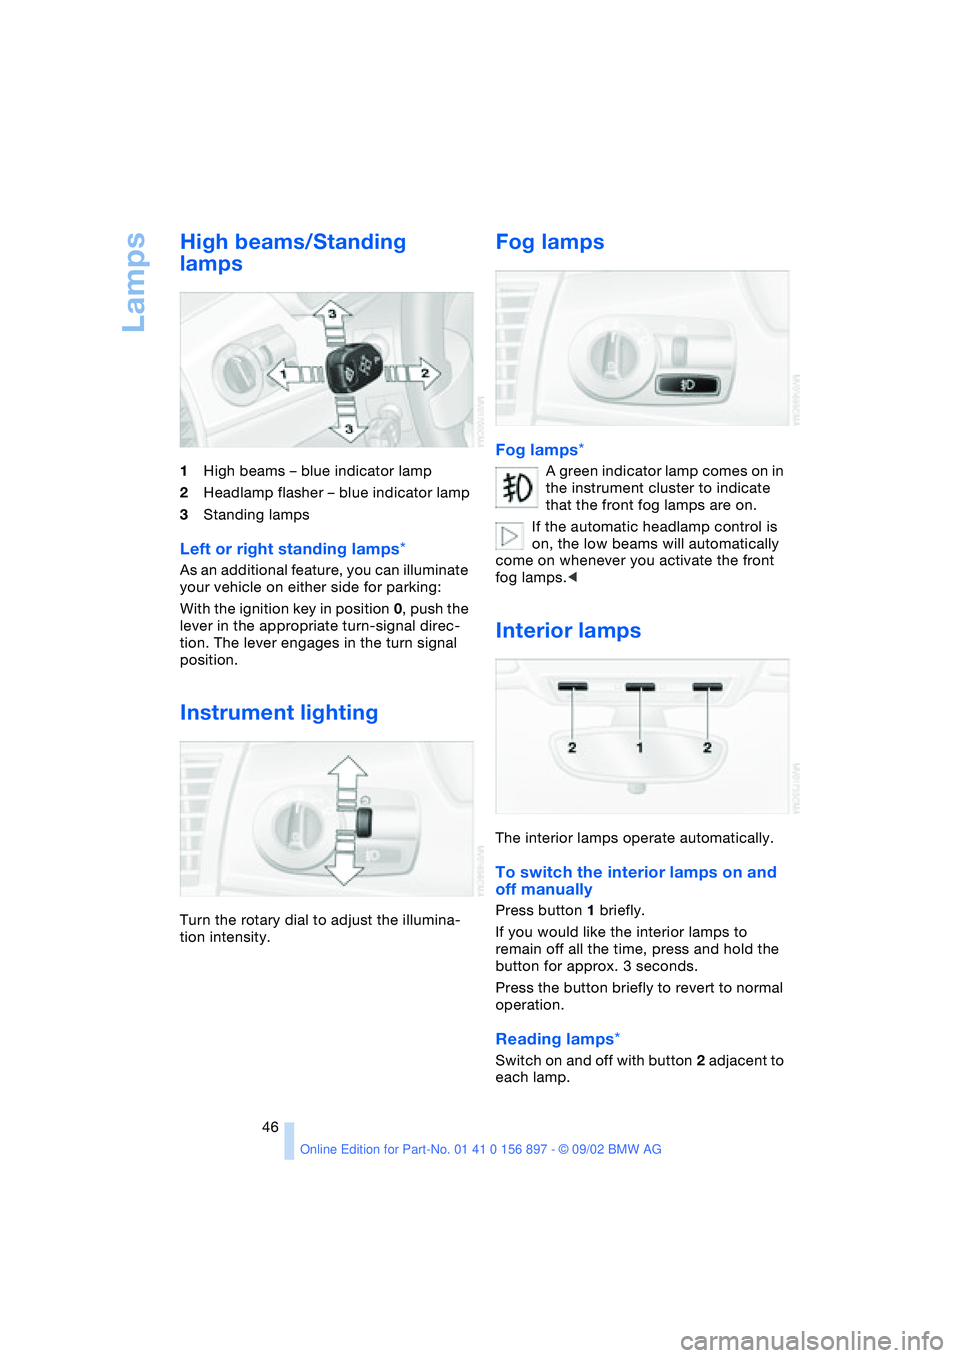
1High beams – blue indicator lamp
2Headlamp flasher – blue indicator lamp
3Standing lamps
Left or right standing lamps*
As an additional feature, you can illuminate
your vehicle on either side for parking:
With the ignition key in position 0, push the
lever in the appropriate turn-signal direc-
tion. The lever engages in the turn signal
position.
Instrument lighting
Turn the rotary dial to adjust the illumina-
tion intensity.
Fog lamps
Fog lamps*
A green indicator lamp comes on in
the instrument cluster to indicate
that the front fog lamps are on.
If the automatic headlamp control is
on, the low beams will automatically
come on whenever you activate the front
fog lamps.<
Interior lamps
The interior lamps operate automatically.
To switch the interior lamps on and
off manually
Press button 1 briefly.
If you would like the interior lamps to
remain off all the time, press and hold the
button for approx. 3 seconds.
Press the button briefly to revert to normal
operation.
Reading lamps*
Switch on and off with button 2 adjacent to
each lamp.
Page 47 of 106
At a glance
Controls
Driving tips
Mobility
Reference
47
Everything under control
Odometer
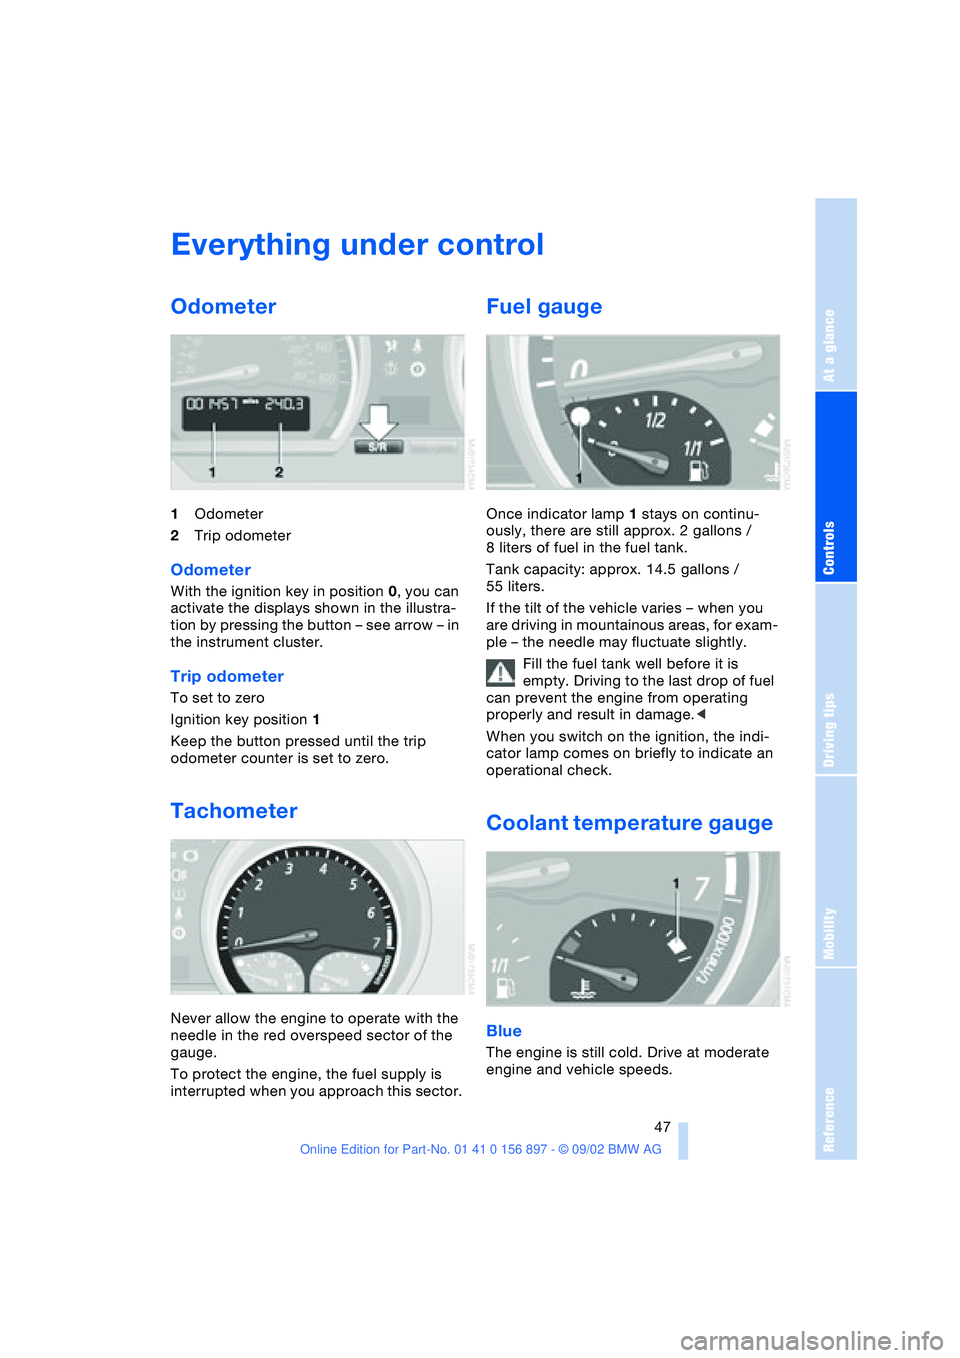
1Odometer
2Trip odometer
Odometer
With the ignition key in position 0, you can
activate the displays shown in the illustra-
tion by pressing the button – see arrow – in
the instrument cluster.
Trip odometer
To set to zero
Ignition key position 1
Keep the button pressed until the trip
odometer counter is set to zero.
Tachometer
Never allow the engine to operate with the
needle in the red overspeed sector of the
gauge.
To protect the engine, the fuel supply is
interrupted when you approach this sector.
Fuel gauge
Once indicator lamp 1 stays on continu-
ously, there are still approx. 2 gallons /
8 liters of fuel in the fuel tank.
Tank capacity: approx. 14.5 gallons /
55 liters.
If the tilt of the vehicle varies – when you
are driving in mountainous areas, for exam-
ple – the needle may fluctuate slightly.
Fill the fuel tank well before it is
empty. Driving to the last drop of fuel
can prevent the engine from operating
properly and result in damage.<
When you switch on the ignition, the indi-
cator lamp comes on briefly to indicate an
operational check.
Coolant temperature gauge
Blue
The engine is still cold. Drive at moderate
engine and vehicle speeds.
Page 48 of 106
Everything under control
48
Between the blue and red zones
Normal operating range. The needle may
rise as far as the edge of the red sector dur-
ing normal operation.
Red
When you switch on the ignition, warning
lamp 1 comes on briefly to indicate an
operational check.
Comes on while driving:
The engine has overheated. Switch off the
engine immediately and allow it to cool
down.
For checking the coolant level, refer to
page 80.
Service interval display
Remaining distance to next service
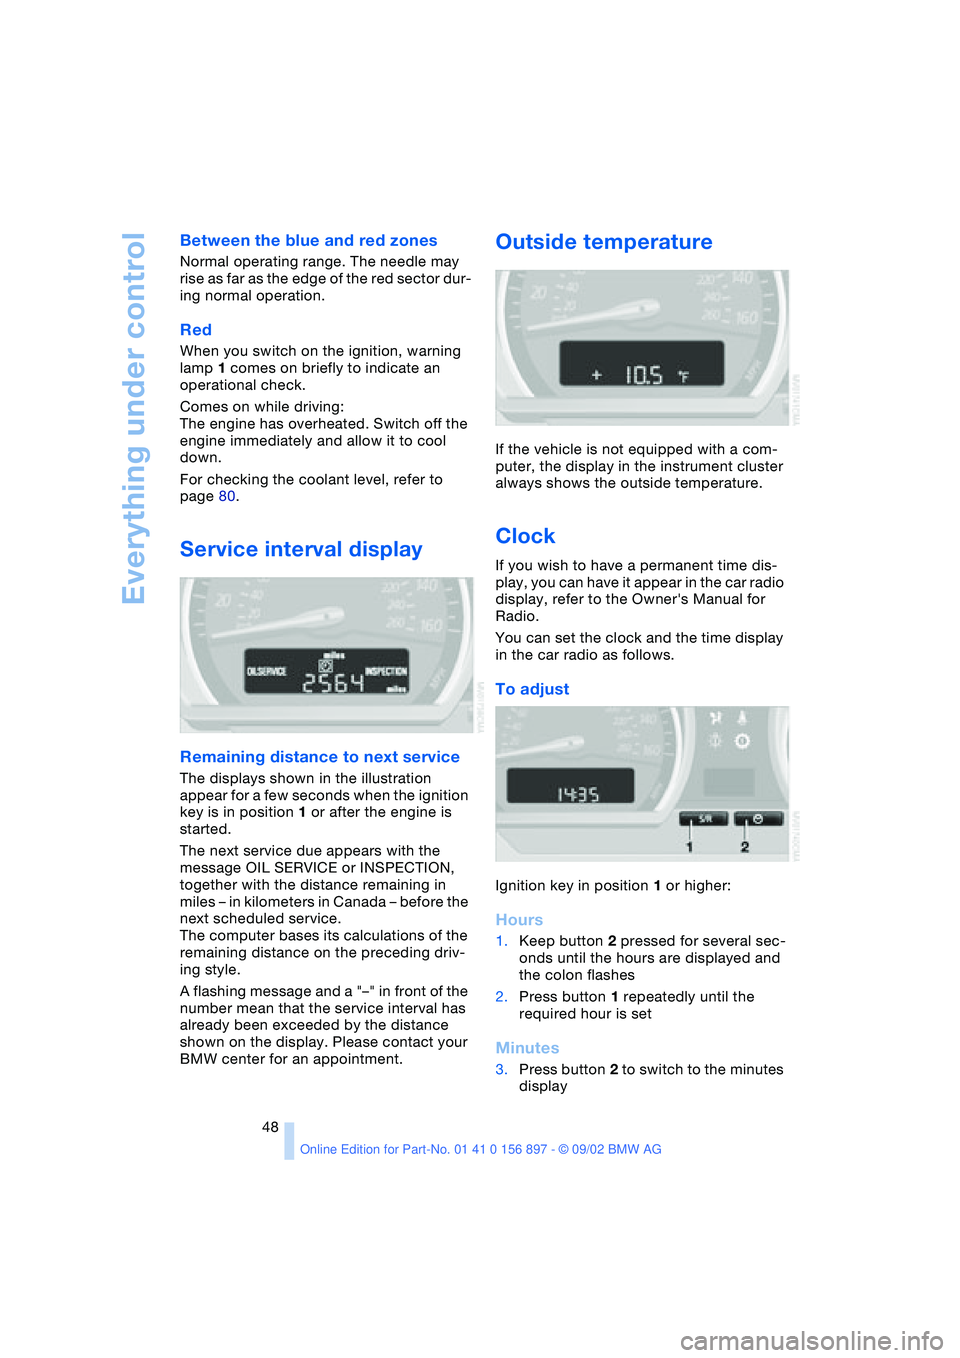
The displays shown in the illustration
appear for a few seconds when the ignition
key is in position 1 or after the engine is
started.
The next service due appears with the
message OIL SERVICE or INSPECTION,
together with the distance remaining in
miles – in kilometers in Canada – before the
next scheduled service.
The computer bases its calculations of the
remaining distance on the preceding driv-
ing style.
A flashing message and a "–" in front of the
number mean that the service interval has
already been exceeded by the distance
shown on the display. Please contact your
BMW center for an appointment.
Outside temperature
If the vehicle is not equipped with a com-
puter, the display in the instrument cluster
always shows the outside temperature.
Clock
If you wish to have a permanent time dis-
play, you can have it appear in the car radio
display, refer to the Owner's Manual for
Radio.
You can set the clock and the time display
in the car radio as follows.
To adjust
Ignition key in position 1 or higher:
Hours
1.Keep button 2 pressed for several sec-
onds until the hours are displayed and
the colon flashes
2.Press button 1 repeatedly until the
required hour is set
Minutes
3.Press button 2 to switch to the minutes
display
Page 49 of 106
At a glance
Controls
Driving tips
Mobility
Reference
49
4.Press button 1 repeatedly until the
required minutes are set
5.Press button 2 to confirm the settings.
The set time of day is transferred to the car
radio display or appears in the instrument
cluster display.
Display mode
In ignition key position 0:
Press button 1.
The time of day is displayed for several
seconds.
Computer*
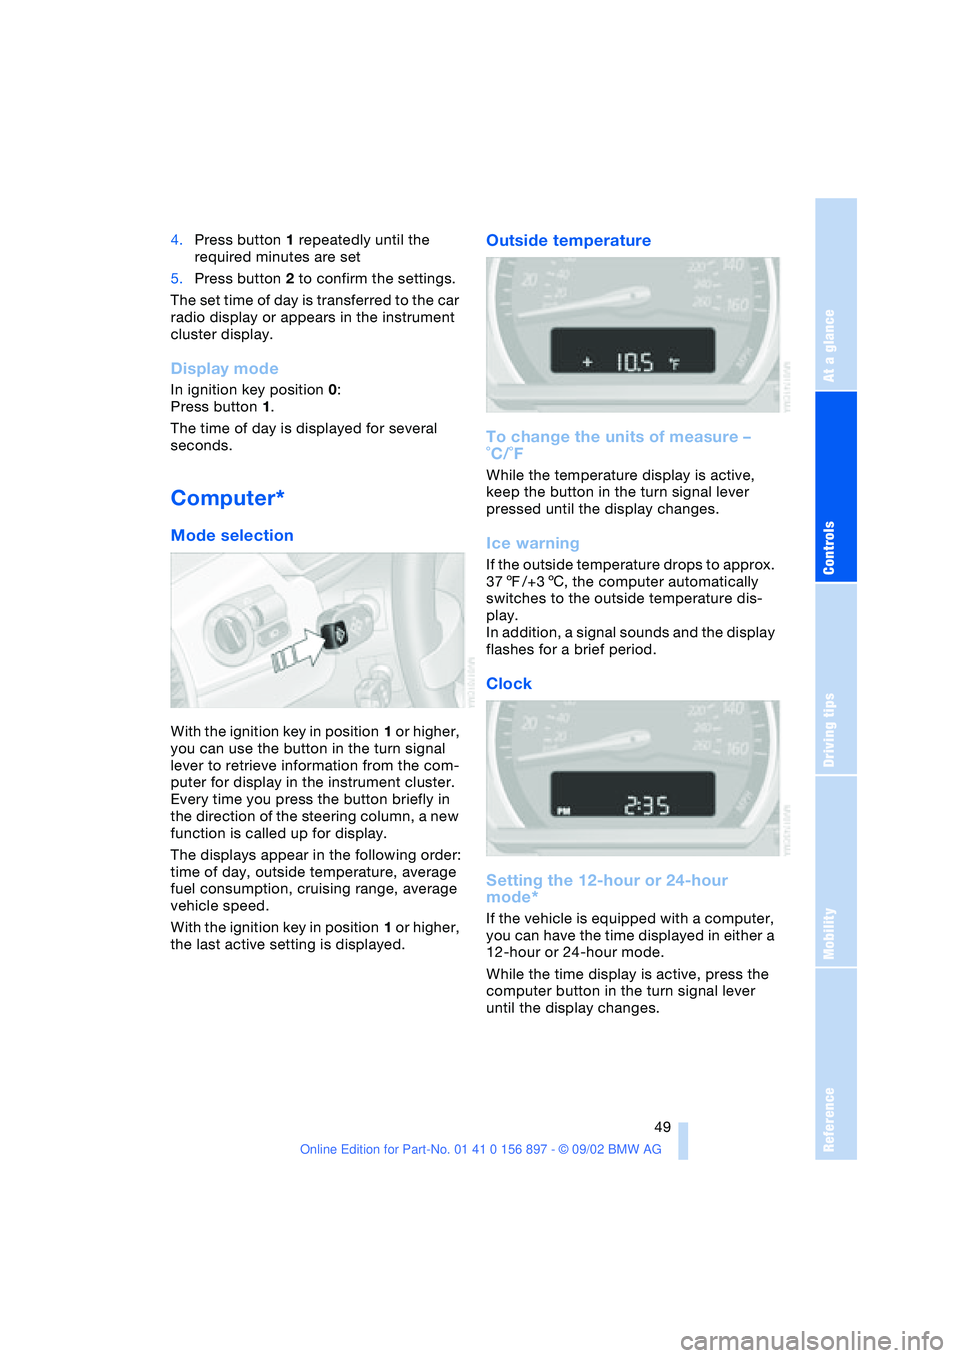
Mode selection
With the ignition key in position 1 or higher,
you can use the button in the turn signal
lever to retrieve information from the com-
puter for display in the instrument cluster.
Every time you press the button briefly in
the direction of the steering column, a new
function is called up for display.
The displays appear in the following order:
time of day, outside temperature, average
fuel consumption, cruising range, average
vehicle speed.
With the ignition key in position 1 or higher,
the last active setting is displayed.
Outside temperature
To change the units of measure –
˚C/˚F
While the temperature display is active,
keep the button in the turn signal lever
pressed until the display changes.
Ice warning
If the outside temperature drops to approx.
377/+36, the computer automatically
switches to the outside temperature dis-
play.
In addition, a signal sounds and the display
flashes for a brief period.
Clock
Setting the 12-hour or 24-hour
mode*
If the vehicle is equipped with a computer,
you can have the time displayed in either a
12-hour or 24-hour mode.
While the time display is active, press the
computer button in the turn signal lever
until the display changes.
Page 51 of 106
At a glance
Controls
Driving tips
Mobility
Reference
51
Technology for safety and driving
convenience
Dynamic Stability Control
DSC
The concept
DSC maintains vehicle stability, even in
critical driving situations.
The DSC is operational every time you start
the engine.
For additional details on the system
and the various functions, please
refer to the "Technology" brochure.<
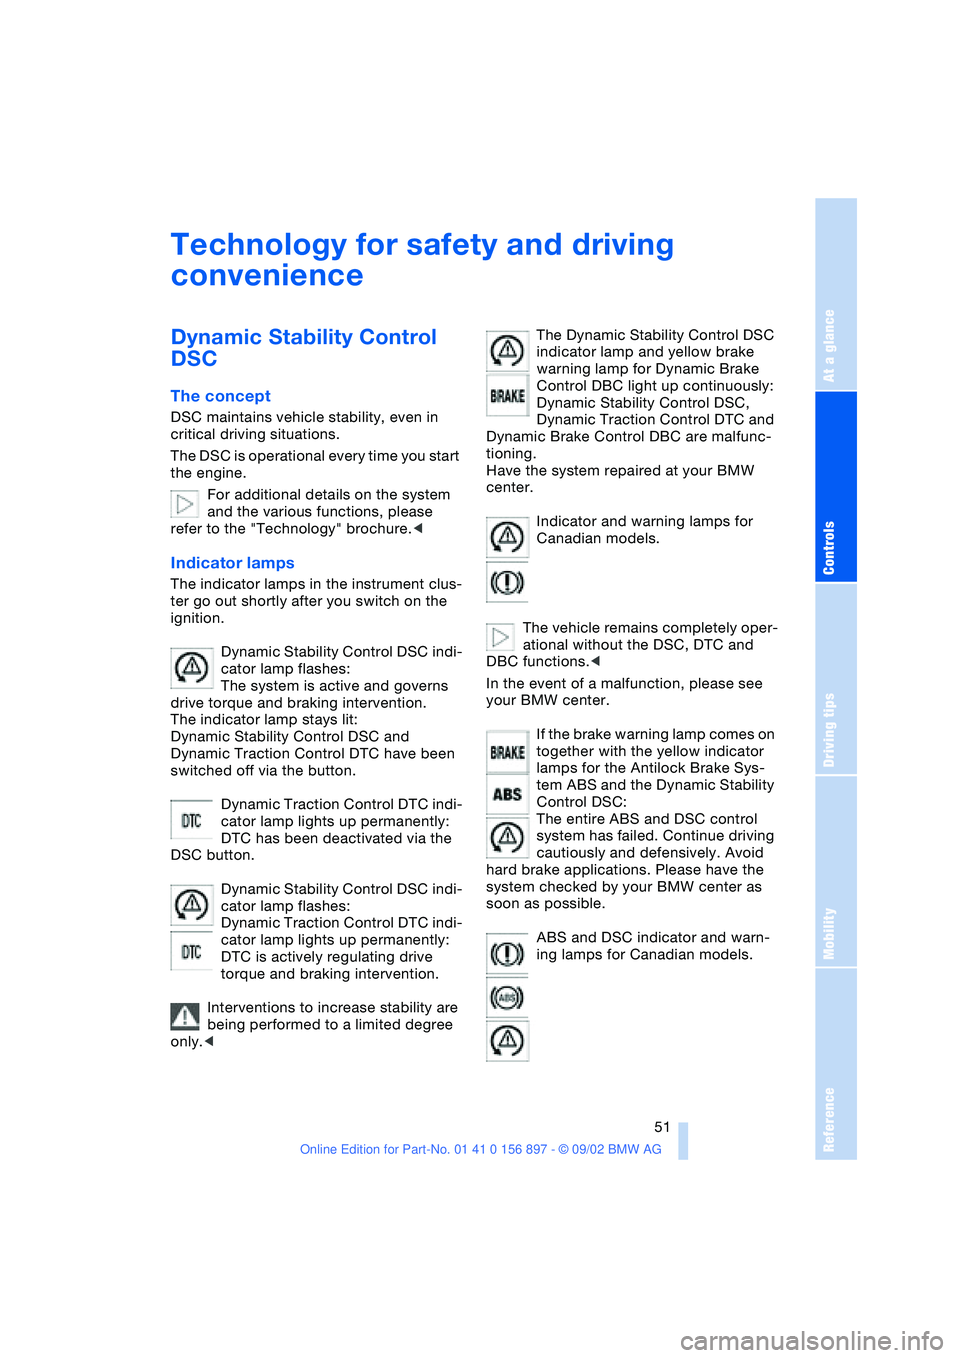
Indicator lamps
The indicator lamps in the instrument clus-
ter go out shortly after you switch on the
ignition.
Dynamic Stability Control DSC indi-
cator lamp flashes:
The system is active and governs
drive torque and braking intervention.
The indicator lamp stays lit:
Dynamic Stability Control DSC and
Dynamic Traction Control DTC have been
switched off via the button.
Dynamic Traction Control DTC indi-
cator lamp lights up permanently:
DTC has been deactivated via the
DSC button.
Dynamic Stability Control DSC indi-
cator lamp flashes:
Dynamic Traction Control DTC indi-
cator lamp lights up permanently:
DTC is actively regulating drive
torque and braking intervention.
Interventions to increase stability are
being performed to a limited degree
only.
warning lamp for Dynamic Brake
Control DBC light up continuously:
Dynamic Stability Control DSC,
Dynamic Traction Control DTC and
Dynamic Brake Control DBC are malfunc-
tioning.
Have the system repaired at your BMW
center.
Indicator and warning lamps for
Canadian models.
The vehicle remains completely oper-
ational without the DSC, DTC and
DBC functions.<
In the event of a malfunction, please see
your BMW center.
If the brake warning lamp comes on
together with the yellow indicator
lamps for the Antilock Brake Sys-
tem ABS and the Dynamic Stability
Control DSC:
The entire ABS and DSC control
system has failed. Continue driving
cautiously and defensively. Avoid
hard brake applications. Please have the
system checked by your BMW center as
soon as possible.
ABS and DSC indicator and warn-
ing lamps for Canadian models.
Page 54 of 106
Technology for safety and driving convenience
54
System malfunction
The indicator lamp lights up yellow:
There is a malfunction or fault in the
Flat Tire Monitor.
In the event of this, please contact your
BMW center.
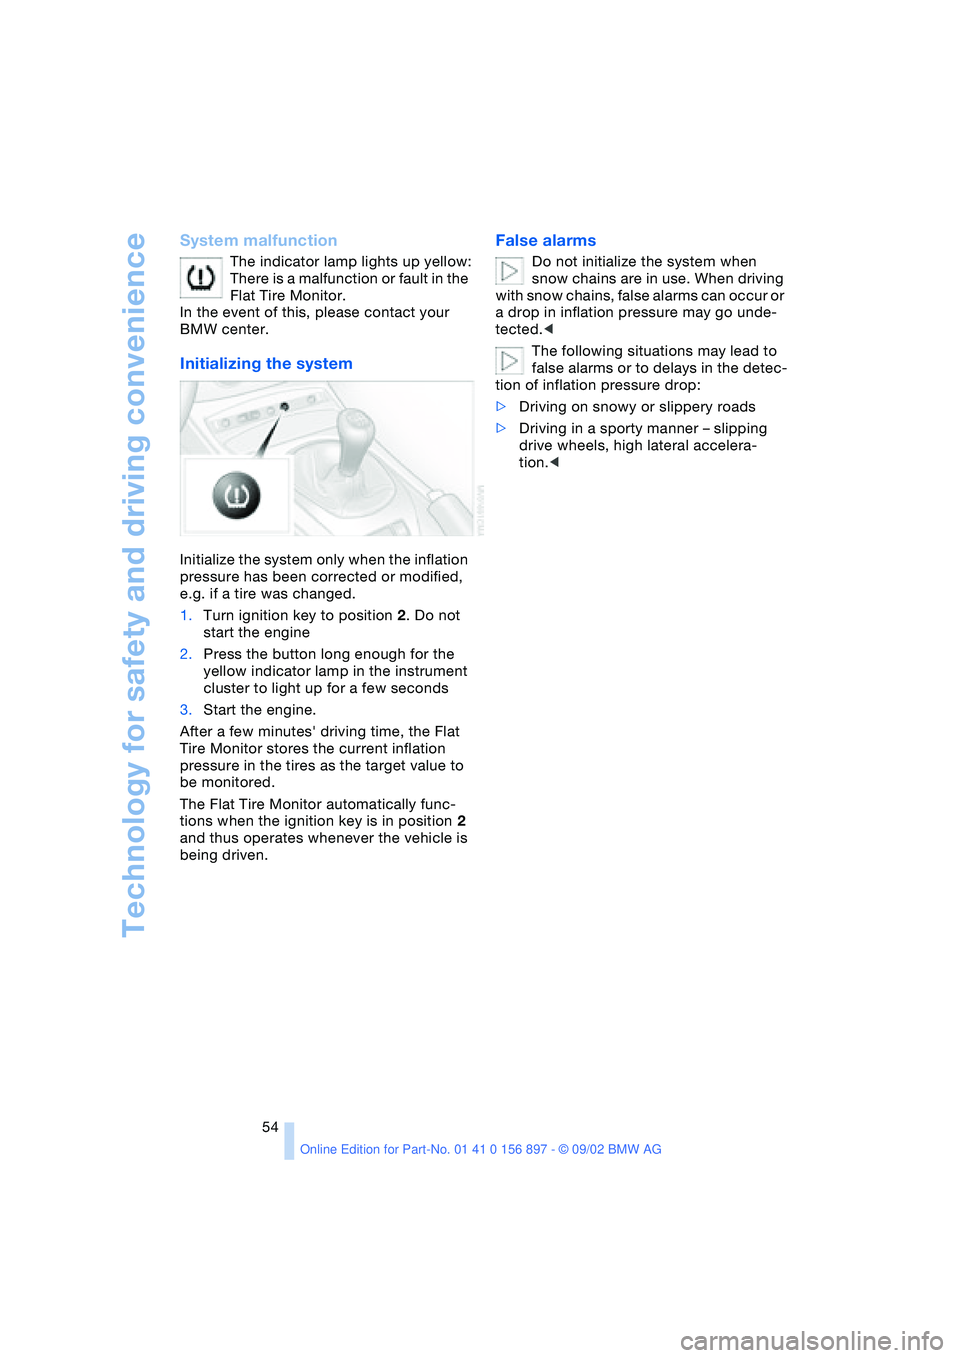
Initializing the system
Initialize the system only when the inflation
pressure has been corrected or modified,
e.g. if a tire was changed.
1.Turn ignition key to position 2. Do not
start the engine
2.Press the button long enough for the
yellow indicator lamp in the instrument
cluster to light up for a few seconds
3.Start the engine.
After a few minutes' driving time, the Flat
Tire Monitor stores the current inflation
pressure in the tires as the target value to
be monitored.
The Flat Tire Monitor automatically func-
tions when the ignition key is in position 2
and thus operates whenever the vehicle is
being driven.
False alarms
Do not initialize the system when
snow chains are in use. When driving
with snow chains, false alarms can occur or
a drop in inflation pressure may go unde-
tected.<
The following situations may lead to
false alarms or to delays in the detec-
tion of inflation pressure drop:
>Driving on snowy or slippery roads
>Driving in a sporty manner – slipping
drive wheels, high lateral accelera-
tion.<