2003 BMW Z4 2.5I service
[x] Cancel search: servicePage 52 of 106
Technology for safety and driving convenience
52 For more information on the various
systems, refer to the "Technology"
brochure.<
Switching off DSC/Activating DTC
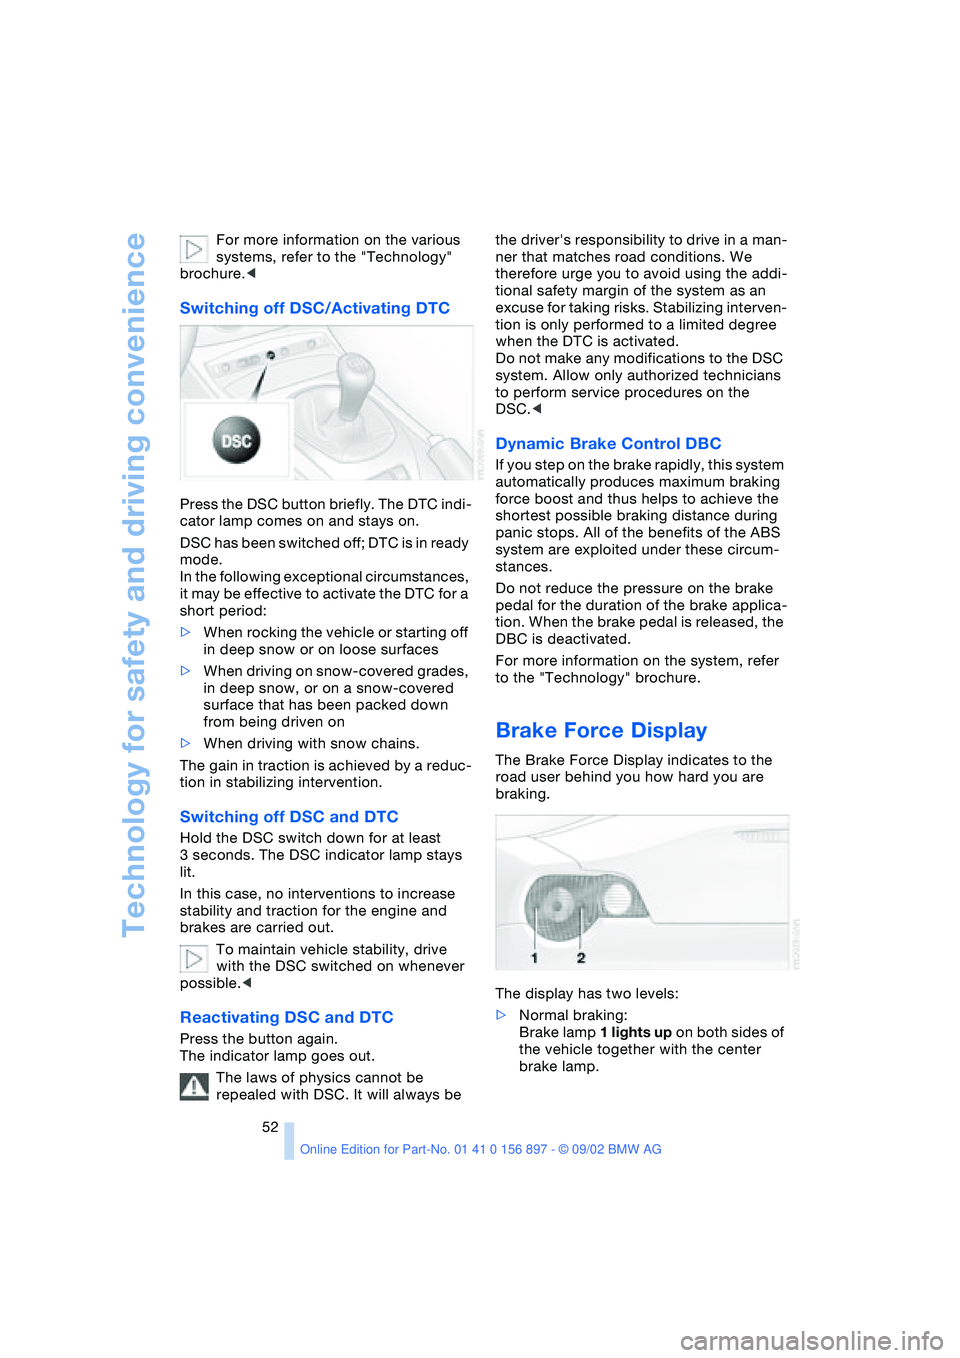
Press the DSC button briefly. The DTC indi-
cator lamp comes on and stays on.
DSC has been switched off; DTC is in ready
mode.
In the following exceptional circumstances,
it may be effective to activate the DTC for a
short period:
>When rocking the vehicle or starting off
in deep snow or on loose surfaces
>When driving on snow-covered grades,
in deep snow, or on a snow-covered
surface that has been packed down
from being driven on
>When driving with snow chains.
The gain in traction is achieved by a reduc-
tion in stabilizing intervention.
Switching off DSC and DTC
Hold the DSC switch down for at least
3 seconds. The DSC indicator lamp stays
lit.
In this case, no interventions to increase
stability and traction for the engine and
brakes are carried out.
To maintain vehicle stability, drive
with the DSC switched on whenever
possible.<
Reactivating DSC and DTC
Press the button again.
The indicator lamp goes out.
The laws of physics cannot be
repealed with DSC. It will always be the driver's responsibility to drive in a man-
ner that matches road conditions. We
therefore urge you to avoid using the addi-
tional safety margin of the system as an
excuse for taking risks. Stabilizing interven-
tion is only performed to a limited degree
when the DTC is activated.
Do not make any modifications to the DSC
system. Allow only authorized technicians
to perform service procedures on the
DSC.<
Dynamic Brake Control DBC
If you step on the brake rapidly, this system
automatically produces maximum braking
force boost and thus helps to achieve the
shortest possible braking distance during
panic stops. All of the benefits of the ABS
system are exploited under these circum-
stances.
Do not reduce the pressure on the brake
pedal for the duration of the brake applica-
tion. When the brake pedal is released, the
DBC is deactivated.
For more information on the system, refer
to the "Technology" brochure.
Brake Force Display
The Brake Force Display indicates to the
road user behind you how hard you are
braking.
The display has two levels:
>Normal braking:
Brake lamp 1 lights up on both sides of
the vehicle together with the center
brake lamp.
Page 64 of 106
Special operating instructions
64
Special operating instructions
Break-in procedures
To ensure that your vehicle provides maxi-
mum economy throughout a long service
life, we request that you observe the fol-
lowing:
Engine and differential
Up to 1,250 miles / 2,000 km:
Drive at varying engine and road speeds,
but do not exceed the following engine or
road speed:
4,500/min or 100 mph / 160 km/h:
Obey your local and state maximum speed
limits.
Refrain from using full throttle and avoid
pressing the accelerator beyond the kick-
down point.
After you have driven 1,250 miles /
2,000 km, you can gradually increase the
engine or road speeds.
You should also comply with these break-in
procedures if the engine or differential is
replaced later in the course of the vehicle's
service life.
Tires
Due to technical factors associated with
their manufacture, tires do not achieve their
full traction potential until an initial break-in
period has elapsed. You should therefore
drive with extra caution during the first
200 miles / 300 km.
Obey your local and state maximum speed
limits.
When the vehicle is operated on wet
or slushy roads, a wedge of water
may form between the tire and the road
surface. This phenomenon is referred to as
hydroplaning and can lead to partial or
complete loss of traction, vehicle control
and braking effectiveness. Reduce your
speed on wet roads.<
Brake system
Approx. 300 miles / 500 km must elapse
before the brake pads and rotors achieve
their optimal surface and wear pattern.
To break in the separate parking brake
drums, apply the parking brake lightly when
coasting to a standstill – at a traffic signal,
for instance; use caution to avoid posing a
danger to other road users.
To avoid corrosion, repeat this procedure
from time to time.
The brake lamps do not come on when the
parking brake is set.
Vacuum for the brake system servo
unit on your BMW is available only
when the engine is running. When you
move the car with the engine off – e.g., by
towing – substantially higher levels of pedal
force will be required to brake the vehicle.<
Clutch
The clutch will achieve its optimal function-
ality after approx. 300 miles / 500 km. Shift
gears carefully during the break-in period.
Page 70 of 106

Refueling
70
Refueling
Fuel filler door
1.Open fuel filler door
2.Turn the filler cap in a counter-clock-
wise direction
3.Place the filler cap in the bracket on the
filler door.
Releasing manually
If an electrical malfunction occurs, you can
unlock the fuel filler door manually.
1.Remove the covers of the tail lamps by
turning the lock to the right; refer also to
page 87
2.Pull the luggage compartment trim
panel slightly toward the interior.
The green button with the fuel pump
symbol is revealed
3.Undo the adhesive strip and pull off
4.Pull on the knob
Fuel filler cap is released.
Fuel gas cap
Close the gas cap carefully after refu-
eling until a "click" is heard. While closing, be sure not to squeeze the strap
which is fastened to the cap. A loose or
missing cap will activate the "Check gas
cap" lamp.<
Check gas cap
This indicator lamp comes on when
the fuel gas cap is loose or missing.
Close the gas cap tightly as described
above.
Tank capacity: approx. 14.5 gallons /
55 liters, of which approx. 2.1 gallons /
8 liters are reserve capacity.
Simple and environmentally friendly
When handling fuels, comply with all
of the applicable safety precautions
posted at the service station.<
When refueling, insert the filler nozzle com-
pletely into the filler pipe. Pulling the nozzle
out of the pipe during refueling
>results in premature shutoff
>and will reduce the effect of the vapor
recovery system on the pump.
The fuel tank is full when the filler nozzle
shuts off the first time.
Fill the fuel tank before it is com-
pletely empty. Driving to the last drop
of fuel can prevent the engine from operat-
ing properly and result in damage.<
Fuel specifications
The engine uses lead-free gasoline only.
Required fuel:
>Premium Unleaded Gasoline,
min. 91 AKI.
AKI = Anti Knock Index.
Do not use leaded fuels. The use of
leaded fuels will cause permanent
damage to the system's oxygen sensor and
the catalytic converter.<
Page 71 of 106
At a glance
Controls
Driving tips
Mobility
Reference
71
Wheels and tires
Tire inflation pressure
Information for your safety
The factory-approved Run Flat tires are
matched to the vehicle and have been
selected to provide optimum safety and
driving comfort.
It is not merely the tire's service life, but
also driving comfort and – above all else –
driving safety that depend on the condition
of the tires and the maintenance of the
specified tire pressure.
Incorrect tire inflation pressure is a fre-
quent cause of tire damage. It also signifi-
cantly influences the roadholding ability of
your BMW.
Check tire inflation pressures regu-
larly – at least every two weeks and
before every extended journey. If this is not
done, incorrect tire pressures can cause
driving instability or tire damage, ultimately
resulting in accidents.<
Checking tire pressures
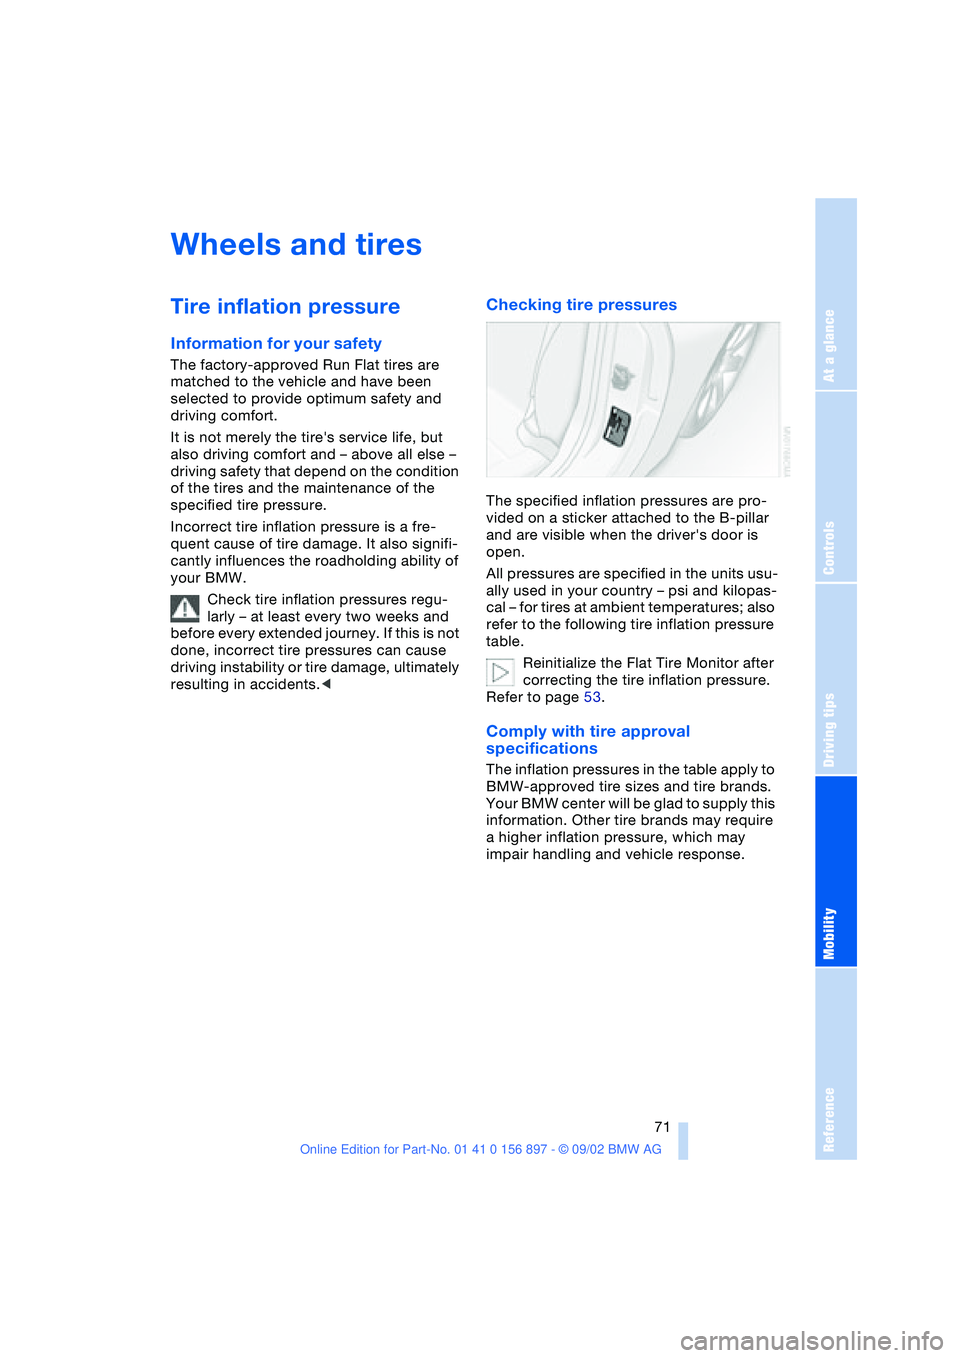
The specified inflation pressures are pro-
vided on a sticker attached to the B-pillar
and are visible when the driver's door is
open.
All pressures are specified in the units usu-
ally used in your country – psi and kilopas-
cal – for tires at ambient temperatures; also
refer to the following tire inflation pressure
table.
Reinitialize the Flat Tire Monitor after
correcting the tire inflation pressure.
Refer to page 53.
Comply with tire approval
specifications
The inflation pressures in the table apply to
BMW-approved tire sizes and tire brands.
Your BMW center will be glad to supply this
information. Other tire brands may require
a higher inflation pressure, which may
impair handling and vehicle response.
Page 74 of 106
Wheels and tires
74 one and one-half (1 γ) times as well on the
government course as a tire graded 100.
The relative performance of tires depends
upon the actual conditions of their use,
however, and may depart significantly from
the norm due to variations in driving habits,
service practices and differences in road
characteristics and climate.
Traction
The traction grades, from highest to lowest,
are AA, A, B and C.
Those grades represent the tire's ability to
stop on wet pavement as measured under
controlled conditions on specified govern-
ment test surfaces of asphalt and concrete.
A tire marked C may have poor traction
performance.
The traction grade assigned to this
tire is based on straight-ahead brak-
ing traction tests, and does not include
acceleration, cornering, hydroplaning, or
peak traction characteristics.<
Temperature
The temperature grades are A – the
highest – B, and C, representing the tire's
resistance to the generation of heat and its
ability to dissipate heat when tested under
controlled conditions on a specified indoor
laboratory test wheel.
Sustained high temperature can cause the
material of the tire to degenerate and
reduce tire life, and excessive temperature
can lead to sudden tire failure. The grade C
corresponds to a level of performance
which all passenger car tires must meet
under the Federal Motor Vehicle Safety
Standard No. 109. Grades B and A repre-
sent higher levels of performance on the
laboratory test wheel than the minimum
required by law.
The temperature grade for this tire is
established for a tire that is properly
inflated and not overloaded. Excessive
speed, under-inflation, or excessive load-
ing, either separately or in combination,
can cause heat buildup and possible tire
failure.<
Uniform Tire Quality Grading
Quality grades can be found where appli-
cable on the tire sidewall between tread
shoulder and maximum section width. For
example:
Tread wear 200 Traction AA
Temperature A
Wheel and tire combina-
tions
The right choice
Use wheels and tires approved by
BMW for your particular vehicle. Vari-
ations in factors such as manufacturing tol-
erances mean that even wheels and tires
with identical official size ratings could
actually have dimensions different from the
approved units. These differences could
lead to body contact, and with it the risk of
severe accidents. If non-approved wheels
and tires are used, BMW cannot evaluate
their suitability, and therefore cannot be
held liable for driving safety.<
BMW tests certain tire brands for each tire
size, classifies them as road-safe and
approves them. Consult your BMW center
for more information. Observe any country-
specific regulations, e.g. on making a cor-
responding entry in the vehicle documents.
The correct wheel and tire combina-
tion affects different systems such as
ABS, DSC, DTC and DBC. The function of
these systems is impaired if improper
wheel and tire combinations are used.
For this reason, use tires of the same brand
and tread configuration. In the event of a
flat tire, for example, remount the approved
wheel and tire combination as soon as pos-
sible.<
Page 81 of 106
At a glance
Controls
Driving tips
Mobility
Reference
81
allow accumulated pressure to escape,
then open completely
2.The coolant level is correct when the
upper end of the red float is at least
even with the upper edge of the filler
neck but no more than ι in / 2 cm
above it, that is, up to the second mark
on the float. Refer also to the schematic
diagram next to the filler neck
3.If necessary, add coolant. Slowly add
coolant until the correct level is reached
– do not overfill.
Comply with the applicable environ-
mental laws regulating the disposal of
extended-duty antifreeze with corrosion
inhibitor.<
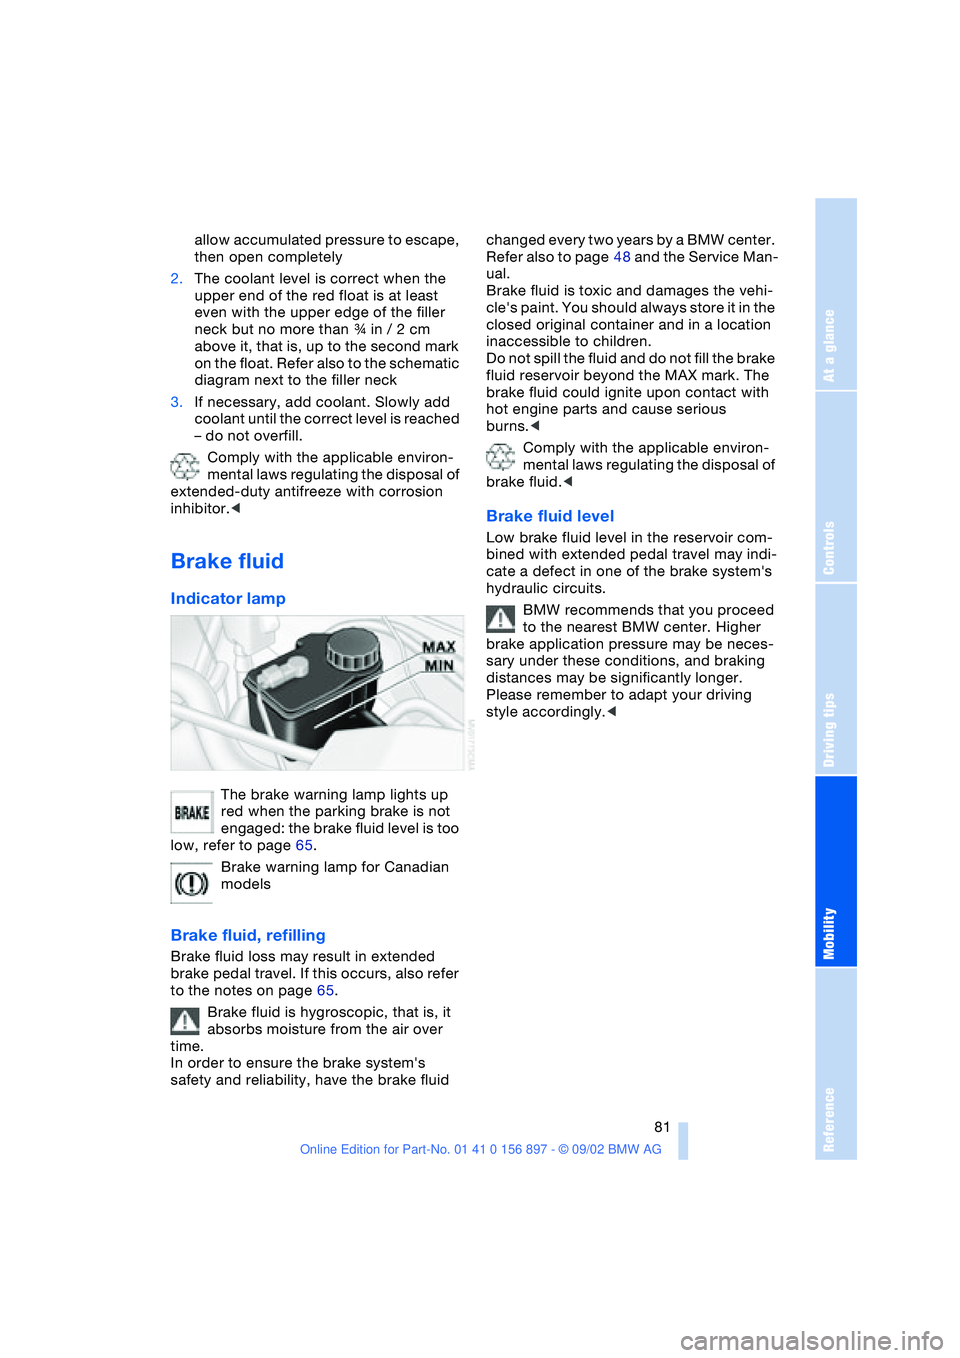
Brake fluid
Indicator lamp
The brake warning lamp lights up
red when the parking brake is not
engaged: the brake fluid level is too
low, refer to page 65.
Brake warning lamp for Canadian
models
Brake fluid, refilling
Brake fluid loss may result in extended
brake pedal travel. If this occurs, also refer
to the notes on page 65.
Brake fluid is hygroscopic, that is, it
absorbs moisture from the air over
time.
In order to ensure the brake system's
safety and reliability, have the brake fluid changed every two years by a BMW center.
Refer also to page 48 and the Service Man-
ual.
Brake fluid is toxic and damages the vehi-
cle's paint. You should always store it in the
closed original container and in a location
inaccessible to children.
Do not spill the fluid and do not fill the brake
fluid reservoir beyond the MAX mark. The
brake fluid could ignite upon contact with
hot engine parts and cause serious
burns.<
Comply with the applicable environ-
mental laws regulating the disposal of
brake fluid.<
Brake fluid level
Low brake fluid level in the reservoir com-
bined with extended pedal travel may indi-
cate a defect in one of the brake system's
hydraulic circuits.
BMW recommends that you proceed
to the nearest BMW center. Higher
brake application pressure may be neces-
sary under these conditions, and braking
distances may be significantly longer.
Please remember to adapt your driving
style accordingly.<
Page 82 of 106
Maintenance
82
Maintenance
The BMW Maintenance
System
The BMW Maintenance System has been
designed as a reliable means of providing
maximum driving and operating safety –
and as cost-effectively for you as possible.
Please keep in mind that regular mainte-
nance is not only necessary for the safety
of your vehicle, but also plays a significant
role in maintaining the resale value of your
vehicle.
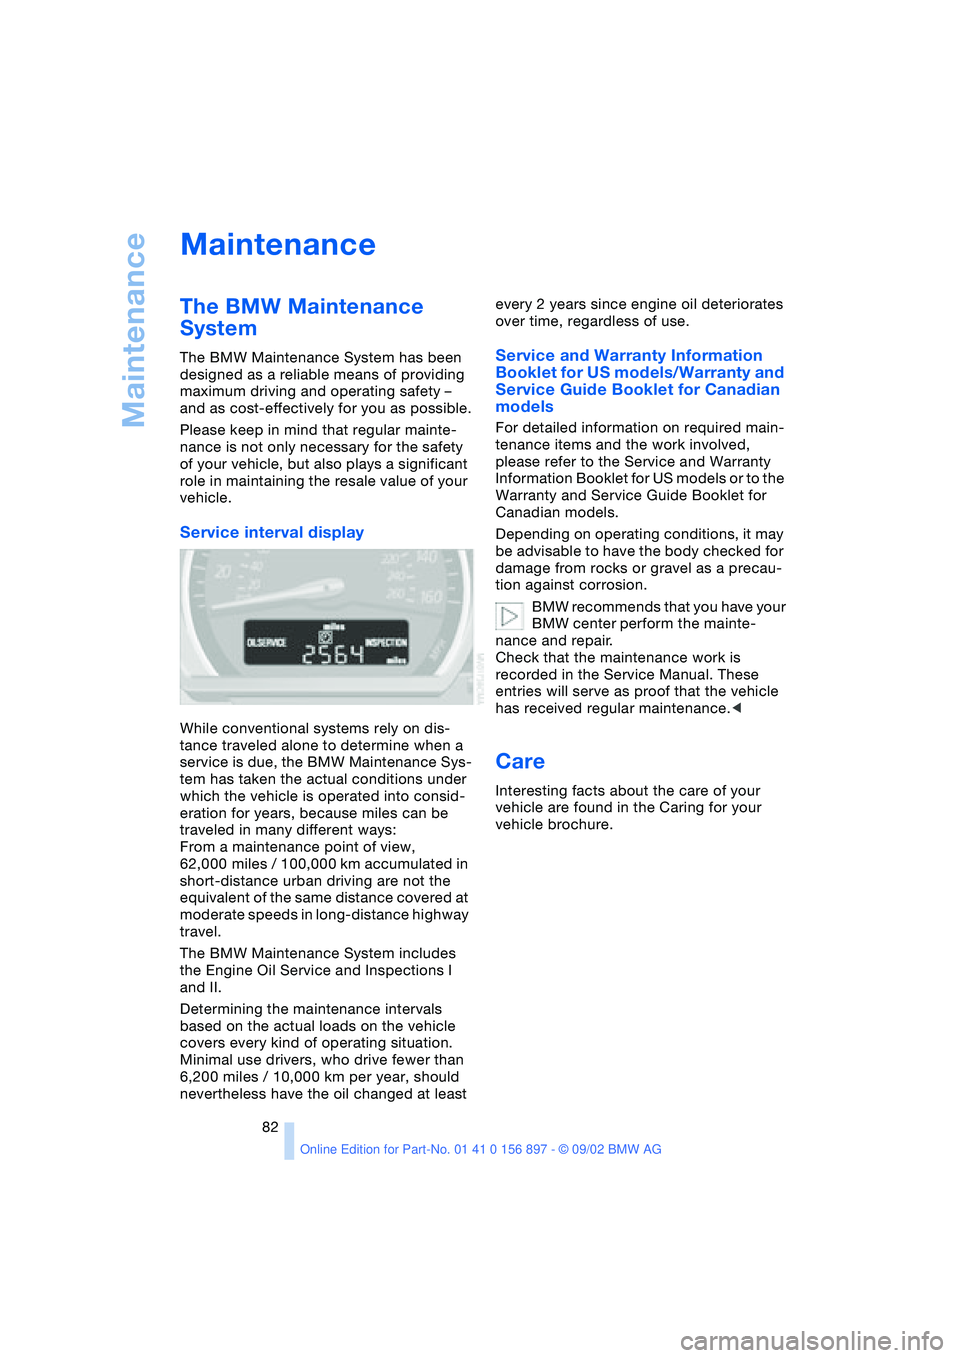
Service interval display
While conventional systems rely on dis-
tance traveled alone to determine when a
service is due, the BMW Maintenance Sys-
tem has taken the actual conditions under
which the vehicle is operated into consid-
eration for years, because miles can be
traveled in many different ways:
From a maintenance point of view,
62,000 miles / 100,000 km accumulated in
short-distance urban driving are not the
equivalent of the same distance covered at
moderate speeds in long-distance highway
travel.
The BMW Maintenance System includes
the Engine Oil Service and Inspections I
and II.
Determining the maintenance intervals
based on the actual loads on the vehicle
covers every kind of operating situation.
Minimal use drivers, who drive fewer than
6,200 miles / 10,000 km per year, should
nevertheless have the oil changed at least every 2 years since engine oil deteriorates
over time, regardless of use.
Service and Warranty Information
Booklet for US models/Warranty and
Service Guide Booklet for Canadian
models
For detailed information on required main-
tenance items and the work involved,
please refer to the Service and Warranty
Information Booklet for US models or to the
Warranty and Service Guide Booklet for
Canadian models.
Depending on operating conditions, it may
be advisable to have the body checked for
damage from rocks or gravel as a precau-
tion against corrosion.
BMW recommends that you have your
BMW center perform the mainte-
nance and repair.
Check that the maintenance work is
recorded in the Service Manual. These
entries will serve as proof that the vehicle
has received regular maintenance.<
Care
Interesting facts about the care of your
vehicle are found in the Caring for your
vehicle brochure.
Page 83 of 106

At a glance
Controls
Driving tips
Mobility
Reference
83
Laws and regulations
California Proposition 65
warning
California laws require us to state the fol-
lowing warning:
Engine exhaust, some of its constitu-
ents, and certain vehicle components
contain or emit chemicals known to the
State of California to cause cancer and
birth defects and reproductive harm. In
addition, certain fluids contained in vehi-
cles and certain products of component
wear contain or emit chemicals known to
the State of California to cause cancer and
birth defects or other reproductive harm.
Battery posts, terminals and related acces-
sories contain lead and lead compounds.
Wash your hands after handling. Used
engine oil contains chemicals that have
caused cancer in laboratory animals.
Always protect your skin by washing thor-
oughly with soap and water.<
OBD interface socket
The Onboard Diagnostic OBD interface
socket is located on the left of the driver's
side behind a specially marked cover
located beneath the instrument panel. The
cover has the letters OBD on it.
This interface makes it possible to access
data on emissions – related components
using special equipment.If the Service Engine Soon indicator
lamp comes on either continuously
or intermittently, this indicates a
fault in the emissions-related electronic
systems. Although the vehicle remains
operational, you should have the systems
checked by your BMW center at the earli-
est possible opportunity.
The illuminated indicator informs you of the
need for service, not that you need to stop
the vehicle. However, the systems should
be checked by your BMW center at the
next opportunity.
If the indicator blinks or flashes, this indi-
cates a high level of engine misfire. Reduce
speed and contact the nearest BMW center
immediately. Severe engine misfiring over
even a short period of time can seriously
damage emission control system compo-
nents, especially the catalytic converter.
Service Engine Soon
warning lamp for Canadian
models.
If the fuel filler cap is not on tight
enough, the OBD system can detect
leaking vapor and the indicator will light up.
If the fuel filler cap is then tightened, the
indicator will usually go out after a short
period of time.<