2003 BMW M5 SEDAN lock
[x] Cancel search: lockPage 37 of 155
37n
OverviewControlsMaintenanceRepairsDataIndex
Electric power windows
After the ignition has been switched off:
>You can still operate the power win-
dows as long as neither of the front
doors has been opened. To open a
window, press the switch beyond the
pressure point.
When leaving the vehicle, always
remove the ignition key from the
lock and remember to close the doors
to prevent children from operating the
power windows and injuring them-
selves, etc.<
For convenience operation via the door
lock or remote control, refer to page 27
or 29.Safety featureA contact strip is located on the inside
upper frame of each of the windows. If
pressure is exerted against this contact
strip while a window is being raised, the
system will respond by stopping the
window and then retracting it slightly.
Despite this safety feature, be
extremely careful to ensure that
the closing path of the window is not
obstructed. Otherwise, an object might
not touch the contact strip in some situ-
ations (very thin objects, for instance).
You can disable this safety feature by
pressing the switch beyond the pres-
sure point and holding it.
Because the power windows are sealed
at high pressure to prevent wind noise
when closed, a powerful motor is
required for efficient closing. When
closing the windows, always be sure
that they are not obstructed in any way.
Unsupervised use of these systems can
result in serious personal injury.
Remove the ignition key to deactivate
the electric power windows whenever
you leave the vehicle. Never leave the
keys in the vehicle with unsupervised
children. Never place anything that
could obstruct the driver's vision on or
next to the windows.<
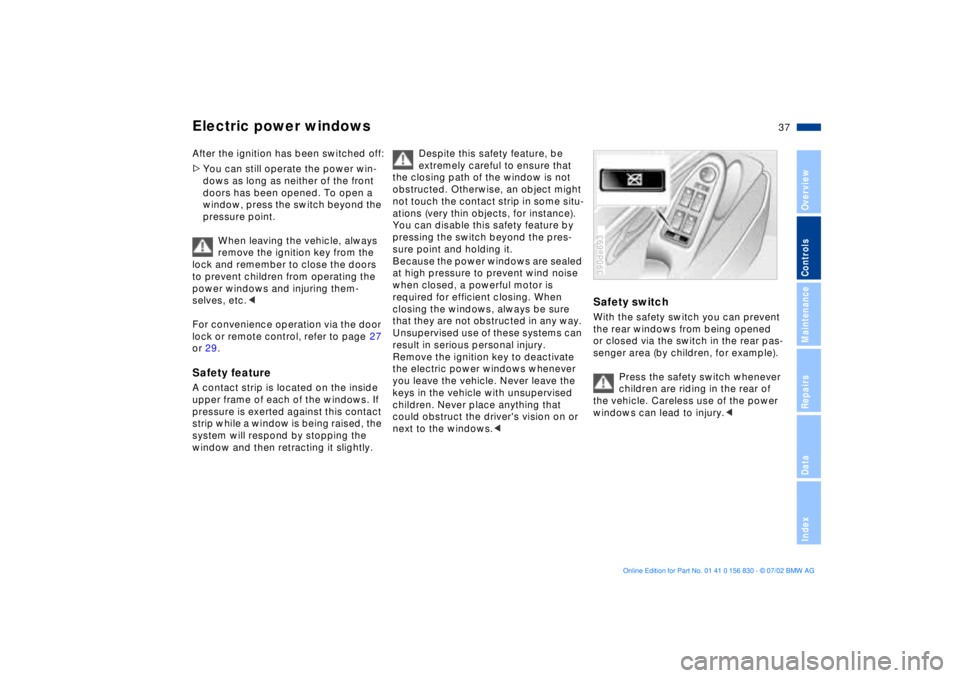
Safety switchWith the safety switch you can prevent
the rear windows from being opened
or closed via the switch in the rear pas-
senger area (by children, for example).
Press the safety switch whenever
children are riding in the rear of
the vehicle. Careless use of the power
windows can lead to injury.<390de693
Page 38 of 155
38n
Sliding/tilt sunroof
*
To prevent injuries, exercise
care when closing the sliding/tilt
sunroof and keep it in your field of
vision until it is shut.
Before leaving the vehicle, switch off
the electric sunroof mechanism by
removing the ignition key. Do not leave
children unattended in the vehicle with
access to vehicle keys. The key can be
used to start the engine and to operate
vehicle systems such as the power sun-
roof, etc. Unsupervised use of these
systems can result in serious personal
injury.<
For convenience operation via the door
lock or remote control, refer to page 27
or 29.
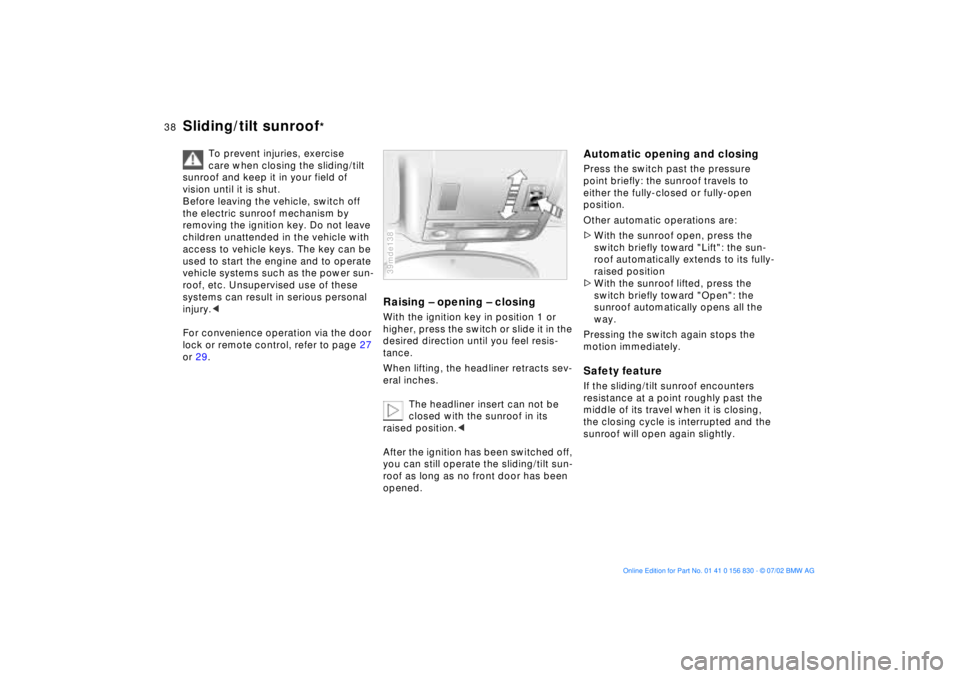
Raising Ð opening Ð closingWith the ignition key in position 1 or
higher, press the switch or slide it in the
desired direction until you feel resis-
tance.
When lifting, the headliner retracts sev-
eral inches.
The headliner insert can not be
closed with the sunroof in its
raised position.<
After the ignition has been switched off,
you can still operate the sliding/tilt sun-
roof as long as no front door has been
opened.39mde138
Automatic opening and closingPress the switch past the pressure
point briefly: the sunroof travels to
either the fully-closed or fully-open
position.
Other automatic operations are:
>With the sunroof open, press the
switch briefly toward "Lift": the sun-
roof automatically extends to its fully-
raised position
>With the sunroof lifted, press the
switch briefly toward "Open": the
sunroof automatically opens all the
way.
Pressing the switch again stops the
motion immediately.Safety featureIf the sliding/tilt sunroof encounters
resistance at a point roughly past the
middle of its travel when it is closing,
the closing cycle is interrupted and the
sunroof will open again slightly.
Page 40 of 155

40n
For relaxed and fatigue-free driving you
should select a seating position that
reflects your personal requirements.
Correct seating position combines with
safety belts and airbags to enhance
occupant safety in the event of an acci-
dent. To ensure that the vehicle's safety
systems provide you with optimal pro-
tection, we request that you direct your
careful attention to the following sec-
tion.
For additional information on trans-
porting children, refer to page 51.
Sitting safely with airbags
Always maintain an adequate dis-
tance between yourself and
the airbags. Always hold the steering
wheel by the rim with the hands at the
9 and 3-o'clock positions to keep any
chance of injury to hands or arms to an
absolute minimum should the airbag be
deployed. Never allow any objects,
individuals or animals to obstruct the
areas between passengers and airbags.
Never use the front airbag's cover as a
storage tray or support for objects of
any kind. Never allow front passengers
to rest their feet or legs on the airbag
cover.<
For airbag locations and additional
information on airbags refer to page 49.Sitting safely with safety belt
Never allow more than one person
to wear a single safety belt. Never
allow infants or small children to ride in
a passenger's lap. Avoid twisting the
belt while routing it firmly across the
pelvis and shoulder, wear it as snugly
against your body as possible. Do not
allow the belt to rest against hard or
fragile objects in your pockets. Do not
route the belt across your neck, or run it
across sharp edges. Avoid wearing
bulky clothing and pull on the lap belt
periodically to retension it over your
shoulders. In the event of a frontal
impact, a loose lap belt could slide over
the hips, leading to abdominal injury. In
addition, the safety belt's restraint
effectiveness is reduced if it is worn
loosely. Expectant mothers should
always wear their safety belts, taking
care to position the lap belt against the
lower hips, where it will not exert pres-
sure against the abdominal area.<
For information on using the safety
belts refer to page 44.
When adjusting your seat, always
observe the following precautions
Never try to adjust your seat while
operating the vehicle. The seat
could respond with an unexpected
movement, and the ensuing loss of
vehicle control could lead to an acci-
dent. Never ride with the backrest
reclined to an extreme horizontal angle
(important for front passengers to
remember), otherwise, there is a risk
that you will slide under the safety belt
in an accident, thus negating the pro-
tection the safety belt provides.
Do not move the seats to the rear when
the vehicle is at an extreme angle (on
garage ramps or steep slopes, for
example). If you do so, the automatic
safety belt height adjustment can be
disengaged.<
Seat adjustment>BMW M sport seat, refer to page 41
>BMW comfort seat, refer to page 42
>Head restraints, refer to page 43
>BMW active seat, refer to page 43
Sitting safely Seats
Page 45 of 155
45n
OverviewControlsMaintenanceRepairsDataIndex
Seat, mirror and steering wheel memory
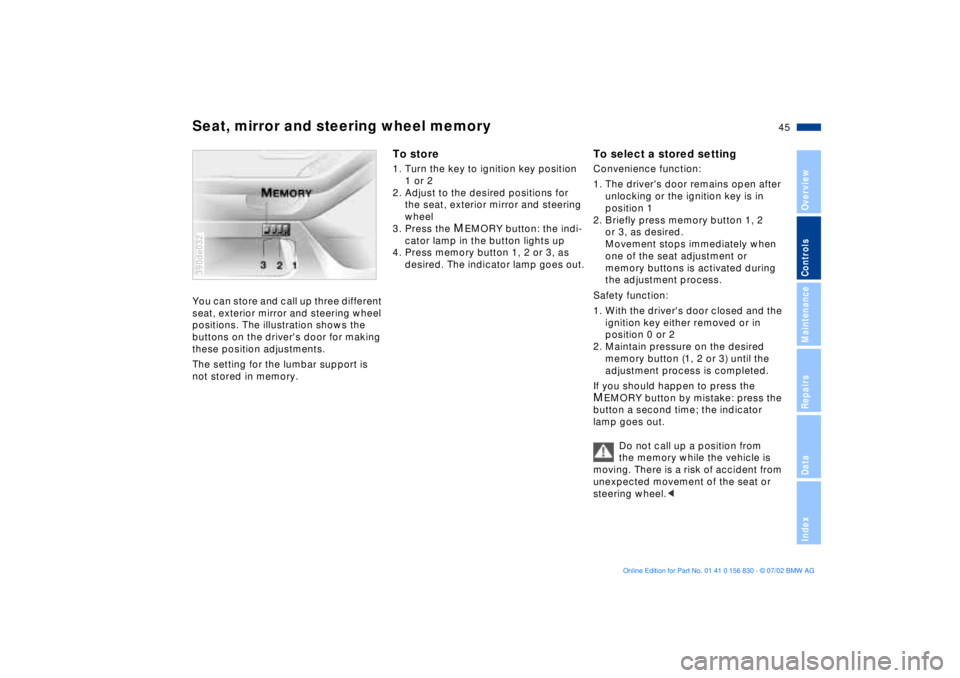
You can store and call up three different
seat, exterior mirror and steering wheel
positions. The illustration shows the
buttons on the driver's door for making
these position adjustments.
The setting for the lumbar support is
not stored in memory. 390de032
To store1. Turn the key to ignition key position
1 or 2
2. Adjust to the desired positions for
the seat, exterior mirror and steering
wheel
3. Press the
MEMORY button: the indi-
cator lamp in the button lights up
4. Press memory button 1, 2 or 3, as
desired. The indicator lamp goes out.
To select a stored settingConvenience function:
1. The driver's door remains open after
unlocking or the ignition key is in
position 1
2. Briefly press memory button 1, 2
or 3, as desired.
Movement stops immediately when
one of the seat adjustment or
memory buttons is activated during
the adjustment process.
Safety function:
1. With the driver's door closed and the
ignition key either removed or in
position 0 or 2
2. Maintain pressure on the desired
memory button (1, 2 or 3) until the
adjustment process is completed.
If you should happen to press the MEMORY button by mistake: press the
button a second time; the indicator
lamp goes out.
Do not call up a position from
the memory while the vehicle is
moving. There is a risk of accident from
unexpected movement of the seat or
steering wheel.<
Page 46 of 155
46n
Seat, mirror and steering wheel memory Seat heating
Your BMW center can adjust
your vehicle's systems in such a
manner that your personalized settings
are automatically called up for the seat,
mirror and steering wheel positions
when you unlock the vehicle with your
personal remote control key.<
Before using the key memory fea-
ture to unlock the vehicle always
ensure that no objects are stored in the
footwell behind the driver's seat. If you
fail to do so, persons or objects could
be injured or damaged if the seat
should move backward.<
Passenger-side exterior mirror
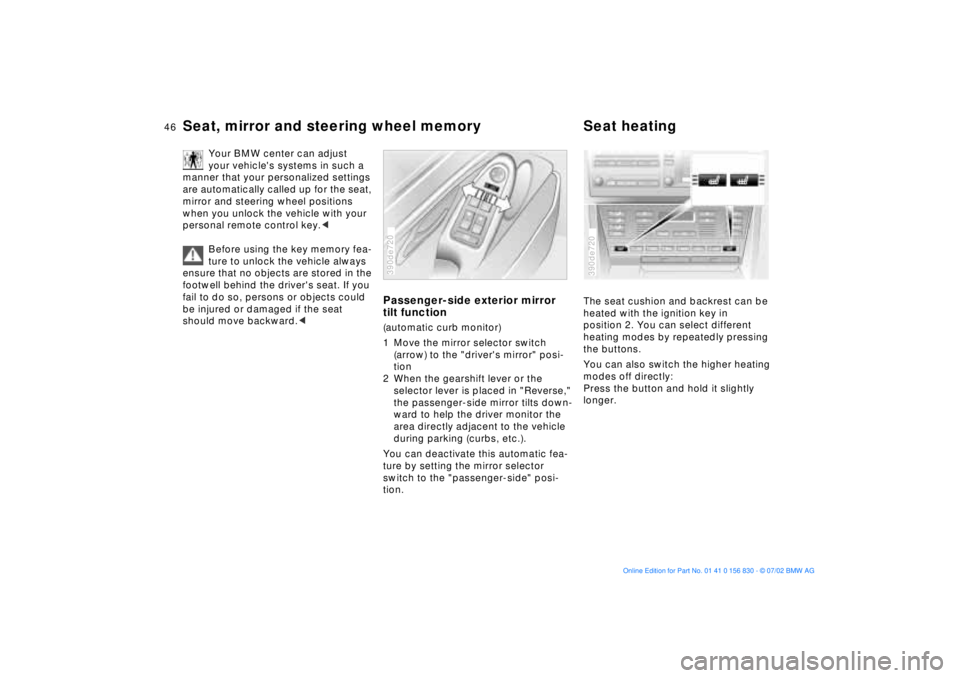
tilt function(automatic curb monitor)
1 Move the mirror selector switch
(arrow) to the "driver's mirror" posi-
tion
2 When the gearshift lever or the
selector lever is placed in "Reverse,"
the passenger-side mirror tilts down-
ward to help the driver monitor the
area directly adjacent to the vehicle
during parking (curbs, etc.).
You can deactivate this automatic fea-
ture by setting the mirror selector
switch to the "passenger-side" posi-
tion.390de720
The seat cushion and backrest can be
heated with the ignition key in
position 2. You can select different
heating modes by repeatedly pressing
the buttons.
You can also switch the higher heating
modes off directly:
Press the button and hold it slightly
longer.390de720
Page 47 of 155
47n
OverviewControlsMaintenanceRepairsDataIndex
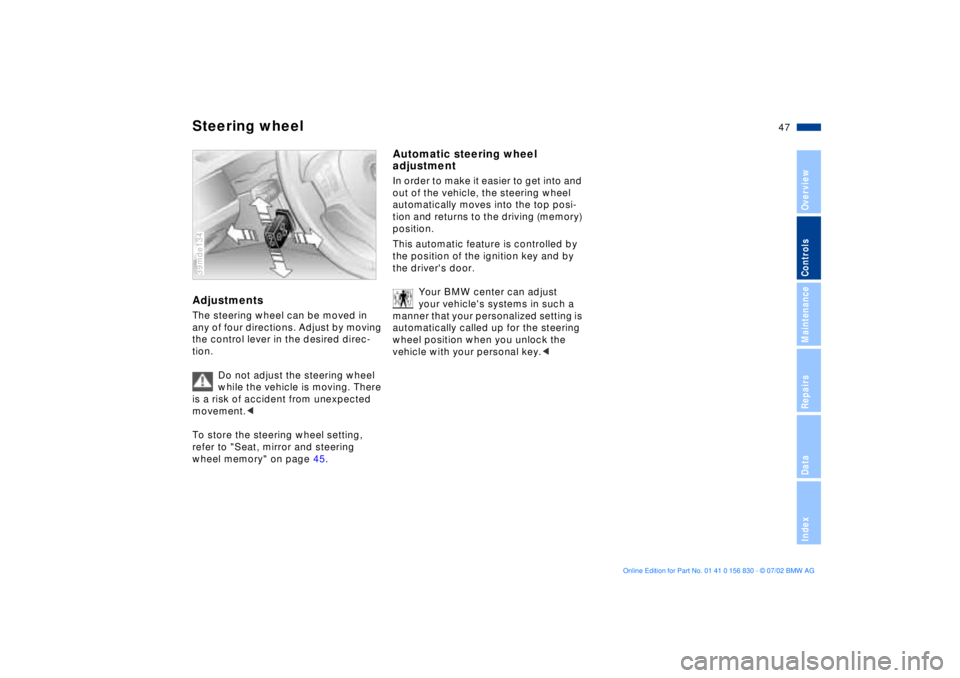
Steering wheelAdjustmentsThe steering wheel can be moved in
any of four directions. Adjust by moving
the control lever in the desired direc-
tion.
Do not adjust the steering wheel
while the vehicle is moving. There
is a risk of accident from unexpected
movement.<
To store the steering wheel setting,
refer to "Seat, mirror and steering
wheel memory" on page 45.39mde134
Automatic steering wheel
adjustmentIn order to make it easier to get into and
out of the vehicle, the steering wheel
automatically moves into the top posi-
tion and returns to the driving (memory)
position.
This automatic feature is controlled by
the position of the ignition key and by
the driver's door.
Your BMW center can adjust
your vehicle's systems in such a
manner that your personalized setting is
automatically called up for the steering
wheel position when you unlock the
vehicle with your personal key.<
Page 48 of 155
48n
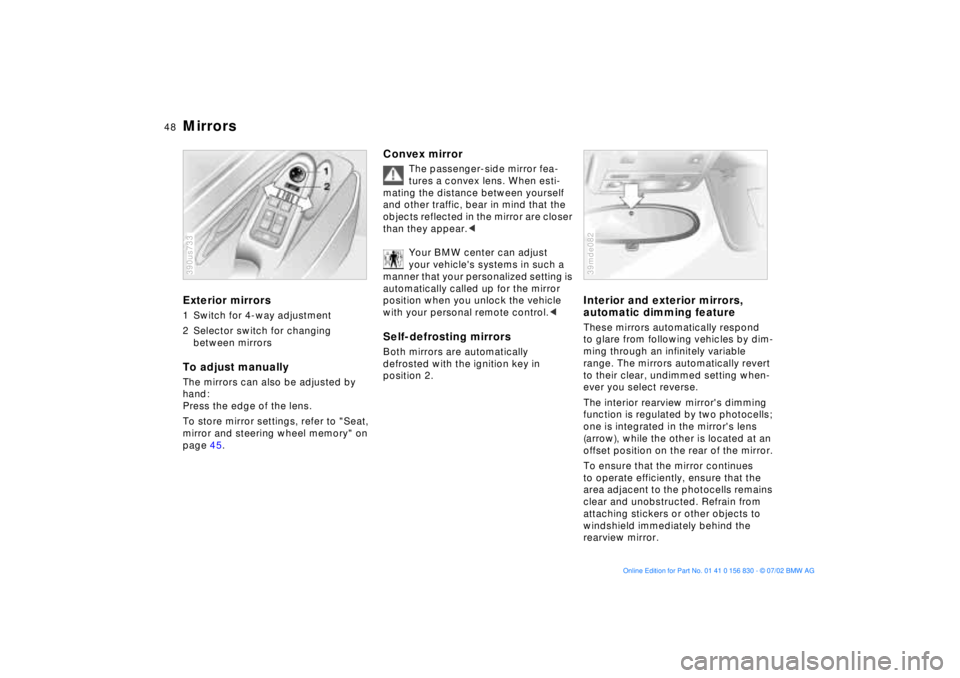
Mirrors Exterior mirrors1 Switch for 4-way adjustment
2 Selector switch for changing
between mirrorsTo adjust manuallyThe mirrors can also be adjusted by
hand:
Press the edge of the lens.
To store mirror settings, refer to "Seat,
mirror and steering wheel memory" on
page 45.390us733
Convex mirror
The passenger-side mirror fea-
tures a convex lens. When esti-
mating the distance between yourself
and other traffic, bear in mind that the
objects reflected in the mirror are closer
than they appear.<
Your BMW center can adjust
your vehicle's systems in such a
manner that your personalized setting is
automatically called up for the mirror
position when you unlock the vehicle
with your personal remote control.<
Self-defrosting mirrors Both mirrors are automatically
defrosted with the ignition key in
position 2.
Interior and exterior mirrors,
automatic dimming feature These mirrors automatically respond
to glare from following vehicles by dim-
ming through an infinitely variable
range. The mirrors automatically revert
to their clear, undimmed setting when-
ever you select reverse.
The interior rearview mirror's dimming
function is regulated by two photocells;
one is integrated in the mirror's lens
(arrow), while the other is located at an
offset position on the rear of the mirror.
To ensure that the mirror continues
to operate efficiently, ensure that the
area adjacent to the photocells remains
clear and unobstructed. Refrain from
attaching stickers or other objects to
windshield immediately behind the
rearview mirror.39mde082
Page 53 of 155
53n
OverviewControlsMaintenanceRepairsDataIndex
Transporting children safelyThis important precaution is intended to
maximize the distance between the
airbag and the child. Older children
should be tightly secured with a safety
belt, after they have outgrown a booster
seat that is appropriate for their age,
height and weight.
Younger children should be secured in
an appropriate forward-facing child-
restraint system that has first been
properly secured with a safety belt.
Never install a rearward-facing child-
restraint system in the front passenger
seat. We strongly urge you to carefully
read and comply with the instructions
for installation and use provided by the
child restraint's manufacturer when-
ever you use such a device.
Be sure that all occupants (of all ages)
remain properly and securely restrained
at all times.<
All rear seating positions in your vehicle
meet the recommendations of SAE
J1819, an industry-recommended prac-
tice for securing child-restraint systems
in motor vehicles.
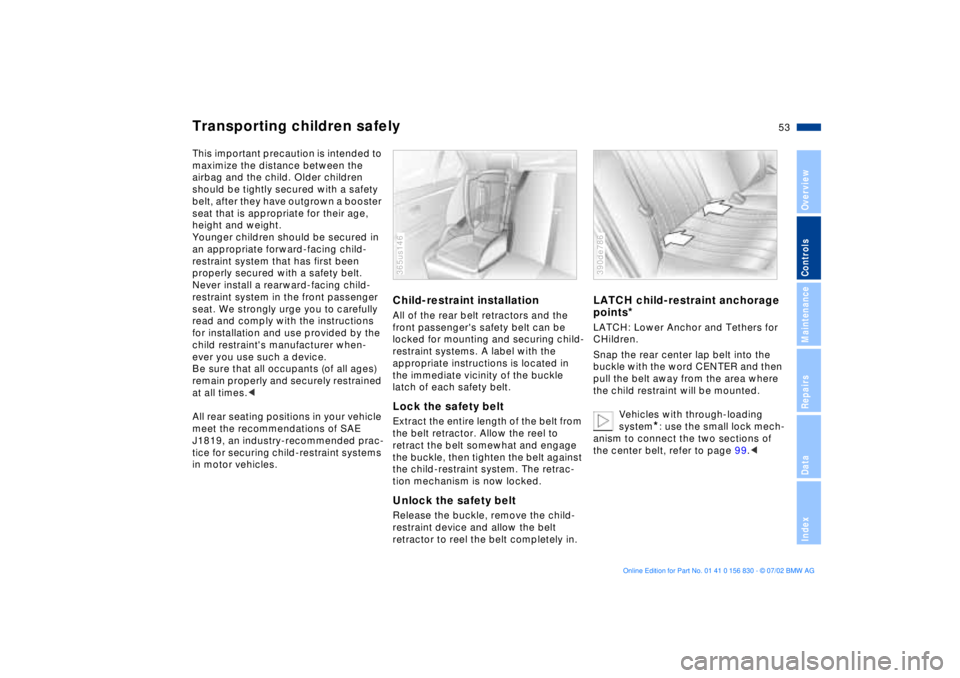
Child-restraint installationAll of the rear belt retractors and the
front passenger's safety belt can be
locked for mounting and securing child-
restraint systems. A label with the
appropriate instructions is located in
the immediate vicinity of the buckle
latch of each safety belt.Lock the safety beltExtract the entire length of the belt from
the belt retractor. Allow the reel to
retract the belt somewhat and engage
the buckle, then tighten the belt against
the child-restraint system. The retrac-
tion mechanism is now locked.Unlock the safety beltRelease the buckle, remove the child-
restraint device and allow the belt
retractor to reel the belt completely in.365us146
LATCH child-restraint anchorage
points
*
LATCH: Lower Anchor and Tethers for
CHildren.
Snap the rear center lap belt into the
buckle with the word CENTER and then
pull the belt away from the area where
the child restraint will be mounted.
Vehicles with through-loading
system
*: use the small lock mech-
anism to connect the two sections of
the center belt, refer to page 99.<
390de786