2003 BMW M3 CONVERTIBLE height
[x] Cancel search: heightPage 49 of 166

49
SeatsWhen adjusting your seat, always
observe the following precautions
Never try to adjust your seat while
operating the vehicle. The seat
could respond with an unexpected
movement, and the ensuing loss of
vehicle control could lead to an acci-
dent. Never ride with the backrest
reclined to an extreme horizontal angle
– important for front passengers to
remember. Keep the backrest relatively
upright to minimize the risk of sliding
under the safety belt and sustaining
injury in an accident.
With the wind deflector in place: never
push the front seats all the way back to
avoid damaging the wind deflector.<
Adjusting the seats>Power seat adjustment, refer to
page 49
>Head restraint, refer to page 50
>Entering the rear, refer to page 51.
Power seat adjustmentSeat adjustment1Tilt angle
2Forward/backward adjustment
3Height
4Backrest angle
You can manually adjust the thigh sup-
port.
Thigh support Pull the lever and adjust the position of
the cushion for thigh support as
desired.
OverviewControlsMaintenanceRepairsDataIndex
handbook.book Page 49 Tuesday, July 30, 2002 9:28 AM
Page 50 of 166

50
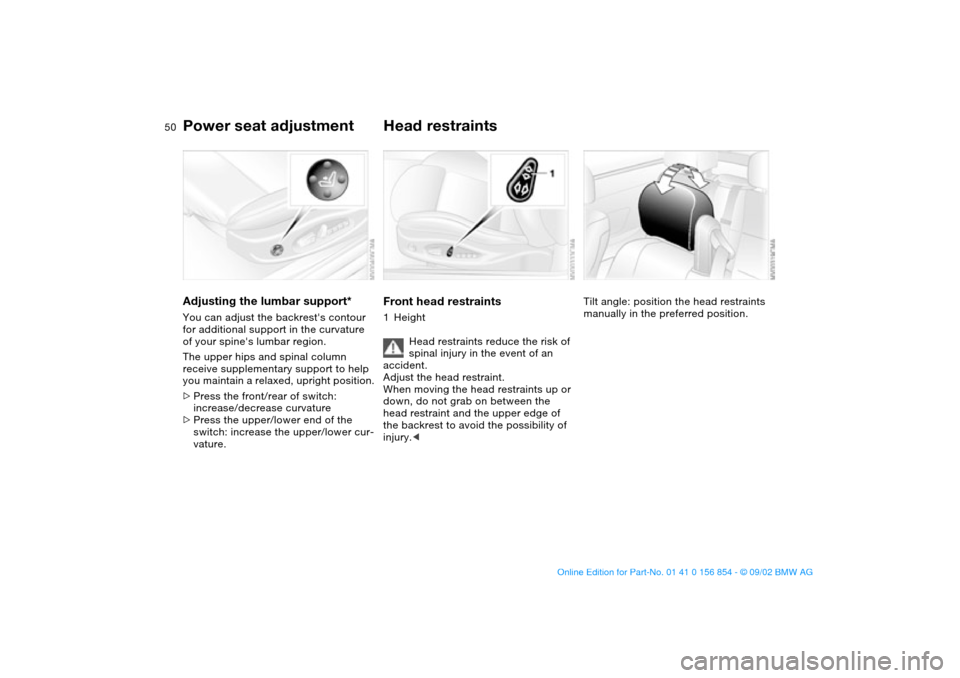
Adjusting the lumbar support*You can adjust the backrest's contour
for additional support in the curvature
of your spine's lumbar region.
The upper hips and spinal column
receive supplementary support to help
you maintain a relaxed, upright position.
>Press the front/rear of switch:
increase/decrease curvature
>Press the upper/lower end of the
switch: increase the upper/lower cur-
vature.
Head restraintsFront head restraints1Height
Head restraints reduce the risk of
spinal injury in the event of an
accident.
Adjust the head restraint.
When moving the head restraints up or
down, do not grab on between the
head restraint and the upper edge of
the backrest to avoid the possibility of
injury.<
Tilt angle: position the head restraints
manually in the preferred position.
Power seat adjustment
handbook.book Page 50 Tuesday, July 30, 2002 9:28 AM
Page 52 of 166

52
Press against the backrest until you
hear it snap into place. Lever 1 does
not have to be released to fold the seat
back.<
Lock both backrests while driving,
otherwise there is a danger of an
unexpected movement causing an
accident.<
The indicator lamp in the instrument
cluster flashes, when the backrest is
not locked, refer to page 18.
Safety beltsAlways wear your safety beltAlways fasten your safety belt before
starting off. As supplemental restraint
devices, the airbags are designed to
enhance the effectiveness of the safety
belts, and not to replace them.
Before putting your safety belts on
in the rear, take them out of the
holder.<
Leave the rear safety belts in the
holders if they are not needed, in
order to avoid unwanted movement
from the safety belts at high speeds.
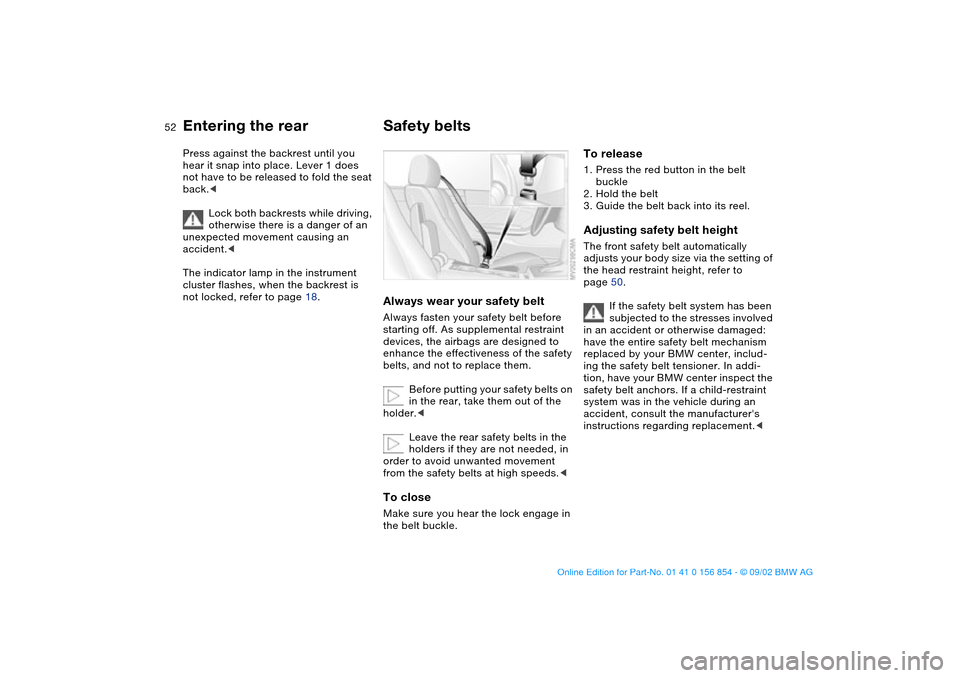
To release1. Press the red button in the belt
buckle
2. Hold the belt
3. Guide the belt back into its reel.Adjusting safety belt heightThe front safety belt automatically
adjusts your body size via the setting of
the head restraint height, refer to
page 50.
If the safety belt system has been
subjected to the stresses involved
in an accident or otherwise damaged:
have the entire safety belt mechanism
replaced by your BMW center, includ-
ing the safety belt tensioner. In addi-
tion, have your BMW center inspect the
safety belt anchors. If a child-restraint
system was in the vehicle during an
accident, consult the manufacturer's
instructions regarding replacement.<
Entering the rear
handbook.book Page 52 Tuesday, July 30, 2002 9:28 AM
Page 61 of 166

61
should be tightly secured with the
safety belt after they have outgrown a
booster seat that is appropriate for their
age, height, and weight.
Younger children should be secured in
an appropriate forward-facing child-
restraint system that has first been
properly secured with a safety belt.
Never install a rearward-facing child-
restraint system in the front passenger
seat.
We strongly urge you to carefully read
and comply with the instructions for
installation and use provided by the
child-restraint's manufacturer whenever
you use such a device.
Do not attempt to modify child-restraint
systems. If you do this, the protection
provided by these systems could be
impaired.
Be sure that all occupants – of all ages –
remain properly and securely restrained
at all times.<
All rear seating positions in your vehicle
meet the recommendations of
SAE J1819, an industry-recommended
practice for securing child-restraint sys-
tems in motor vehicles.
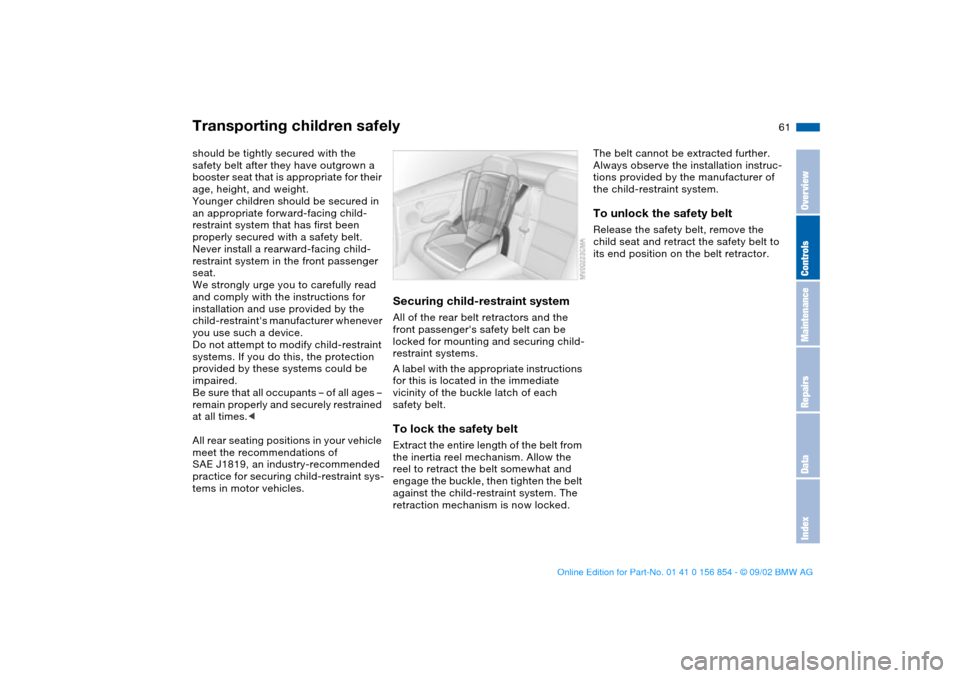
Securing child-restraint systemAll of the rear belt retractors and the
front passenger's safety belt can be
locked for mounting and securing child-
restraint systems.
A label with the appropriate instructions
for this is located in the immediate
vicinity of the buckle latch of each
safety belt.To lock the safety beltExtract the entire length of the belt from
the inertia reel mechanism. Allow the
reel to retract the belt somewhat and
engage the buckle, then tighten the belt
against the child-restraint system. The
retraction mechanism is now locked.
The belt cannot be extracted further.
Always observe the installation instruc-
tions provided by the manufacturer of
the child-restraint system.To unlock the safety belt Release the safety belt, remove the
child seat and retract the safety belt to
its end position on the belt retractor.
Transporting children safely
OverviewControlsMaintenanceRepairsDataIndex
handbook.book Page 61 Tuesday, July 30, 2002 9:28 AM
Page 120 of 166

120In the engine compartment
HoodTo releasePull the lever located under the left-
hand side of the instrument panel.
Do not attempt to service your
vehicle if you do not have the
required technical background. Failure
to work in an informed, professional
manner when servicing components
and materials constitutes a safety haz-
ard for vehicle occupants and other
road users. If you are not familiar with
the guidelines, please have the opera-
tions performed by your BMW center.<
To openPull the release handle and open the
hood.
It is not possible to drive off using
SMG II when the hood is open.<
To closePull the hood downwards and allow the
hood to fall from a minimum height of
1 ft/30 cm so that it audibly engages.
Check for proper locking by pulling on
the hood at the left and right above the
headlamps.
To avoid injuries, be sure that the
travel path of the hood is clear
when it is closed, following the same
safety precautions used in all closing
procedures.
If you notice while driving that the hood
is not completely closed, stop immedi-
ately and close it securely.<
handbook.book Page 120 Tuesday, July 30, 2002 9:28 AM
Page 157 of 166

Everything from A to Z
157
Cleaning position, convert-
ible top 45
Cleaning windshield 78
Clock 83
refer also to the radio or
onboard computer
Owner's Manual
Cockpit 14
Code, tires 118
Coin box 102
Compression ratio 150
Computer 84
Condensation, removing
from windows 98
Configure personal settings
Vehicle Memory, Key
Memory 65
Consumption
display 81
fuel 85
Convertible top
cleaning position 45
electrical malfunction 44
emergency operation 44
opening and closing 42
Convertible top operation
fully automatic convertible
top 41
Coolant 122, 126, 153
indicator lamp 19
Cooling system 153
Copyright 4Cornering Brake Control
(CBC) 111
Cruise control 78
indicator lamp 20
Cup holder, see Beverage
holder 102
Curb weight 152
Cushion height 151
D
Data
dimensions 151
engine 150
weights 152
Daytime driving lamps 92
DBC Dynamic Brake
Control 88
warning lamp 19
Defrost position 98
Defrosting rear window 99
Defrosting windows 98
Digital clock 83
Dimensions 151
Dipstick, engine oil 124
Disc brakes 112
Displacement 150
Display lighting 93
Displays 16
Distance warning 86
Door key 30
Door lock buttons 34Doors
emergency operation 33
manual operation 33
remote control 31
unlocking and locking
31, 33
Drivelogic 74
Driving notes
braking 111
disc brakes 112
general 111
hydroplaning 111
DSC Dynamic Stability Con-
trol 87
indicator lamp 19
Dynamic Brake Control
(DBC) 88
Dynamic Stability Control
(DSC) 87
indicator lamp 19
E
Electric malfunction
doors 33
Electric power windows 40
Electrical accessories, fail-
ure 144
Electrical malfunction
convertible top 44
fuel filler door 24Emergency operation
doors 33
fuel filler door 24
Emergency release
luggage compartment
lid 36
Engine
displacement 150
output 150
starting 67
switching off 69
torque 150
Engine compartment 122
Engine coolant 153
refilling 126
temperature gauge 81
Engine data 150
Engine electronics
warning lamp 19
Engine oil
adding 122, 124
capacity 153
consumption 124
dipstick 124
quality 125
types 125
viscosity 125
Engine oil level
check 122
indicator lamp 19
warning lamp 18
OverviewControlsMaintenanceRepairsDataIndex
handbook.book Page 157 Tuesday, July 30, 2002 9:28 AM